A well-designed website serves as a brand’s online face, attracting visitors, generating leads, and driving sales. However, creating a professional website can be complex and time-consuming. Fortunately, powerful tools like WordPress and Divi have revolutionized web design, making it accessible to beginners and seasoned developers.
A structured approach can speed up the web design process and achieve incredible results. In this post, we will explore the key stages of web design, from the initial creative brief to the final launch, and how you can utilize WordPress and Divi to complete the task in a fraction of the time.
Let’s get started.
The 7 Stages Of Web Design Explained
Web design is a multi-step process that involves planning, creating, and launching a website. Here’s a breakdown of the key stages of web design:
1. Setting Up A Creative Brief
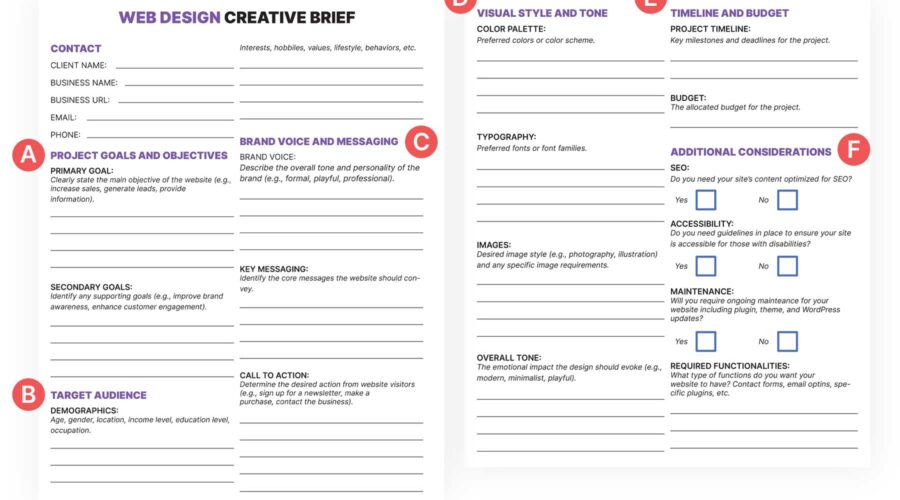
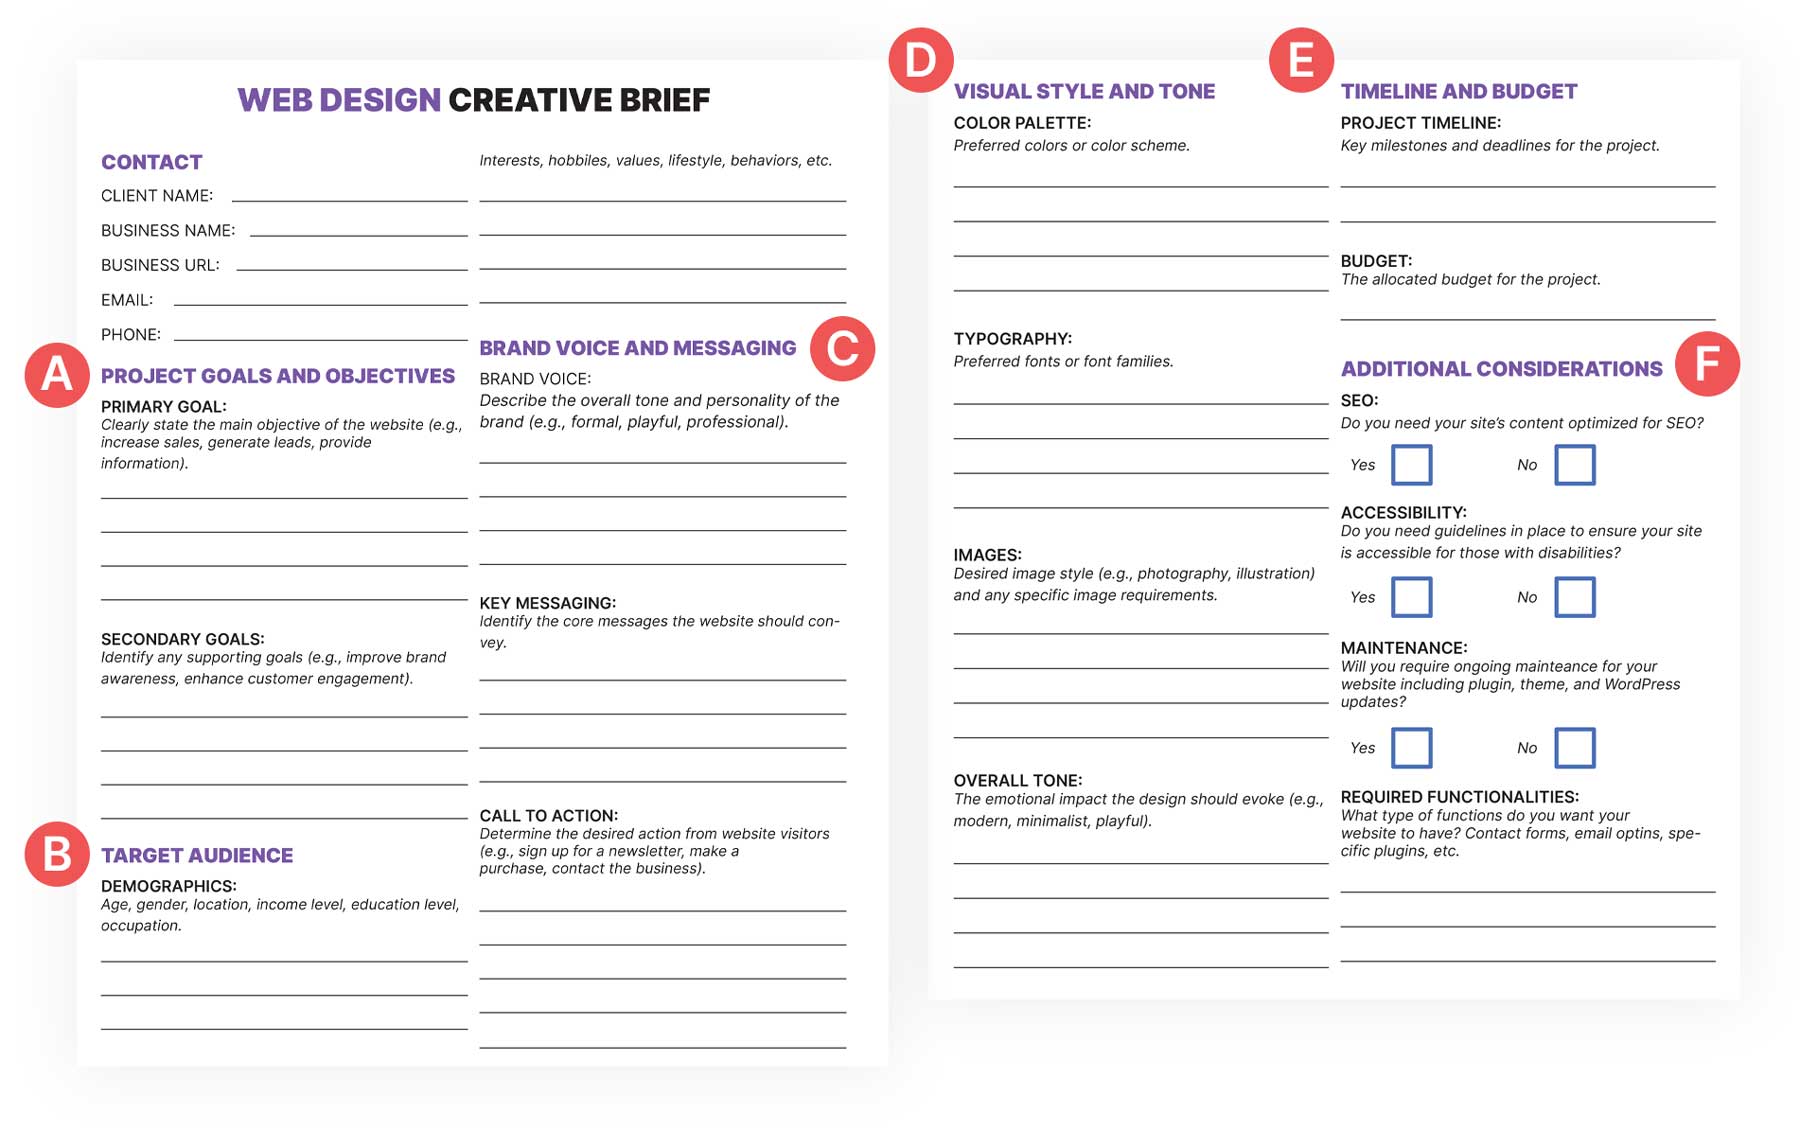
A creative brief is a document that outlines the details and goals of a web project. It serves as a roadmap for creatives, ensuring everyone involved is on the same page regarding the project’s objectives. By clearly defining the project’s purpose, target audience, messaging, and visual style, a creative brief helps to streamline the creative process so that you can deliver exceptional results. While a creative brief is optional, starting a project without clearly defined goals and outcomes can slow down the entire project.
Key Elements Of A Creative Brief
A creative brief can help define the project, assist in determining goals, and help identify client needs and wants. For the creative brief to be successful, be sure to include the following:
A. Project Goals & Objectives:
During the initial stages of web design, it’s key to state the primary and secondary goals for the project. A creative brief helps define whether the customer wants to increase brand awareness, generate leads, or drive sales. Additional considerations include improving website traffic, enhancing customer engagement, or boosting their social media following.
B. Target Audience:
For your project to be successful, it’s crucial to gather information, such as age, gender, location, income, education, and occupation, to help determine your target audience. Some other useful metrics include interests, hobbies, values, lifestyle, and behaviors. By determining who your client is upfront, you can tailor the website’s content and look and feel to appeal to the right people.
C. Brand Voice & Messaging:
A brand voice is how a brand speaks to its audience. While a formal voice might be appropriate for a luxury brand, a humorous one may be better suited for a tech startup. Messaging involves identifying the core messaging you want to convey to your target audience. Writing should be clear, concise, and aligned with a brand’s values. Using WordPress to build your branding gives you a leg up from the start, but here are a few tips to help you along the way.
D. Visual Style and Tone:
What type of style is your client looking for? Establishing a visual style and tone is essential, whether minimalist, modern, vintage, whimsical, or something else.
E. Timeline and Budget:
Establish the project timeline, including key milestones and deadlines. Establish the budget for the project so that both parties are on the same page as well.
F. Additional Considerations:
Determine which functionalities are needed for the project. Does the client require contact forms, newsletter sign-up forms, or specific plugins? Also, decide whether or not you’ll be responsible for search engine optimization (SEO), monthly maintenance, or ensuring their site is accessible to those with disabilities.
2. Analyzing The Creative Brief
The next step in successfully navigating the stages of web design is to analyze the information from the creative brief. Start by breaking down key points, such as the project goals, target audience, branding, and desired visual style. Analyzing the information will give you a better understanding of the project’s scope and how to make the client happy.
Competitive Analysis
Another important aspect of analyzing your project is to study some of the competition. Conducting a competitor analysis can help you determine their strengths, weaknesses, and selling points. Pay attention to their design, tone of the content, and overall user experience. Look for ways to improve upon what they are doing to give your client the competitive edge. By understanding what your competitors are doing well and where they fall short, you can identify opportunities to help your client’s website stand out.
Client’s Existing Website Audit
If your client already has a website, doing a full audit of its design, performance, and UI/UX is a great idea. Ask for access to Google Analytics, the client’s current hosting provider, and other services they subscribe to.
Here’s a list of items you should check to get a better idea of ways you can improve your client’s site:
- Website Traffic: Monitor how many clicks/visitors the website has.
- Bounce Rate: Determine how quickly users hop off the site once they land on it.
- Conversion Rates: If applicable, check GA to determine how many visitors become customers.
- Mobile Responsiveness: Ensure the client’s website suits devices with varying screen sizes.
- Page Speed: Check Google Page Speed to see how fast or slow the website is loading.
- Content Quality: If the client plans to use the existing content, look for opportunities to make it more engaging and SEO-optimized.
3. Planning The Website
Setting measurable goals is important before diving into the design and development phases. These goals should line up with the client’s vision for their website. One way to meet these goals is to boost organic traffic. If you aim to attract new visitors to the website through organic search, social media, or other marketing channels, conduct keyword research to help you meet those goals. Also, ensure that your on-page SEO is up to par. Some ways to do that is by ensuring strong page titles, meta descriptions, header tags, and image alt tags are in place.
Similarly, if your client wants higher conversion rates, optimize the current site’s content to encourage users to take action. Consider optimizing the site’s navigation, ensure images are properly sized, and minimize code when possible. Thankfully, using a theme like Divi to build your website is a great place to start. With built-in performance tools to minimize code and the ability to create custom headers with the Theme Builder, you already have the tools to get the job done.
Lastly, consider optimizing all forms on the site, keeping the design mobile-friendly, and including compelling calls to action (CTAs).
Creating A Site Map
A well-organized sitemap is one of the most crucial steps when planning the stages of web design. It visually represents the website’s structure, hierarchy, and navigation. Users can find what they want with little effort with a good site map. In the planning stages of building your site map, consider the following factors:
- Proper Organization: Determine the most logical way to categorize and organize the website’s content.
- Plan the Menu Strategically: Lay out the menu so users can easily access key pages.
- Internal Linking: Create a clear internal linking structure to help visitors navigate seamlessly between pages.
Choosing The Right Website Type
Choosing the right type of website for your client is as important as defining a website’s goal and planning a site map. For example, there may be better courses of action than adding e-commerce functionality to an informational website. Determine what your client’s niche is and stick to it. Whether it’s a brochure, portfolio, blog, membership, or e-commerce site, choosing the right style for your client is one of the most important aspects of planning a successful website.
Identifying Necessary Functionalities
Once you’ve determined the type of website your client needs, identify the functionalities it will take to run it. These may include contact forms, a blog, e-commerce capabilities, search functionality, and more. In most cases, these functionalities come in the form of plugins. WordPress works much like Legos. The platform itself serves as a base for your creation. What your website ends up as depends on the other pieces needed to run it.
Thankfully, the Divi theme provides most of the pieces for you, including Contact Form Modules, the ability to create a custom blog, archive and search templates, and e-commerce capabilities. Divi even provides a way to showcase social media platforms. That said, there may be a few things you’ll need to pull it all together, including:
- Membership Areas: Incorporating a membership plugin will allow you to provide exclusive content or services to members through a paywall. Tools like MemberPress and Paid Memberships Pro integrate seamlessly with Divi to create a money-making membership website for your client.
- Search Functionality: WordPress has an onboard search, but it leaves something to be desired. Thankfully, you can find some great plugins in the Divi Marketplace that will add a more comprehensive search tool with Ajax so you can deliver search results faster and more effectively.
- Social Media Integration: There may be times when you want to showcase posts from Instagram, Facebook, or X. Plenty of good social media plugins allow you to present the information beautifully while boosting your site’s SEO.
- Analytics Tools: For your site to be successful, adding a Google Analytics plugin is a great idea. You can monitor website traffic and conversions and identify opportunities to improve.
4. Designing The Website
In the design phase, your website’s visual identity and user experience come to life. A well-designed website looks good and functions seamlessly, guiding users toward desired actions.
Establishing Brand Identity
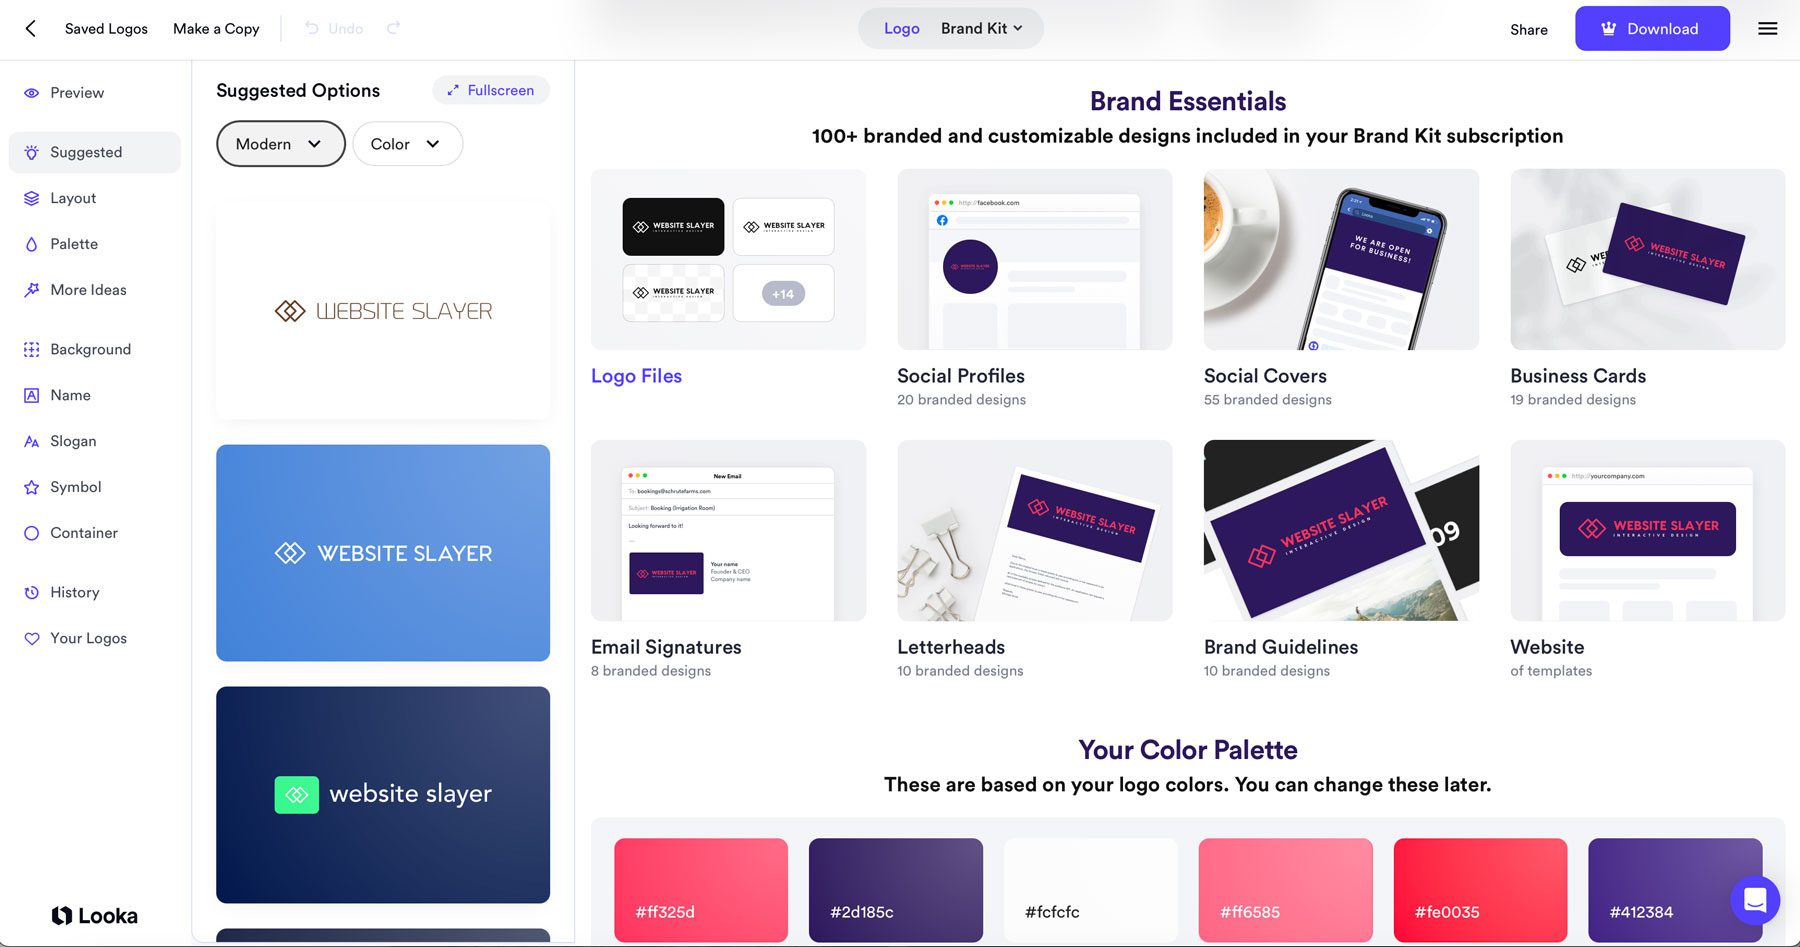
A strong brand identity is crucial for creating a recognizable brand. When developing a brand identity for a client, focus on these key elements: a simple and memorable logo, a 5-6 color palette that reflects the brand’s personality, and a limited selection of easy-to-read fonts that align with the brand’s tone. By consistently applying these elements across the website, marketing materials, and social media platforms, you can establish a strong brand identity that resonates with your target audience.
Leverage powerful tools like Adobe Creative Cloud or AI-driven platforms like Looka to craft a brand identity that truly resonates with your client. It’s also a good idea to stay ahead of the curve by keeping up with the latest web design trends, ensuring your design embodies contemporary principles and captivates your audience.
Creating Wireframes & Mockups
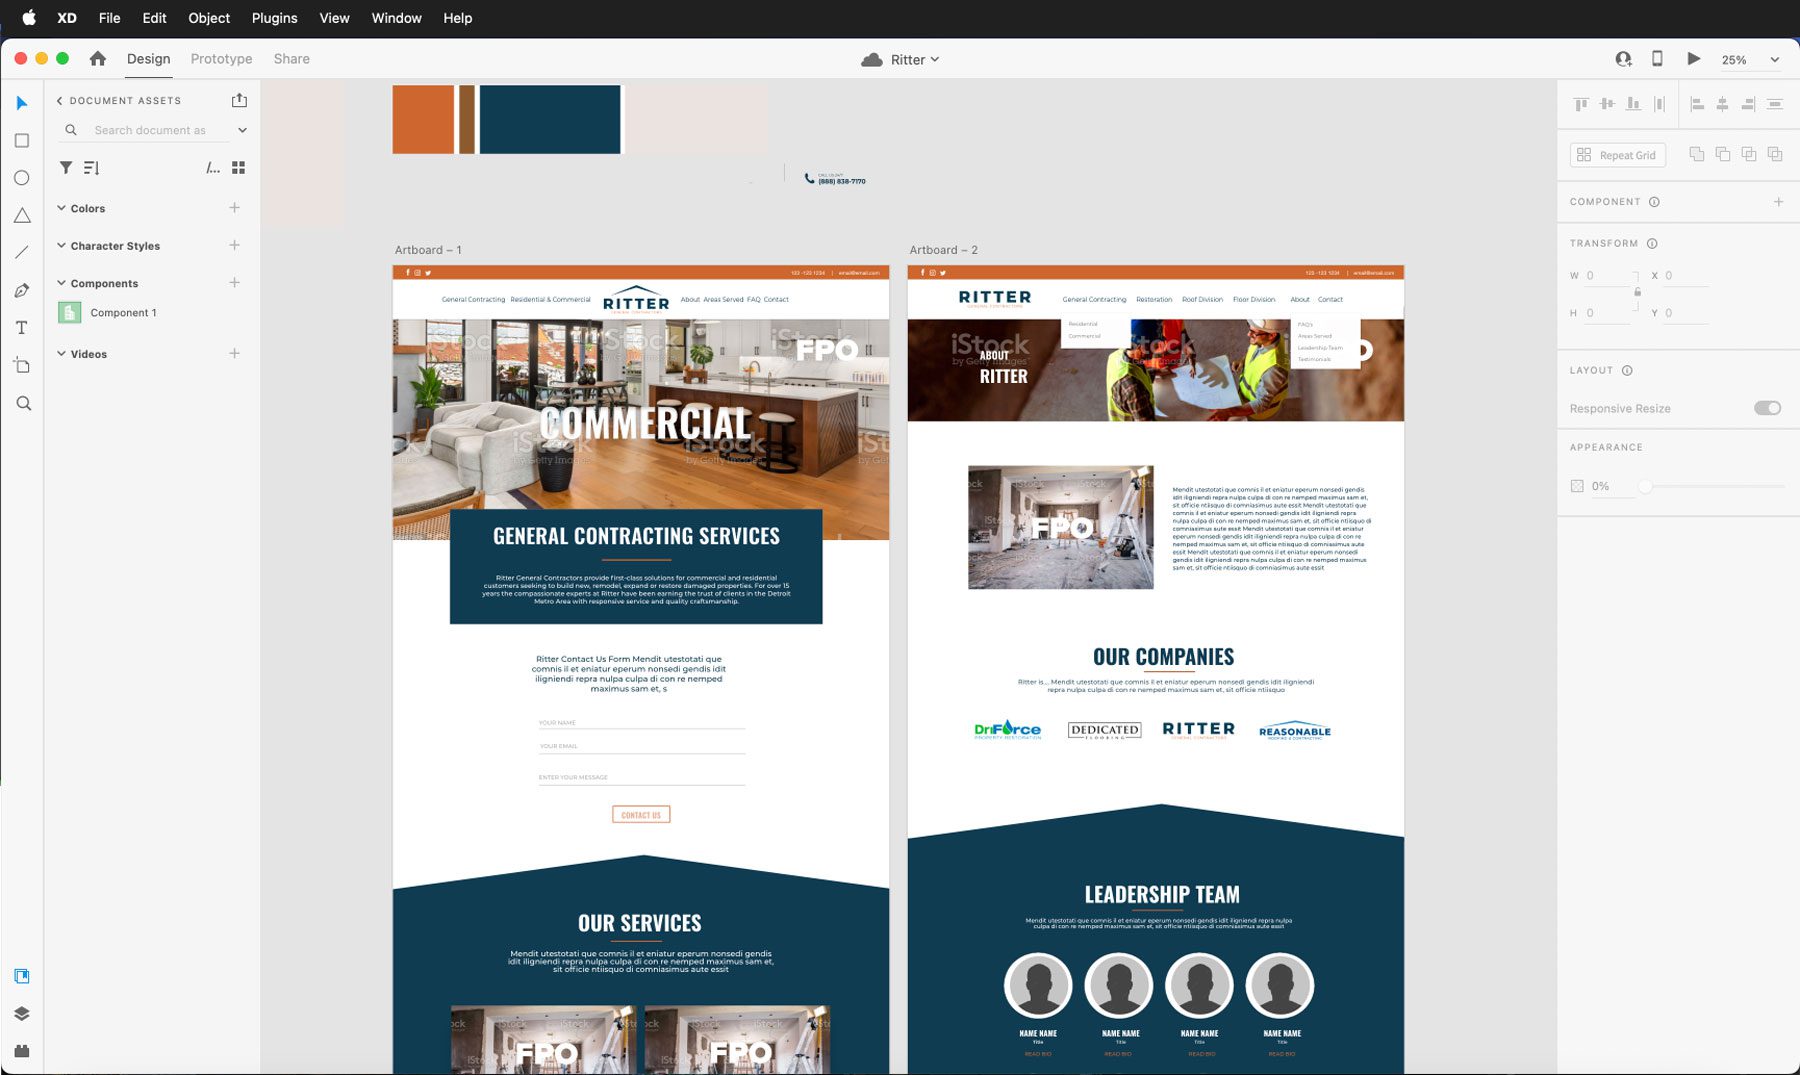
For most clients, visualizing their website before development begins is crucial. This allows the client and the designer to collaborate effectively and refine the design. Starting with a simple black-and-white sketch or utilizing a professional design tool like Figma or Adobe XD to create detailed wireframes can be beneficial. These wireframes can incorporate typography, color, and basic imagery, clearly representing the website’s layout.
By sharing these wireframes with the client, designers can gather feedback and make necessary adjustments before diving into WordPress development, ensuring a smoother and more efficient process. With tools like Divi, you can easily create the wireframe inside your page itself, using the Visual Builder. This means you don’t necessarily need to use a separate design tool in advance, but in many cases, it might be preferred.
5. Creating Web Content
A website’s content is the heart and soul of its online presence. It’s what attracts visitors, engages them, and ultimately converts them into customers. To create effective website content, you must consider various factors, including keyword research, media selection, content creation, and legal compliance.
Keyword Research
Keyword research is a crucial step in optimizing your website for search engines. You can attract organic traffic and improve your search engine rankings by identifying relevant keywords and phrases.
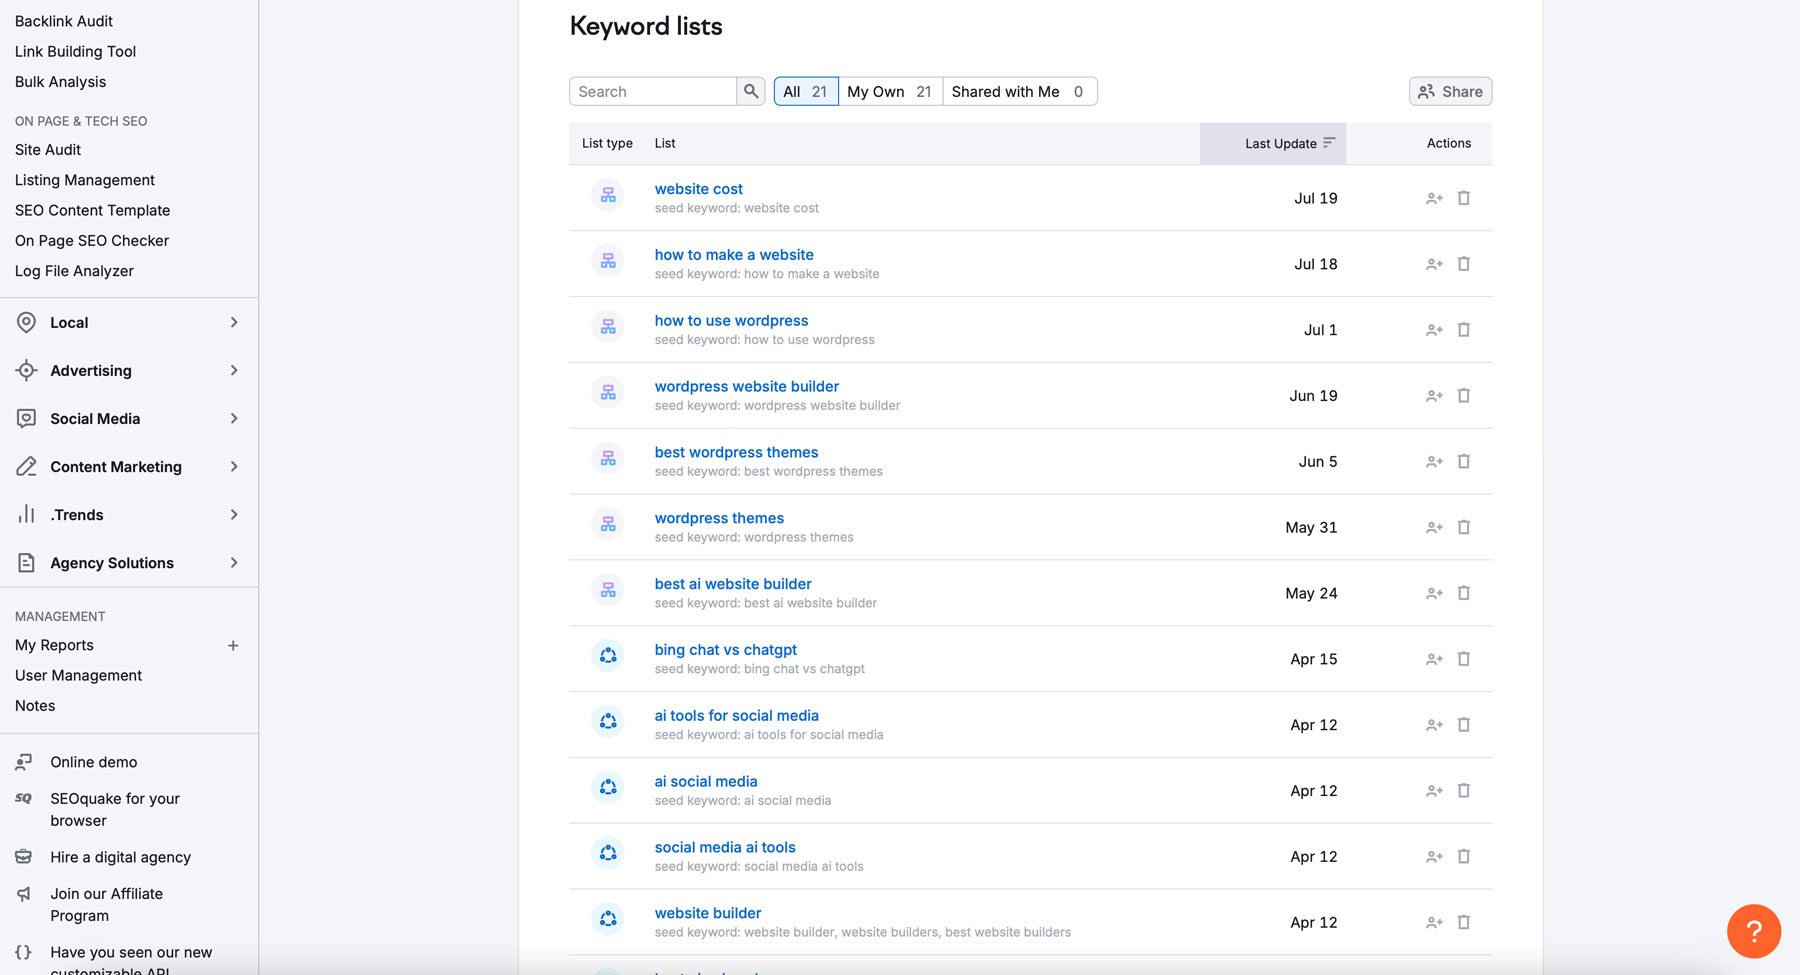
To conduct effective keyword research, brainstorm keywords related to your website’s topic. Then, utilize tools like Semrush to discover popular keywords and their search volume. Consider targeting long-tail keywords, which are more specific and less competitive, or exact keywords to attract a more precise audience. By strategically incorporating these keywords into your website’s content, you can enhance your visibility and drive more organic traffic.
Gathering Media
You’ll need to gather high-quality images, videos, and other media assets to create a visually appealing and engaging website. You can make your own by capturing original photos and videos that align with your client’s brand style and messaging, but that takes expertise and experience you may not have. Alternatively, you could hire a professional, but that comes with added costs that you may not be able to absorb. Another option is to use stock photo websites like Shutterstock or Unsplash to find royalty-free images, but depending on the subject matter, this can be a tall task too.
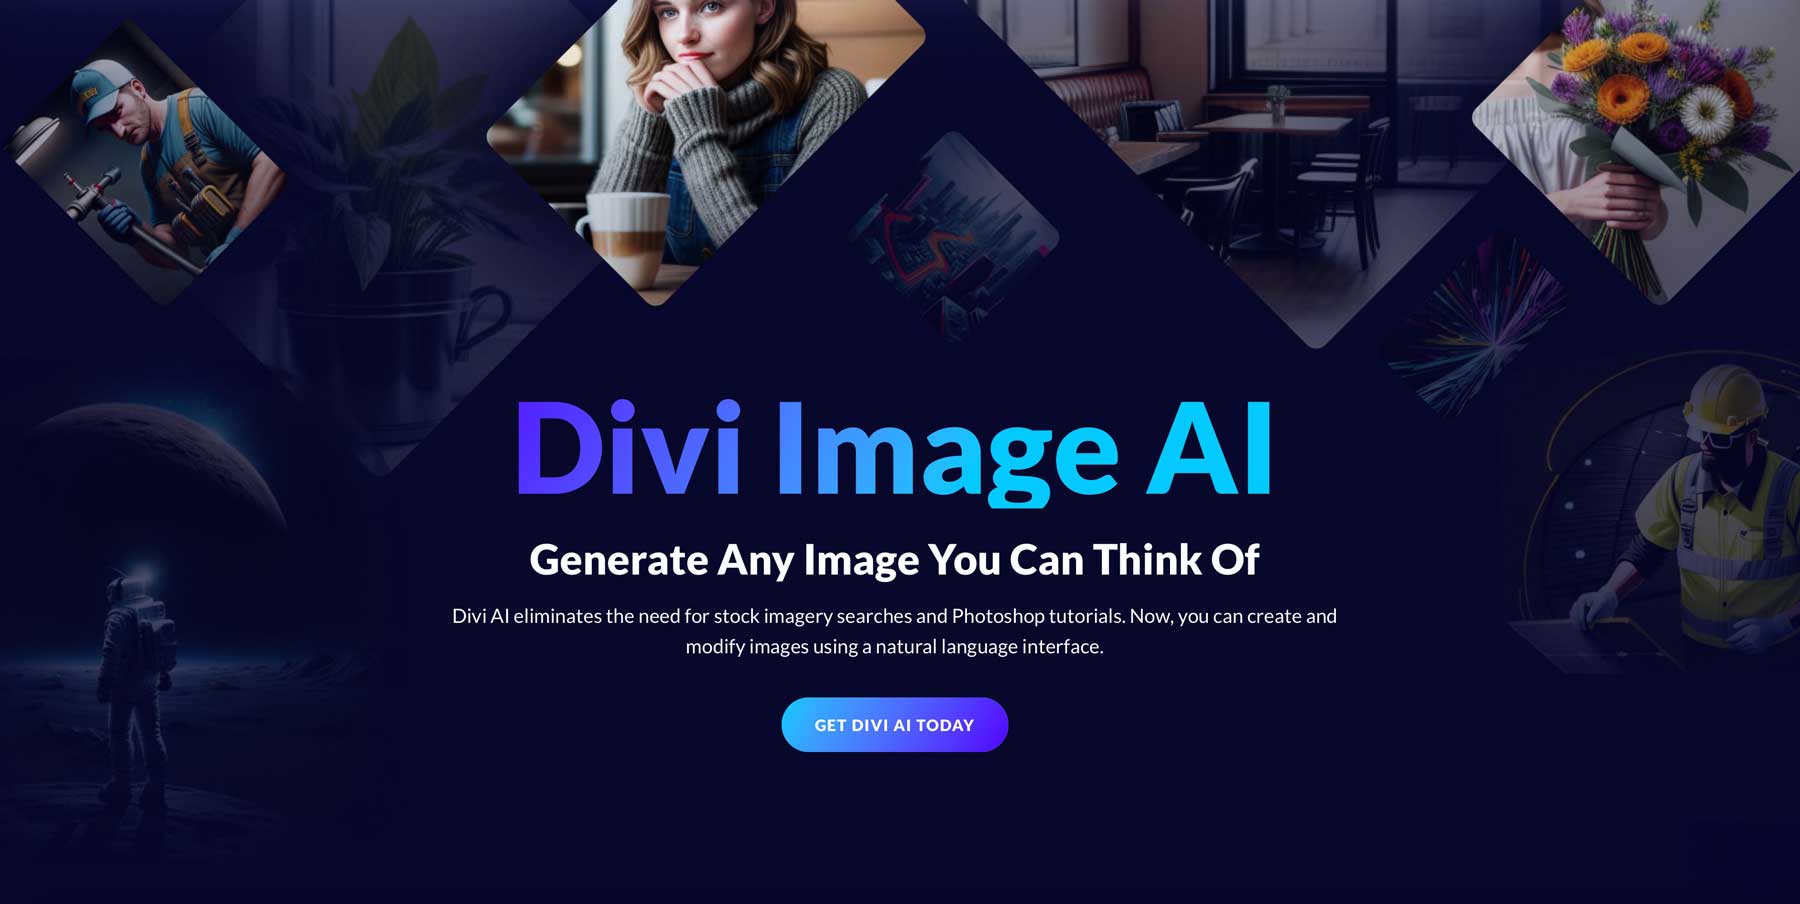
One of the best options is to use Divi AI to create images for you. With a text prompt, you can describe the image you’d like to generate and sit back as Divi does all the hard work for you. The best part about Divi AI is that you can use it to create unlimited images for your site. It’s much cheaper than most stock image sites, and it’s easy enough for newbies to use.
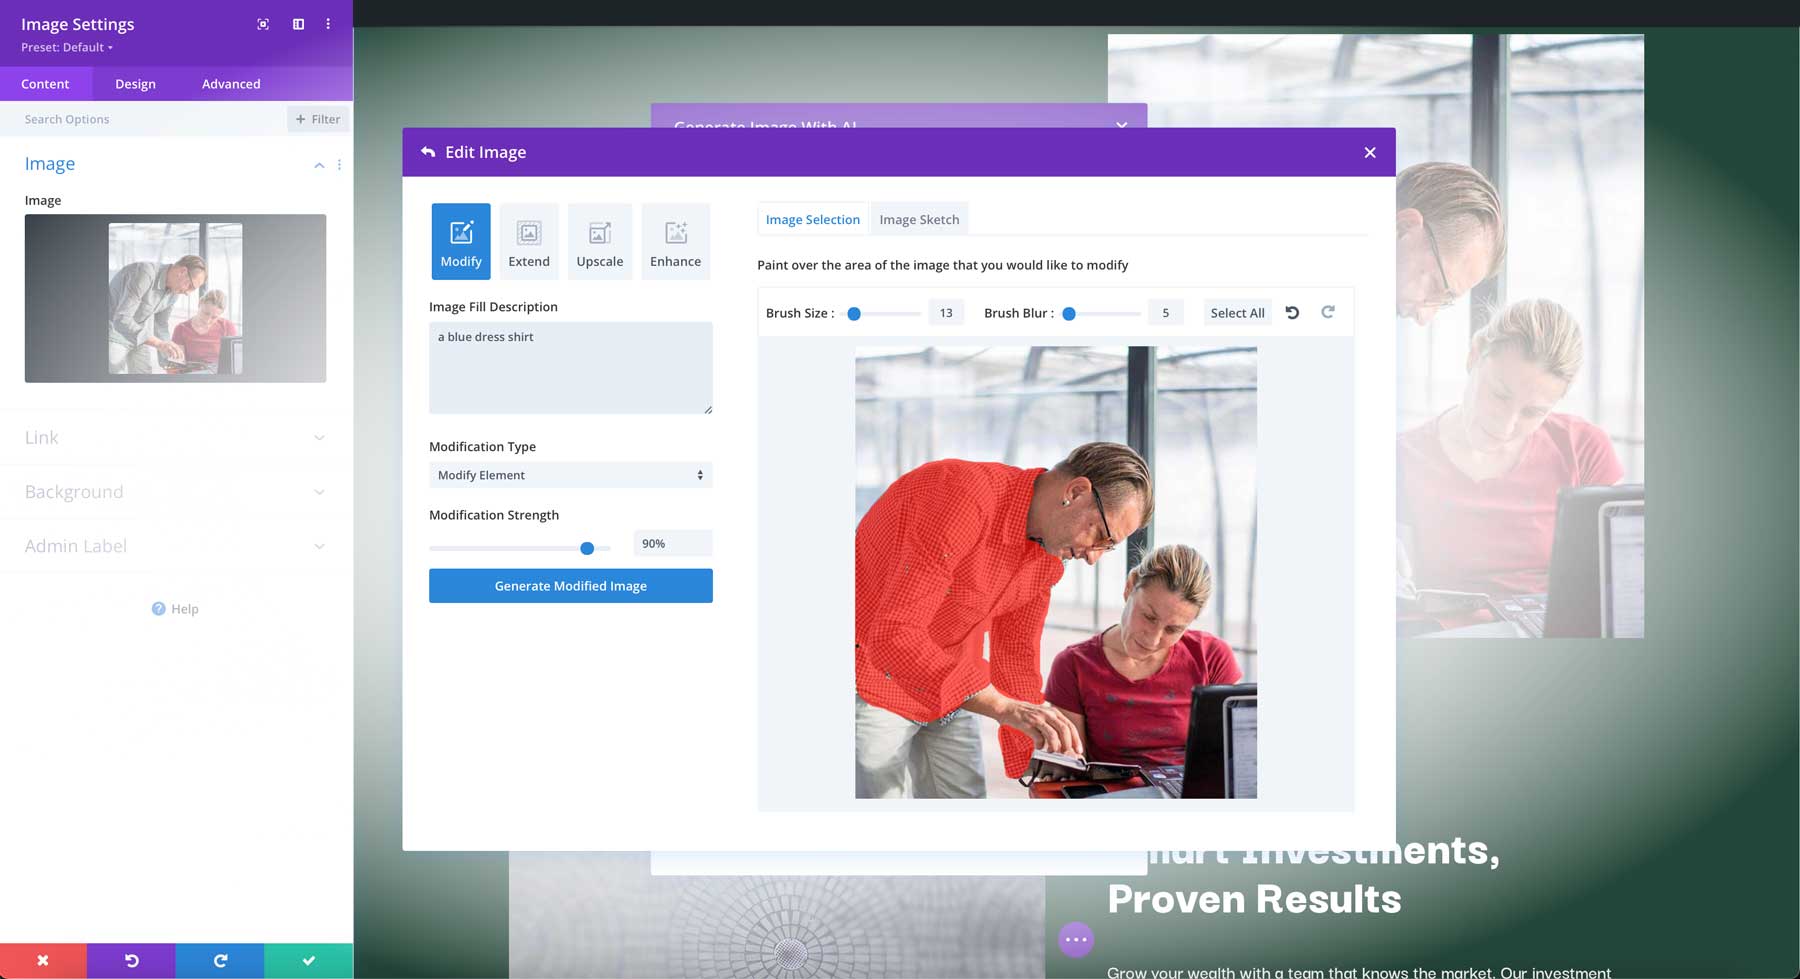
In addition to generating images with Divi AI, you can alter existing ones. Whether you want to expand an image beyond its original borders, upscale it, or modify an element, Divi AI is a WordPress-based image editor that can help you craft the perfect image.
Creating Content With Divi AI
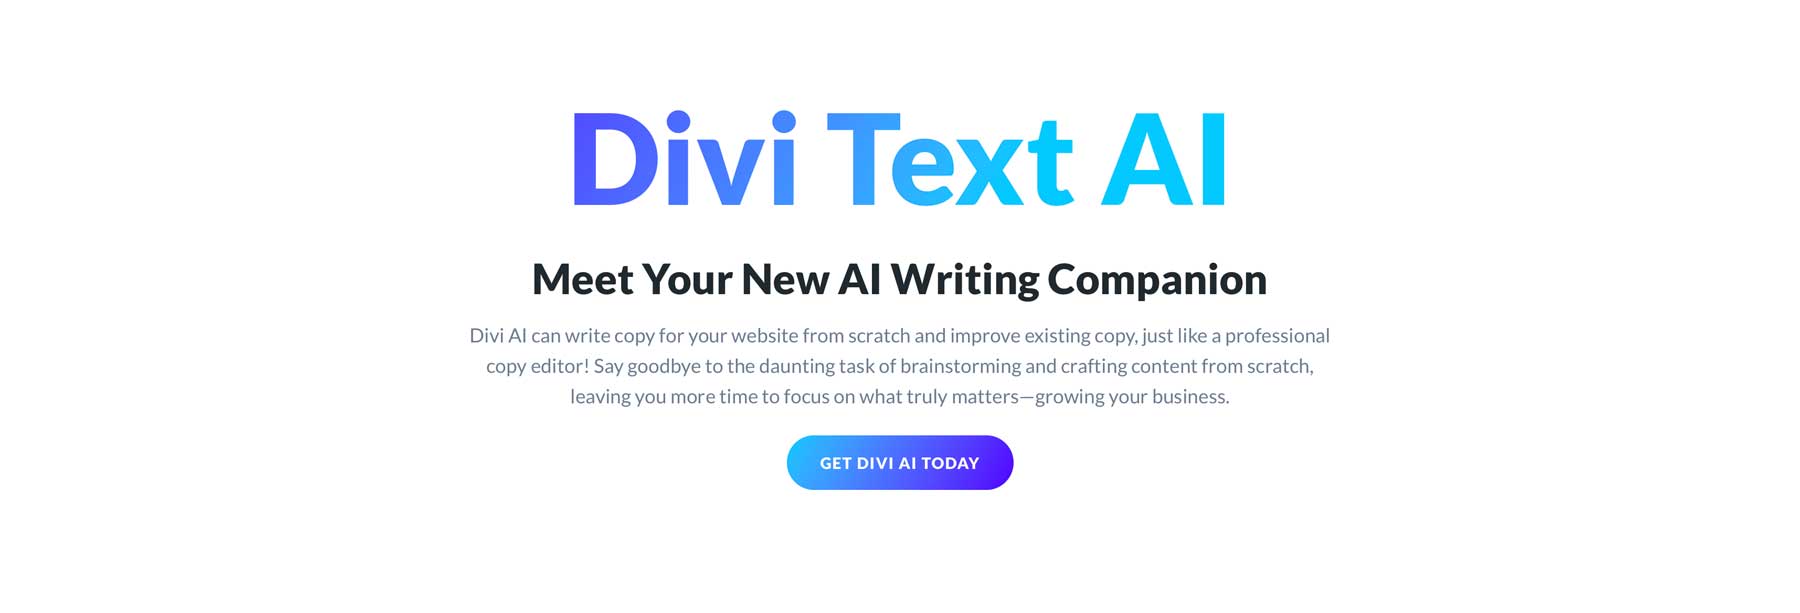
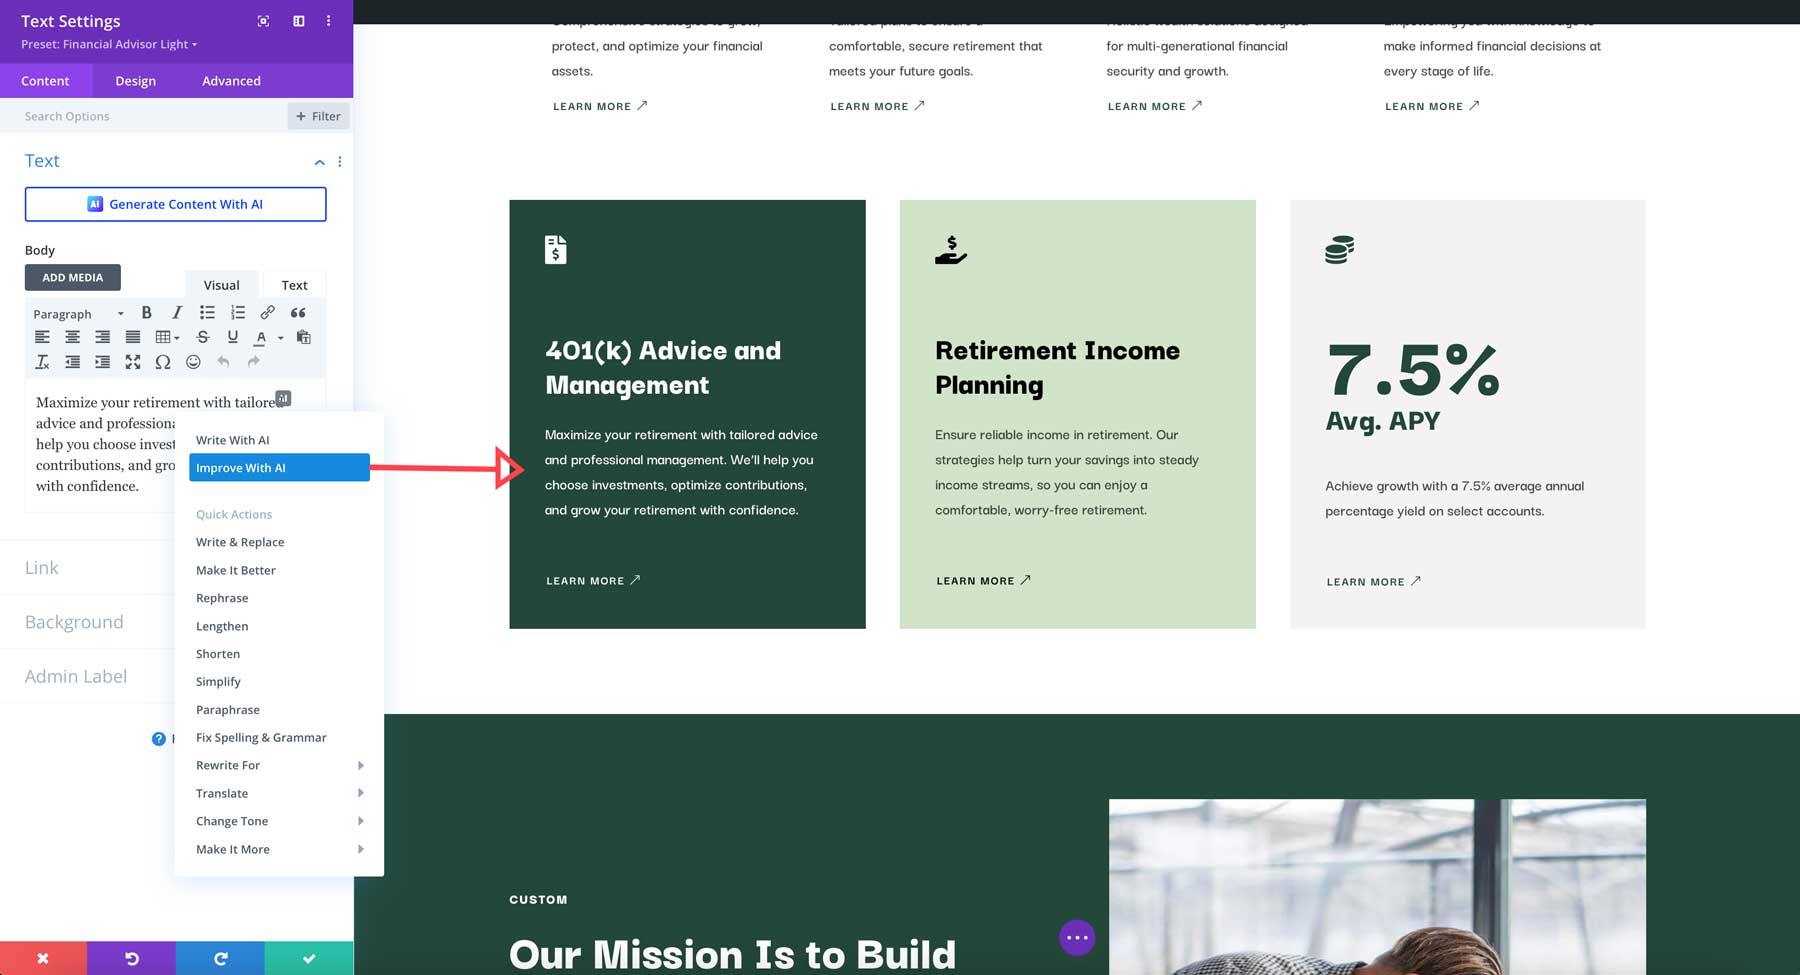
In addition to creating images, Divi AI can help you craft compelling content. It can generate blog posts on various topics, from industry trends to personal opinions. It can also write product descriptions, develop marketing copy, create headlines, and more. With Divi AI, you can save time and effort while producing high-quality content that resonates with your audience.
Legal Pages
Last but not least, having a privacy policy, terms and conditions, and other legal pages is crucial when in the content stage of web design. These pages are important to ensure your website complies with legal regulations. These legal pages help protect your business from potential legal issues like data protection laws through GDPR and CCPA. If your website uses cookies, you should have a cookie policy that explains what cookies are, how you use them, and how users can manage them.
6. Developing The Website
With the design and content ready, it’s time to get approval and bring your website to life. This involves setting up WordPress, installing the Divi theme, and choosing essential plugins.
Client Approval
Once you’ve finalized the design and content, it’s best to get your client’s approval before moving forward with the development stage. Present your client with a detailed mockup and a sitemap illustrating the website’s structure and user flow. Consider offering a couple of rounds of revisions to identify potential issues or design changes. This will give your client a sense of ownership over the project.
It’s also a good idea to give them a few days to review your proposal and provide approval. Doing so will allow them to review everything thoroughly without causing a delay in the project’s timeline.
WordPress & Divi Setup
With client approval, you can move on to the fun part. For this tutorial, we’ll assume you already have a hosting provider for your website. If you do, you don’t have to worry about manually installing WordPress. Many hosting providers, including SiteGround, Cloudways, and Pressable take the guesswork out of installing WordPress by doing it for you. You still need to install Divi (or your chosen WordPress theme).
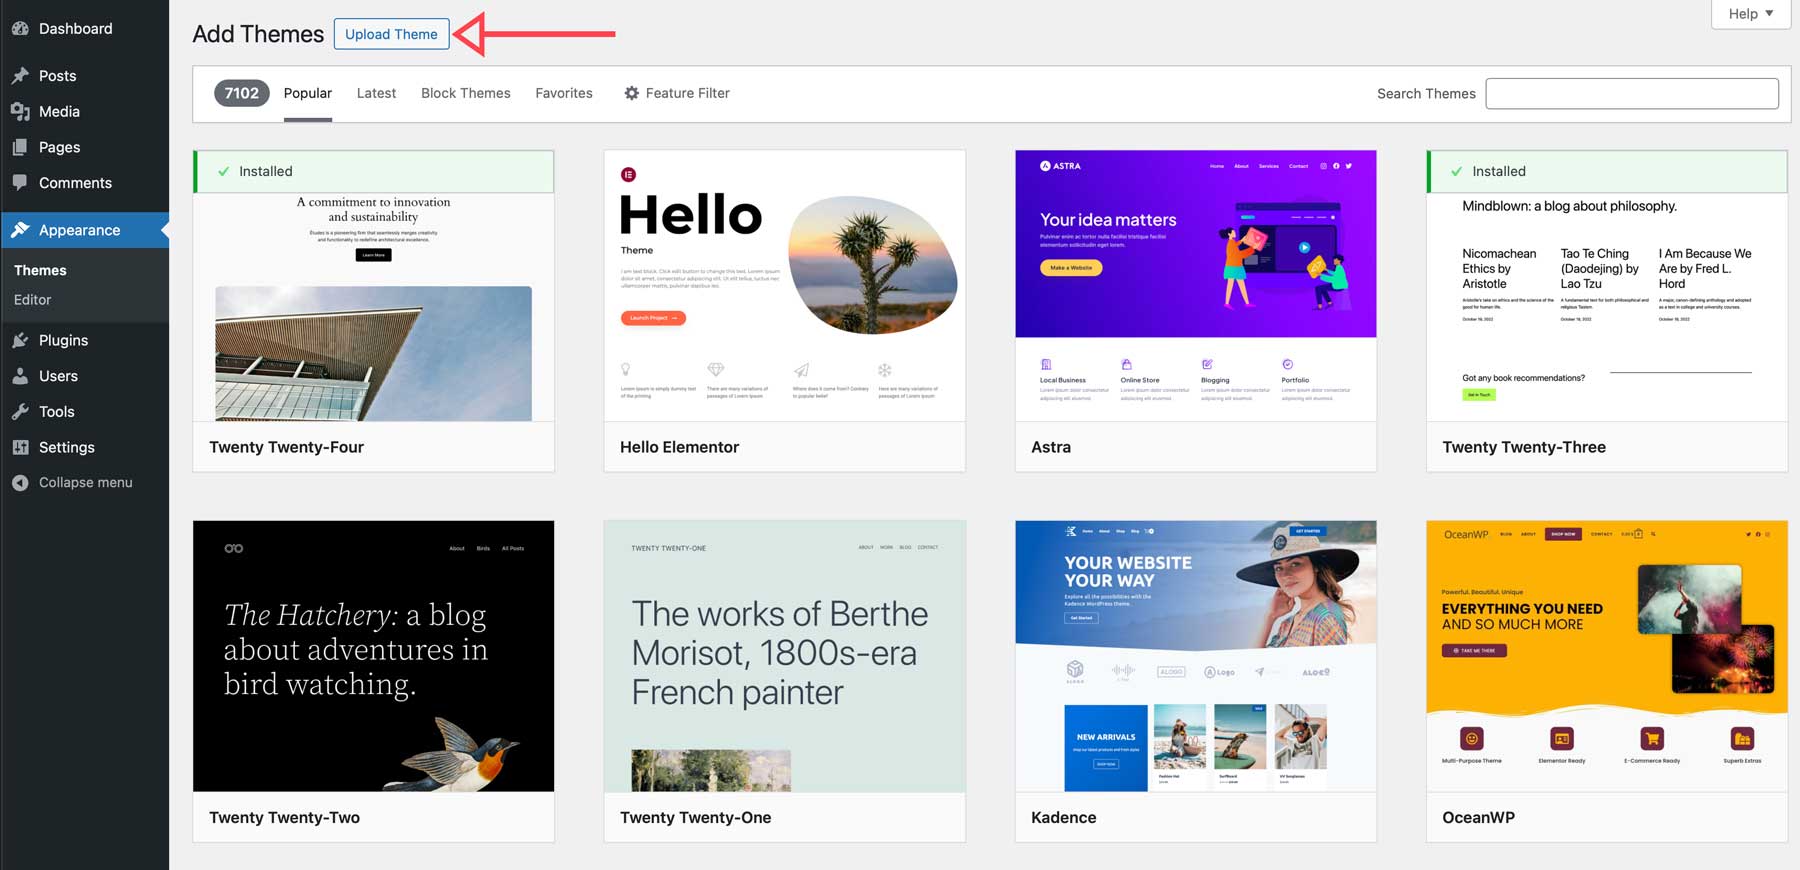
Start by accessing the back end of your WordPress website. Once logged in, head to Appearance & Themes. Click the Add New Theme button to add Divi to your website.
You can download Divi from your Elegant Themes Account in the members area. Once downloaded, click the Upload Theme button to load your zipped Divi file.
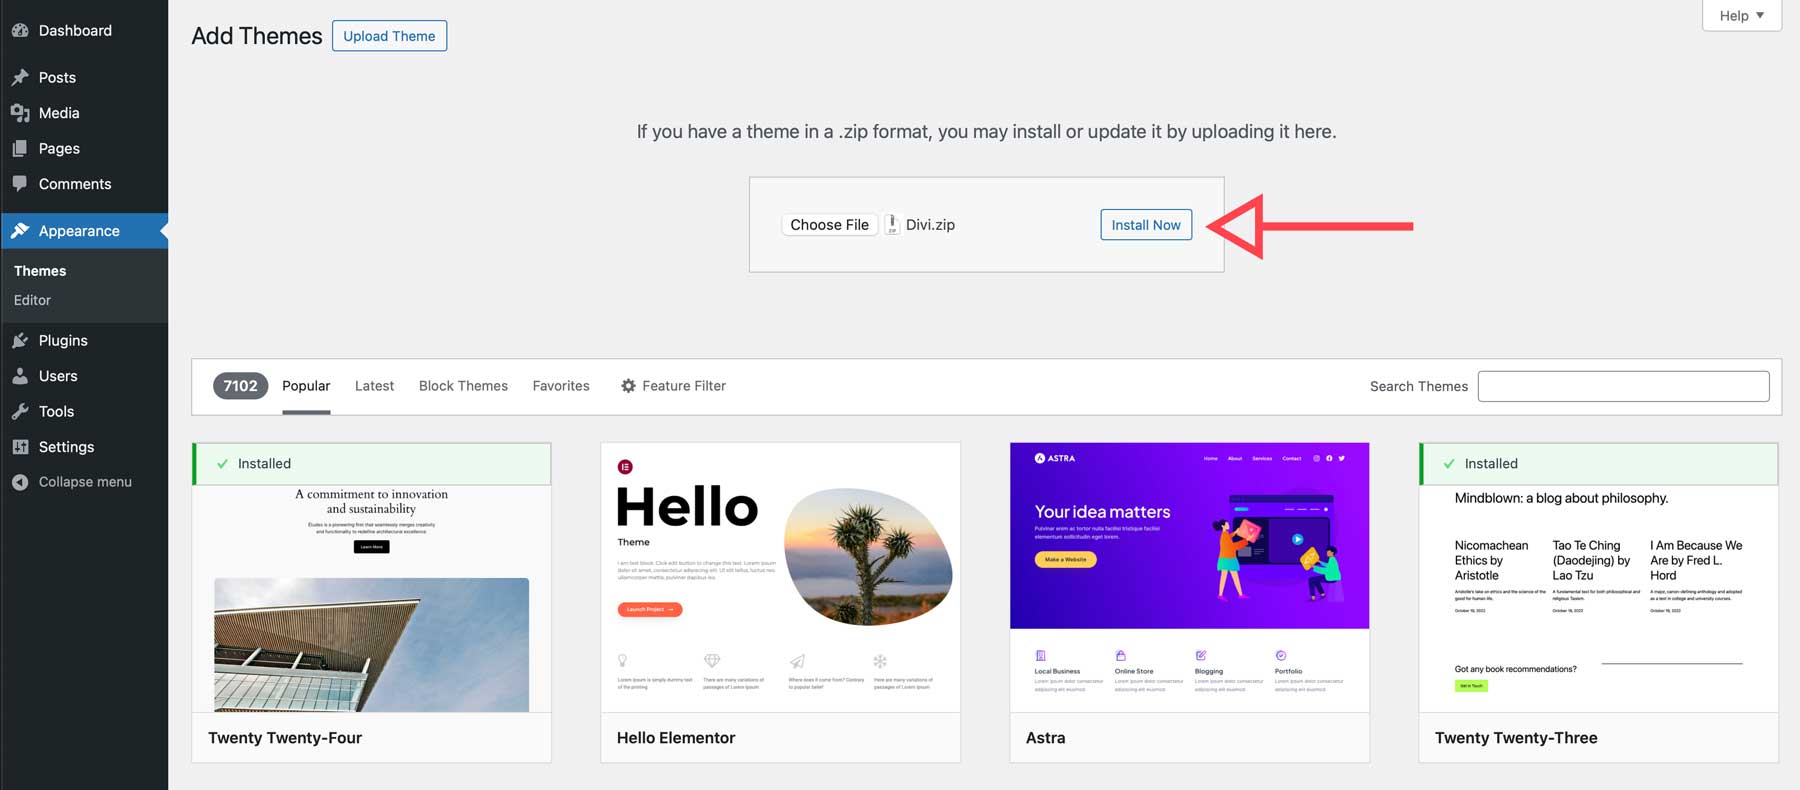
Click Install Now to proceed with uploading the file.
Once Divi is installed, click Activate to make it the active theme on your WordPress site.
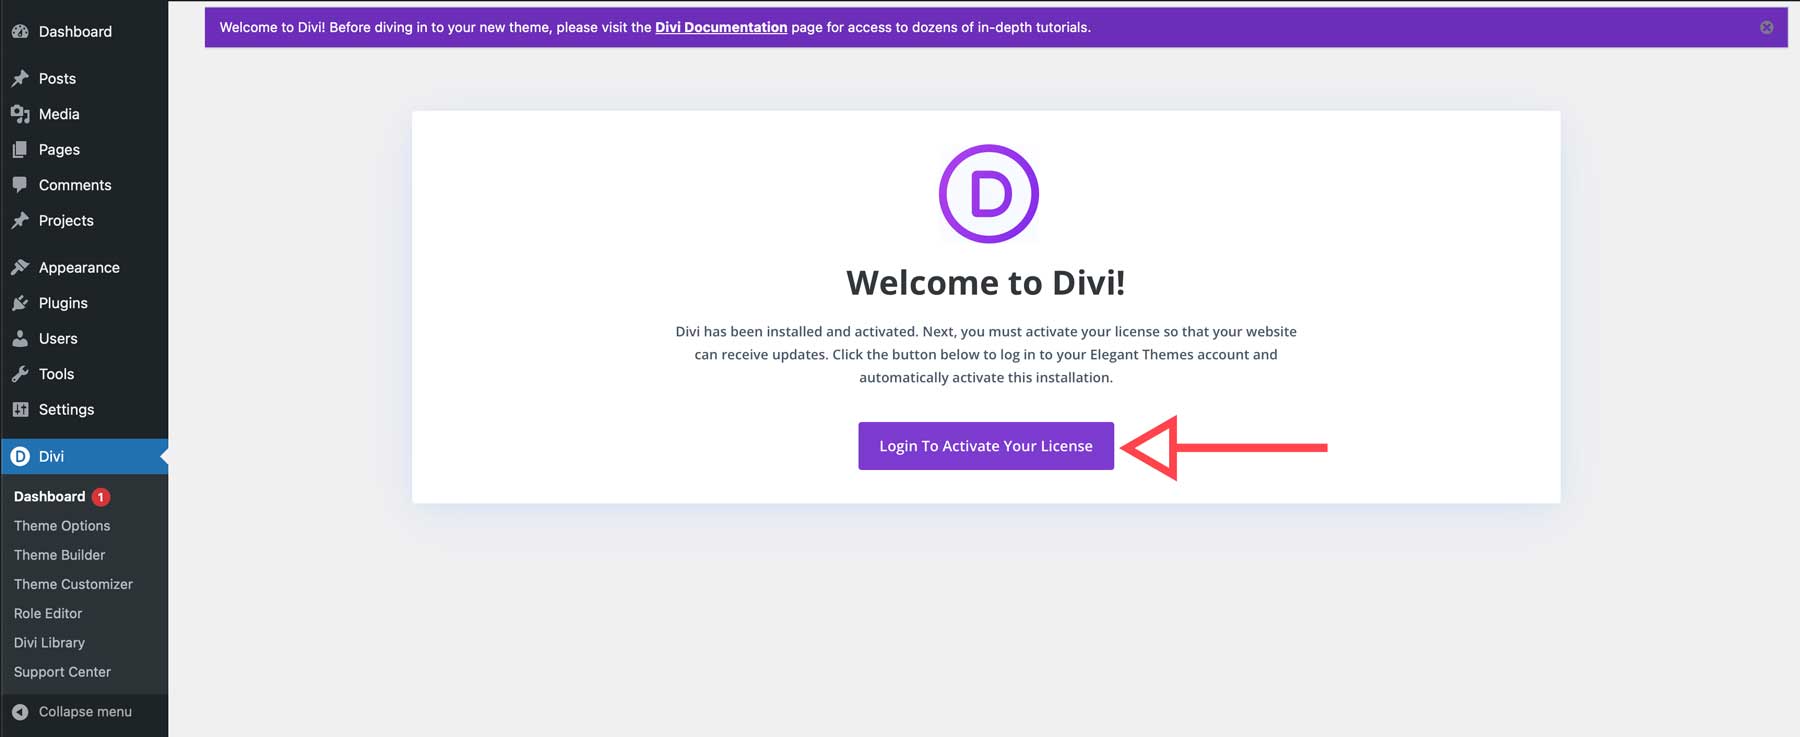
When the page refreshes, you’ll need to log in to your Elegant Themes account to generate a unique API key and connect your site to your account. Click Login To Activate Your License.
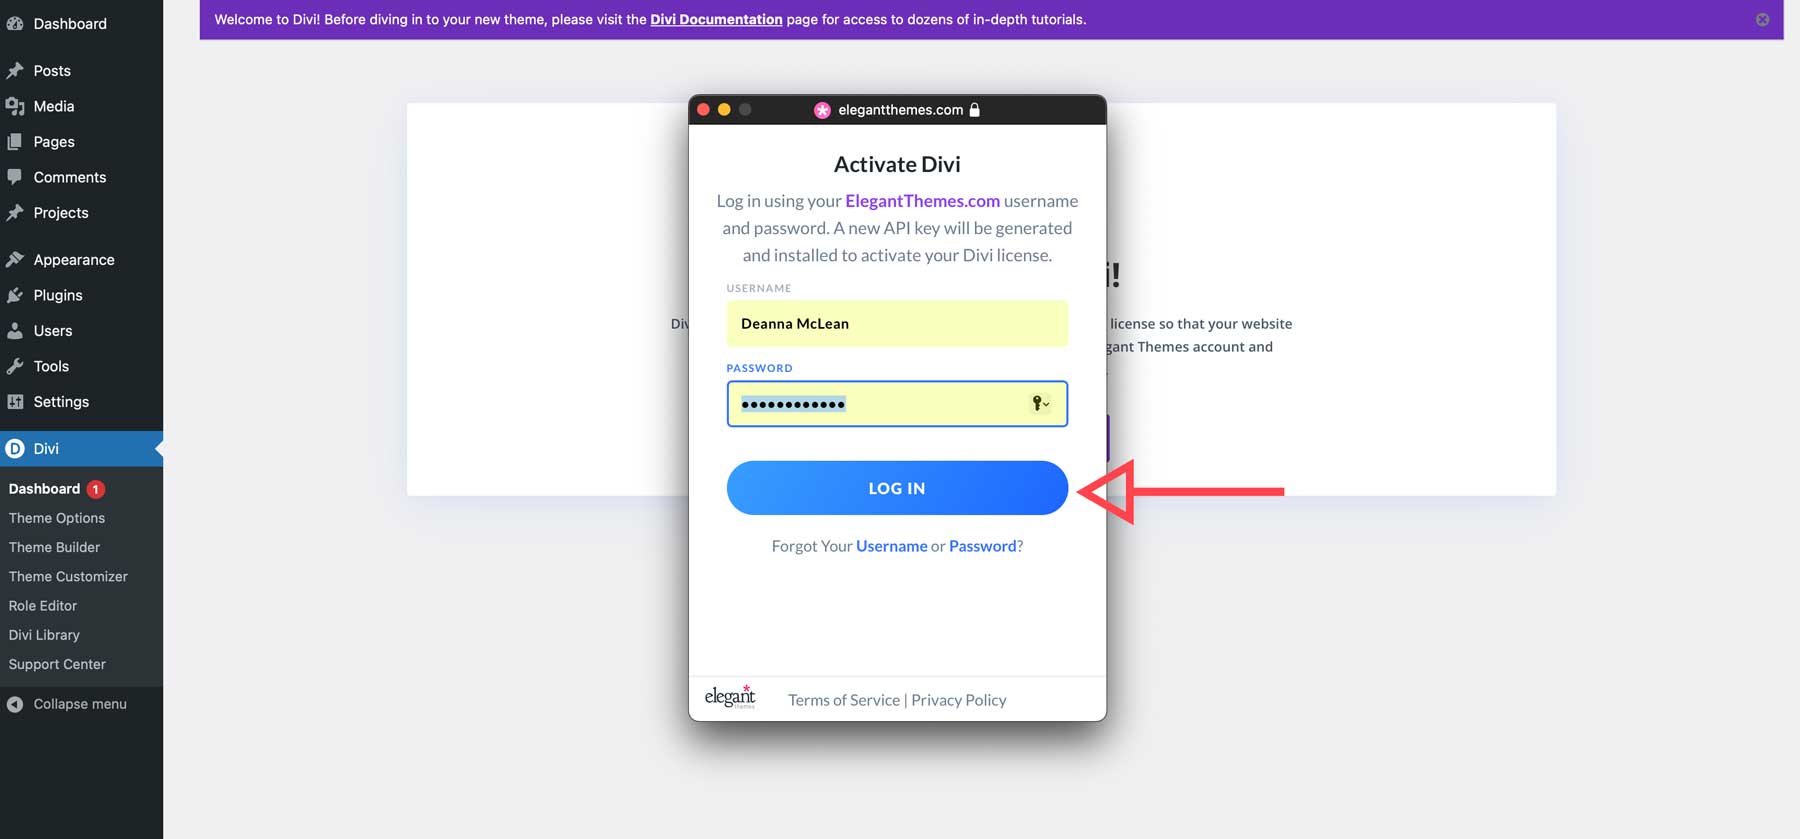
A dialog box will appear, prompting you to enter your Elegant Themes username and password. Once entered, click Log In.
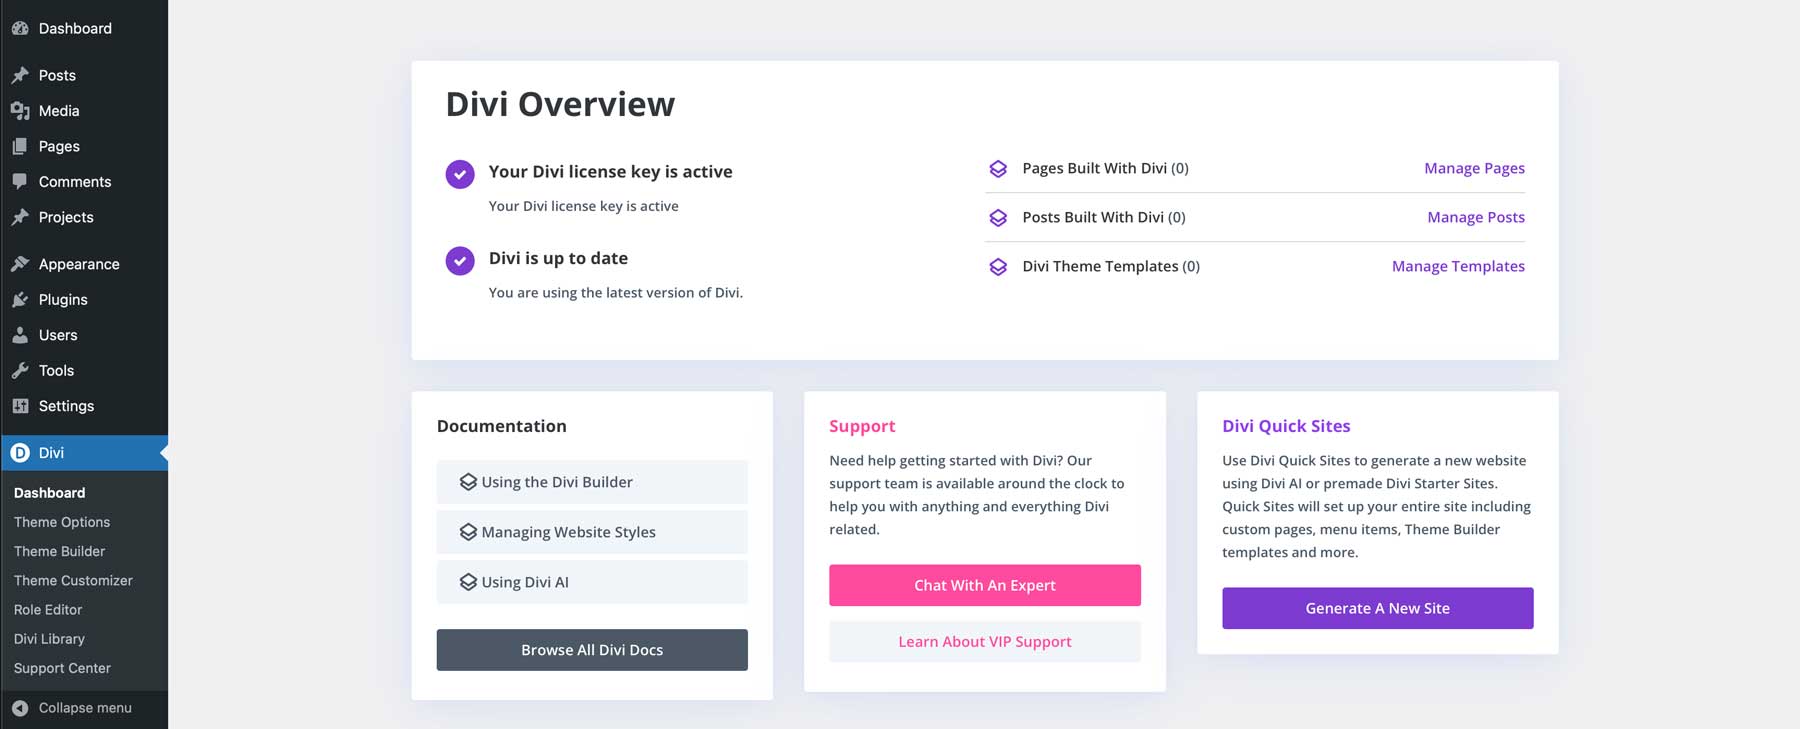
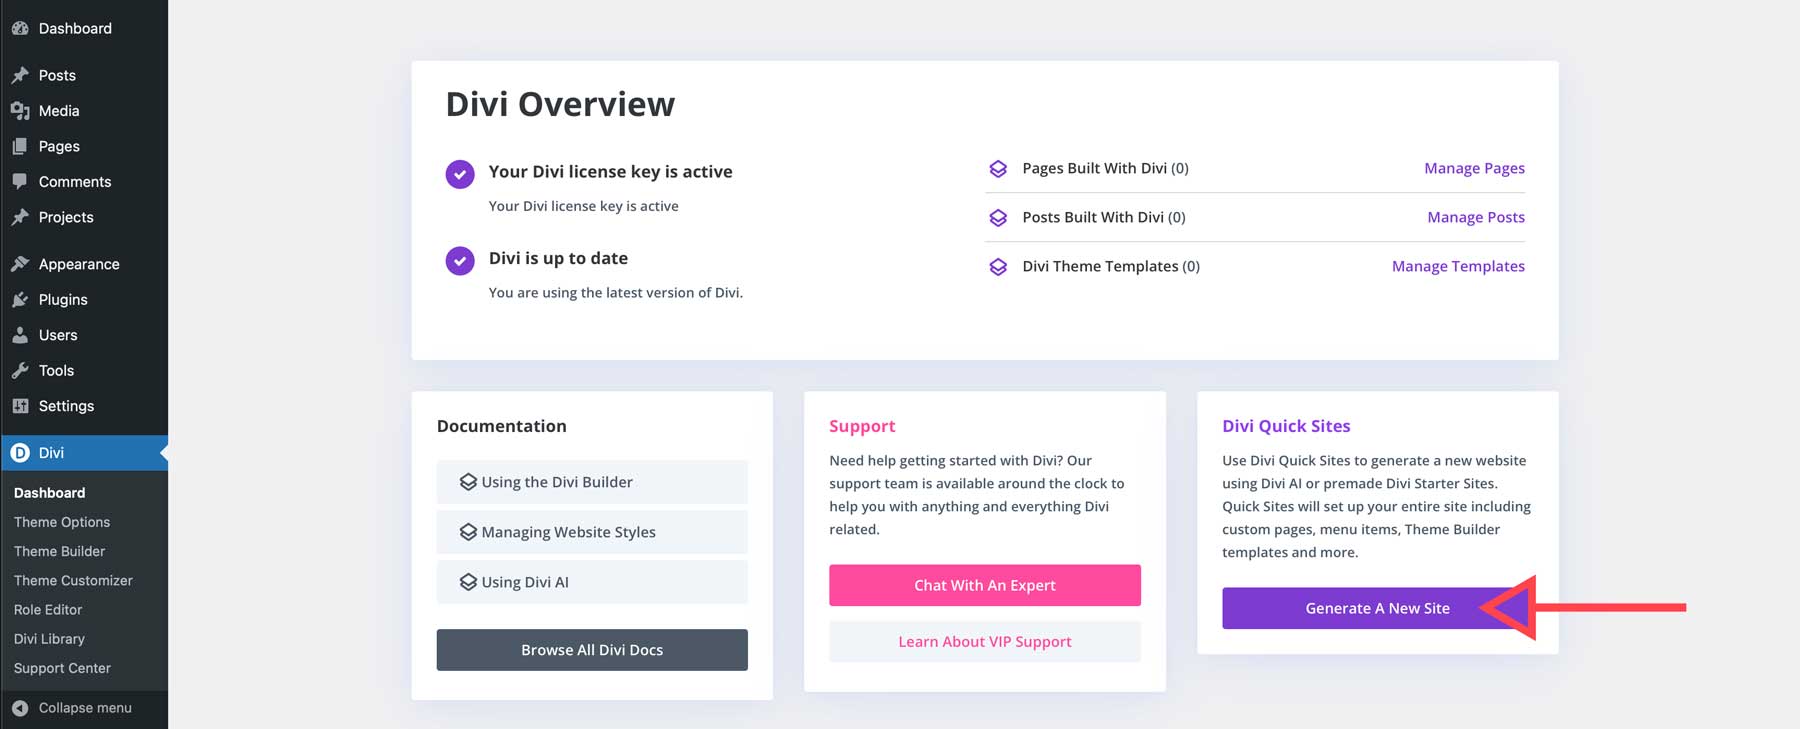
Once connected to Elegant Themes, you’ll be forwarded to your website’s dashboard, where you can access helpful documentation, get support, create a new website with Divi Quick Sites, and manage all pages, posts, and templates.
Creating A Website With Divi
With Divi installed, you can start bringing your vision to life. With several ways to create a website, Divi is a web designer’s best friend. You can start with one of Divi’s pre-made layouts, create an entire website in minutes with Divi Quick Sites, create pages and content with Divi AI, or bring your mockup to life with Divi’s no-code Visual Builder. Regardless of how you want to create your website, Divi has the chops to do it.
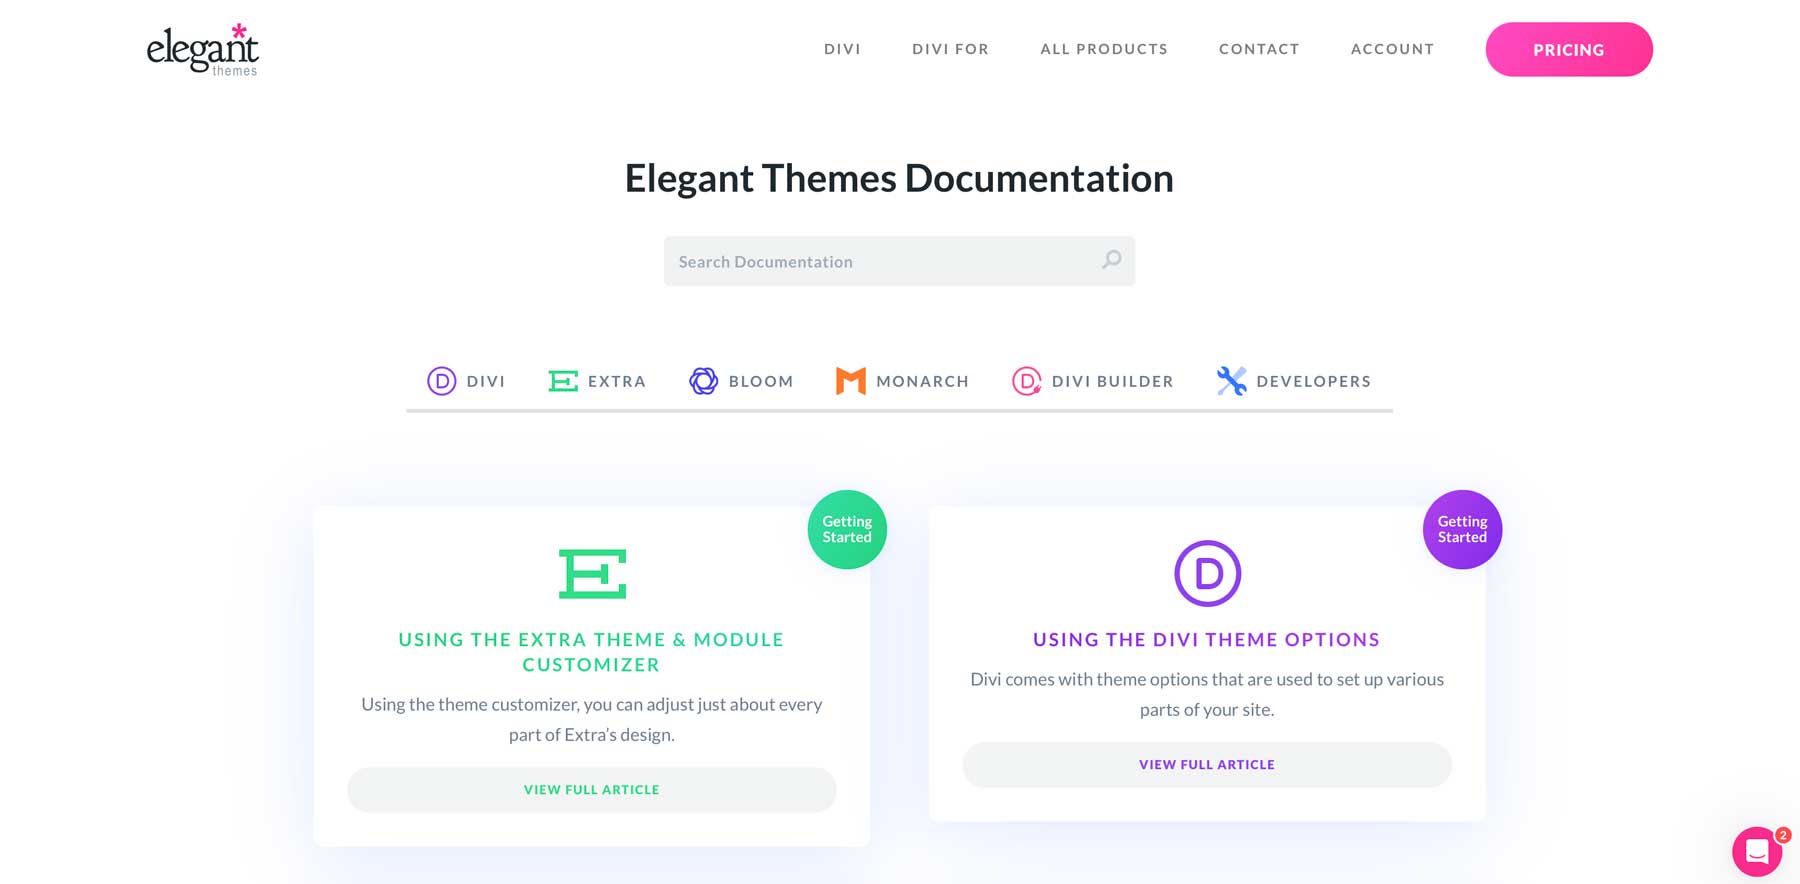
For those just starting with Divi, we have an entire documentation website dedicated to learning how to use it. There, you can learn how to use the Visual Builder, create global color palettes, and get tips on how to use every Divi Module included with the theme.
Creating A Website With Divi Quick Sites
There are a couple of options for those who want to start with a pre-made design. Using Divi Quick Sites, you can launch a complete website within a few minutes. While in the Divi Dashboard, click Generate A New Site under Divi Quick Sites.
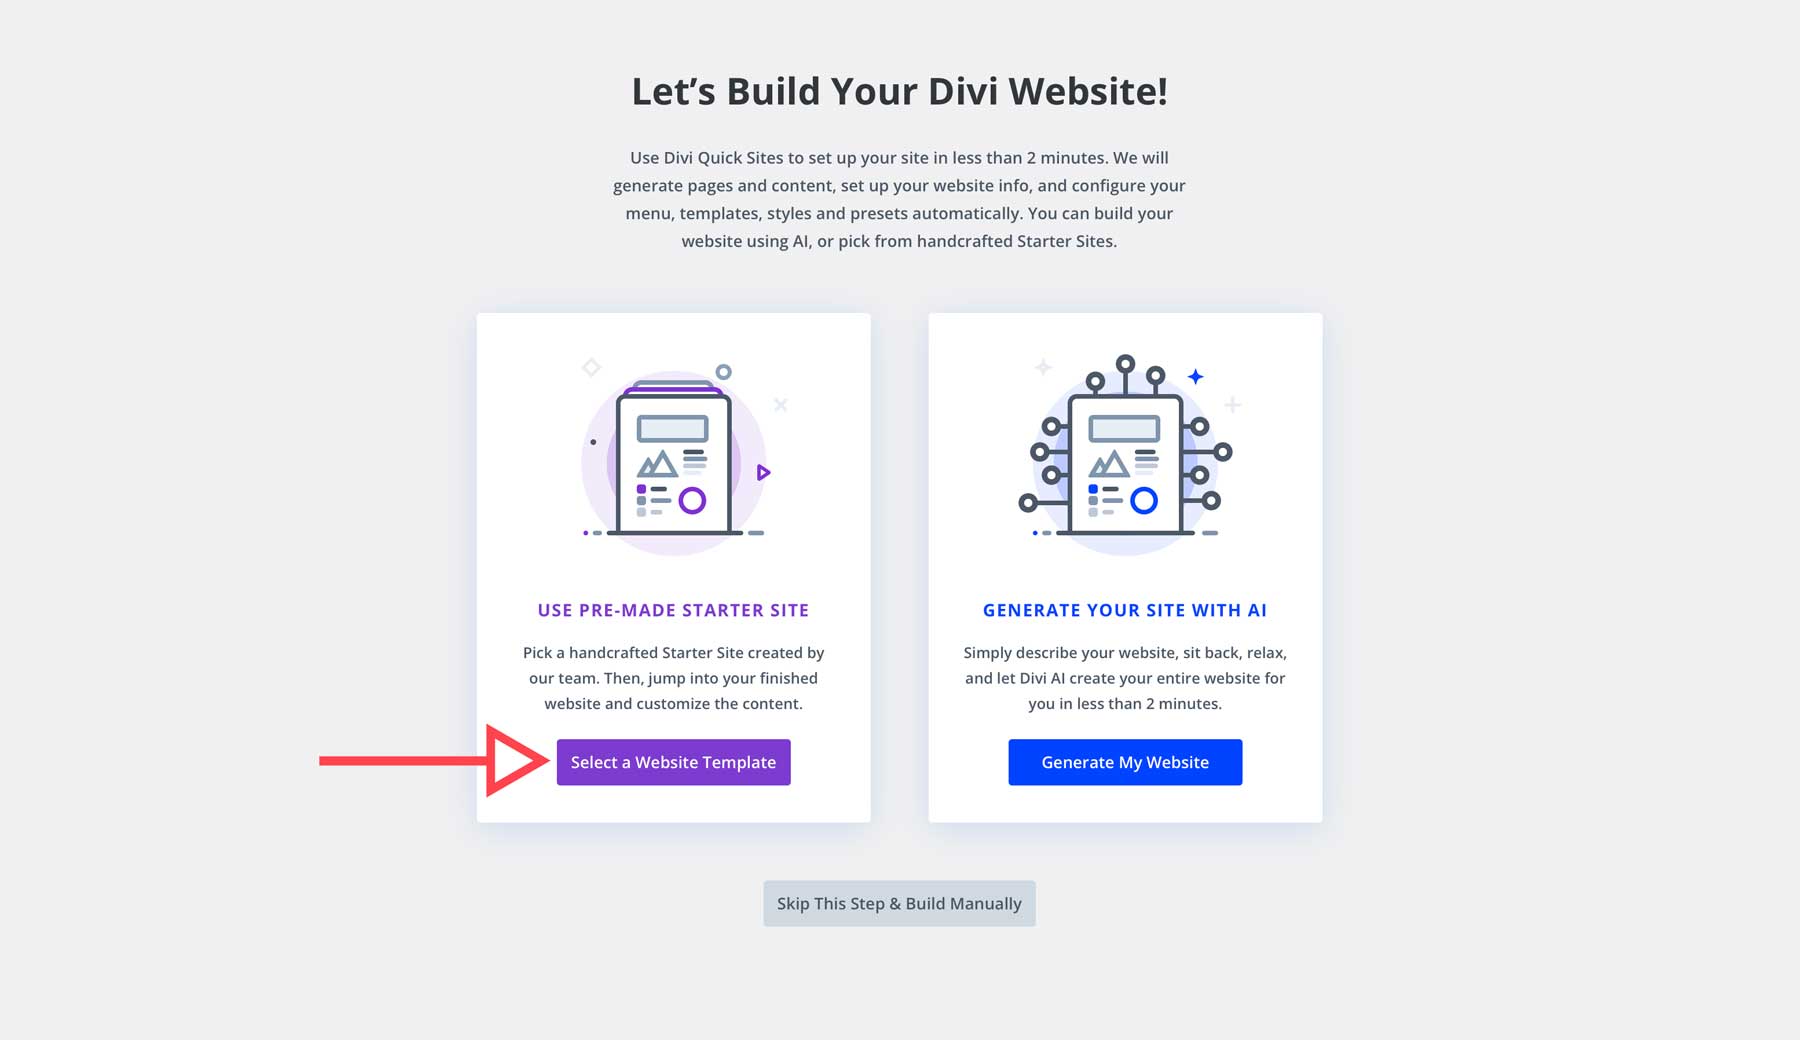
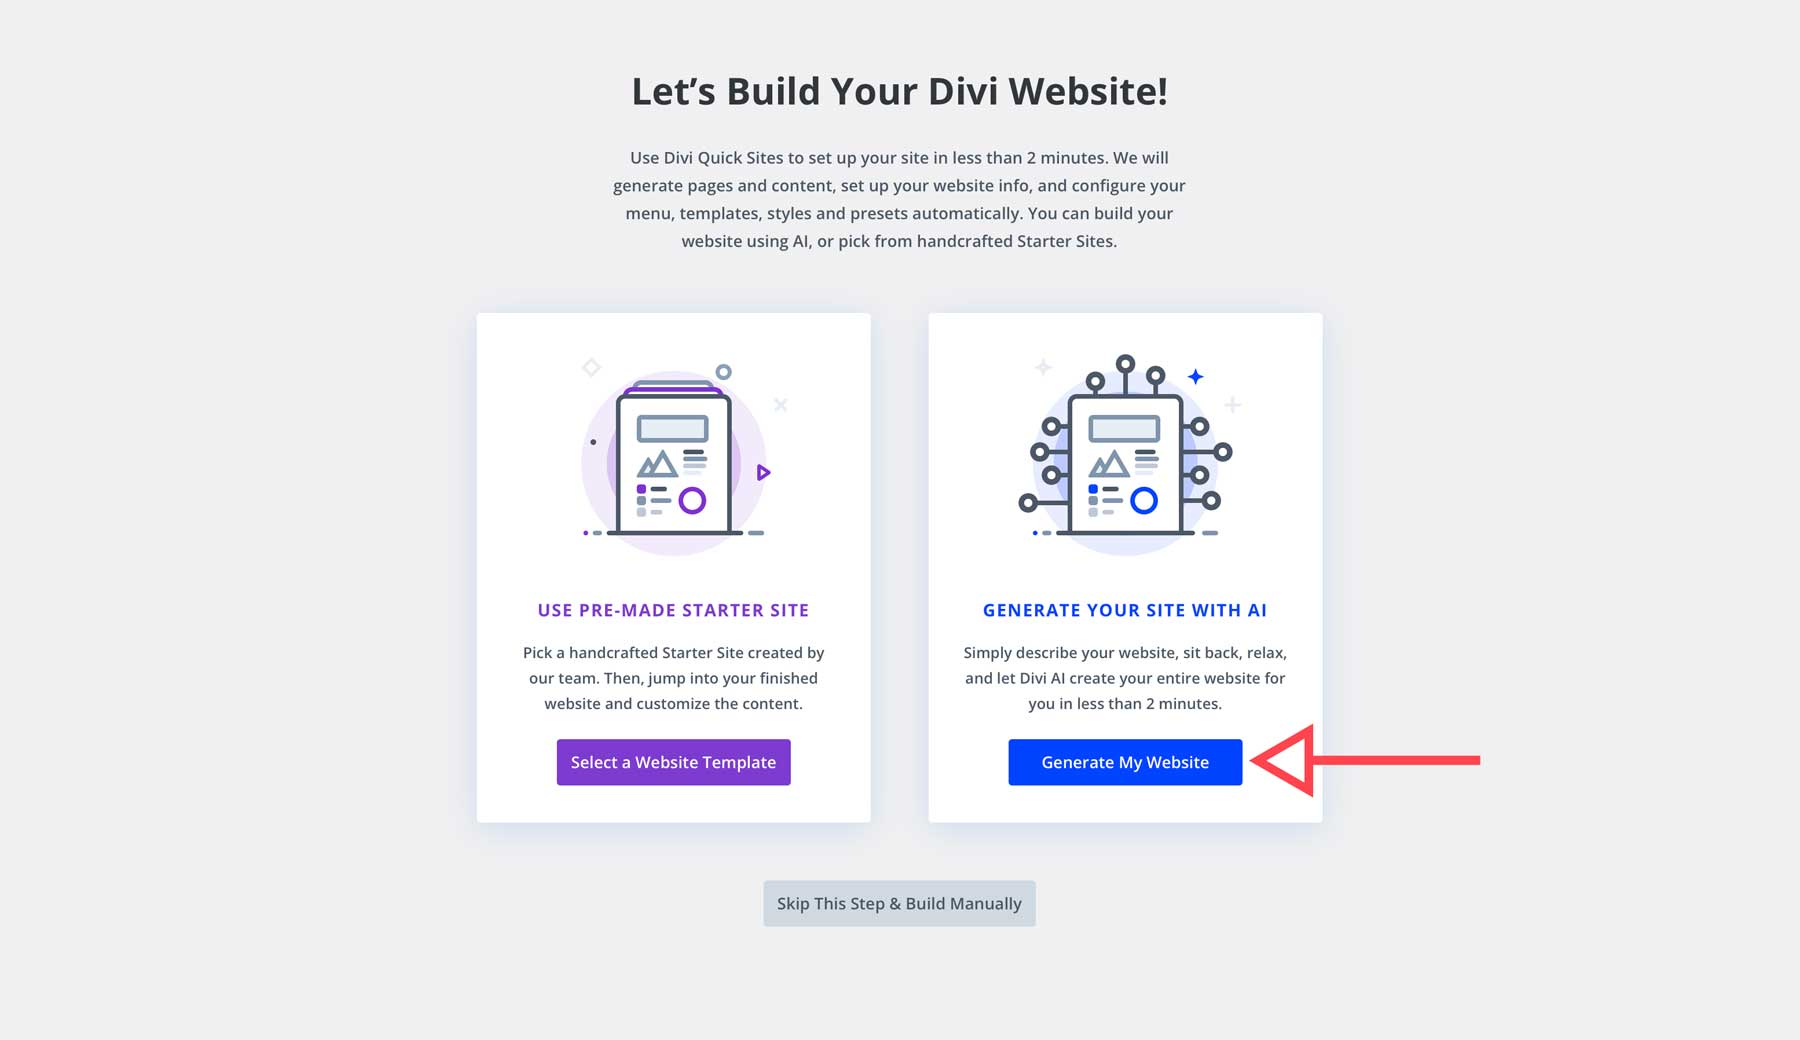
When the screen refreshes, you can select two options: using a pre-made starter site or generating a website with AI. Let’s walk through both of these options. Click the Select a Website Template button to start with a template.
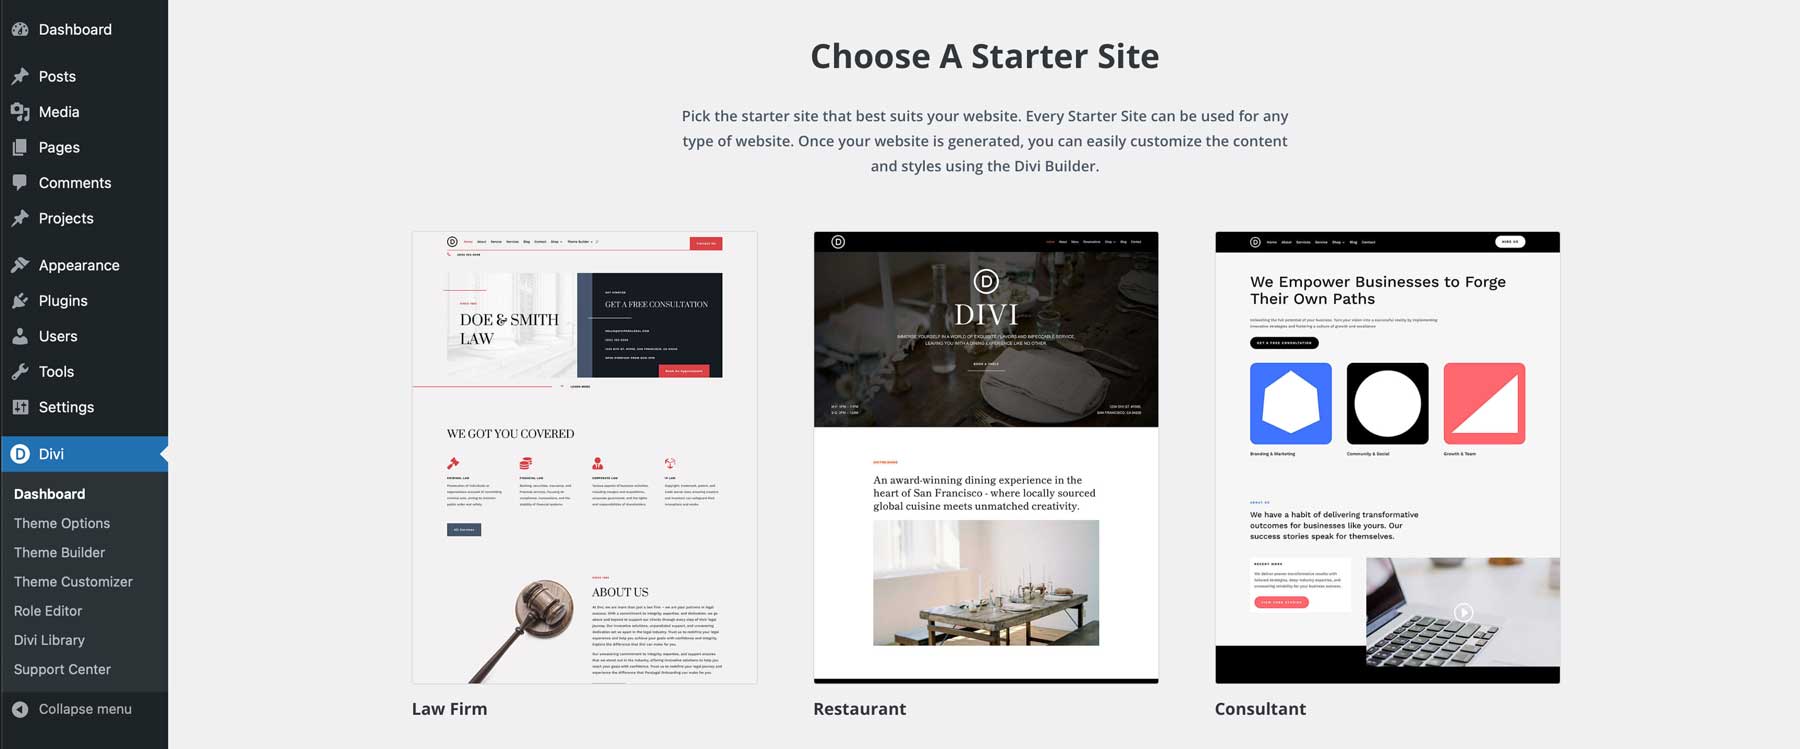
On the next page, select from a collection of starter sites spanning various industries.
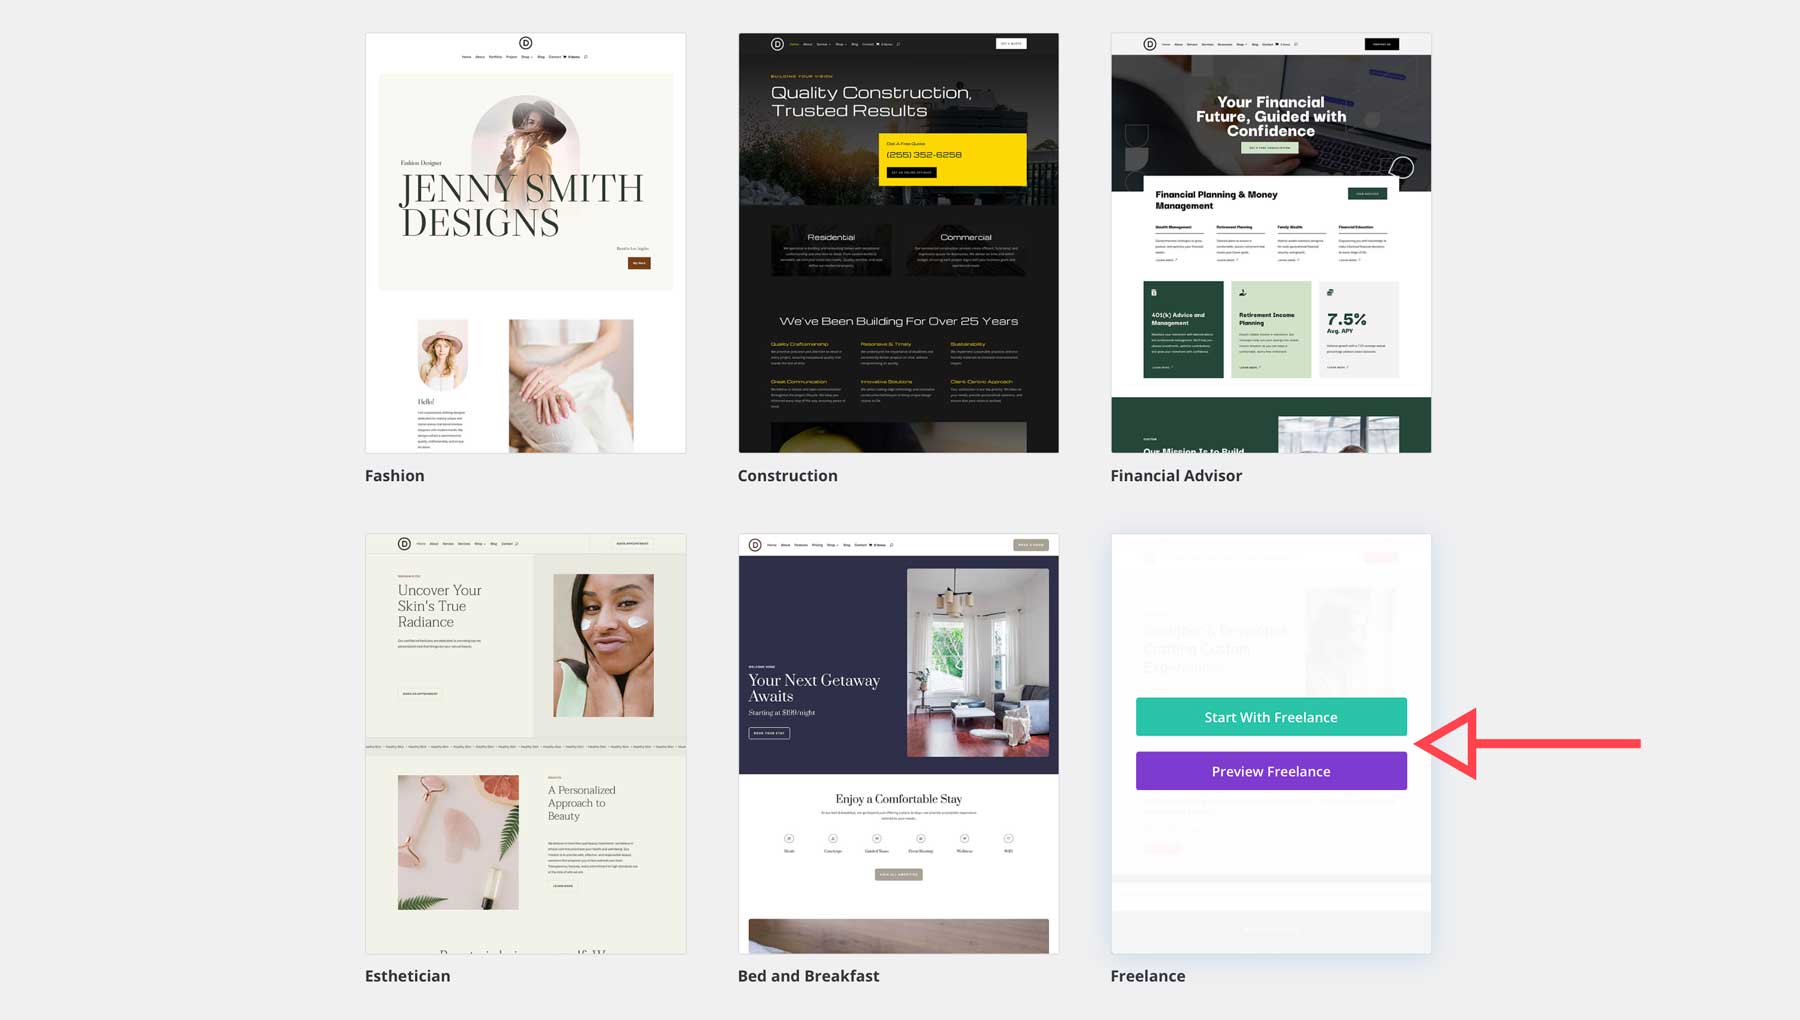
Once you find one you like, click on it to preview or select the layout.
Next, you’ll give your site a name, provide a slogan (tagline), upload a logo, and choose which pages you’d like to install. You can also customize your fonts and colors to stick to your branding. Once selected, click Generate & Publish My Website.
Divi will create your website with content, stock images, global styles, and all Theme Builder templates. If you’d like a deeper look at the process, check out one of our posts for installing and configuring its settings.
Creating A Website With Divi AI
If you’d rather create a website with AI, you can do that too! Divi AI can generate a complete website (similar to a pre-made starter site), but instead of picking a template, you can instruct the AI to create one based on your text prompt. Select Generate My Website under Generate Your Site With AI on the Divi Dashboard page.
The next screen is similar to the pre-made starter site screen. However, there are two differences. Here, you can give Divi AI insight into the type of site you want to create and choose between AI-generated images or stock images. The most important part of this process is to nail the text prompt. For help crafting the perfect prompt, read 5 Seamless Examples of Divi AI-Generated Websites (& Their Prompts).
Divi AI will start creating your site once you click Generate & Publish My Website. Your site will include AI-generated text, stock or AI images, all Theme Builder templates, global styles, all pages, and a menu. Divi AI will even assign a home page for you.
Once your site is complete, you can use the Visual Builder to change fonts, images, colors, or designs. With Divi, the sky is the limit.
Plugin Installation
Once your website is set up, it’s time to install some plugins. WordPress plugins can improve your website’s performance, security, SEO, and user experience. Whether you’re looking to boost your website’s page speed or enhance performance with caching, some plugins are essential to your website’s success. Here are some essential plugins to consider:
- SEO Plugins: These plugins help optimize your website for search engines. Popular options include Yoast SEO and All in One SEO.
- Security Plugins: Protect your website from hackers and malware attacks with plugins like Wordfence Security and iThemes Security.
- Speed Optimization Plugins: Improve your website’s loading speed with plugins like WP Rocket and Hummingbird.
- Caching Plugins: Enhance website performance by caching static content. Popular options include WP Super Cache or W3 Total Cache.
- Contact Form Plugins: Create custom forms for contact, surveys, and other purposes using plugins like Contact Form 7 and Gravity Forms.
- Backup Plugins: Regularly back up your website to protect against data loss with plugins like UpdraftPlus and BackupBuddy.
When installing plugins, be mindful of a few considerations. First, choose reputable plugins compatible with your WordPress version and theme. Also, install only a few plugins, as installing too many can slow your website down considerably. Finally, be sure to keep your plugins up-to-date by using a site management tool like Divi Dash. That way, you can ensure your site is performing as it should and isn’t exposed to security vulnerabilities that come with outdated software.
7. Testing & Launch The Website
Conduct thorough testing before going live to ensure a good user experience. This includes testing for functionality, browser compatibility, accessibility, speed, and SEO.
Thorough Testing
Before launching your website, it’s a good idea to perform testing to ensure everything is ready. This starts with functional testing. This involves testing all contact forms, links, buttons, and other interactive elements to ensure they work as they should. You should also verify that the navigation menu is intuitive and easy to use. If your site includes e-commerce capabilities, go through the checkout process to make sure there aren’t any snags.
Another thing to consider during the stages of web design is browser compatibility. While WordPress and Divi do an amazing job of this naturally, some lingering issues may arise, especially if you use custom code. Be sure to test your website on all major browsers (Chrome, Safari, Firefox, and Edge) and major operating systems, such as Windows, MacOSX, and Linux, to ensure consistent performance.
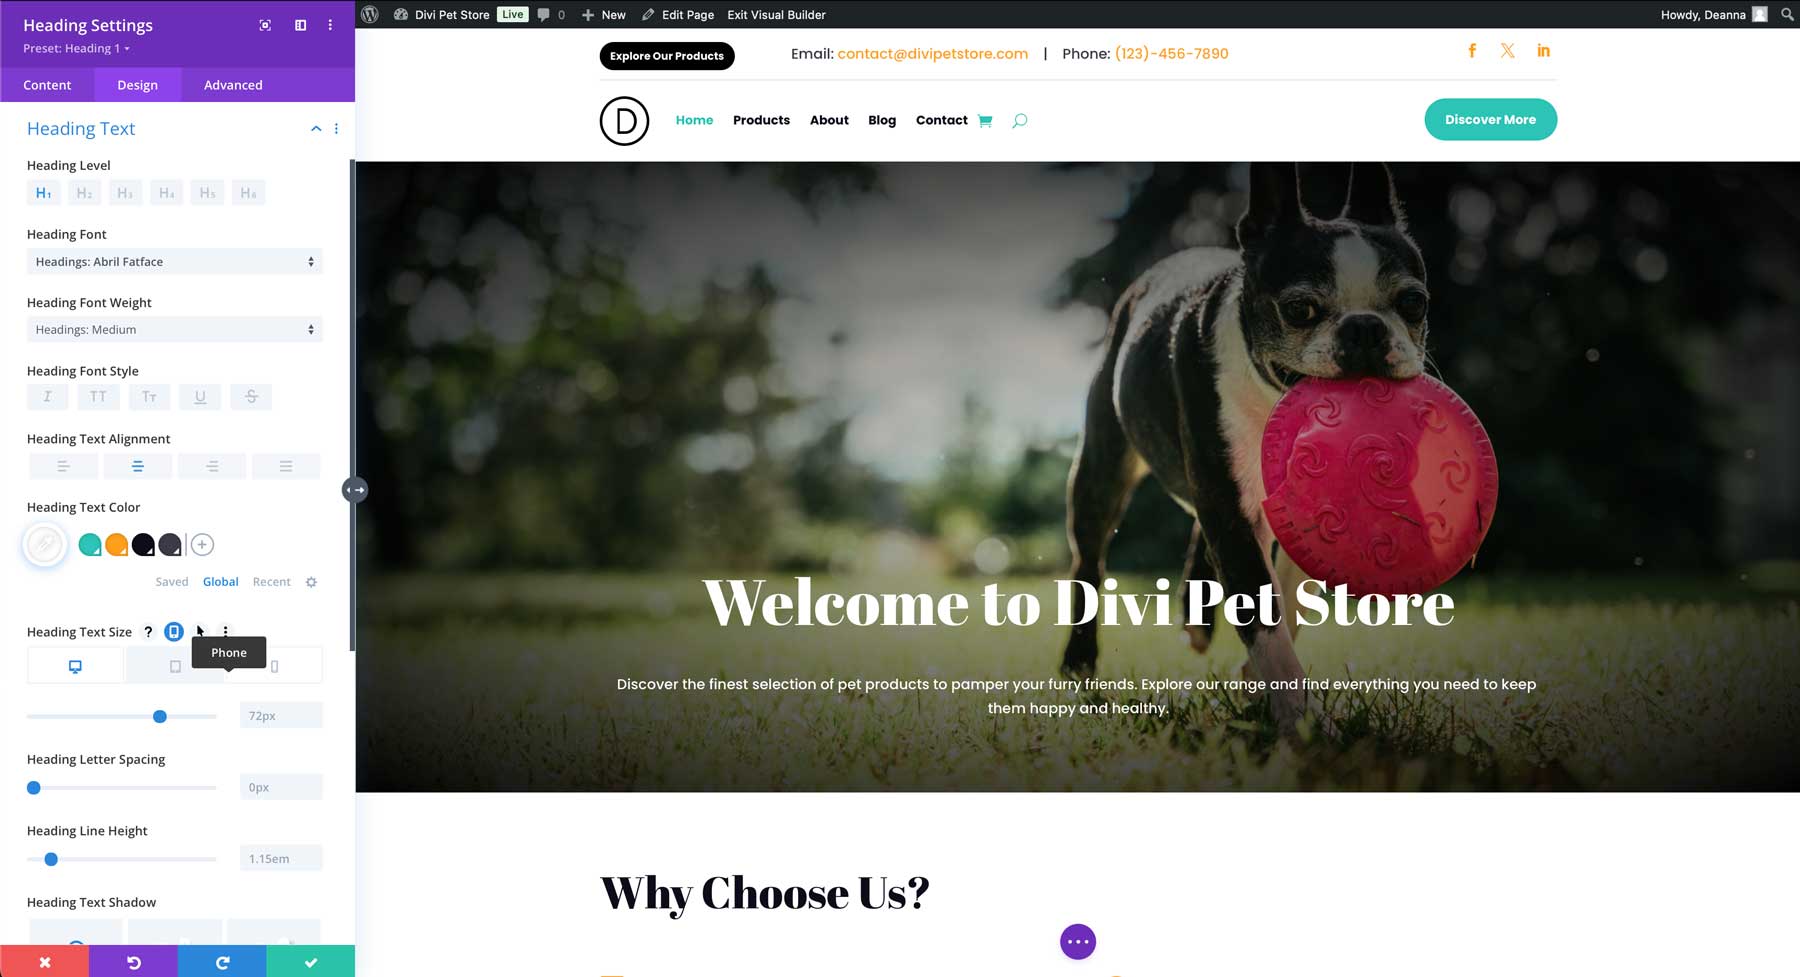
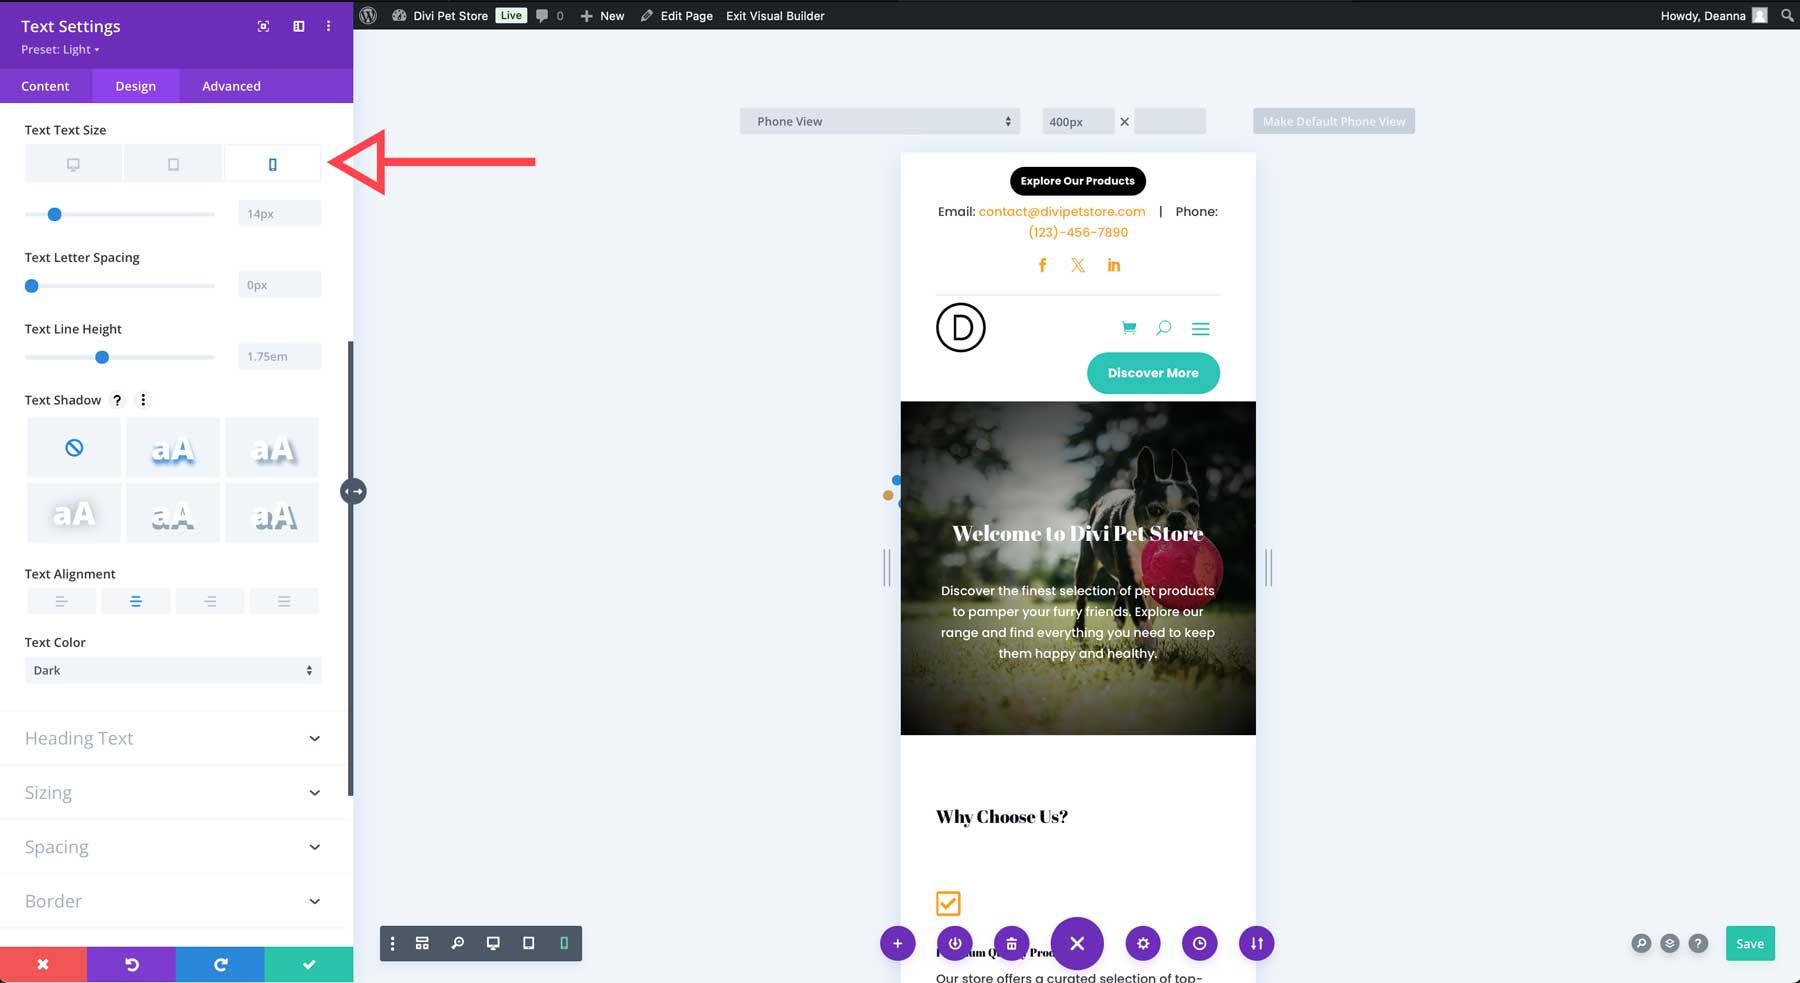
You’ll also want to test your website on various devices (desktop, tablet, and mobile) to ensure it adapts to different screen sizes and breakpoints. Ensure the layout is consistent, appropriate font sizes are used, and images are displayed as intended. As a Divi user, thanks to the Visual Builder’s incredible responsive controls, you’ll have this under control. You can control your site’s appearance across various screen sizes and adjust design elements.
Finally, usability tests should be conducted to identify any pain points or areas of confusion. A good way to do this is to gather feedback from real users to improve the overall user experience. You should also consider accessibility testing to ensure your website is properly set up for those with disabilities. Consider implementing an accessibility plugin with specific functionality, like screen readers, keyboard navigation, font-size adjustments, and semantic HTML.
Google Analytics and Search Console
Consider setting up Google Analytics and Google Search Console to gain valuable insights into your website’s performance and optimize your SEO strategy. Google Analytics allows you to track website traffic, user behavior, and conversion rates. It will even key you into how users access your website (desktop, mobile, or tablet) and help you understand where your traffic is coming from (demographics).
Google Search Console, on the other hand, provides insights into how your website is indexed and performs in Google Search. With GSC, you can track the keywords that people use to find your site, submit your XML sitemap, and monitor Core Web Vitals, like First Input Delay (FID), First Contentful Paint (FCP), and Time to First Byte.
Page Speed Optimization
Page Speed is a critical factor in user experience and search engine rankings. A slow-loading website can lead to higher bounce rates, lower conversion rates, and lower search engine rankings. To identify potential issues, use tools like Google PageSpeed Insights. It analyzes your site’s performance and provides recommendations on how to improve them. Some factors that can affect your site are image optimization, minifying CSS, HTML, and JavaScript, browser caching, and reducing HTTP requests. The best way to combat this is by choosing a good hosting provider that offers server-side enhancements to keep your site blazing-fast. Page Speed is an important consideration throughout all stages of web design, from initial planning to final launch.
SEO Configuration
We’ve briefly touched on SEO earlier in our post, but it’s worth repeating: optimizing for SEO should be at the top of your list. SEO is crucial for improving your website’s visibility in search engines. Here are a few factors to consider:
On-Page SEO:
- Title Tags: Create unique and descriptive title tags for each page. Include relevant keywords and keep them concise.
- Meta Descriptions: Write compelling meta descriptions that accurately summarize the content of each page.
- Header Tags (H1, H2, H3, etc.): Use header tags to structure your content and highlight important keywords.
- Image Alt Text: Add descriptive alt text to images to improve accessibility and SEO.
- URL Structure: Use clean and keyword-rich URLs.
- Internal Linking: Create a strong internal linking structure to help search engines crawl your website.
Technical SEO:
- XML Sitemap: Create an XML sitemap to help search engines discover and index your website’s pages.
- Robots.txt: Use a robots.txt file to instruct search engine crawlers on which pages to index.
- Mobile-Friendliness: Ensure your website is mobile-friendly to cater to mobile users.
- Page Speed: Optimize your website’s loading speed to improve user experience and search engine rankings.
Remember, these are just a few of the many stages of web design. From initial planning and design to development and launch, each stage is crucial to the success of your website.
WordPress & Divi: Crucial Pieces In The Stages Of Web Design
In this post, we’ve explored the essential stages of web design, from initial planning to final launch. You can create stunning, high-performing websites by following these steps and leveraging the power of WordPress and Divi. Remember, a well-designed website is valuable for any business or individual. By combining these two powerful tools, web designers can efficiently navigate the various stages of web design, from initial planning and layout to content creation and final launch.
The post What Are The Stages Of Web Design? appeared first on Elegant Themes Blog.
