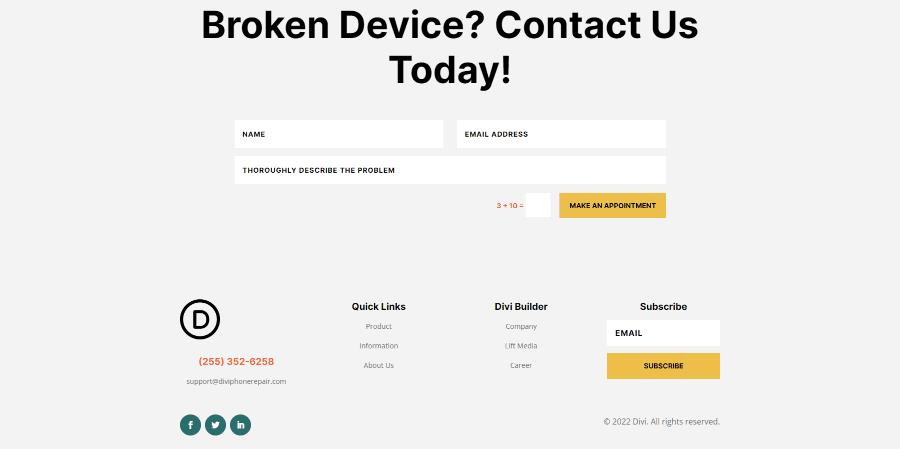
One particular field, the Input Field, allows you to set the minimum character length for the field inside Divi’s Contact Form Module. This is a great way to control the field’s content. In this post, we’ll see how to set a minimum length for the contact form fields to help you get the exact information you need. We’ll also see a few examples of how it can be used, and we’ll see an example of adding the contact form to a Divi layout.
Let’s get started.
Preview
Desktop Minimum Length for Contact Form Fields Example
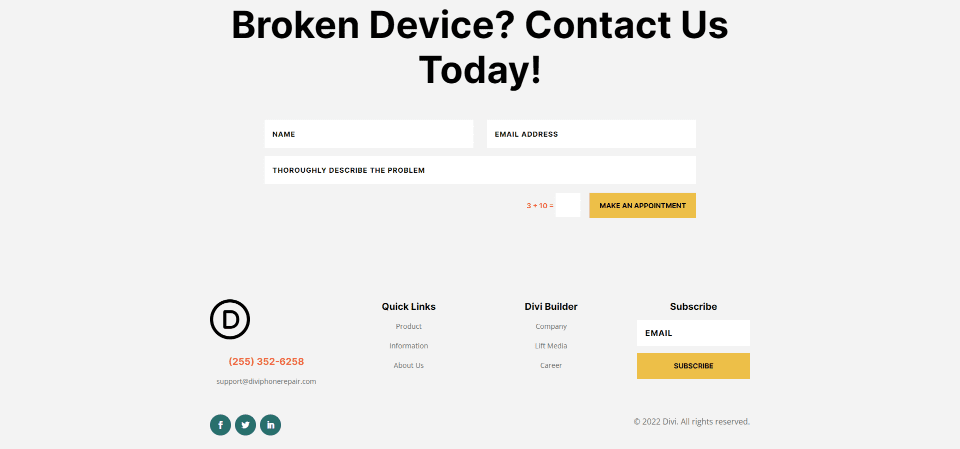
Phone Minimum Length for Contact Form Fields Example
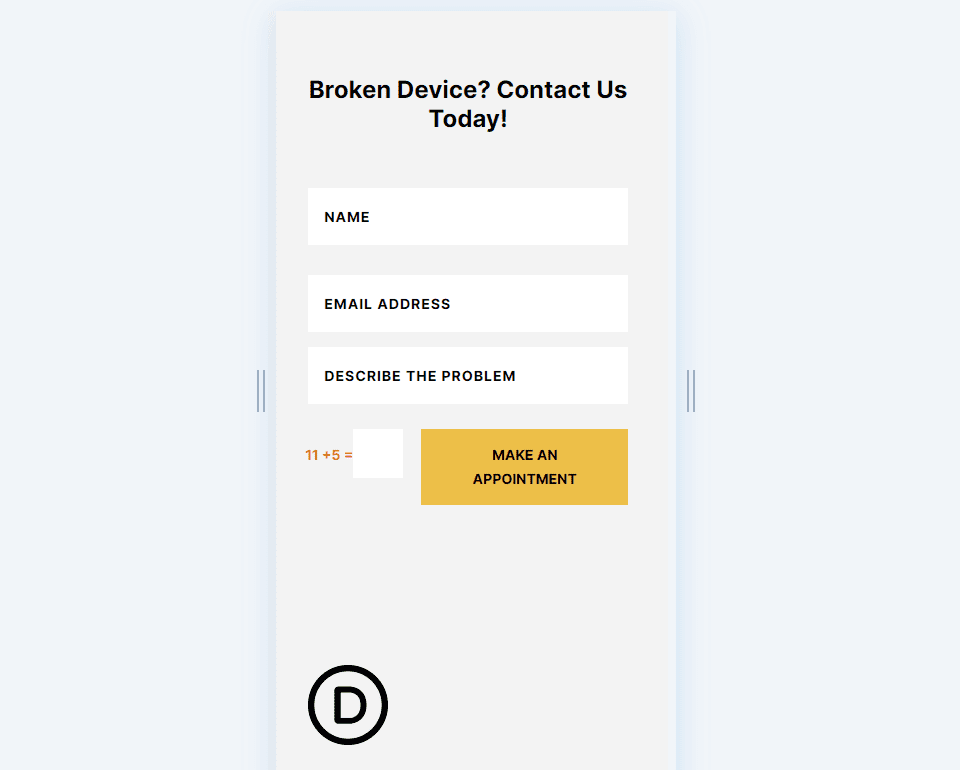
How to Set a Minimum Length for Contact Form Fields
First, open the Contact Form’s settings as normal by hovering over the Contact Form Module and clicking the dark gray gear icon.
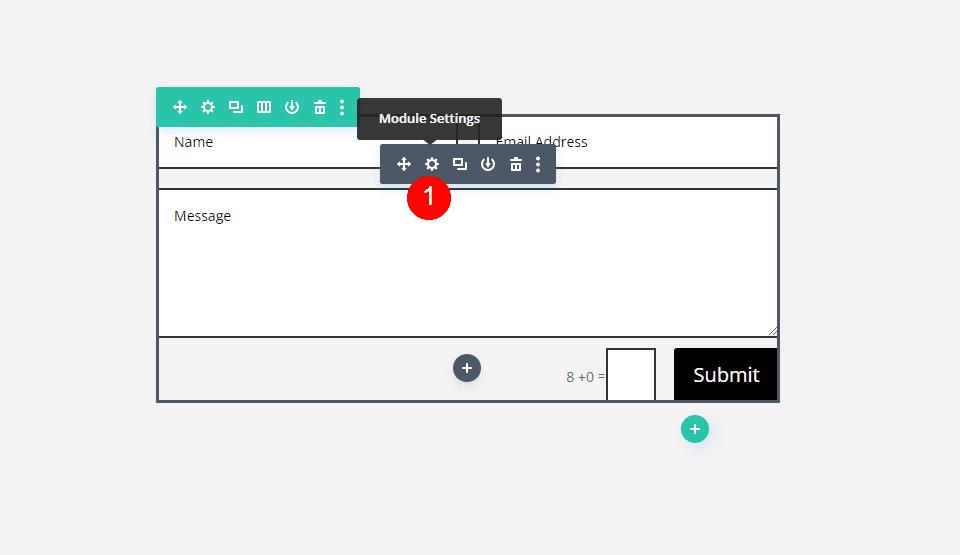
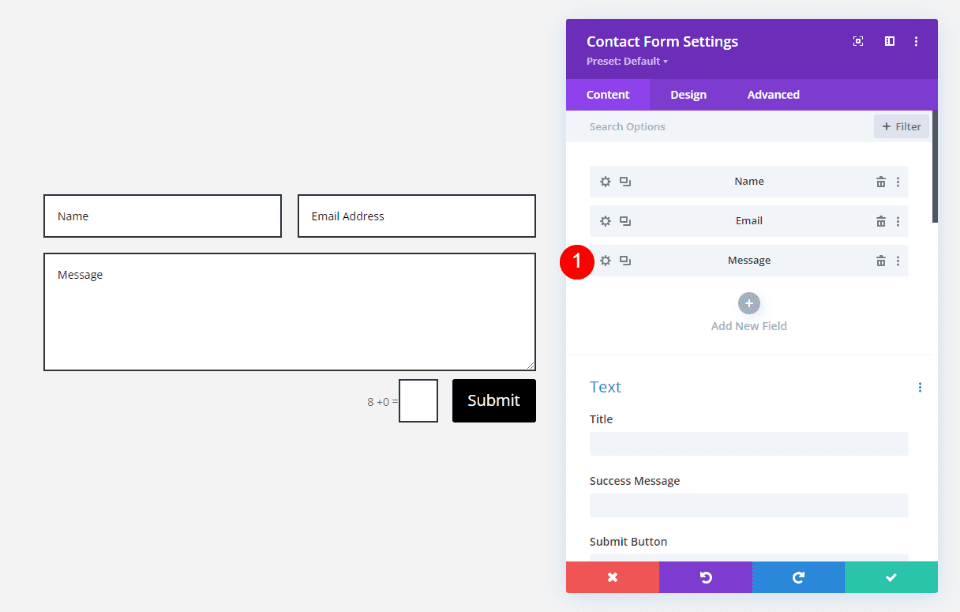
Next, add a new field or open the settings for the field you want to limit by clicking its gear icon. For this example, I’ll set the Minimum Length for the Message field.
Field Options
Next, scroll down to Field Options. Select the Type dropdown box to see the options.
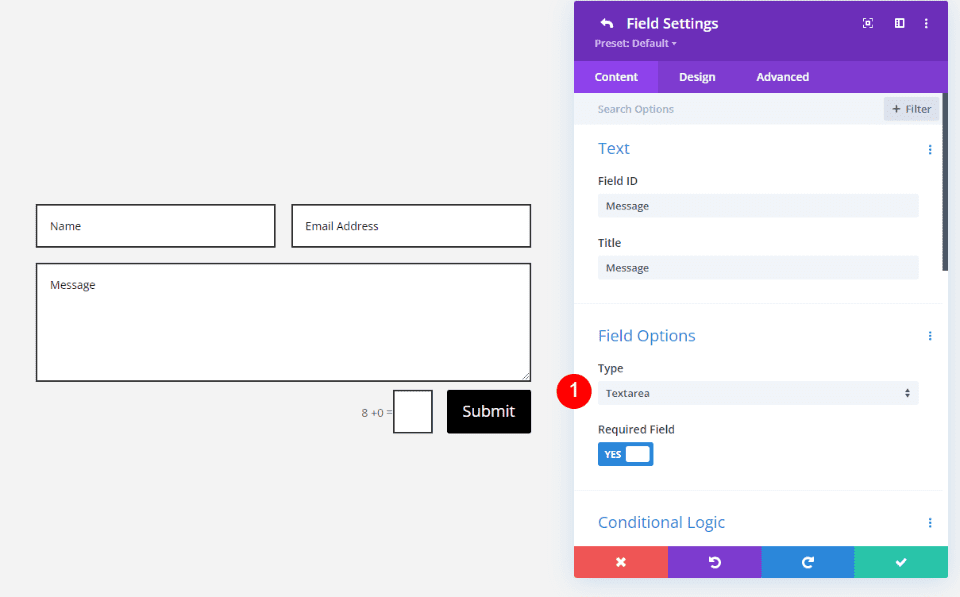
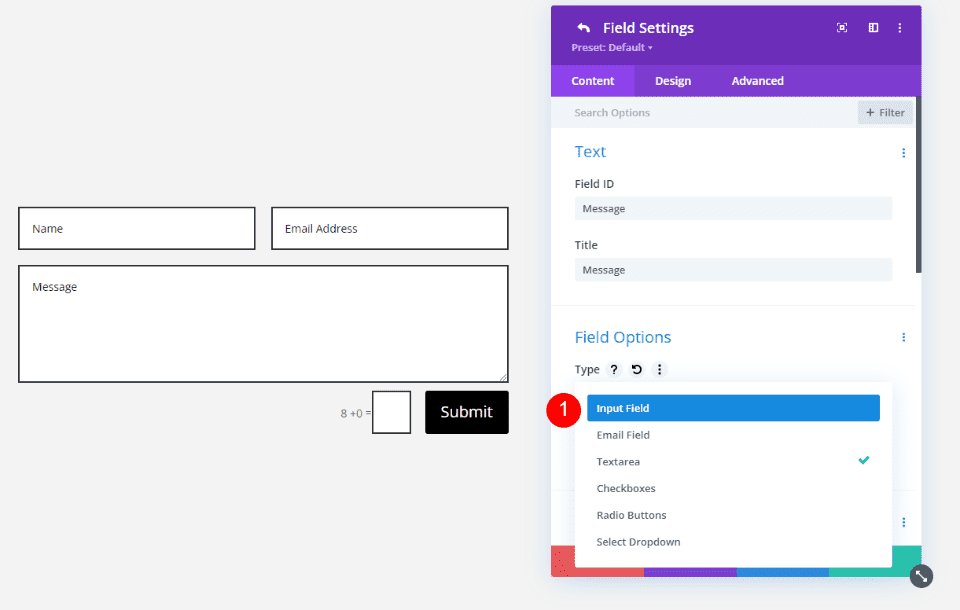
Choose Input Field from your choices. The Input Field allows users to enter letters, numbers, or symbols, and you can control this.
This changes the field type and opens a new set of options, including Minimum Length, Maximum Length, and Allowed Symbols.
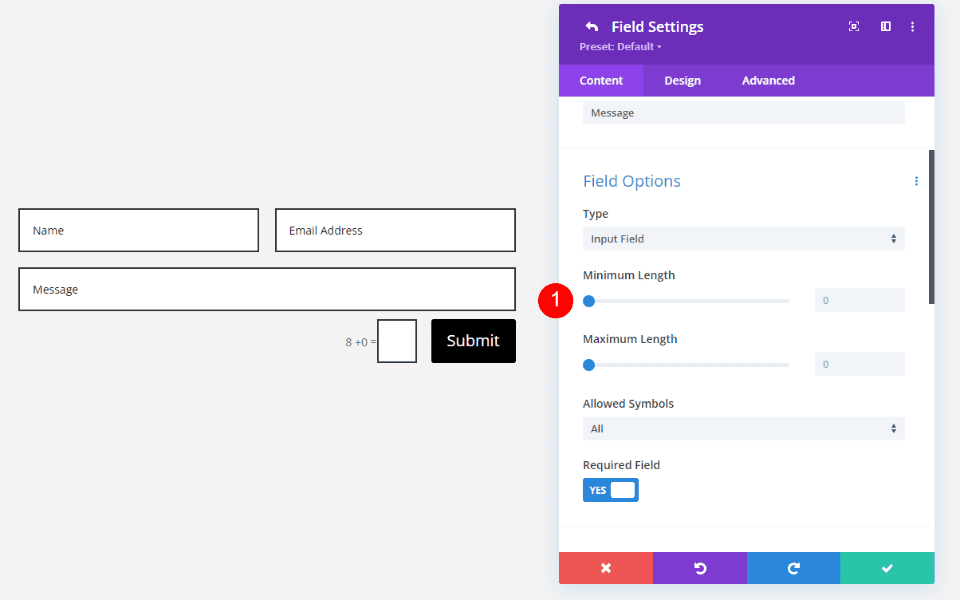
To adjust the Minimum Length, enter the number of characters you want to use as the required minimum. Use the slider or enter the number into the field.
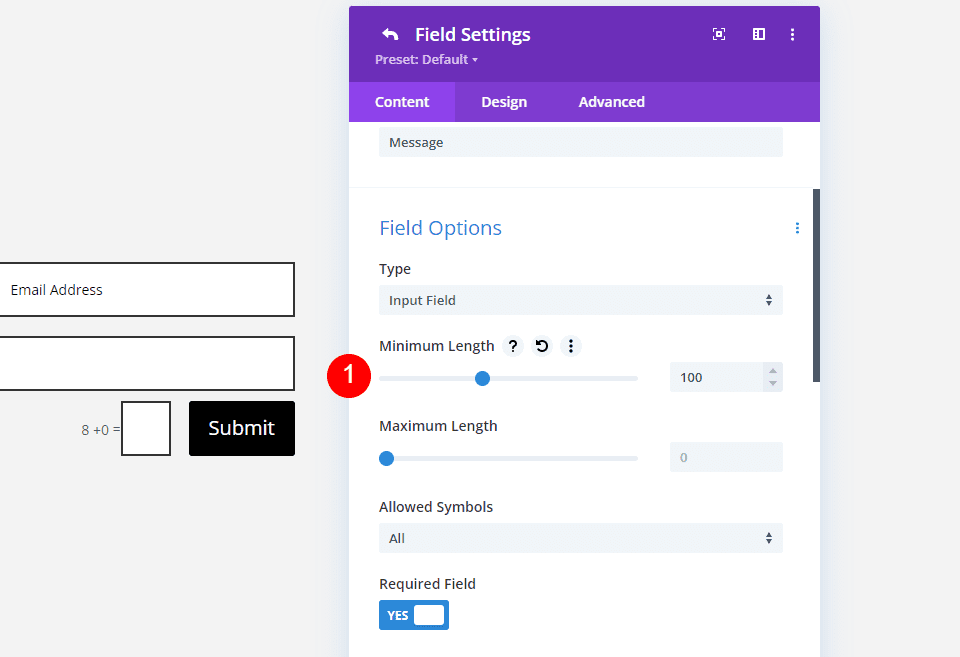
Why Set a Minimum Length for Contact Form Fields?
Limiting the minimum and maximum characters for the Input Field helps ensure you get the data you need. This can keep users from entering the wrong number of characters, such as a phone number or zip code, limit the amount of information they can provide, etc.
The Input Field’s Allowed Symbols option lets you choose how to use the field. Choose between letters only, numbers only, or both. With these options, you can determine the types of data the users can input into the field.
Generally, 100 characters are around 16 words. So, if you wanted around 100 words, you’d set the Minimum Length to 1600. The typical paragraph is around 50 words (of course, this varies depending on the type of writing). If you wanted a typical paragraph of text, you could set the Minimum to 800 characters. Don’t require too many words, as this can cause users to abandon your contact form. Set the limit as low as possible to get the information you need.
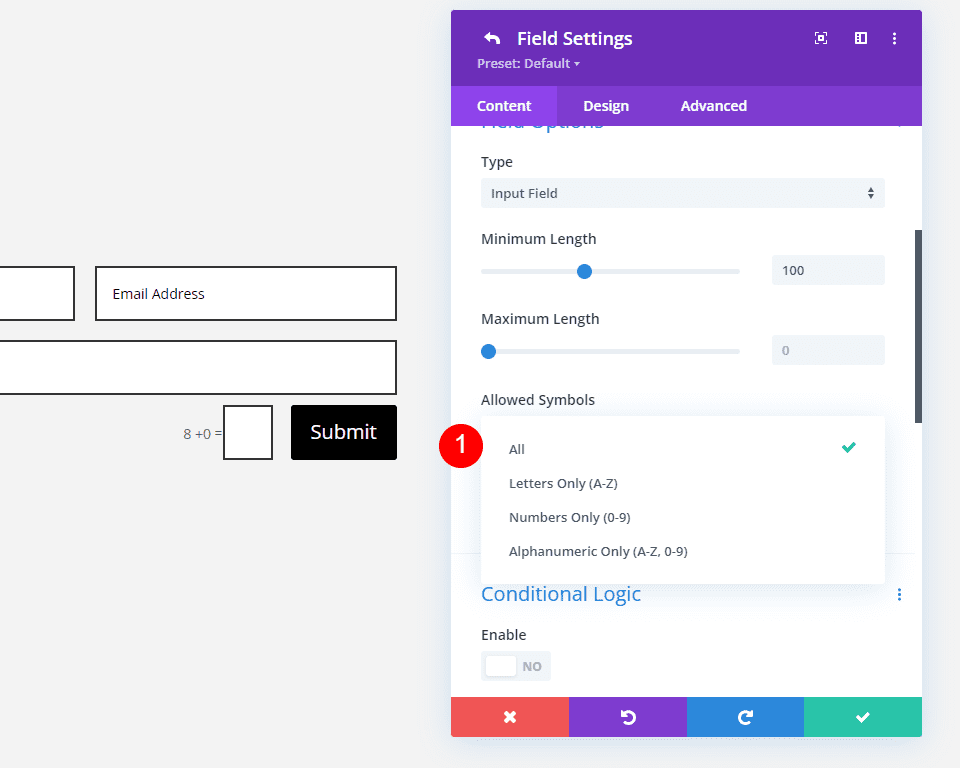
Zip Code Example
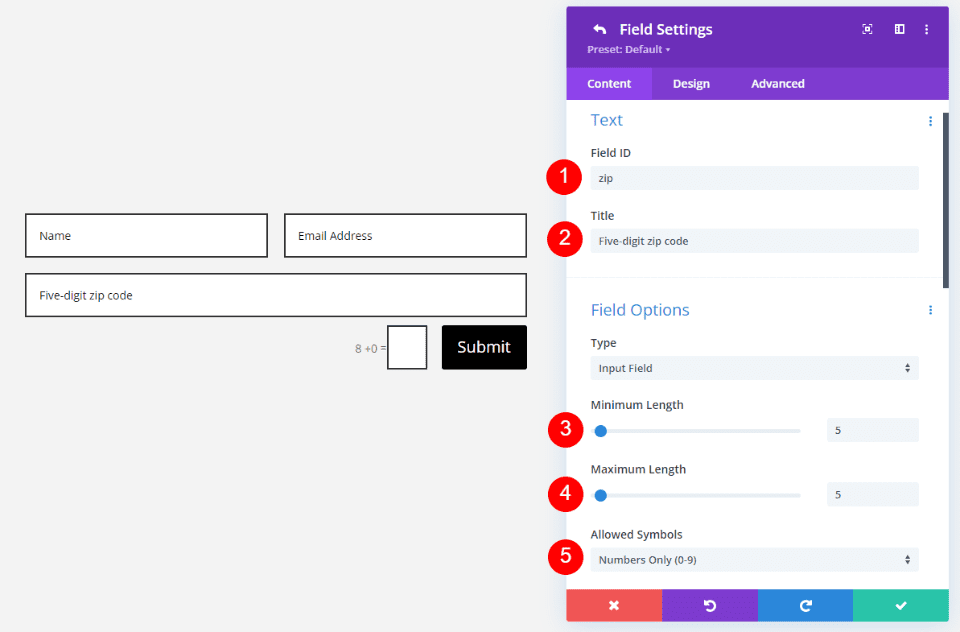
For example, if the field is used to get a five-digit zip code, you can set the field to allow numbers only and limit both the minimum and maximum to 5. In the example below, I’ve changed the Field ID and Field Title to identify the purpose of the field. I’ve set both the Minimum and Maximum Lengths to 5. For Allowed Symbols, I’ve selected Numbers Only.
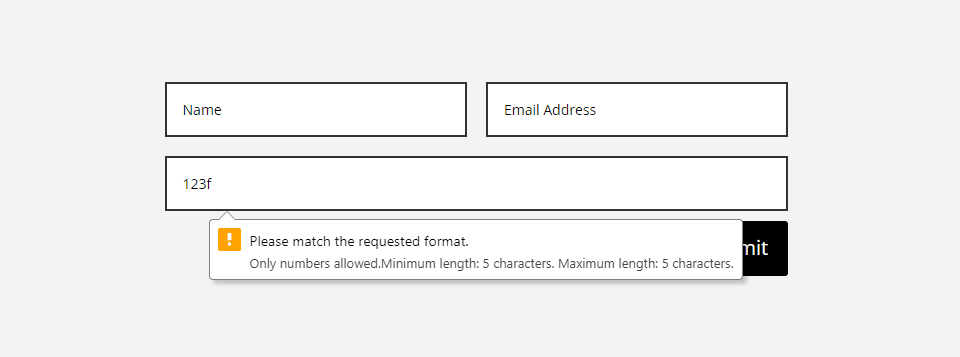
Users can only input numbers; they see an error message if they’ve added letters or didn’t meet the minimum and maximum character count.
Detailed Description Example
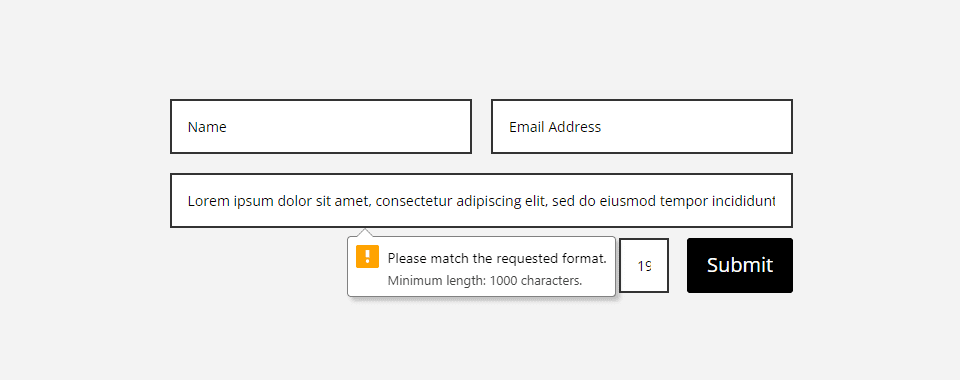
As another example, if we wanted to ensure that we got a detailed description from the user, we could set a Minimum Length limit for the Input Field. This is ideal for any type of detailed information to decide or provide the help needed. Examples include providing information for a job application, a detailed description of work the user is requesting to have done, etc.
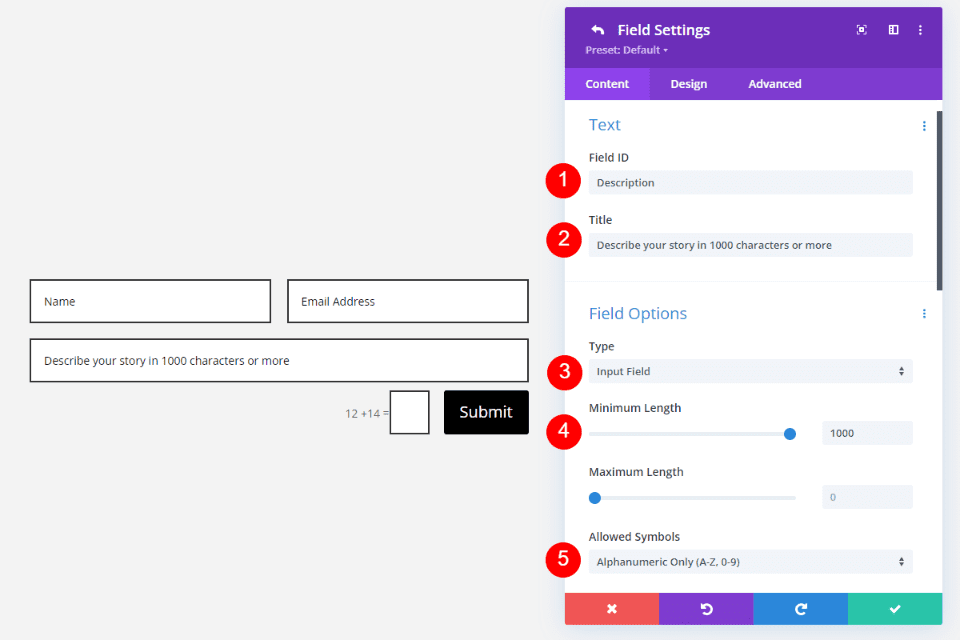
For example, if you published stories, you’d want as much information as possible for the story submission. Set the Minimum Length to help ensure you get the details you need. In this example, I’ve set the Field ID and Title to describe the field. For the Field Options, I’ve set the Minimum Length to 1000 characters and Allowed Symbols to show Alphanumeric Only.
If the user doesn’t input enough characters, they’ll see an error telling them they haven’t reached the minimum character length.

Minimum Length for Contact Form Fields Example
Now, let’s add a contact form to a Divi layout. For our example, I’ll add a Divi Contact Form Module to the landing page of the free Device Repair Layout Pack available within Divi. We’ll change the Message Textarea Field to an Input Field to limit the number of characters. This will encourage users to provide more information about the problem they need to solve rather than un-useful descriptions such as “it won’t work.”
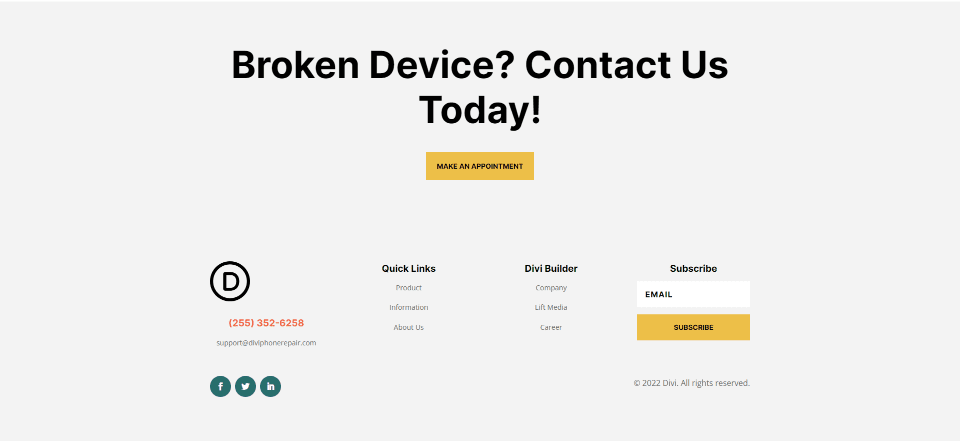
For reference, here’s a look at the section before adding the Contact Form Module. I’ll replace the button with a contact form. As always, I’ll use design elements from the layout and integrate the new module.
Add Contact Form Module
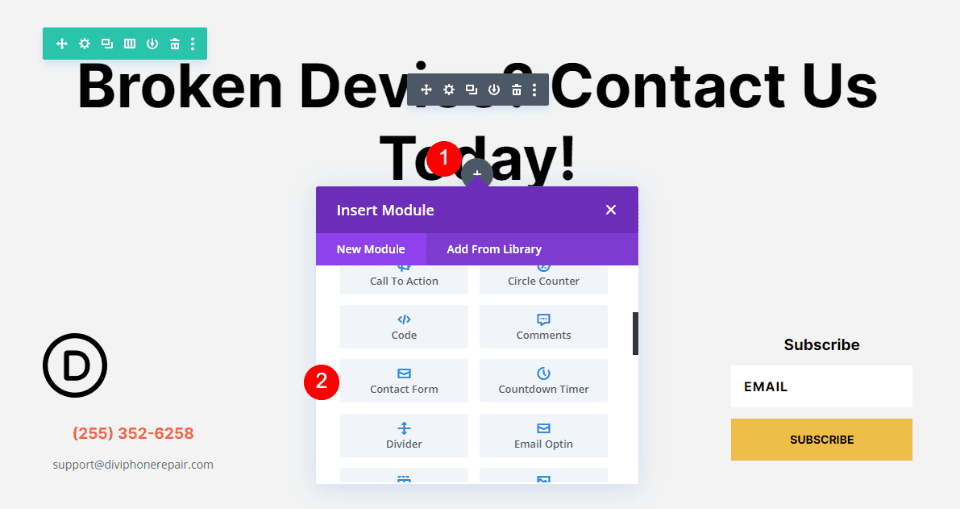
First, delete the Button Module under the Section’s Title Text Module.
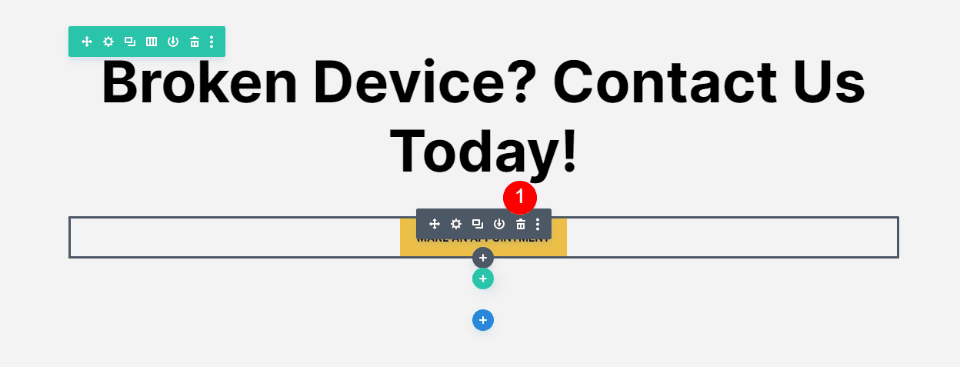
Next, add a Contact Form Module in its place.
Field Settings
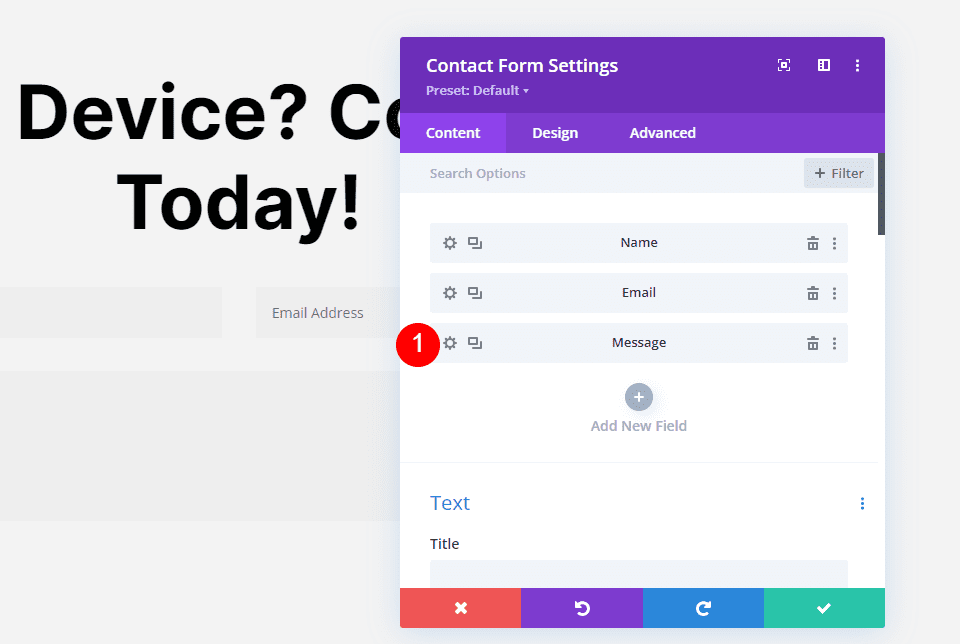
Next, open the Field Settings for the Message field by clicking its gear icon.
Title
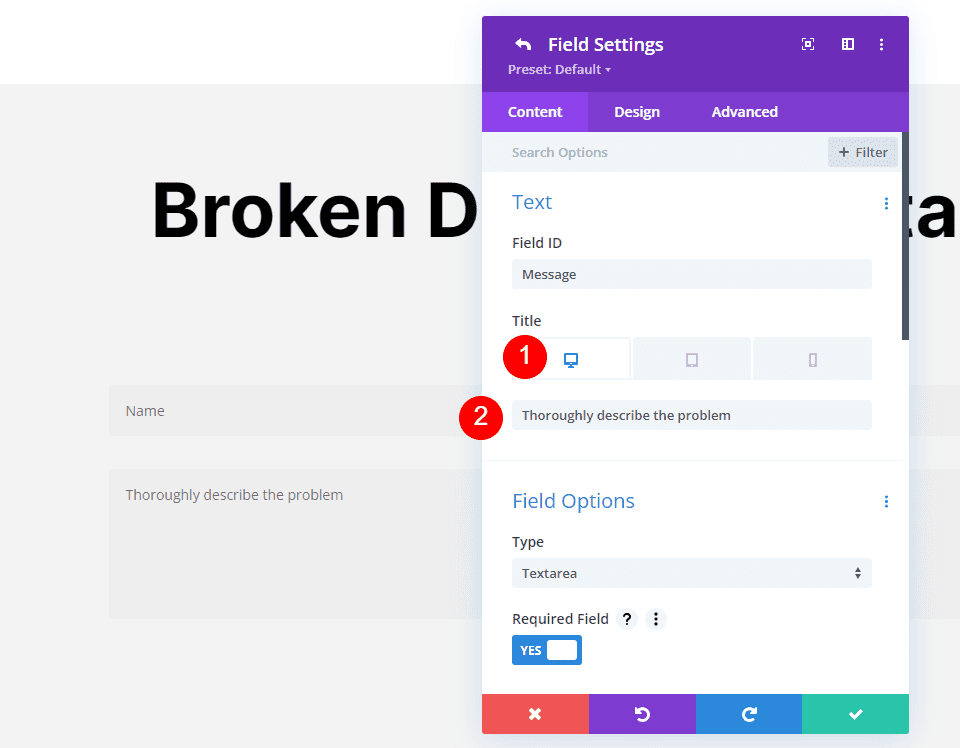
I’ll use the same Field ID because it makes sense for this field. Change the Title to a message that informs the user of the field’s purpose. In this case, I’ll use a description that gives them instructions. This description will be too long for phones so that it will have a shorter version.
- Title (desktop and tablet): Thoroughly describe the problem
- Title (phone): Describe the problem
Field Options
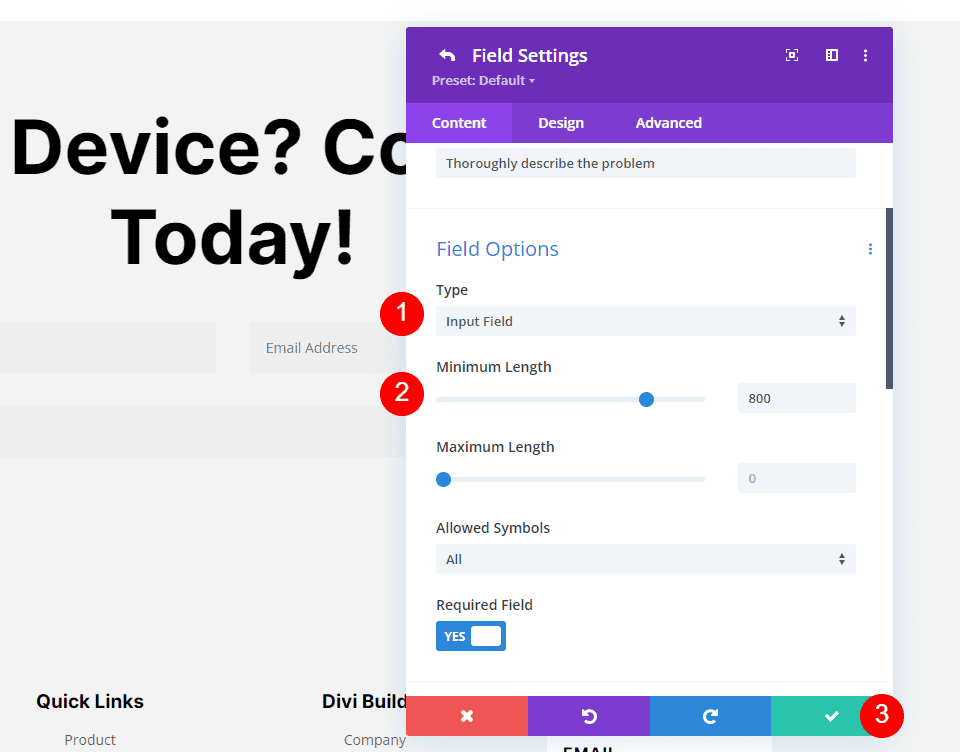
Change the Type to Input Field. I’ve set the Minimum Length to 800. This sets the minimum amount of text to around a paragraph of 50 words. We don’t want to overwhelm the user, which should be enough to get a good idea of the problem. For reference, this paragraph is 57 words. Close the submodule.
- Type: Input Field
- Minimum Length: 800
Text
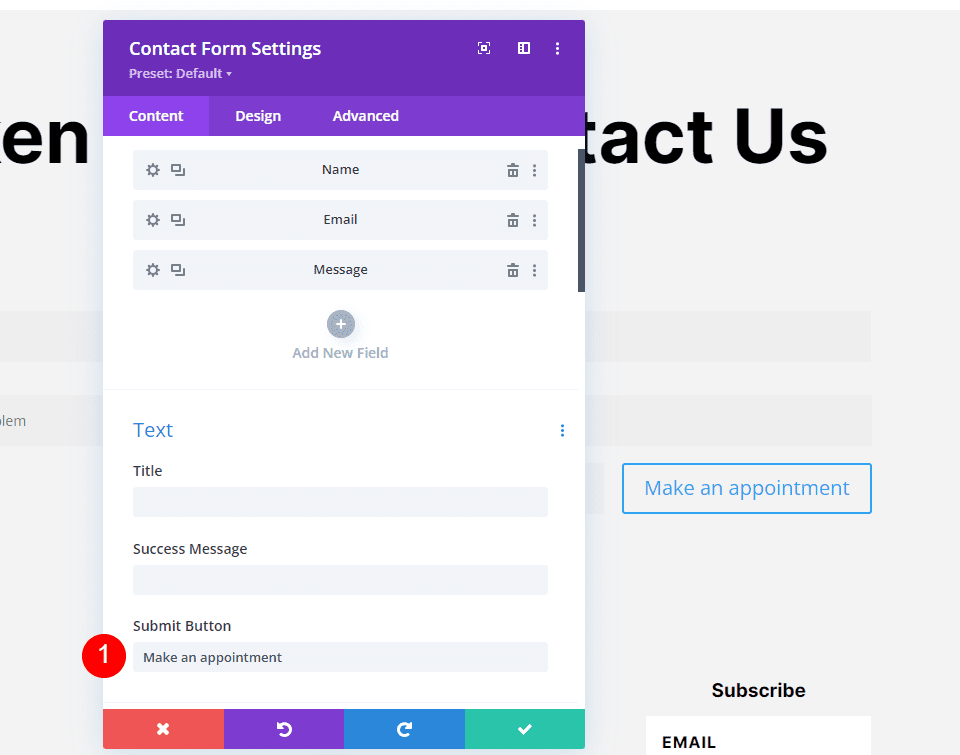
Next, we’ll adjust the Text settings in the Contact Form Module’s Content tab. Change the Submit Button text to Make an appointment. This matches the button that we replaced. We’ll recreate that button within the contact form.
- Submit Button: Make an appointment
Fields
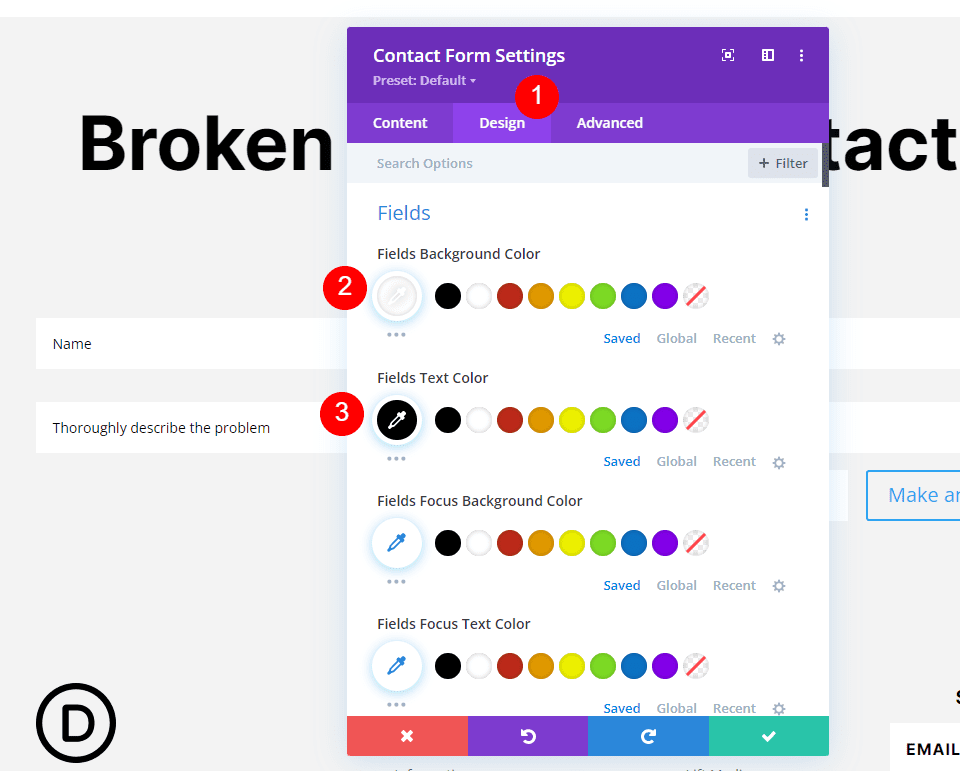
Next, go to the Design tab. For the Fields settings, change the Fields Background Color to white and the Fields Text Color to black.
- Background Color: #ffffff
- Text Color: #000000
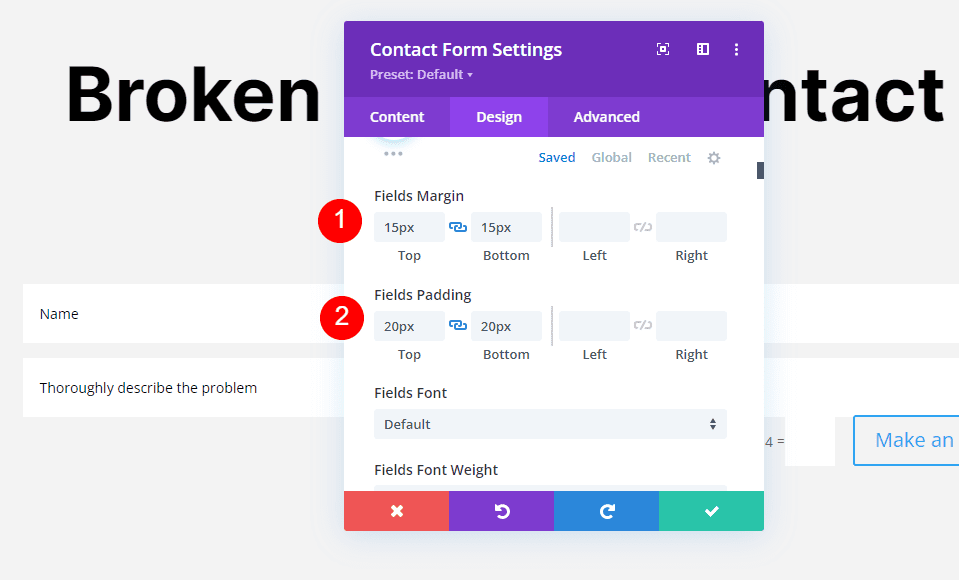
Next, add 15px to the Top and Bottom Margin. This brings the fields closer together vertically. Also, add 20px to the Top and Bottom Padding. This increases the vertical size of the fields. Both settings make the contact form’s fields match the email optin form in the footer. This doesn’t affect the Captcha field or the submit button, so we’ll adjust them with CSS.
- Fields Margin: 15px Top and Bottom
- Fields Padding: 20px Top and Bottom
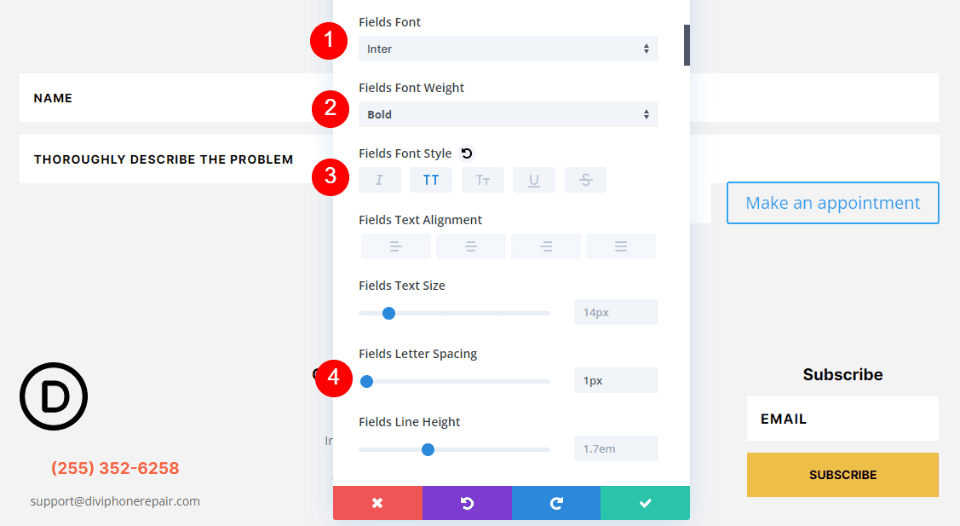
Next, change the Font to Inter, set the Weight to Bold, the Style to TT, and the Letter Spacing to 1px. This makes the text match the email form in the footer.
- Font: Inter
- Weight: Bold
- Style: TT
- Letter Spacing: 1px
Captcha Text
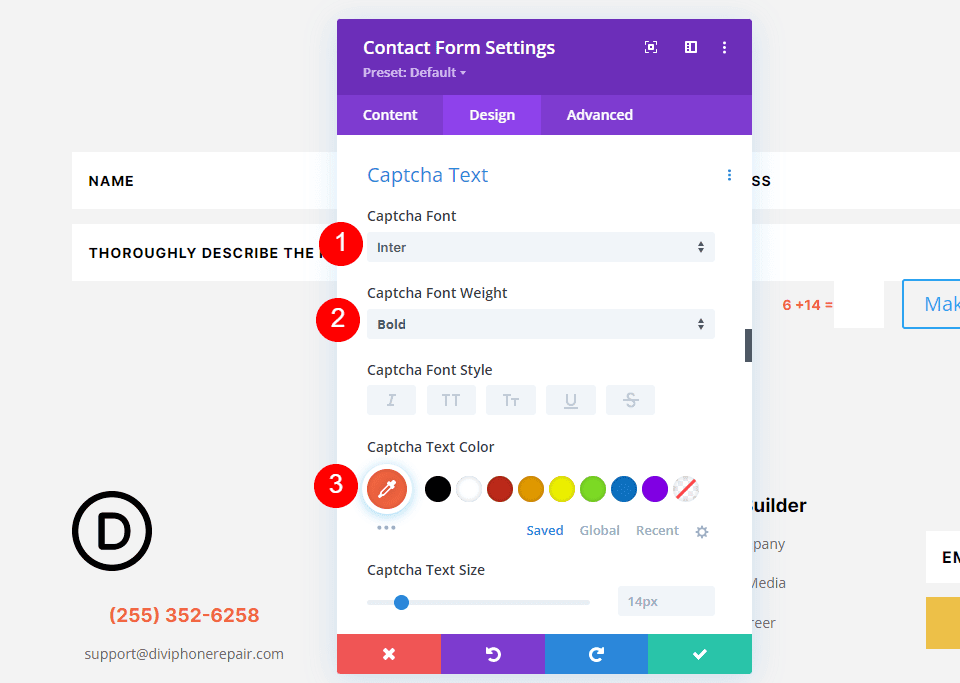
Next, scroll down to Captcha Text. Set the Font to Inter, the Weight to Bold, and the Color to #f26440. This matches the phone number provided in the footer but with a smaller font.
- Font: Inter
- Weight: Bold
- Color: #f26440
Button
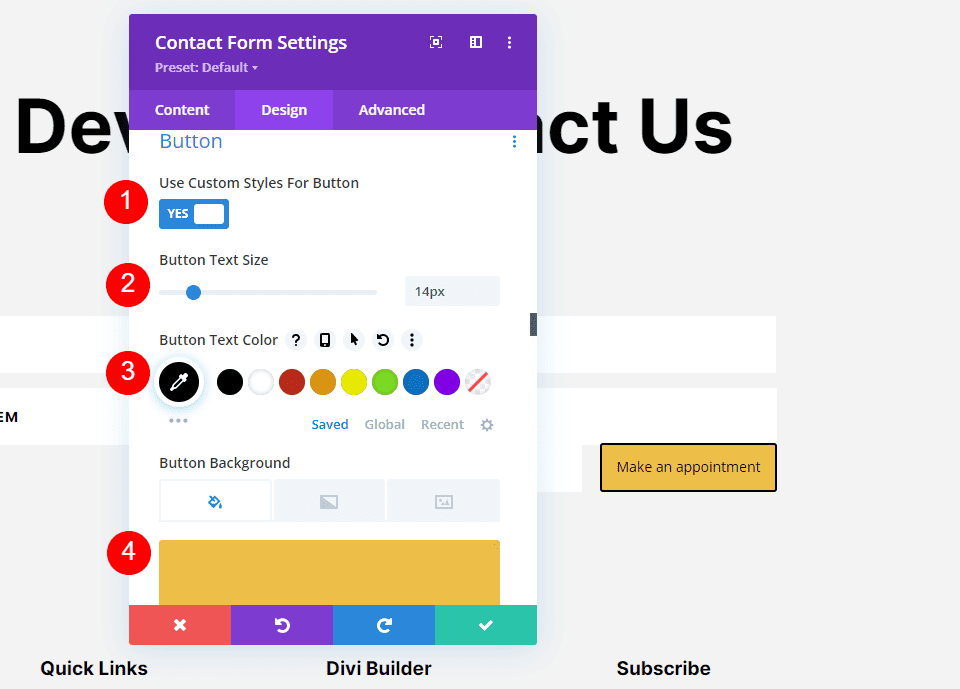
Next, scroll down to Button and enable Use Custom Styles for Button. We’ll style the button to match the original that we deleted. Change the Size to 14px, the Color to black, and the Background Color to #edbf48.
- Text Size: 14px
- Font Color: #000000
- Background Color: #edbf48
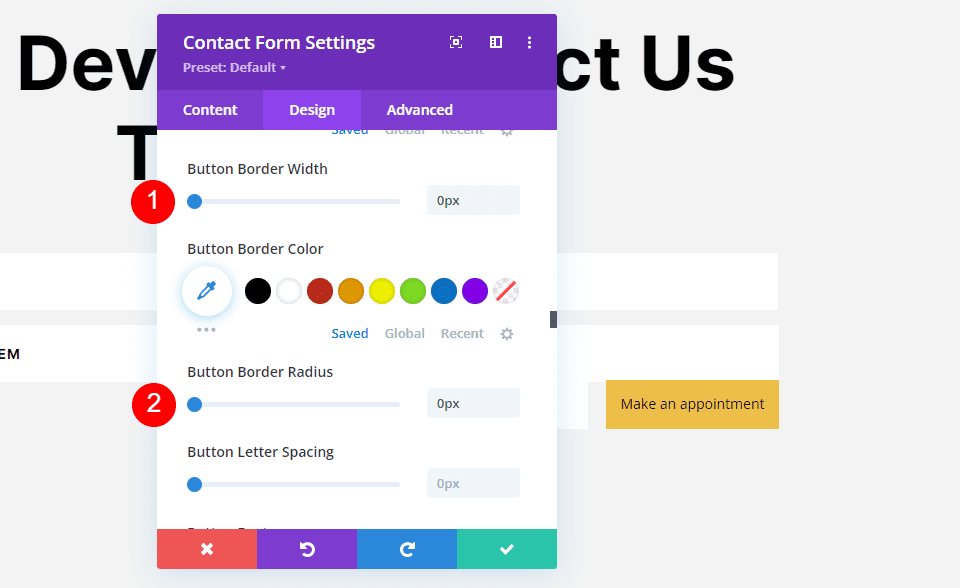
Set the Border Width and Border Radius to 0px.
- Border Width: 0px
- Border Radius: 0px
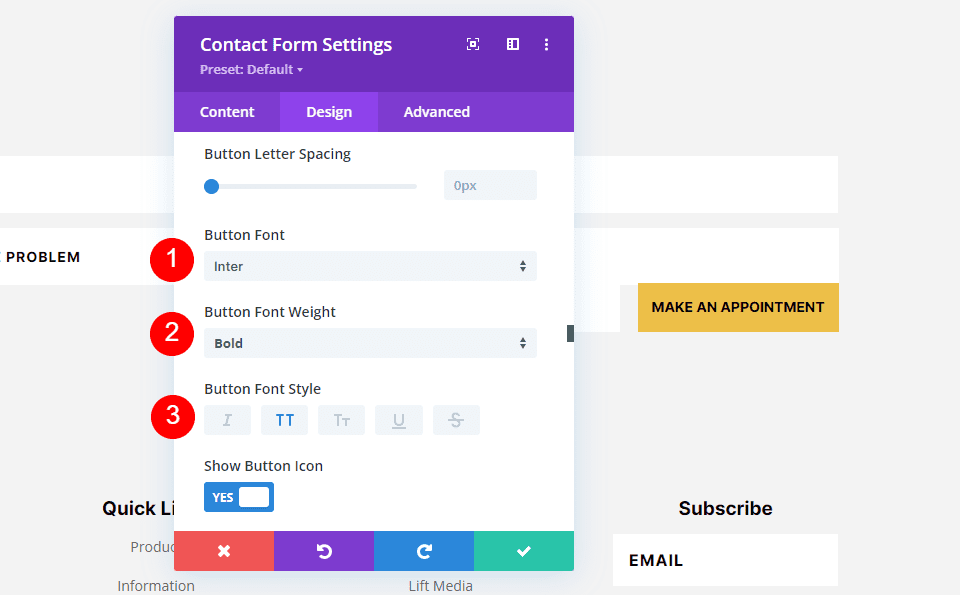
Change the Font to Inter, the Weight to Bold, and the Style to TT.
- Font: Inter
- Weight: Bold
- Style: TT
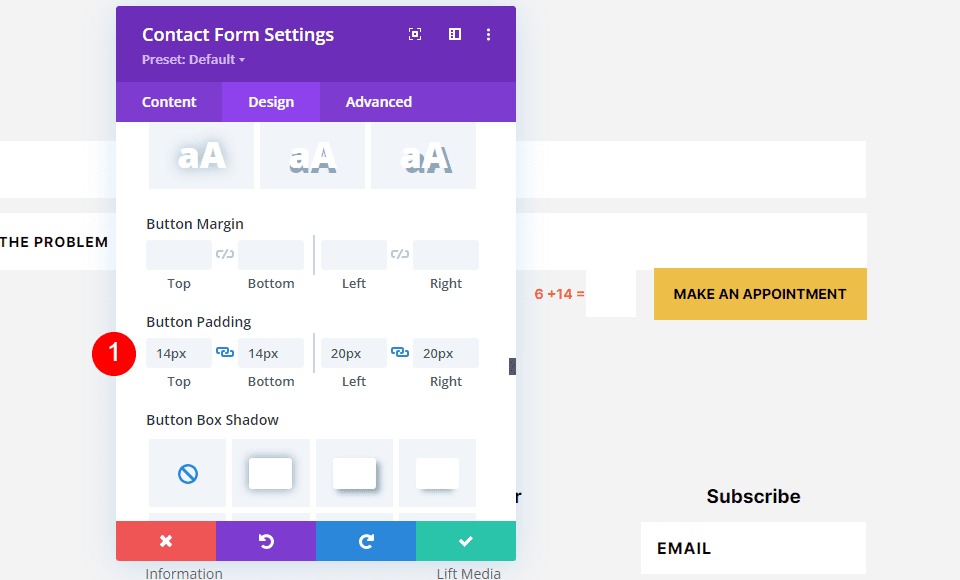
Next, add 14px to the Top and Bottom and 20px to the Left and Right Button Padding. The button should now look the same as the original.
- Padding: 14px Top and Bottom, 20px Left and Right
Sizing
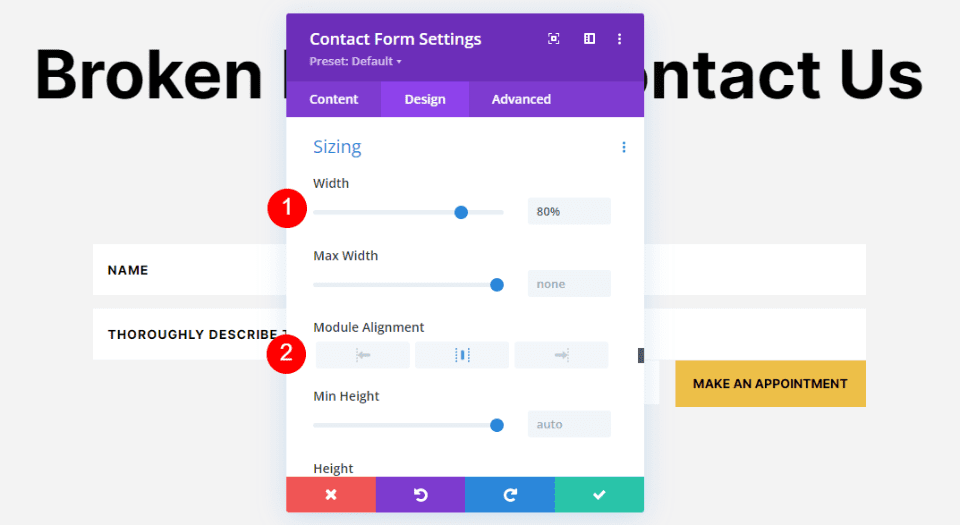
Next, scroll down to Sizing. Change the Width to 80% and the Module Alignment to Center. This gives the contact form a more natural look for its location in the layout.
- Width: 80%
- Module Alignment: Center
CSS
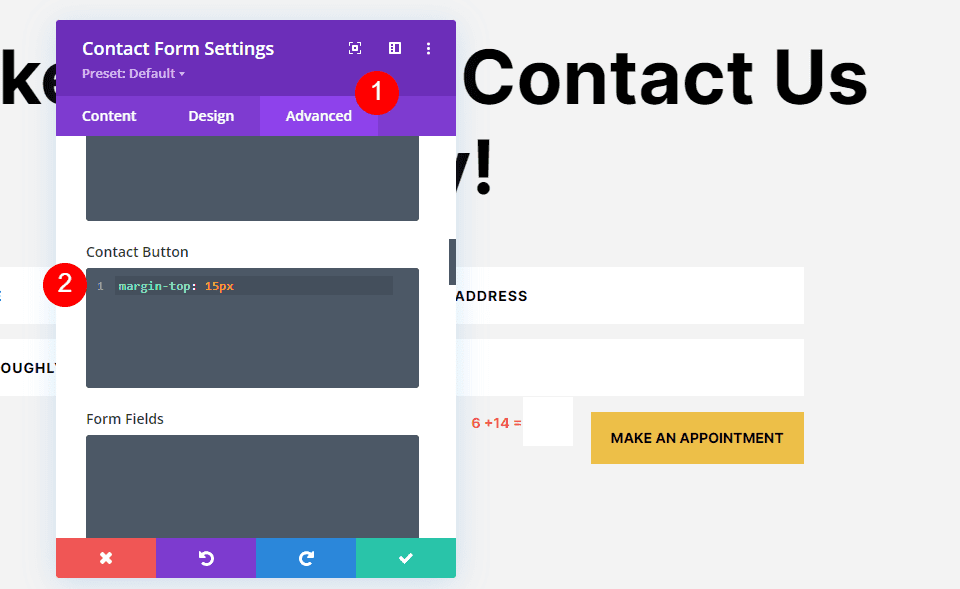
Finally, go to the Advanced tab. Here, we’ll add some simple CSS to remove the Captcha field and button from the form field above them. Scroll down to the Contact Button and add the following CSS to the field.
- Contact Button:
margin-top: 15px
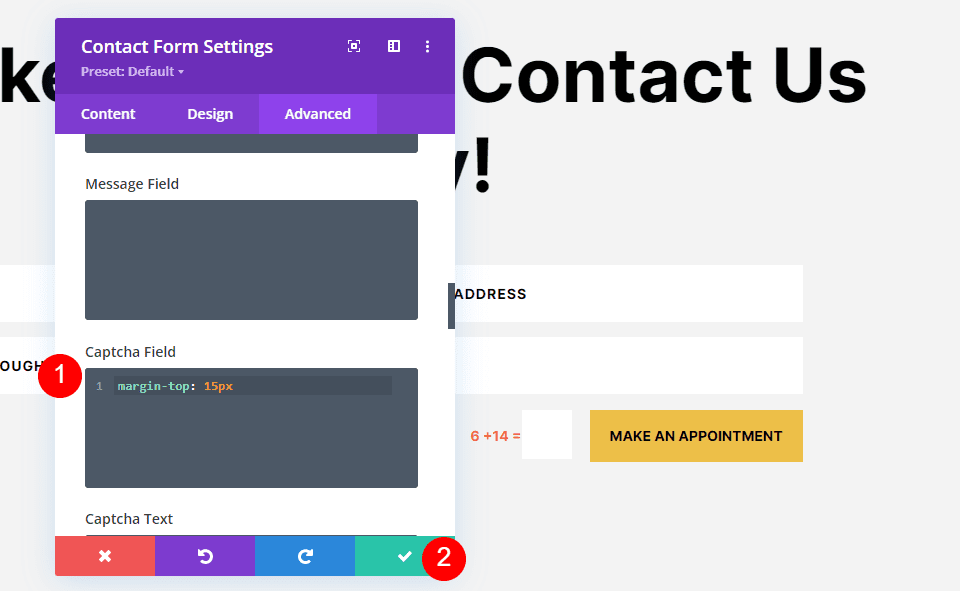
Lastly, scroll down to Captcha Field and enter the following CSS into the field. Close the module and save your settings.
- Captcha Field: margin-top: 15px
Results
Desktop Minimum Length for Contact Form Fields Example

Phone Minimum Length for Contact Form Fields Example

Ending Thoughts
That’s our look at how to set a minimum length for contact form fields. Setting the minimum, and by extension, the maximum, field length is both simple and beneficial. The Input field is a great way to limit or specify the number of characters the user can enter, helping to ensure you get the correct information or the details you need from your contact form.
We want to hear from you. Do you set a minimum length for your contact form fields? Let us know about your experience in the comments.
The post How to Set a Minimum Length for Divi Contact Form Fields appeared first on Elegant Themes Blog.
