
Use WooCommerce: In a nutshell, this is how to create an ecommerce website with WordPress. However, this is also a gross oversimplification. There’s lots to consider when it comes to a project like this. In fact, you should think about every action you take – even your preferred choice of ecommerce plugin.
 For this post, we won’t go through the typical steps you’d expect when you create an ecommerce website with WordPress. Instead, we’ll give you a checklist of sorts to help guide you as you progress. First up, let’s talk about what you need as far as resources and skills are concerned.
What you need to set up an ecommerce website with WordPress
Of course, to develop an ecommerce website with WordPress, you’ll need both the number one web publishing platform and the leading ecommerce plugin for it. For most needs, WordPress is perfect.
However, there is plenty more that you will want in your toolbox:
- WordPress development skills. You have to have a strong understanding of WordPress. For starters, it’s important to know how WordPress works under the hood. From there, learn about theme customization, plugin development, and template hierarchy. When it comes to languages, you should have PHP, HTML, CSS, and JavaScript skills on your team.
- Theme development knowledge. You may need to develop a custom theme or modify an existing one. The alternative is to rely on off-the-shelf designs without advanced customization.
- An ecommerce plugin. We will talk about this in greater detail later. However, spoiler alert: you should understand the inner workings of the WooCommerce plugin above any other.
- A plan! This will have many facets. It will include your workflow, the project’s goals, the security provisions you’ll implement, the payment gateways you’ll use, and more. Much of this article will focus on these aspects.
In many cases, you should also look to track the customizations or modifications you make and begin to develop documentation for future reference. This will be especially important if you have to hand off a site to another developer at some point.
What an ecommerce website should include
A typical ecommerce website includes a number of essential elements. While you could break this down in lots of different ways, we’re going to focus on front-end and back-end elements here.
The front-end experience 
Front-end features speak to users and affect the site’s User Experience (UX). For instance, you should use a clean and intuitive design with easy navigation. Clear taxonomies with good organization (along with searching and filtering functionality) will enhance UX.
However, there’s more you can (and should) consider:
- High-quality product images and descriptions. These will be the only ways customers can view a product. As such, high-resolution images from different angles, along with detailed descriptions, help customers to make an informed purchase.
- Easy checkout process. We’d advise you to make this as straightforward as possible to keep cart abandonment rates low and boost sales. You want to take a minimum number of steps to checkout. Other UX choices include auto-fill options and progress indicators.
- Secure payment options. You want to make sure that customers can use their preferred payment gateway and that it’s secure. If you can ensure customer safety while they’re on site, it’s a step closer to a sale.
- Cross-device accessibility. Mobile internet traffic is in the majority. This means most visitors will view your site on a small screen. As such, the site you deliver must scale and work on all screen sizes.
You should also add in elements that boost the perception of the site in the eyes of other customers. Some tried and trusted ways to do this are with reviews, ratings, and testimonials:

Social proof elements may work too, such as social media sharing buttons, sales figures, and more.
Back-end management and security 
Back-end management should also be one of your concerns. After all, if you can’t manage orders and customers, it could reflect badly on the site and business. As such, look to provide real-time order tracking updates and implement multiple support channels, such as live chat and email.

Furthermore, security measures should be one of your key implementations. Secure Socket Layers (SSL) encryption, secure server connections, and PCI compliance can ensure the safety of customer data and build further trust.
Once you understand what an ecommerce website includes, planning it out will help keep your project on track and on budget. Next, we’ll look at this in greater detail.
How to create an ecommerce website with WordPress: project planning
Planning your site could be a deep dive, depending on your needs and goals. As such, we advise you to take your time here. The old adage, “Fail to prepare, prepare to fail” is true for ecommerce sites, too.
Because of this, prepare to understand the following, and use it as the basis for your ecommerce site:
- Identify the products or services that the site will sell. This is arguably the easiest part, as it will likely be the inspiration for the store in the first place.
- Define the website’s business goals and target audience.
- Determine design and branding requirements.
- Note down any specific requirements or preferences you want to implement on your site.
- Define the website’s purpose, features, and functionality.
Also, when it comes to branding, decide on what assets you need and already have available, such as color schemes, logos, and more. This will not only help you plan out the project, but will also save you time throughout.
How to create an ecommerce website with WordPress: technical considerations and workflow
You have a plan in place and an idea of what the end goal will be. Now it’s time to build the website. The rest of this post will look at how to create an ecommerce website with WordPress.
The tutorial splits into three sections: technical considerations, design, and testing. Let’s first look at how to set up WordPress and make the site secure.
1. Set up a WordPress website 
Setting up a WordPress website involves some steps: purchasing a domain name, hosting server, SSL certificate, and installing WordPress. In this section, we will show you how to carry out each of these steps.
Purchase a domain name
A domain name is the name of a website (e.g., WPShout.com) and it has to be purchased from a domain registrar (many hosting companies serve as domain name registrars, so you can often go through them). But before you make the purchase, you need to find the perfect domain name and then spend some time considering which TLD (top-level domain) is most suitable for your ecommerce site.
Purchase a hosting server
Hosting companies provide server space. That’s where files and folders of a website are stored. The server spaces can be used only after you subscribe to a hosting plan.
Certain hosting plans (like VPS hosting and managed hosting) are expensive because they offer dedicated resources, advanced management, and technical support for optimal performance and reliability.
A brand new store doesn’t need expensive hosting, so we recommend choosing a more affordable plan from your preferred ecommerce hosting provider.
Install an SSL certificate
An SSL certificate is a digital certificate that encrypts data between a user’s browser and a website. It ensures secure communication between the browser and the website, which is particularly important for online transactions.
Popular browsers, like Chrome, Safari, and others, have made it mandatory for all websites to install an SSL certificate. Sites without it are marked as insecure to prevent visitors from browsing or trusting the website.
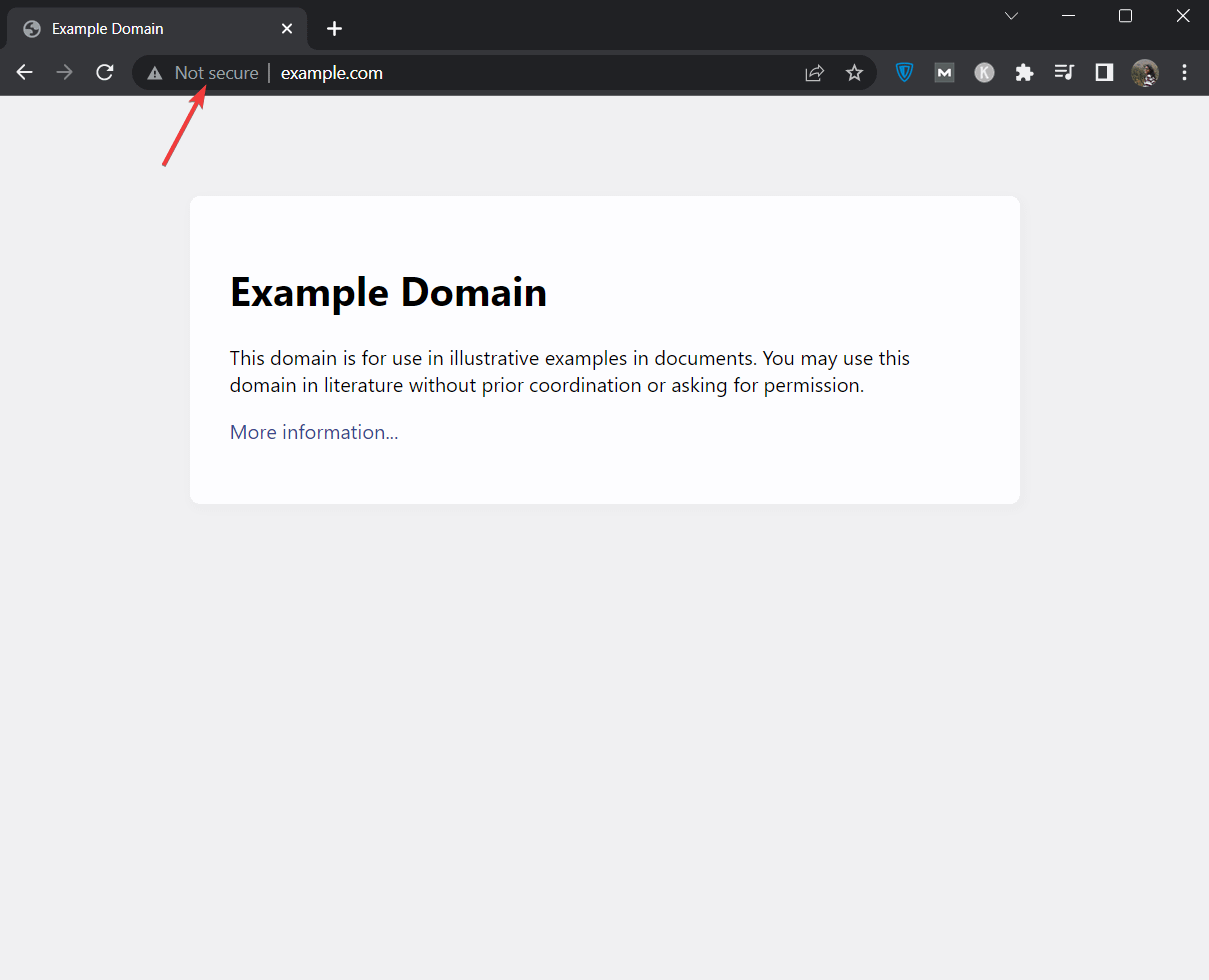
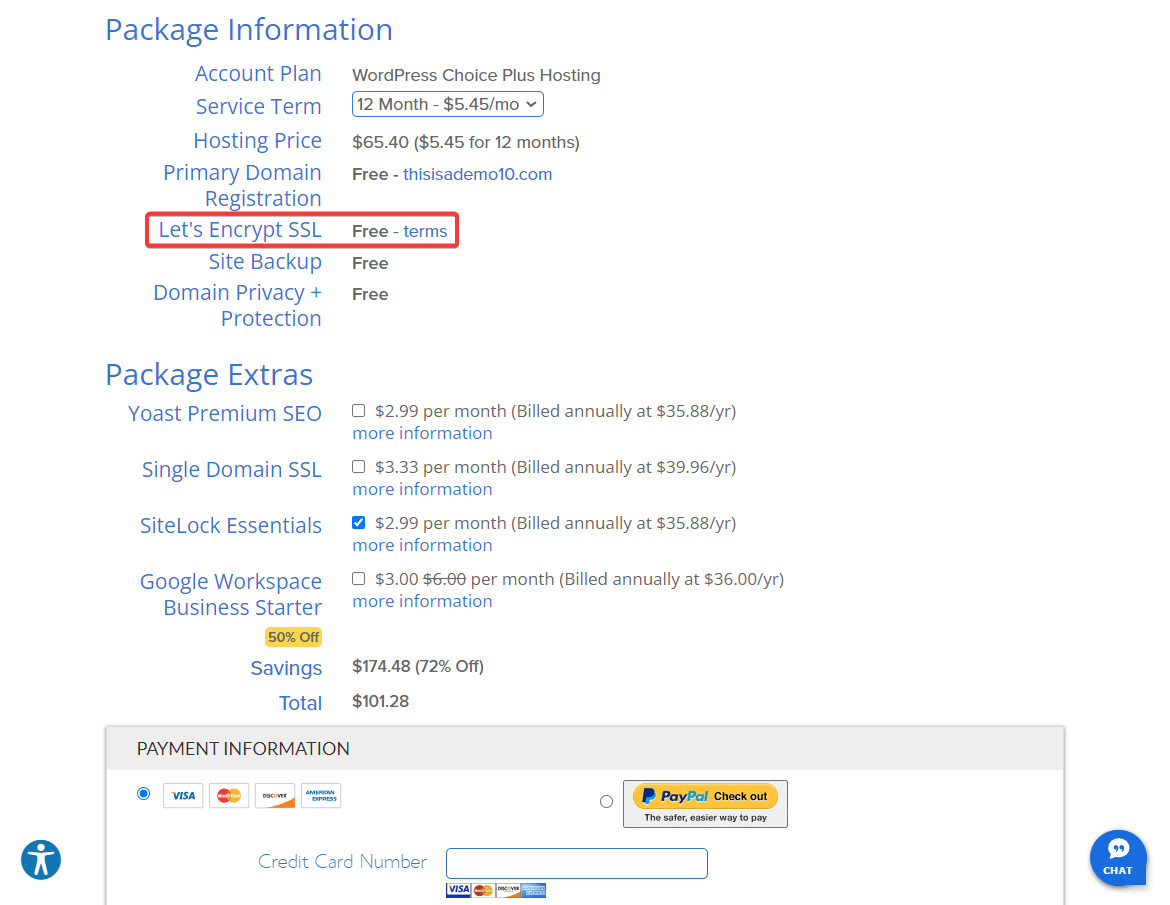
There are different types of SSL certificates to choose from. A new ecommerce website will need a basic SSL certificate which can be acquired from the hosting provider. Most hosting providers (like Bluehost, Namecheap, Hostinger, etc.,) offer a free SSL certificate for the first year.
As for the installation of the certificate, every hosting provider has a different process. Find the official help doc showing how to do that or reach out to the support team for assistance. Keep reading for our next step on how to create ecommerce website in WordPress.
Install and set up WordPress
WordPress is a popular content management system (CMS) that allows you to create and manage websites.
To get your ecommerce site up and running, you need to install WordPress with the help of your hosting provider.
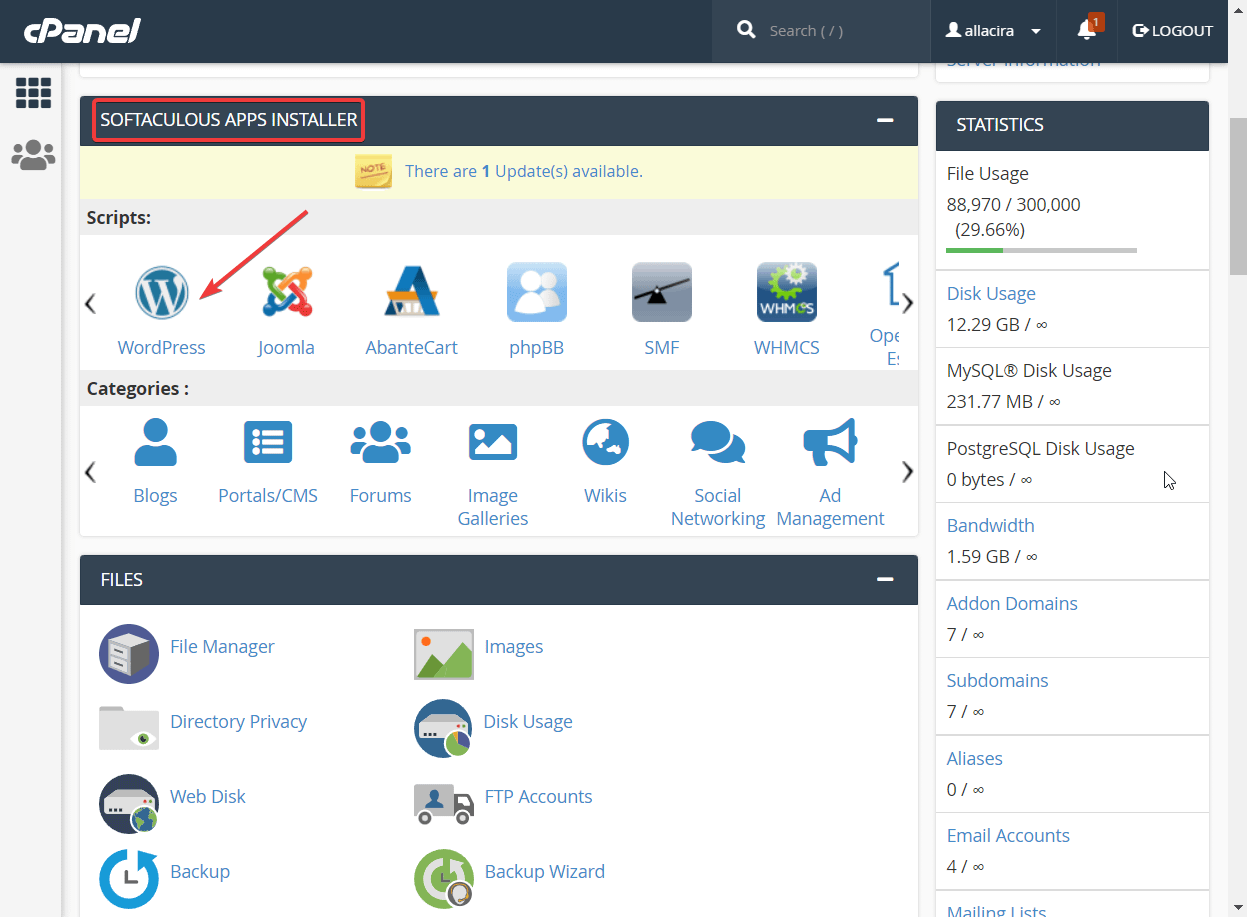
In this article, we are going to show you how to install WordPress using the WordPress app, which can be accessed via the cPanel located in your hosting provider.
The cPanel is a popular hosting control panel that offers tools to help manage websites, domains, email accounts, databases, files, security settings, and other aspects of your hosting.
While many hosting providers use the cPanel, some don’t. For instance, Hostinger offers a custom dashboard called hPanel. And Kinsta, Flywheel, and WP Engine have their own dashboards that look very different from the cPanel.
In the following demonstration, we will use Namecheap’s cPanel to install and set up WordPress. If your hosting account does not offer cPanel, it’s best to seek a help document from your hosting provider that shows how to install WordPress and follow that. Alternatively, you can reach out to your hosting support and ask for help.
Now, let’s dive into the process of installing and setting up WordPress using the cPanel.
Log into your hosting account, and locate the cPanel.
Look for the WordPress app or script and click on that.
Then, under Software Setup, select the protocol as https, choose your domain, and hit the Quick Install button.
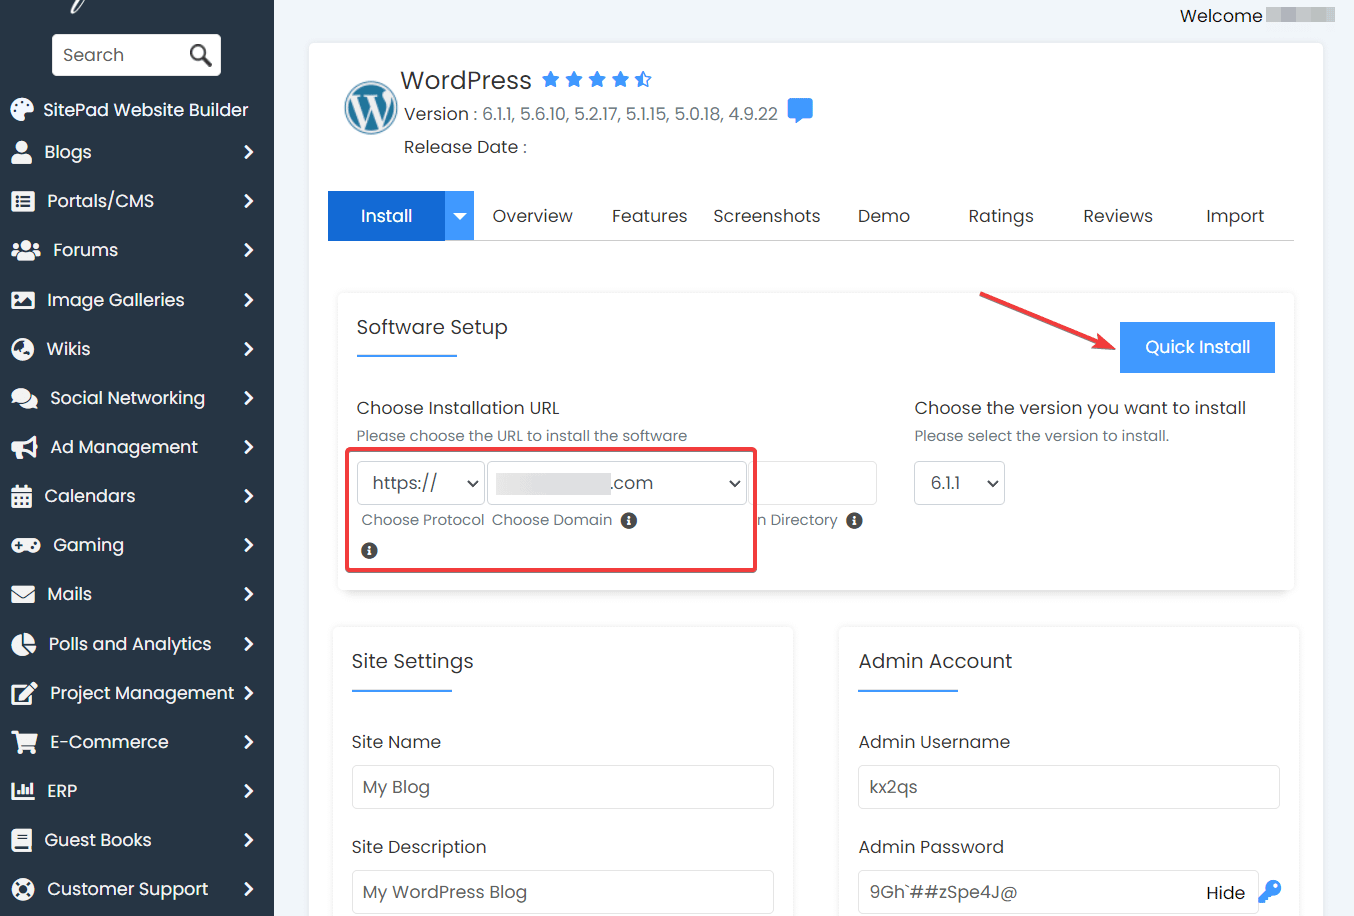
It will take a few minutes to install WordPress. When it’s done, the tool will give you a login URL along with a username and password.
Insert the login URL in your browser’s address bar and then enter the username and password to log into your website.
As soon as you log in, you will see the WordPress dashboard appear on the screen.
On the left-hand side of the dashboard, hover your cursor over the Settings option to reveal several choices.
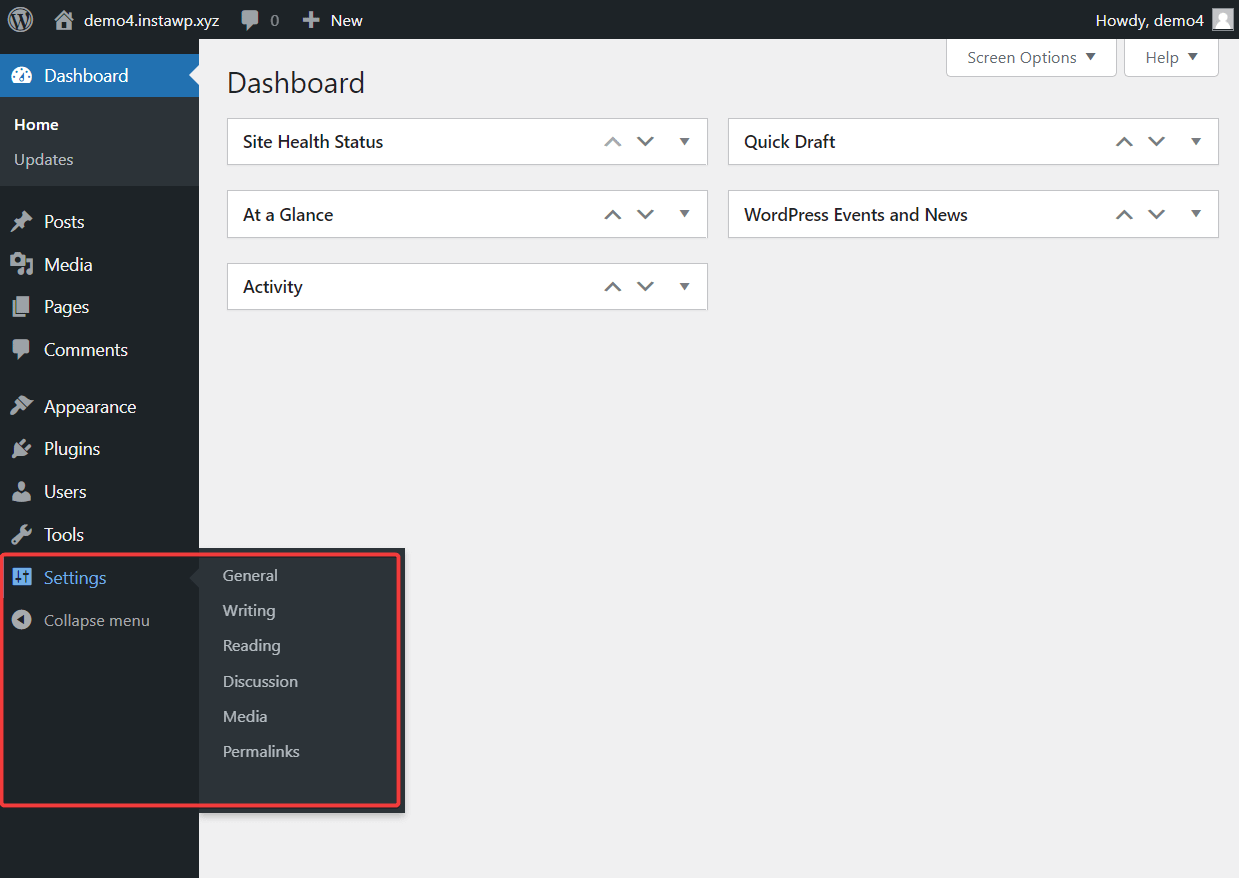
These pages are the default WordPress setting pages. You will need to visit each page and modify them to ensure that your website is running just the way you want it to.
2. Install a lightweight theme and page builder (Neve and Elementor) 
The next step on how to create ecommerce website in WordPress involves modifying the design of the website.
Right now, your website looks very bland on the frontend. To convert it into a professional-looking ecommerce site, you need to install a WordPress theme.
There are plenty of themes to choose from, but many of the themes available online are unsuitable for an ecommerce site. We recommend using Neve, since it’s a fast, multi-purpose theme that supports WooCommerce.
Neve has a free and a premium version. You can start with the free version and upgrade to the premium one when needed.
Installing Neve WordPress theme
To start using the Neve free version, open your WordPress dashboard and go to Appearance → Themes → Add New, and insert “Neve” in the search bar.
Next, hit the install and activate buttons to activate the theme on your site.
Once active, go to Appearance → Themes → Neve Options and select Go to Starter Sites.
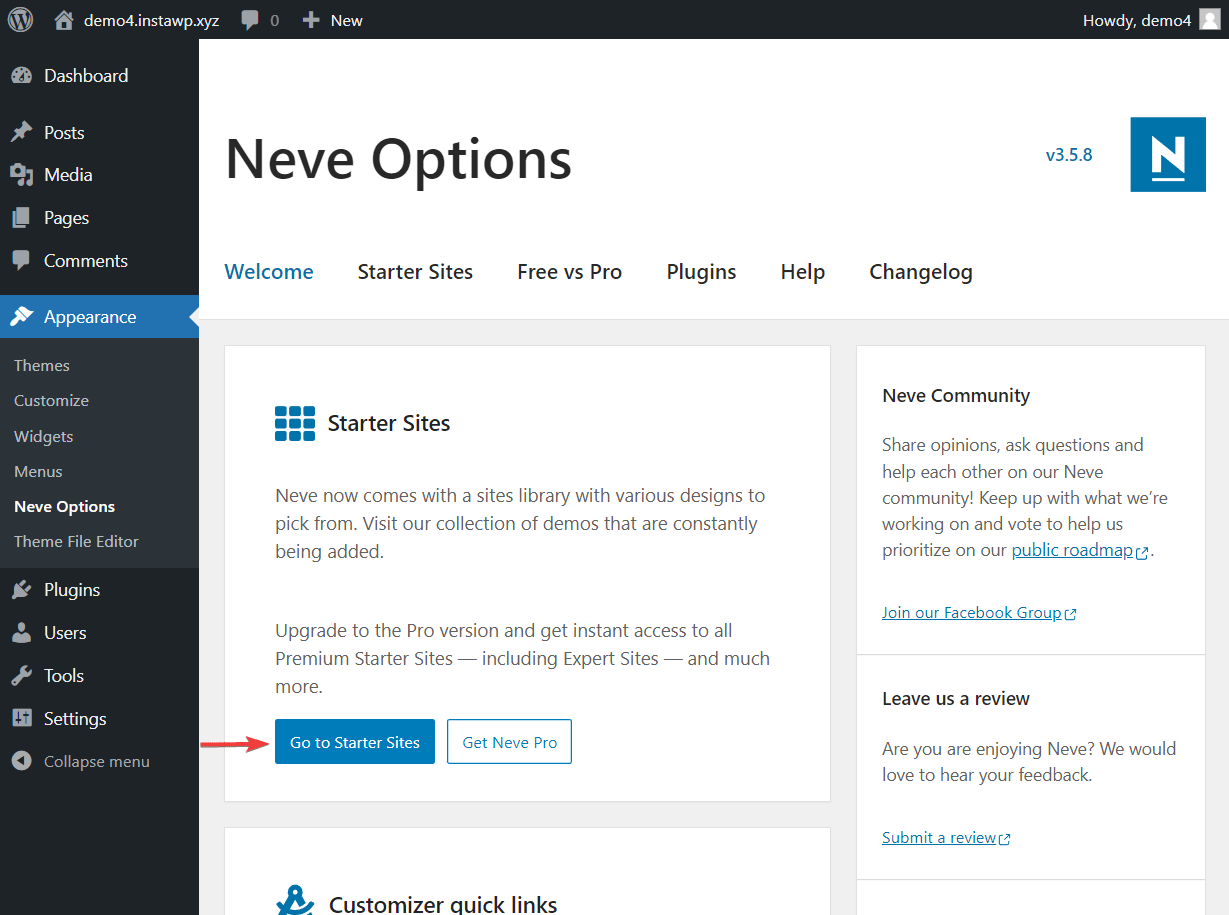
You will be prompted to install a Cloud Templates and Patterns Collection plugin. Do that, and then proceed to choose a starter site.
Starter sites are prebuilt websites that can be previewed and installed within a few clicks. The main advantage of using a starter site is that you don’t need to build a website from scratch.
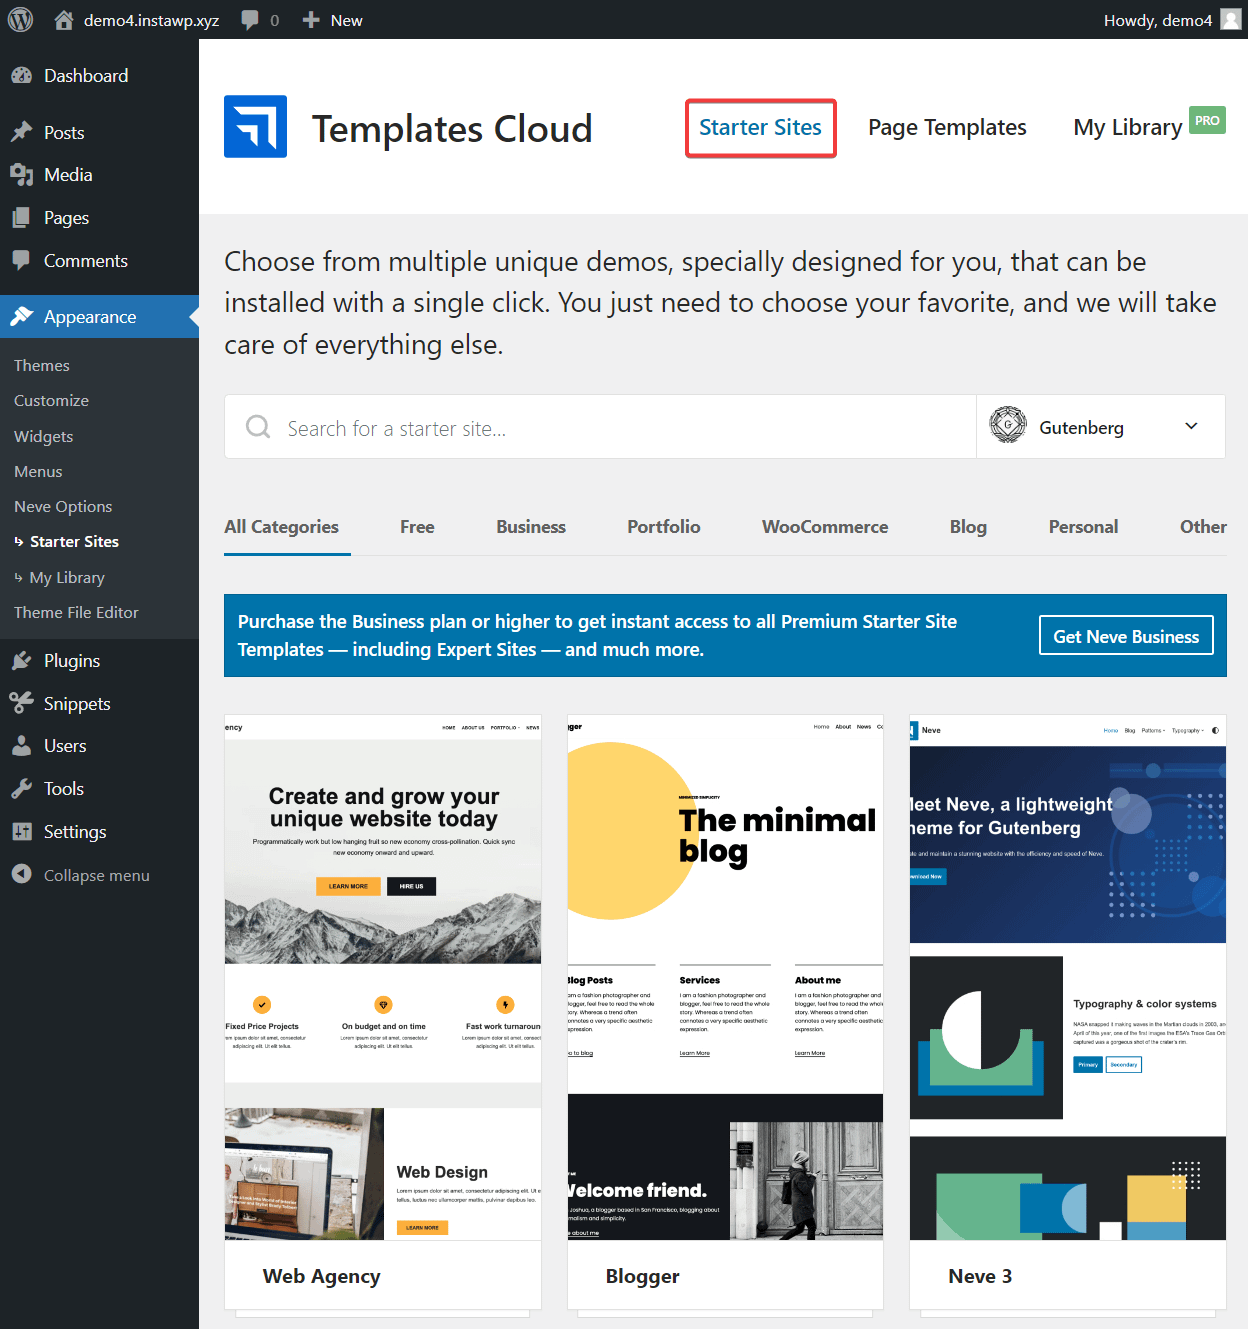
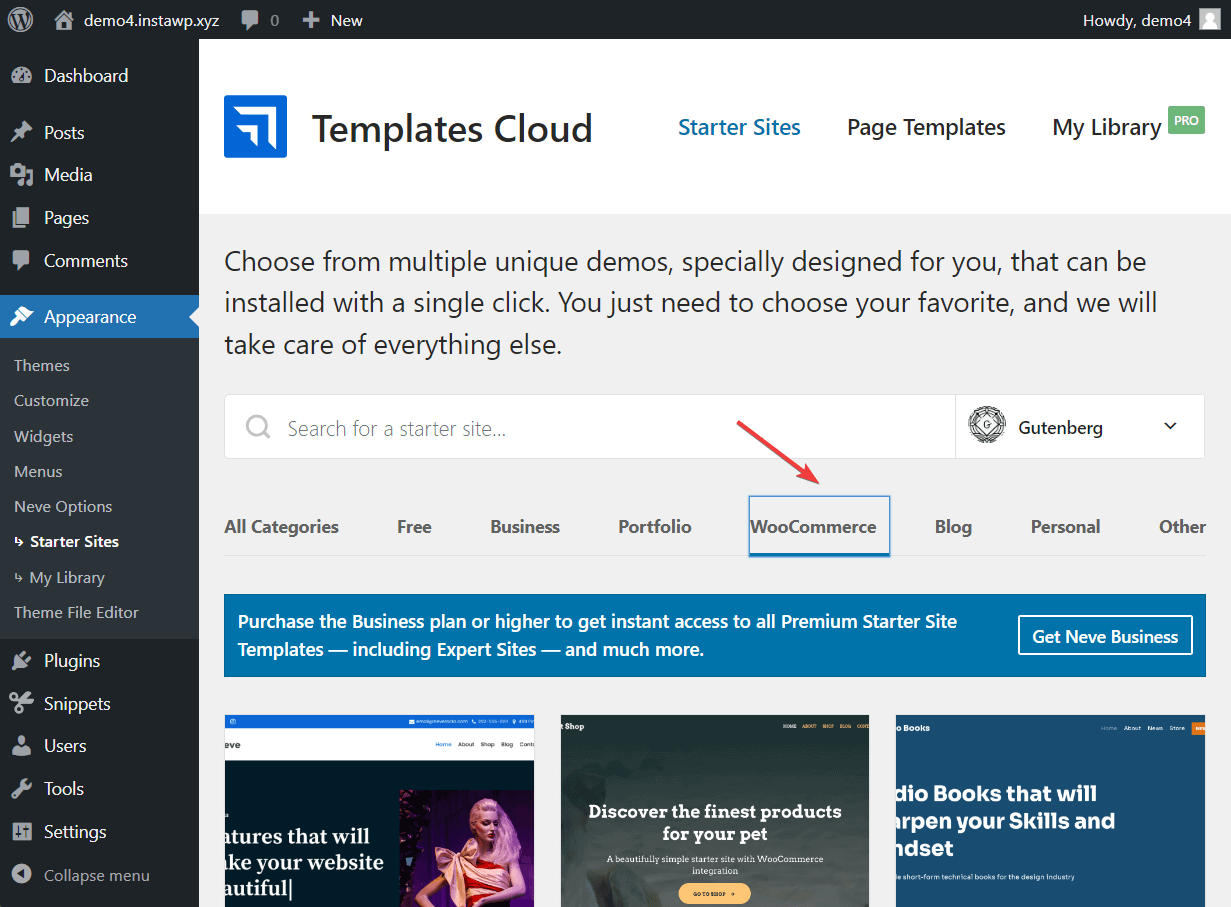
We recommend selecting a WooCommerce starter site as it will install the ecommerce plugin for you. All you will need to do is set up the plugin. If you don’t like the WooCommerce site designs, choose any other starter site and we will show you how to install the WooCommerce plugin in the next section.
You can also select a starter site that comes equipped with the popular page builder – Elementor. Select Elementor from the dropdown menu and then import your preferred Elementor-equipped starter site. And please note: All Elementor-equipped starter sites are a part of Neve’s premium package.
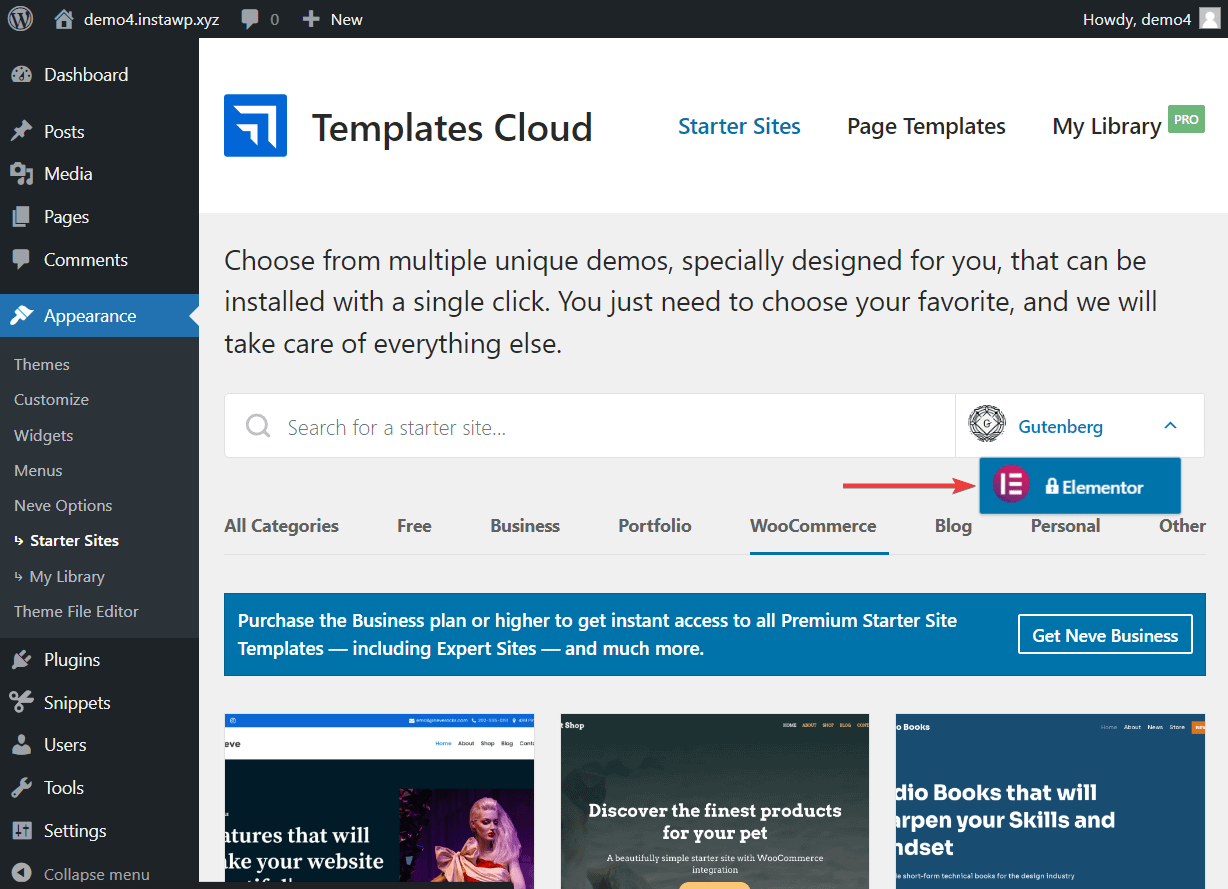
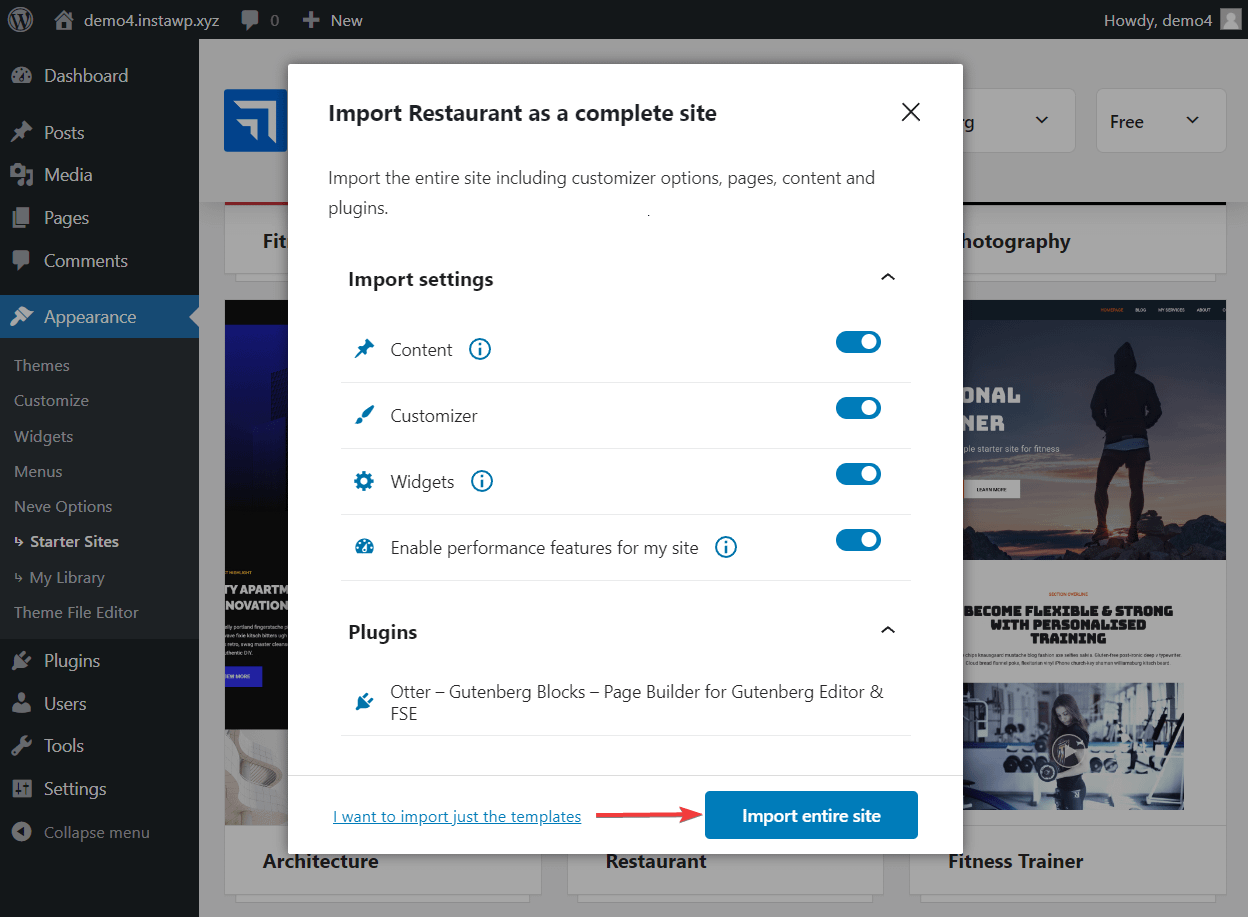
To install a starter site of your choice, select the Import button and hit the Import Entire Site button from the pop-up window.
It’ll take a few minutes for the installation to complete. Move forward to our next step on how to create ecommerce website in WordPress.
3. Install and set up the WooCommerce plugin 
WooCommerce is a plugin for WordPress that adds ecommerce functionality to a website, which is perfect when learning how to create ecommerce website in WordPress.
In this section, we will show you how to install and set up the WooCommerce plugin.
Open your WordPress dashboard and go to Plugins → Add New. Insert “WooCommerce” into the search bar. Hit the Install Now and Activate buttons to activate the plugin on your website.
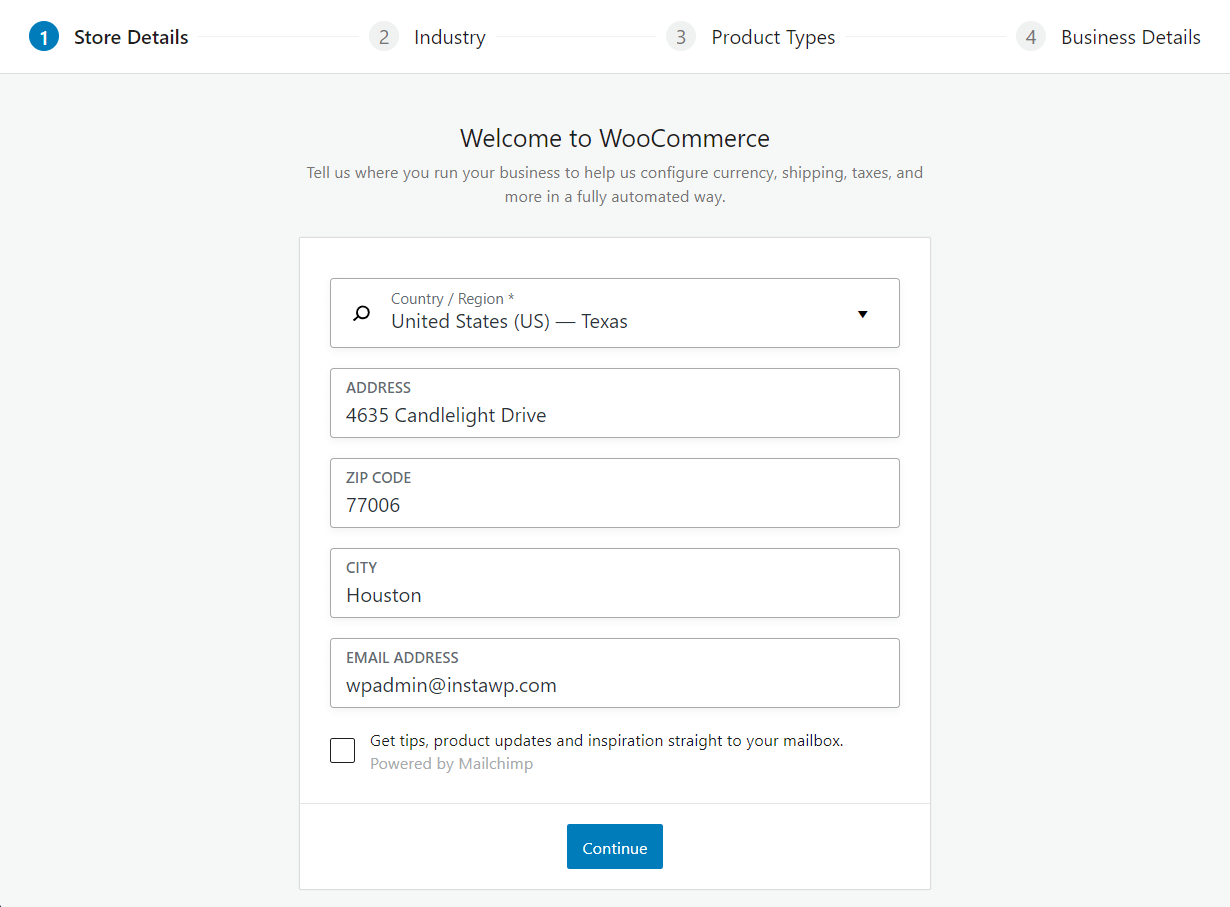
As soon as you activate the plugin, a setup wizard appears.
Side note: If you added a WooCommerce starter site while installing the Neve theme in the previous section, then you won’t see the Setup Wizard. Don’t worry! It’s not a mandatory requirement. The data you have to enter in the setup wizard can be filled in the WooCommerce Settings pages (more on that later).
Set up WooCommerce
The setup wizard will open asking you to enter some details like business address, type of shop, and number of products you are going to sell in the shop, among other things. Fill in these details properly as it will help WooCommerce configure your currency, shipping, and taxes.
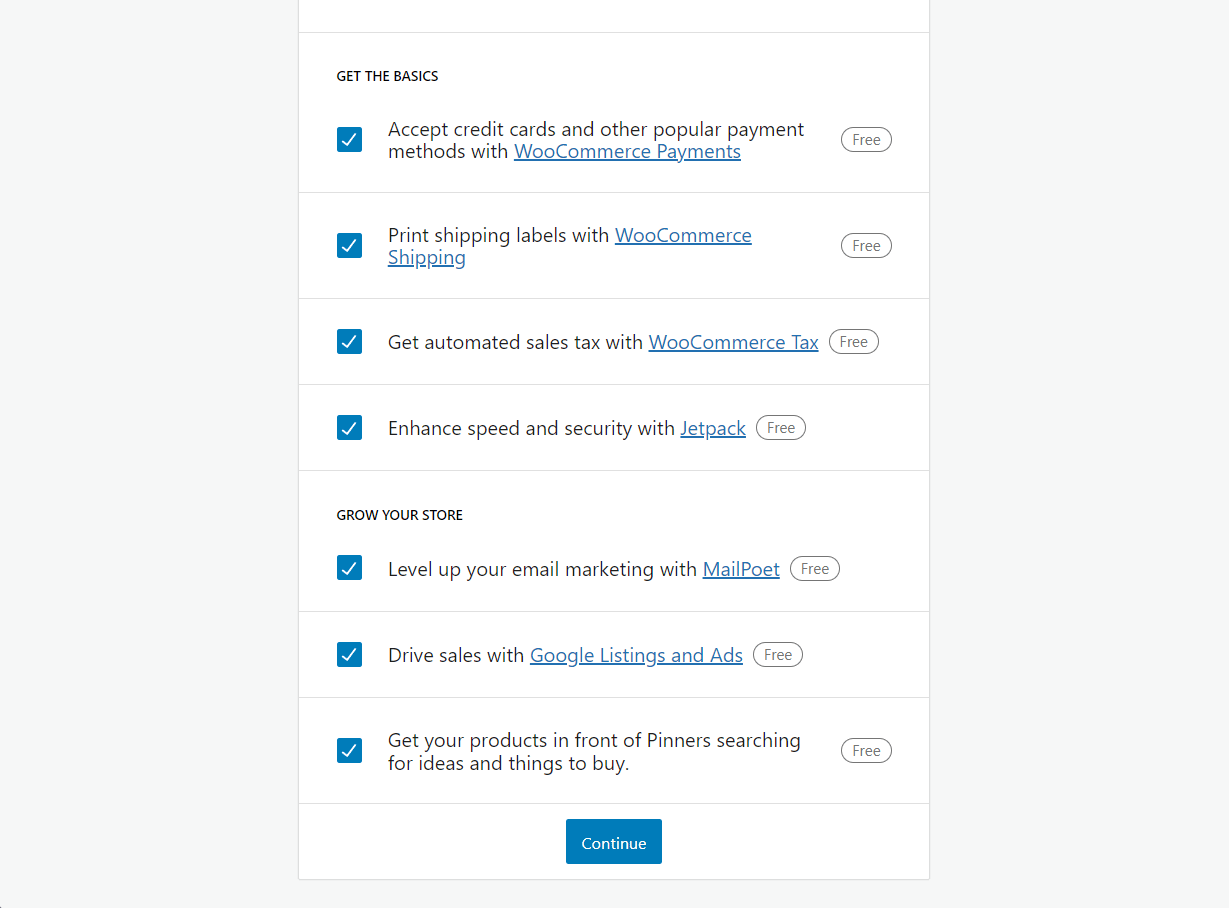
At the end of the setup wizard, there will be a prompt to install add-on plugins. We strongly recommend that you learn about the plugins before installing them. You can also deselect all the plugins and install them later as and when you need them. Cluttering your website with too many plugins is a bad idea because it will overwhelm the dashboard and slow your website down.
When the setup wizard closes, you will be taken to your WordPress dashboard. From the dashboard, go to WooCommerce → Settings and proceed to configure all the settings pages according to your needs. Here’s a comprehensive guide on how to configure WooCommerce settings.
This will take a while but it’s an important part of how to create ecommerce website in WordPress.
3. Choose plugins to boost the functionality of your site
It’s arguable, but plugins make a WordPress site. This is more about what you want to achieve than specific solutions. You need plugins for security, forms, ecommerce, and more. While you may already have your chosen ecommerce plugin in place, the rest is open for interpretation.
In fact, you may already have some plugins you’d like to transpose to the new site. The alternative is to go with fresh plugins relevant for the installation. You want to choose plugins that have a good core feature set, excellent support, developer features such as hooks or an Application Programming Interface (API), and solid ratings and reviews.
If you need inspiration, here’s a roundup of the best WordPress plugins for every type of site. However, take a few beats longer to consider whether your site security is up to scratch.
4. Set up essential ecommerce security provisions 
While security is important for every website, it matters so much for an ecommerce store that you should spend a lot of time here. For instance, take a look at some of the essential tasks for WordPress security:
- Use strong passwords for all users.
- Implement an SSL certificate to encrypt data.
- Protect against voluminous traffic attacks against the site, such as a Distributed Denial of Service (DDoS) attack.
Fortunately, this is a subject we talk about at length in another article on WordPress security. If you don’t already have knowledge in this area, you should. After all, you’ll need to enforce good security practices during the lifetime of your site, so it should be an area you’re hot on.
5. Implement essential ecommerce functionality 
An ecommerce website will often need a number of other extensions and plugins to help with some essential tasks. Here’s a quick breakdown of some of the most important areas you should consider:
- Payment processing. WooCommerce includes basic payment gateways, but extensions will add more. In fact, you want to ensure you cover as many payment options as possible, as this will benefit customers.
- Shipping rates. While WooCommerce includes basic shipping management, you will want to implement something more in-depth and robust. Even something like WooCommerce Shipping will let you print delivery labels off from the WordPress dashboard. Themeisle has a huge guide on WooCommerce shipping.
- Tax rates. You want to ensure that you implement applicable taxes for your customers, as this will have a direct impact on your bottom line and UX. Check out this full guide on the topic. It also includes some choice plugins for the job.
- Transactional emails. Those emails that confirm an order or notify the customer of something? They’re transactional emails and require your attention. The official WooCommerce blog has a fantastic guide on how to set up and optimize these.
With all of the technical details in hand, you can begin to think about the design of your ecommerce store. We’ll look at this in the next section.
How to create an ecommerce website with WordPress: design phase
Once your core foundations are in place, you need to begin their design. The next couple of sections discuss what the process is here.
1. Populate the store with products 
One of the first steps in designing your ecommerce store is to handle at least basic product uploads. If you need to migrate lines over to the new store, the job can be tough without support.
At the very least, you’ll likely need to carry out the following:
- Set up your product attributes and taxonomies. This is one of the deepest areas of WooCommerce, and can help Search Engine Optimization (SEO) if you set it up correctly.
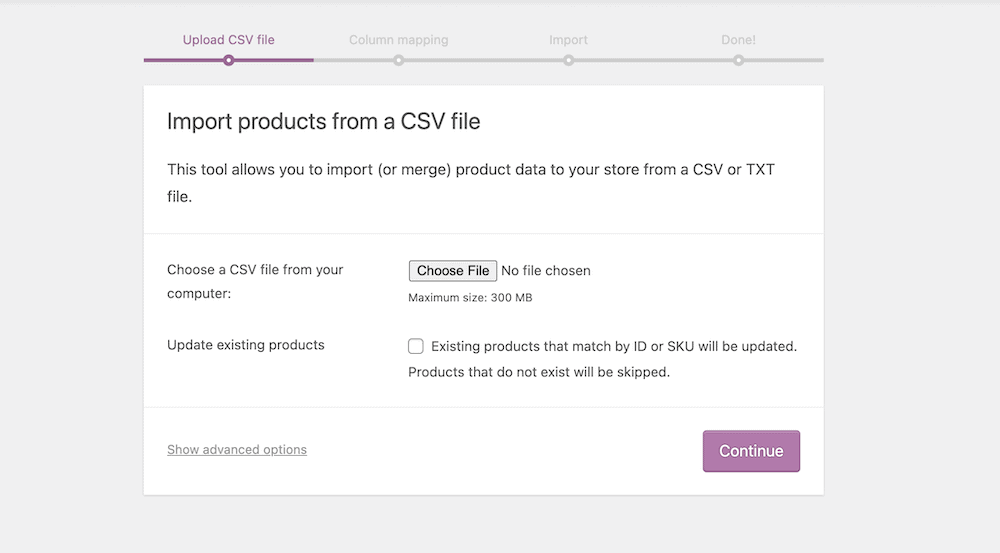
- Add individual products, including images, descriptions, prices, and variations, if applicable. The official WooCommerce blog has a good guide on how to do this for both single products and bulk imports.
Once you import products, you may want to go back and revise the settings for product shipping options, tax rules, and others.
In case you want to add your products by hand, which is a likely scenario for most users probably, here’s how to do that:
To add products to your ecommerce site, go to Products → Add New. A new page will appear where you need to fill in the following sections:
- Title
- Product description
- Product short description
- Product image
- Product category
- Product data
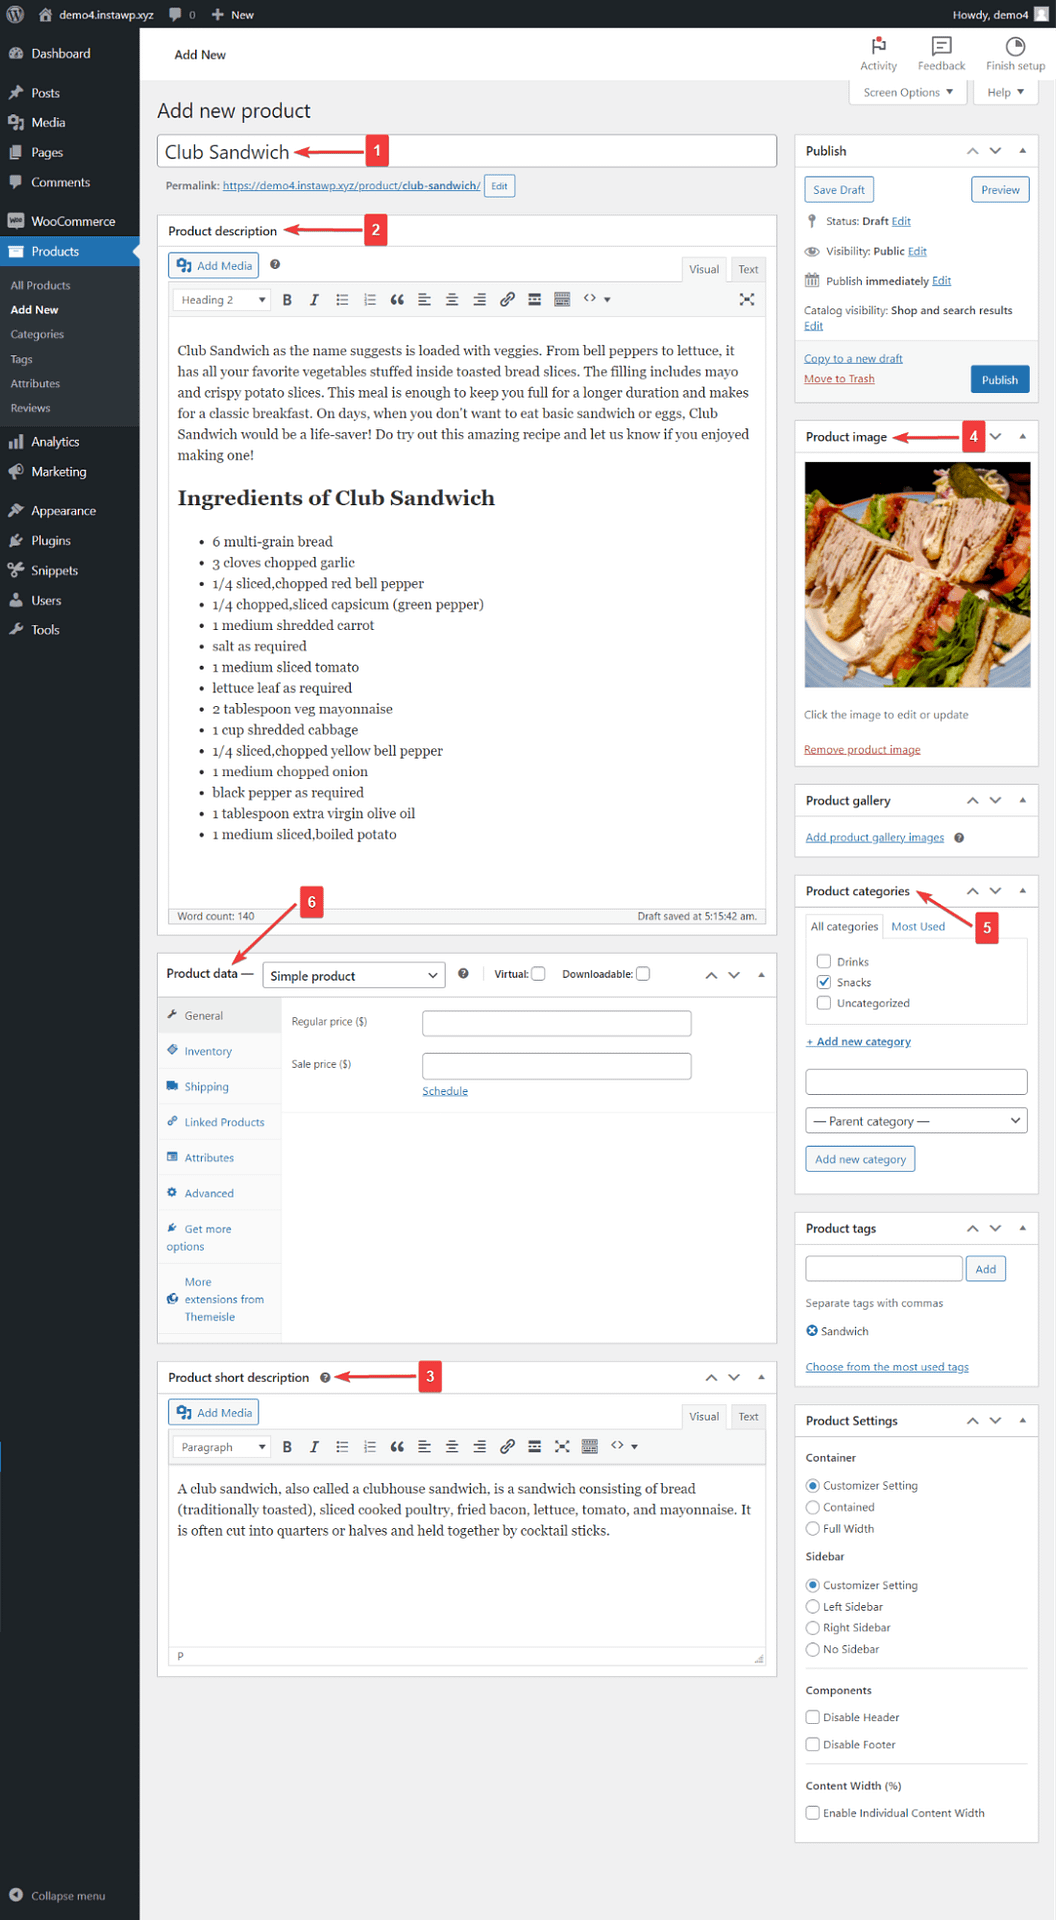
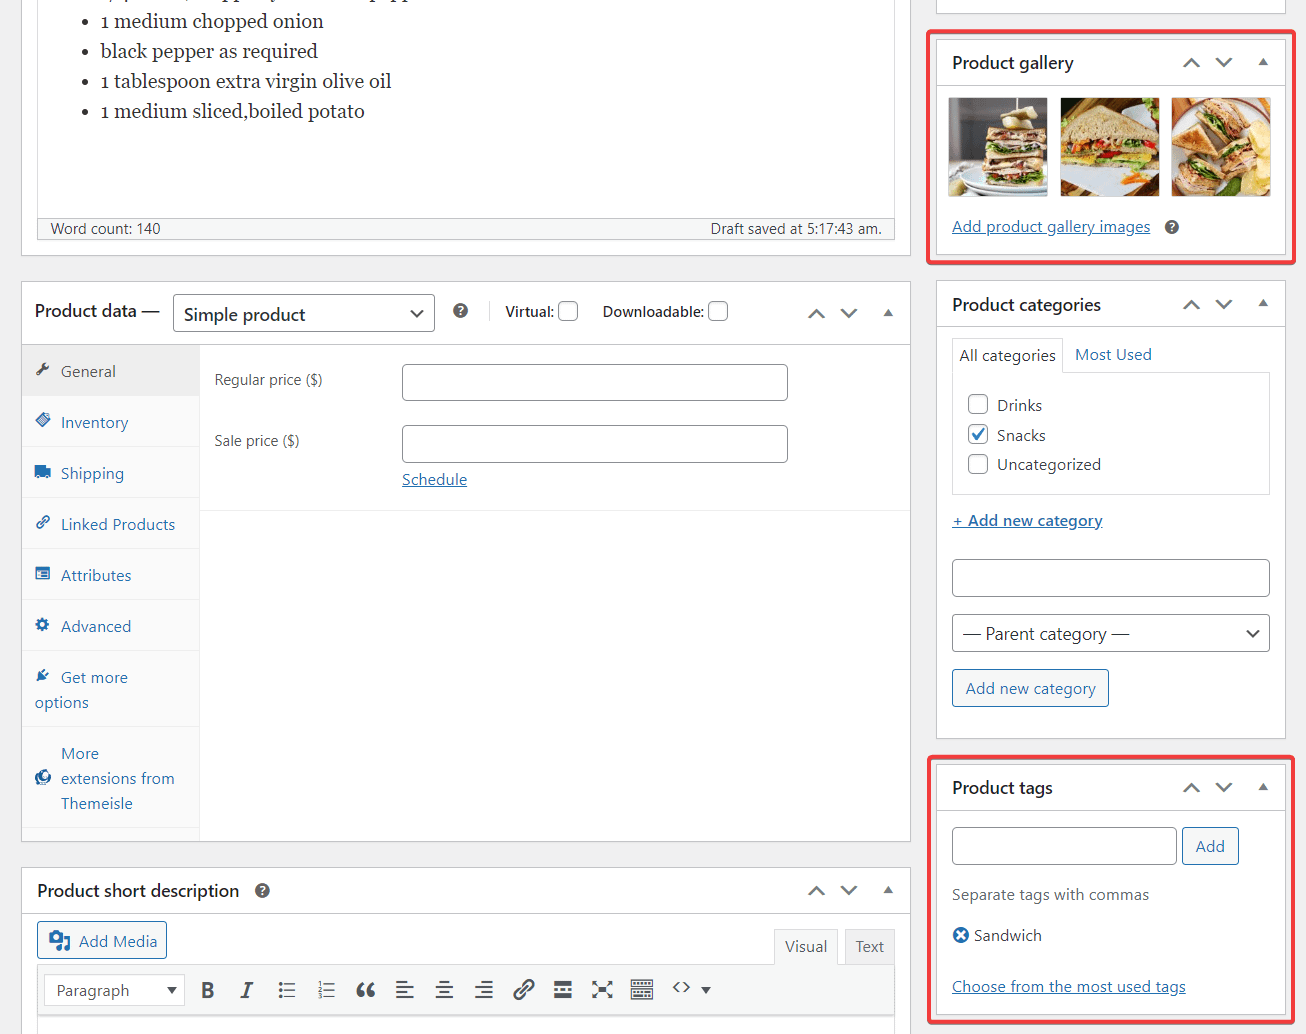
To add more than one image to the same product, use the Product Gallery option.
You can add Tags to categorize the products in any way you want. Just make sure to understand the difference between categories and tags.
It’s worth mentioning that the Product Data section is a very important part of the product page and you need to modify it carefully. Read this help doc to understand how to set up your product data.
Once the page is ready, you can hit the Publish button or the Draft button if you don’t want to publish it immediately.
You can add more items to your store by following the same methods, i.e., go to Products → Add New and add details about another product.
2. Build around the skeleton with design, necessary pages, and menus 
At this point, you should have a barebones WooCommerce website with product lines. From here, you will go through another cycle of design changes, assessments, and revisions.
However, before you assess your work after this first pass, make sure you add the following:
- Create and customize some of the necessary pages. This might be an About Us page, Privacy Policies, Terms of Service, Contact pages, and more.
- Design and configure the website’s navigation menu. It’s important to decide whether you use breadcrumbs, mega menus, or some other specific form of site navigation. It will impact UX and SEO.
- Carry out some general-purpose design choices. You might customize page templates for better consistency, set up a basic color scheme, and do countless other cosmetic tasks.
We also think it’s a good idea to at least set up a blog and populate it with dummy posts. While the dummy content won’t stay, it gives you an idea of how the blog will look during the design phase.
SEO should also begin to be a factor at this stage, but make sure that this task remains within your wheelhouse. It may need an expert or lots of discussion with your client to ensure you optimize the site rather than ‘tank’ it from the start. A good WordPress SEO plugin should be in your toolbox.
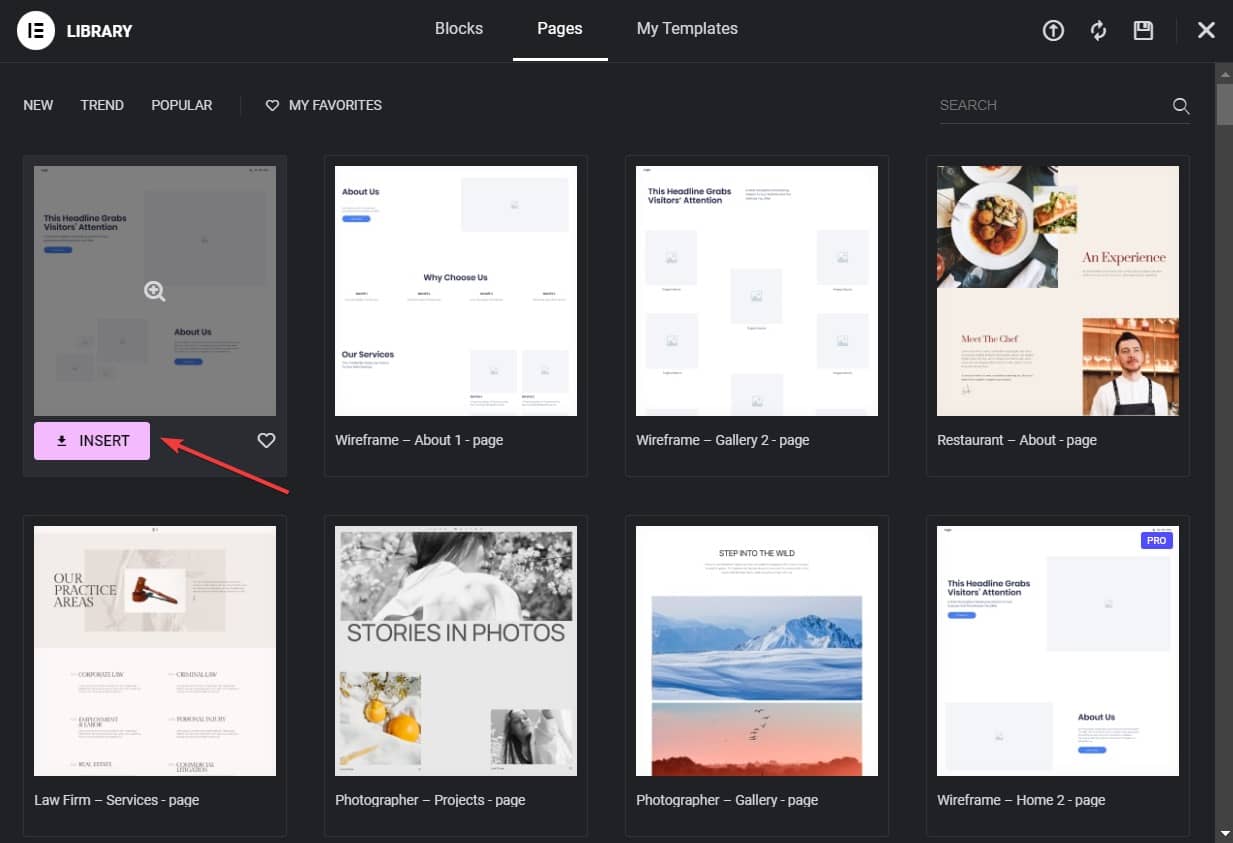
5. (Optional) Use Elementor to create new pages 
Since Neve and WooCommerce automatically create essential pages for an ecommerce website (like the home page, shop, cart, checkout, etc.,) you don’t need to create these pages from scratch. However, if you wish to change them, Elementor can help you do just that.
All you need to do is open the page and choose the Edit with Elementor option. The Elementor editing panel will open on the side of the screen, consisting of numerous tools that can be used to improve the design of the page.

You can use the page builder to create new pages, or choose an Elementor page template.
Using the Elementor templates is easy. Here’s how:
Open a new page, select Edit with Elementor option, and then click on the Add Template button (it looks like a folder).
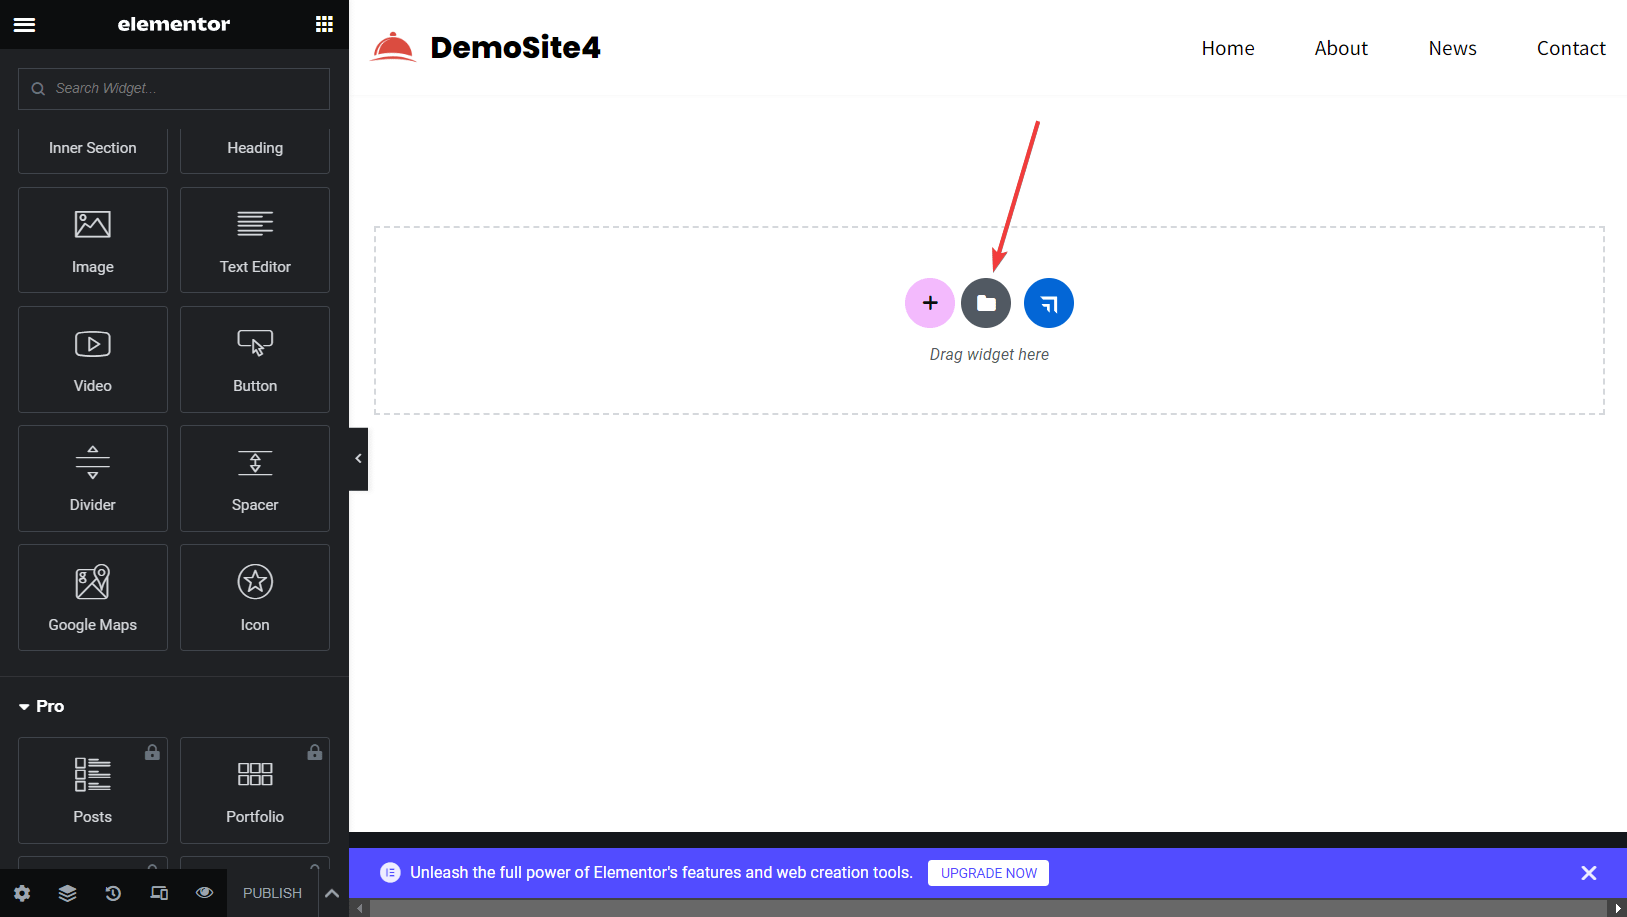
Next, insert any one of the free templates and start modifying the design as per your needs.
How to create an ecommerce website with WordPress: testing and deployment
Once you have a working site with good design in place, you can look to deploy it. Staging will be necessary at some point, although when you do this is subjective. We recommend you do this near the end of the design phase, so you can get a full picture of how the site operates online.
First, testing will make sure you don’t introduce bugs or errors once the site is live. A core testing practice should be to do so across different devices, browsers, and even per Operating System (OS).
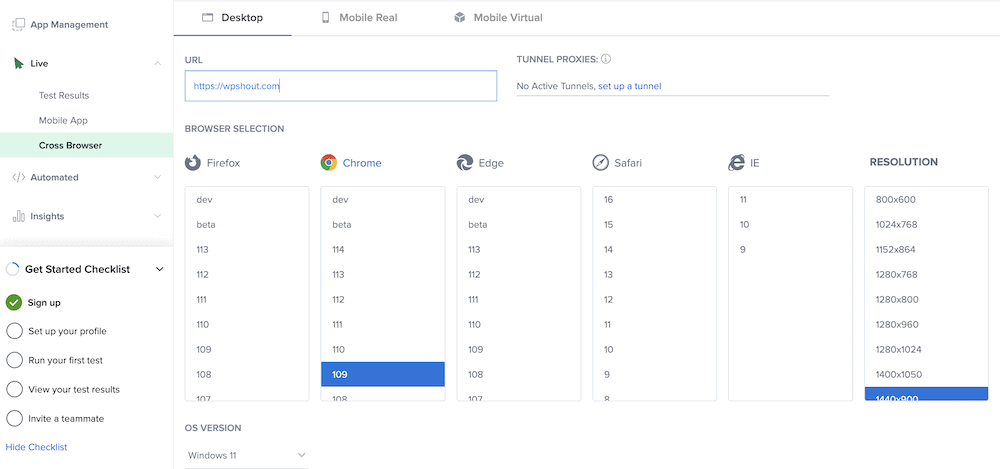
Beta testing helps to figure out whether your site is usable in the right way, responsive across devices, and functional for the user. You could employ some trusted colleagues or friends to test your site. The feedback you get will be crucial for resolving bugs and making the site better.
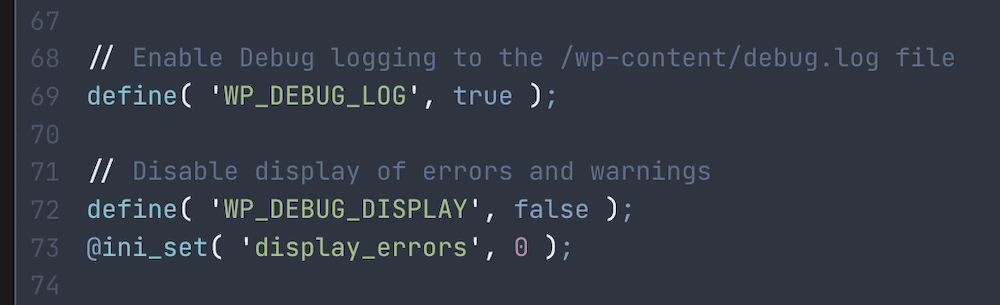
Of course, you want to fix any of the issues you find before you move on, and log those changes down somewhere. Fortunately, debugging WordPress installations can be straightforward, as the platform has its own debug mode.
Once this is over, there’s little else to do other than deploy the site. Here are a couple of tips:
- Check whether you need to set up the domain and hosting to ‘accept’ the site. You may even need to re-test that email addresses and notifications work.
- Don’t deploy straight from staging. Instead, make similar changes to the live site. Remember: only move a live site into staging directly, not the other way around.
At this point, you’ve successfully learned  how to create an ecommerce website with WordPress!
Conclusion 
When it comes to how to create an ecommerce website with WordPress, WooCommerce will be the best method. Even so, putting a plan together for technical considerations, design, and testing will ensure that regardless of the solutions you choose, you can get online with a quality site, fast.
It’s good to think of the build process as a three-stage job: first, decide on your ecommerce plugin, WordPress theme, and other plugins. Next, you can look to upload products and design your site. Once you finish this, you’ll want to stage and deploy the site to your live server. 
Is there anything else you’d like us to cover about how to create an ecommerce website with WordPress? Let us know in the comments section below!