Do you want to learn how to code a website?
Most website code contains HTML, CSS, and JavaScript. Learning these programming languages requires hours of studying and practice. The good news is that there are some excellent tools that let you create any type of website (without writing code).
In this comprehensive guide, we will cover how to code a website using drag-and-drop tools that create all the code for you. We will share how to learn the code fundamentals for those who want to code a website from scratch so you can do just that.

Website Builders vs. Coding a Website From Scratch
In the early days of the internet, building a website was complicated. That’s because developers had to code a website from scratch, which would take hours, if not weeks.
However, those days are now behind us.
Over 62.9% of all websites on the internet are built on a website framework, so most developers don’t have to know how to build a website from scratch anymore.
Most developers now use WordPress and other CMS platforms (website builder frameworks) to speed up website building.
In 95% of cases, you can build a website with website builders or no-code solutions, and it will be just as good as writing code from scratch.
Pros and Cons of Using a Website Builder
Here are some of the benefits of using a website builder:
- It is easy to use, even for beginners.
- You don’t need to invest time and money in learning web development.
- It saves you time, which you can then spend on growing your business.
- Easily build eCommerce, membership, and business websites without spending a fortune.
However, there are a few drawbacks to using a website builder:
- Your website could have unnecessary features that could slow it down.
- You may not need CMS capabilities for a project but will still have to maintain the software updates and backups.
Pros and Cons of Writing Code From Scratch
Here are some benefits of writing code all by yourself from scratch:
- Your website will only have the code it needs, which allows it to load faster.
- You won’t need to maintain software updates.
- You will get valuable programming skills that may lead to new WordPress career opportunities.
However, you will have to compare these advantages with the following downsides:
- You will spend hours and days learning to code in HTML, CSS, and JavaScript.
- Generating content dynamically will be difficult.
- Adding and updating content will require editing multiple files.
- You can’t easily share access to your website without giving full control to someone else.
- If you hire a developer to write the code for you, then it will be expensive and not very cost-effective.
Since time is your most valuable asset, we will show you the fastest ways to code a website using tools that do the code writing for you (methods 1 and 2 will cover this).
In method 3, we will share resources on how to make a website from scratch. This is great for students who want to learn programming.
With that said, let’s look at how to code a website. You can use the quick links below to jump to the method you want to use:
1. Code a Custom Website With WordPress
WordPress is the most popular website builder platform. In fact, according to our CMS market share report, WordPress powers over 43% of all websites on the internet.
It has multiple tools that let you create a custom website from scratch without learning to code.
Our #1 pick is SeedProd. It’s the best drag-and-drop WordPress website builder, used by over 1 million websites.

To start with WordPress, you will need a domain name and web hosting. We recommend using Bluehost.
They are one of the top WordPress hosting providers, and they are offering our readers a free domain name and a 60% discount on hosting (just $2.75/month).
If you want to look at some alternatives, we recommend Hostinger, SiteGround, or one of the other best WordPress hosting companies.
After you have a domain and hosting, the next step is to install WordPress (the right way). If you are using a hosting provider like Bluehost, then you will have access to a 1-click, user-friendly WordPress installation process.
Once you have installed WordPress, you can log in to the admin dashboard. It will look something like this:

First, you need to install and activate the SeedProd plugin. For details, you can see our tutorial on how to install a WordPress plugin.
SeedProd is the best WordPress drag-and-drop page builder for WordPress. It allows you to easily design your website and create beautiful pages without writing any code.
You can even use it to create your own custom WordPress theme from scratch.
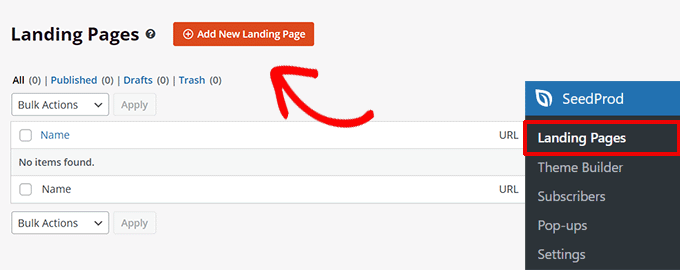
Once you have installed SeedProd, just go to the SeedProd » Landing Pages page and click the ‘Add New Landing Page’ button.
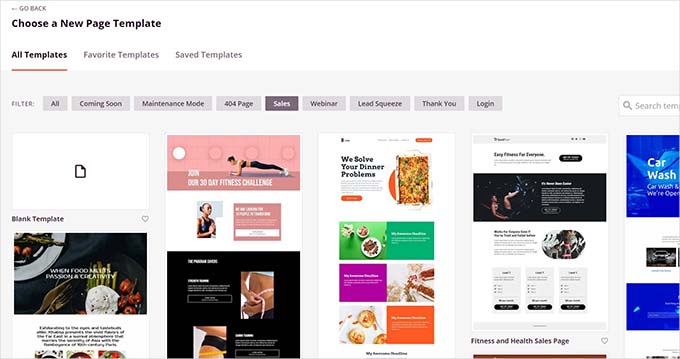
On the next screen, you will be asked to choose a template.
SeedProd has dozens of beautifully designed templates that you can use as a starter point, or you can choose ‘Blank Template’ to start with an empty page.
After that, you will be asked to enter a title for your page and a URL slug.
For instance, if you are creating the front page of your website, then you can enter ‘Home’ as the title and URL.
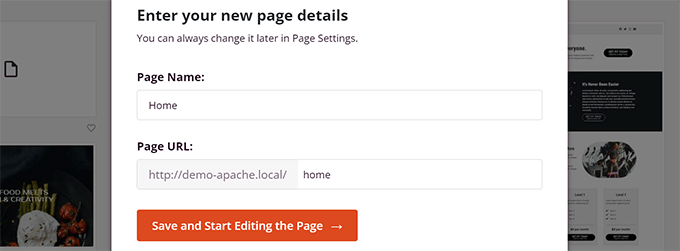
Then, you need to click on the ‘Save and Start Editing the Page’ button.
SeedProd will now load the page builder interface. It is an intuitive page builder where you can simply point and click to start editing.
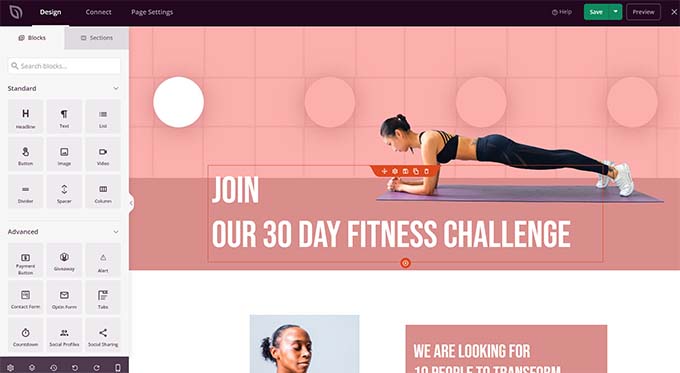
SeedProd’s drag-and-drop interface is easy for beginners but powerful enough for developers.
In the left column, you’ll see the most commonly used web design elements as blocks that you can add to your page.
To your right, you’ll see a live preview of your design where you can simply point and click on any element to edit, delete, or move it.
Basically, you can create a custom web design, including a navigation menu, sidebars, and footers, without writing code.
However, if you need to add custom code, then you can do it by dragging and dropping the Custom HTML block.
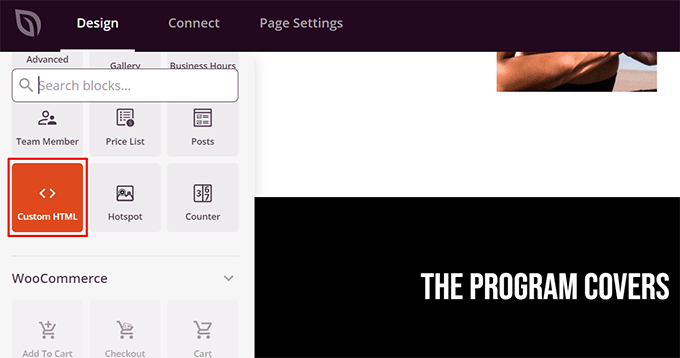
Inside the custom HTML block, you can manually add any HTML code.
You can also adjust the margin, padding, and design attributes of your custom HTML block.
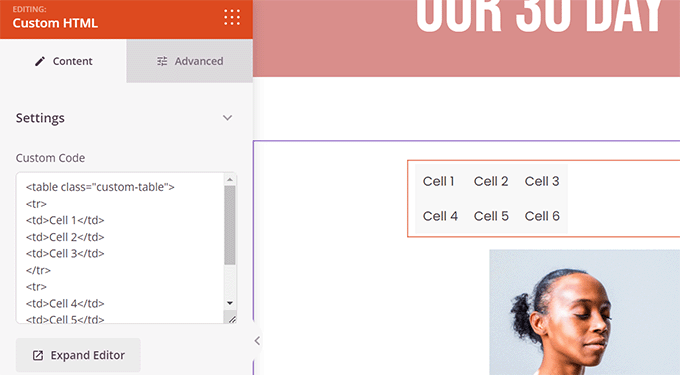
Similarly, you can also add custom CSS code to your page.
Just click the ‘Settings’ button in the bottom left corner and choose ‘Custom CSS’.
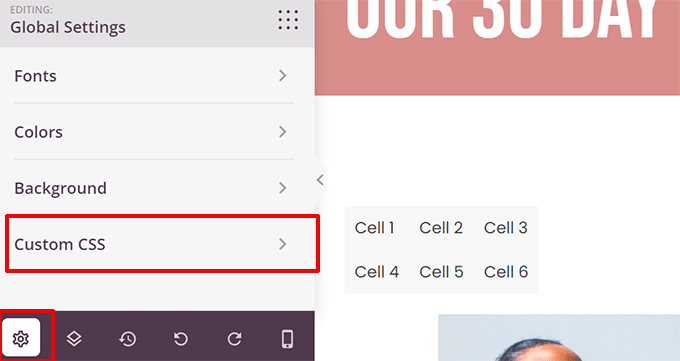
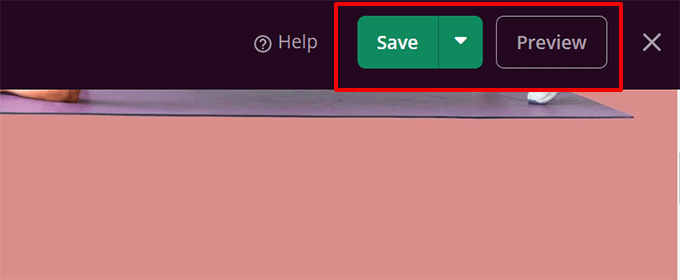
Once you finish editing your page, click the ‘Save and Publish’ button to make it go live.
You can also click the ‘Preview’ button to view your page in live action.
Simply repeat the process to create other pages for your website. You can quickly create a small business website within minutes.
SeedProd website builder makes it easy to make and edit a website effortlessly.
This is why many professional developers use it worldwide. Even developers at large companies like Awesome Motive use SeedProd to build their main websites because it allows for rapid deployment and customization.
Alternatives to SeedProd
There are several other popular WordPress page builders you can use. The following are our top picks for beginners to code a website from scratch without actually writing the code:
- Divi Builder – Drag and drop theme and page builder
- Beaver Builder – Another well-known WordPress page builder
- Astra is a highly customizable theme with ready-made starter websites that you can install with one click.
While we are biased toward WordPress, its popularity speaks for itself. Many big companies use WordPress, like BBC, Microsoft, Facebook, The New York Times, etc.
Tip: Need help setting up WordPress? Our expert team can help you with a free WordPress blog setup.
2. Code a Website With Web.com Website Builder
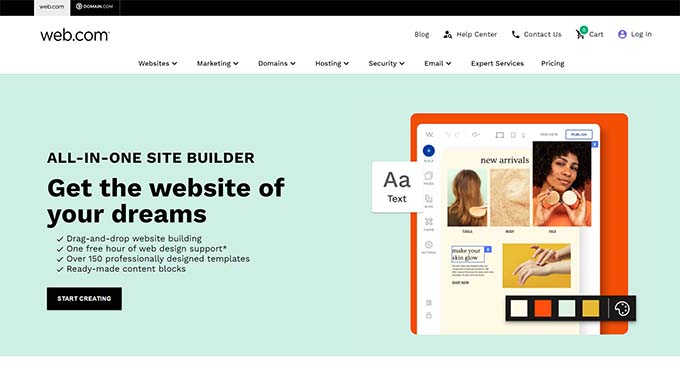
If you don’t want the hassle of getting a domain, hosting, and installing various software like WordPress, then you can use the Web.com website builder.
It is a great platform to build simple business websites and online stores. They even have a guided wizard that helps with the process.
Web.com pricing plans include a free domain name, free SSL certificate, dozens of templates, and an AI writing tool to help you generate website copy quickly.
Simply pick from their thousands of beautiful pre-made website templates and customize the design to match your brand needs with point and click.

The builder comes with all the powerful features you would expect.
You can easily add photo galleries, videos, testimonial sliders, contact forms, map locations, social media buttons, and more.

You won’t need to worry about updates, security, or backups because Web.com takes care of all of that for you. They also offer 24/7 chat, email, and phone support.
Alternatives to Web.com
There are plenty of different all-in-one solutions out there. Apart from Constant Contact, the following are our top picks for easy website builders that are not WordPress:
- Gator by HostGator – Fully hosted website builder with drag-and-drop tools and templates.
- Domain.com Website Builder – Hosted website builder with dozens of beautiful templates for all types of websites
- HubSpot – All-in-one website builder and marketing platform for small businesses
- Wix – Another well-known drag & drop website builder.
- BigCommerce – Fully hosted website builder to create eCommerce stores.
For more options, you can see our comparison of the best website builders with pros and cons.
Want to have an expert design a custom website for you? The team at Web.com also offers custom web design services, giving our users an exclusive deal. Get your free quote today.
3. Learn to Code a Website From Scratch
If you are a student and want to learn how to code a website from scratch, you will need to understand web development fundamentals like HTML, CSS, and more.
While there are many free and paid courses, the best one we have found is the one on Code Academy.
It takes roughly 9 hours to complete, but by the end of it, you will have learned to code a custom responsive website from scratch using HTML, CSS, and Bootstrap.
Even after you finish the course, you will need hours of practice before you can truly become efficient at coding websites from scratch. In the next section, we will show you how to code a very basic website using HTML and CSS.
Coding a Basic Website
Websites use HTML, CSS, and sometimes some JavaScript.
HTML defines the basic layout of a web page, including content like images, text, videos, and more.
CSS defines colors, margins, padding, text size, and more.
To write this code, you will need a code editor. A code editor comes with syntax highlighting, which helps you easily catch mistakes and write code more efficiently.
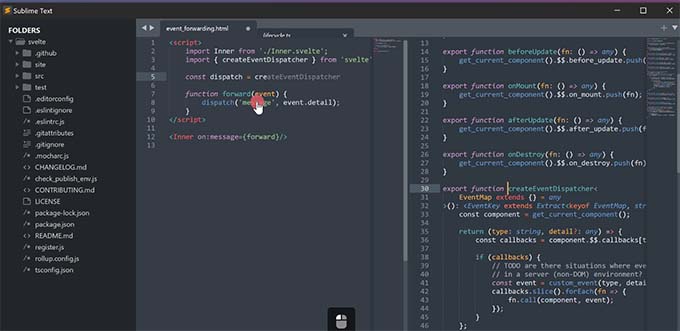
Next, you will need to start a project.
Simply create a new folder on your computer and call it whatever you want. This is where you will store all your website files.
Open your code editor and create a new file. Since this will be your website’s home page, we recommended naming it index.html.
This file is where you will write the HTML code for your first web page.
A basic HTML page contains the following sections.
- HTML document wrapper
- Head
- Body
You can define this structure by writing the following code:
<html>
    <head>

    </head>
    <body>

    </body>
</html>
The code inside the head section is not visible on the screen.
It defines metadata for your HTML document, like the title of your HTML document, link to the CSS file, and more.
Now, let’s fill in the head section of your HTML page:
<html>
    <head>
		<title>Star Plumbing Services</title>
		<link rel="stylesheet" href="style.css" />
    </head>
    <body>

    </body>
</html>
The body section of your website is where you define the page layout and add the content.
Here is an example of a sample web page with a header, main content area, and footer:
<html>
    <head>
		<title>Star Plumbing Services</title>
		<link rel="stylesheet" href="style.css" />
    </head>
    <body>
		<header id="header" class="site-header">
		<h1 class="site-title">Star Plumbing Services</h1>
		<nav class="site-navigation">
		<ul class="nav-menu">
		<li><a href-"index.html">Home</a></li>
		<li><a href="about.html">About</a></li>
		<li><a href="contact.html">Contact</a></li>
		</ul>
		</header>

		<article id="main" class="content">

		<h2>The Best Plumbing Service Providers in Pawnee!</h2>

		<p>Lorem ipsum dolor sit amet, consectetur adipiscing elit, sed do eiusmod tempor incididunt ut labore et dolore magna aliqua. Ut enim ad minim veniam, quis nostrud exercitation ullamco laboris nisi ut aliquip ex ea commodo consequat. </p>

		<p><a href="contact.html" class="cta-button">Call Now</a></p>

		<p><img src="images/plumbing-services.jpg" alt="Star plumbing services at work" width="600px" /></p>

		<p>Duis aute irure dolor in reprehenderit in voluptate velit esse cillum dolore eu fugiat nulla pariatur. Excepteur sint occaecat cupidatat non proident, sunt in culpa qui officia deserunt mollit anim id est laborum.</p>

		</article>

		<footer>
		<p>© 2023 Star Plumbing Services. All Rights Reserved - Call us +1-5555-5555</p>
		</footer>

    </body>
</html>
Feel free to replace the dummy content with your own, and don’t forget to save your changes.
After saving your HTML document, you can preview it in a browser. It will appear like this:
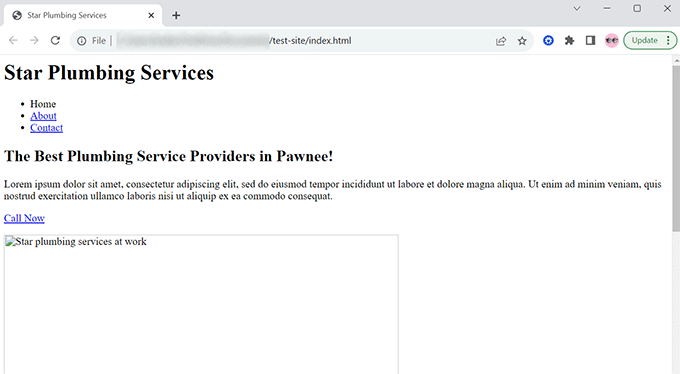
That’s because our HTML document points to two files that don’t exist. The first one is the CSS stylesheet.
Simply create a file called style.css using your code editor and save it in the same folder as your index.html file.
After that, add the following code to your style.css file:
body {
	margin:0;
	padding:0;
	font-family:sans-serif;
	font-size:16px;
	background-color:#f2ffee;
}

h1, h2, h3 {
font-family:Georgia, Times, serif;
}

h2 {
font-size:xx-large;
}

.site-header {
background-color:#2751ac;
width:100%;
padding:20px;
overflow: auto;
color:#FFF;
	}


.site-title {
float:left;
}

.site-navigation {

float:right;
text-align:right;
margin:20px 50px 0px 0px;
}

ul.nav-menu {
list-style-type:none;
list-style:none;
}
ul.nav-menu li {
display:inline;
padding-right:20px;
}


.site-header:after{
clear:both;
}

#main {

margin:0 auto;
background-color:#FFF;
	}

.content {

max-width:60%;
padding:30px;
margin:50px 0px 50px 0px;
font-size:18px;
}

.content p {
margin:50px 20px 50px 20px;

}

a.cta-button {
    background-color: green;
    padding: 20px 100px 20px 100px;
    color: #fff;
    text-decoration: none;
    font-size: xxx-large;
	border:2px solid #abfcab;
	border-radius:18px;

}

footer {
background-color:#2751ac;
width:100%;
padding:20px;
overflow: auto;
color:#FFF;
	}
This takes care of styling, and we still need to upload an image.
Simply create a new folder in your project and name it images.
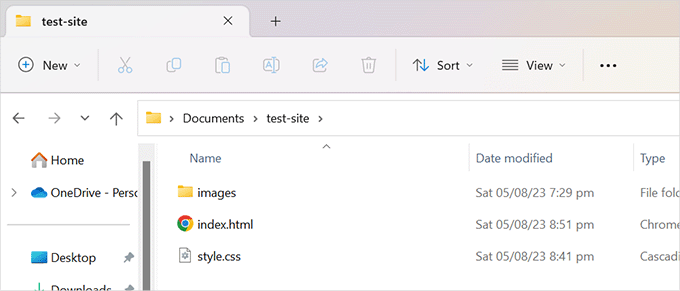
Now, you need to create an image you want to display and add it to the images folder.
Next, change the image name in the HTML code from ‘plumbing-services.jpg’ to your image file name.
Don’t forget to save all changes and preview your page in the browser.

Just repeat the process to create other pages for your website. You can simply use the index.html file as a template for other pages.
We hope this article helped you learn how to code a website. You may also want to see our guide on how to increase website traffic and our expert picks for the best tools for WordPress freelancers, designers, and developers.
If you liked this article, then please subscribe to our YouTube Channel for WordPress video tutorials. You can also find us on Twitter and Facebook.
The post How to Code a Website (Complete Beginner’s Guide) first appeared on WPBeginner.
