Image quality can make or break the visual impact of your content. AI-driven tools have revolutionized the way we enhance photos, making professional-quality adjustments accessible to everyone. In this post, we’ll show you how you can use three leading AI image enhancement tools to improve and enhance your images.
How to Enhance Images Using AI Tools (3 Effective Ways)
AI technology is not just for creating images from scratch; it’s also incredibly powerful for enhancing existing photos. We’ve tested three tools that stand out for their efficiency and quality.
1. Topaz’s Gigapixel for 6x Enhancements
Gigapixel (by Topaz Labs) is the perfect desktop solution for bringing pixelated or blurred images to life again. It can even reduce image artifacts, increase sharpness, and give any image a second chance at being used. It excels at enhancing image clarity and noise reduction with a very simple UI. Here’s how to use it:
Download and install Gigapixel. If you want to try it out, they offer a free trial (but you can’t download the images it enhances for you).
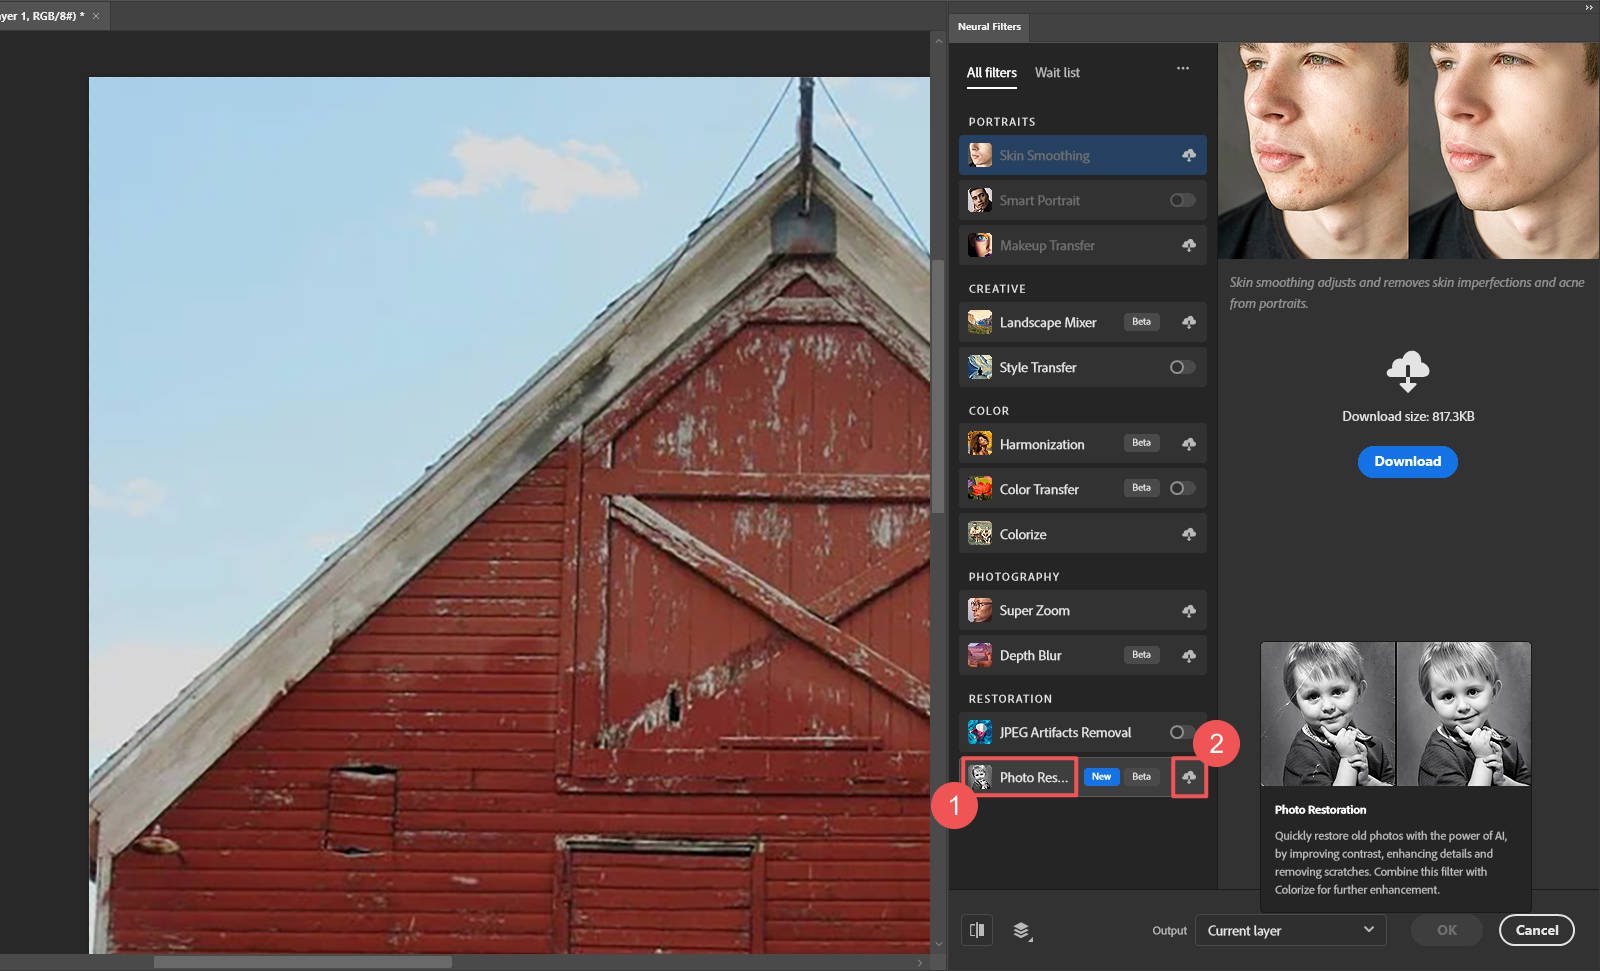
![]()
We have this image from a family vacation—unfortunately, it’s been compressed and shared a few times, so the image quality is quite poor. We’re going to see if we can enhance the image so that it is big enough to use as a website section background without being stretched.

You can open your image in Gigapixel by pressing “Ctrl + O” or clicking “File > Open Images.” Then, on the right sidebar, you’ll have several options under “Resize Mode” and “Output.” Gigapixel also lets you choose between various AI models based on your specific needs. The settings available depend on the AI model you choose.
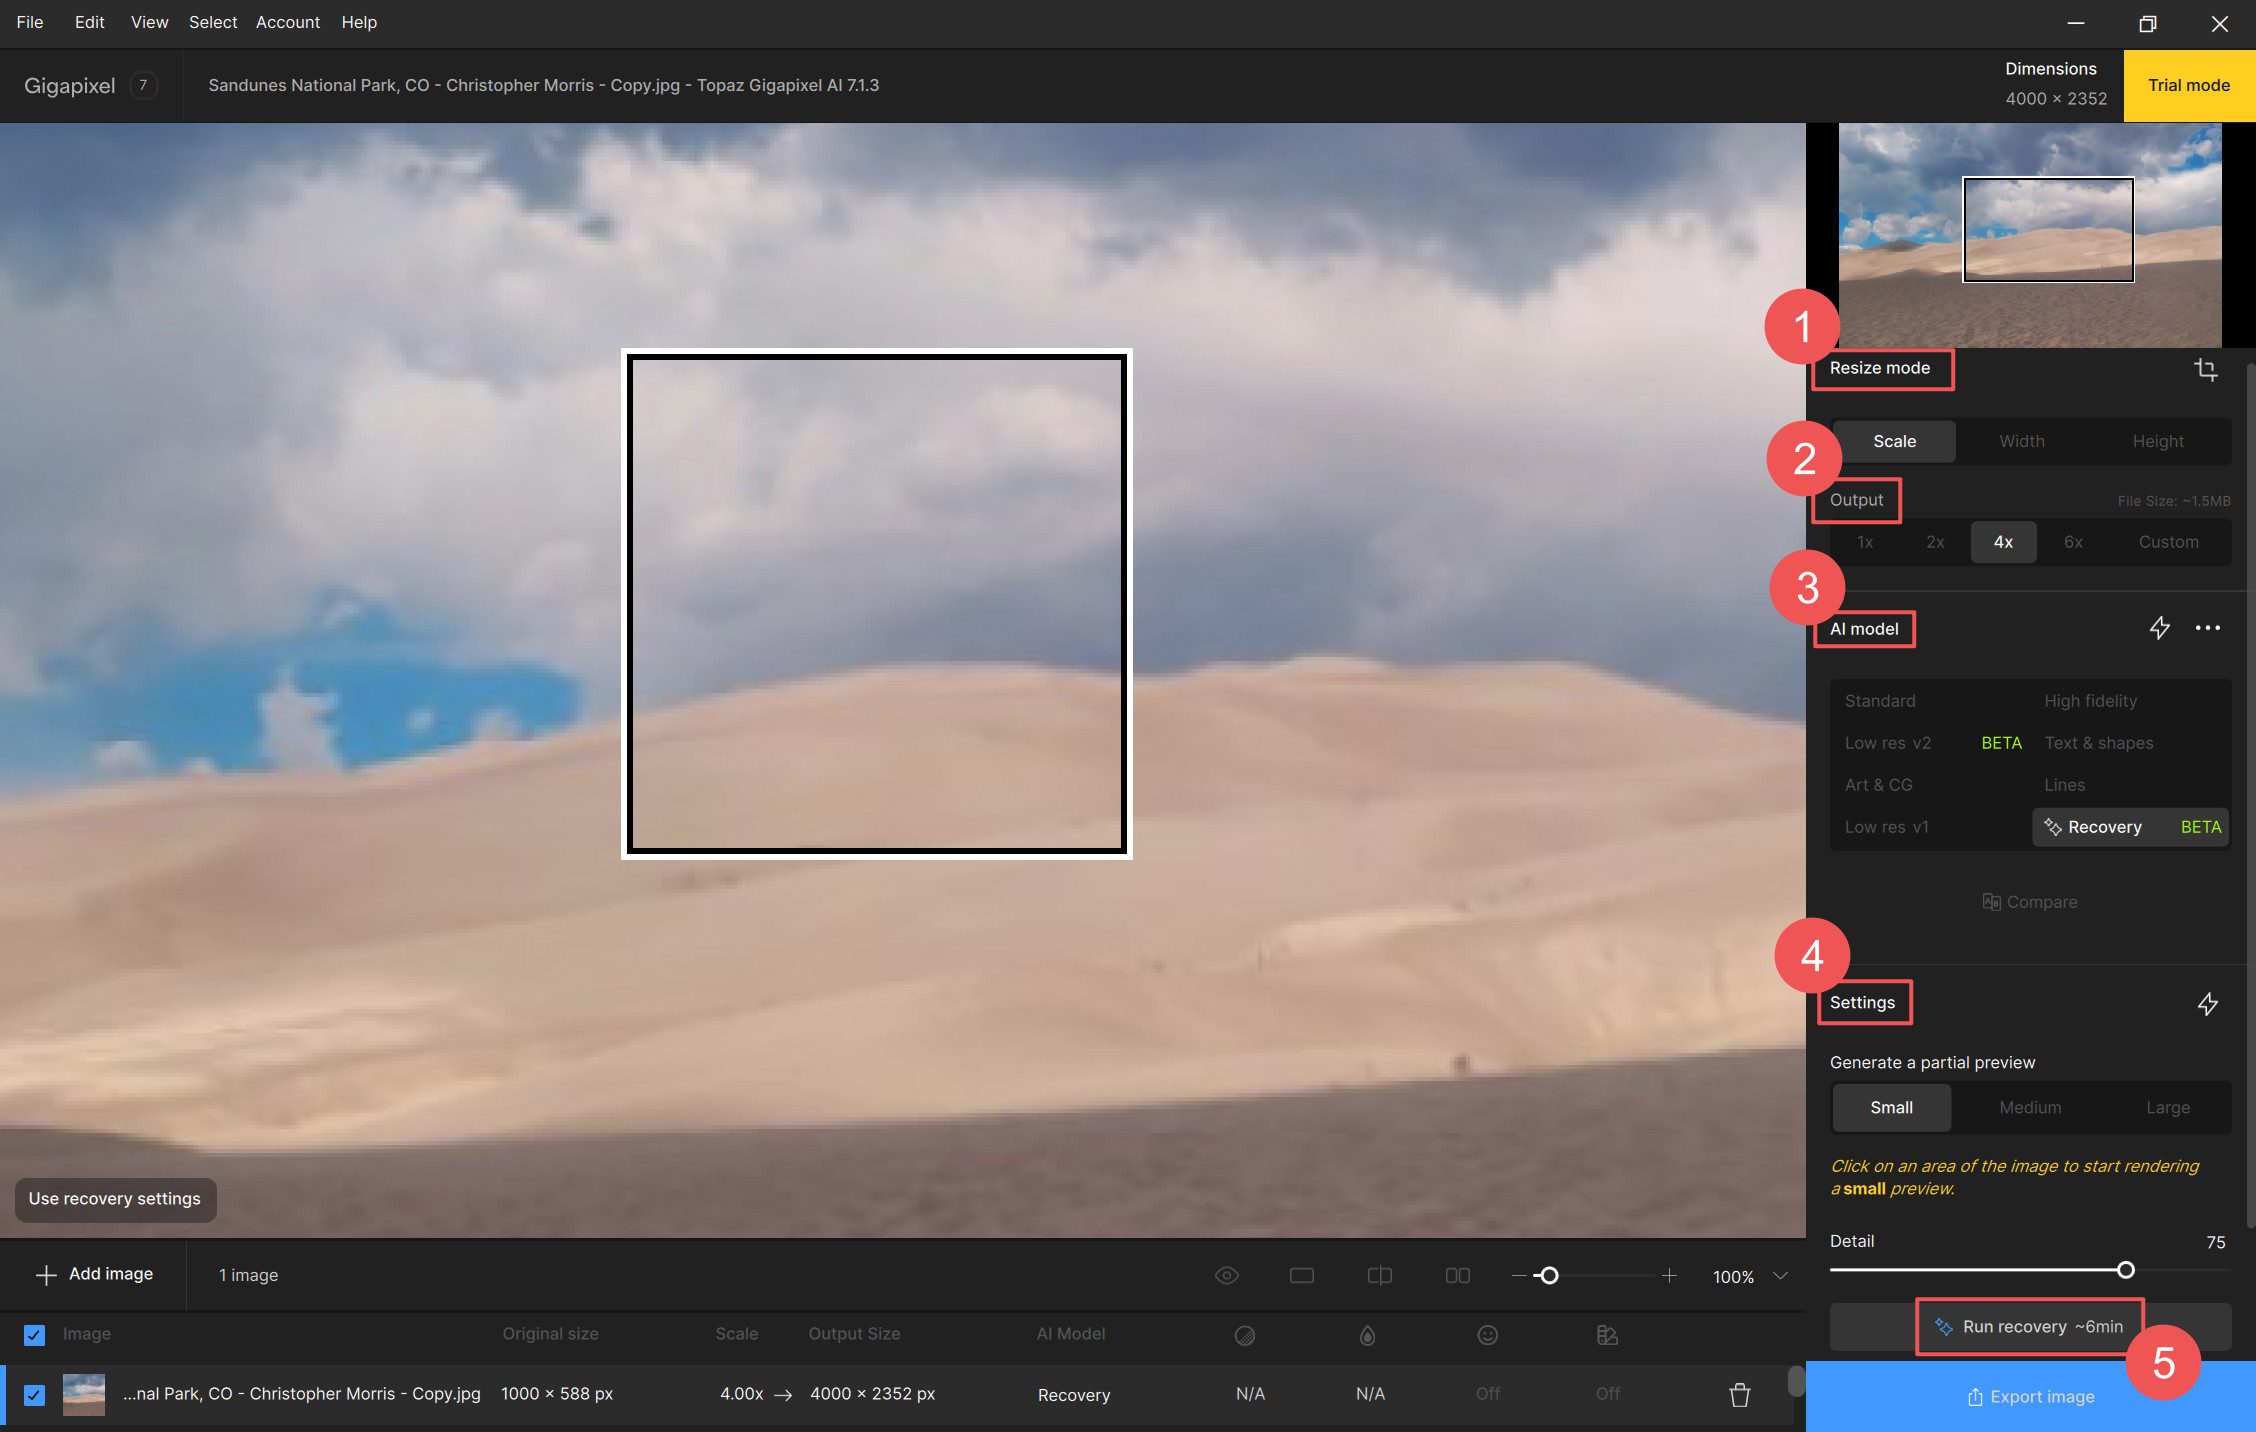
The original image we used was 1000 x 588 px, but we used the 4x setting with the “Recovery” AI model. That enhanced the image and brought the final dimensions to 4000 x 2352 px. Based on the memory available on the desktop I used, Gigapixel could do the restorative work in about 6 minutes. Here are the before and after of an isolated selection from the example image.
![]()
Here’s another before and after example from Gigapixel of distressed wood from an old barn.
![]()
If you’ve purchased Gigapixel, you’ll be able to export the enhanced image in your desired image format. In seconds, we turned a barely usable photo into something we wouldn’t mind sharing with the world.
Want to learn more about this incredible tool? Check out our Gigapixel review and learn everything you need to know about it.
2. Adobe Photoshop’s Firefly for Precision Editing
Adobe’s Firefly AI works directly inside Photoshop and Lightroom. This makes it convenient to use for those already familiar with those applications. It’s easy to use and can improve grainy photos enough to make them usable again.
To quickly enhance an image, download and install Photoshop. Then, load your image into a new canvas. Select “Image > Image Size” in the menu bar. For this example, we chose to double the image size.
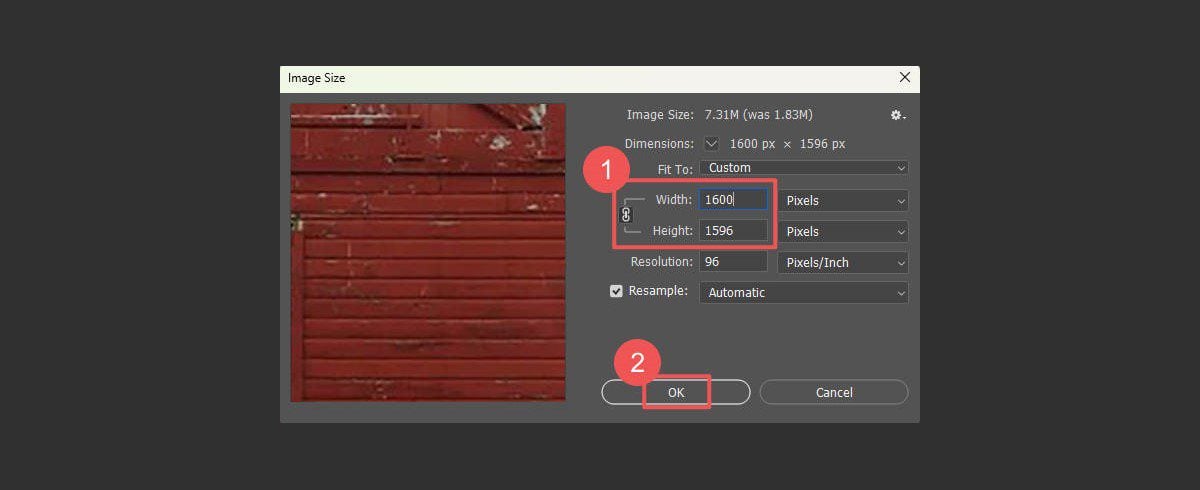
As you can see, this stretches the image out and adds distortion.
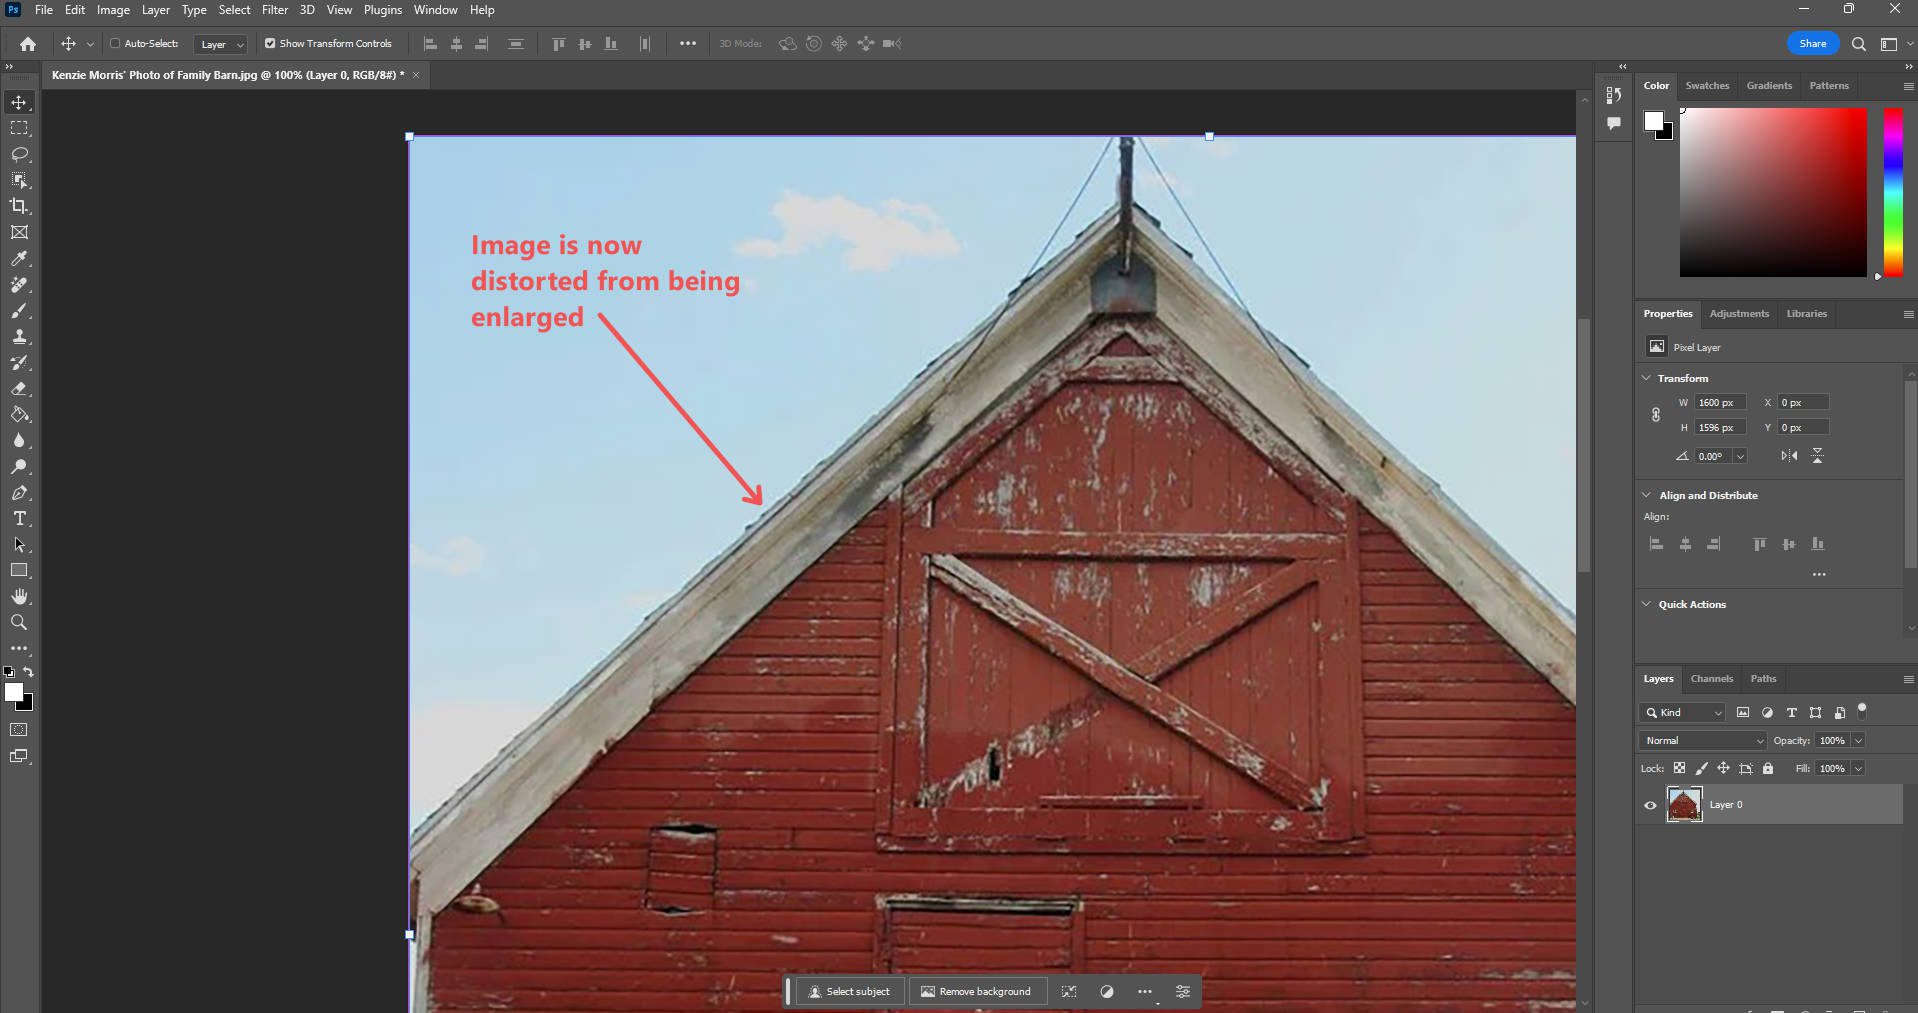
Now that we have the image the size we want it to be, we need to correct these distortions using one of Photoshop’s AI Neural Filters. Select “Filter > Neural Filter.”
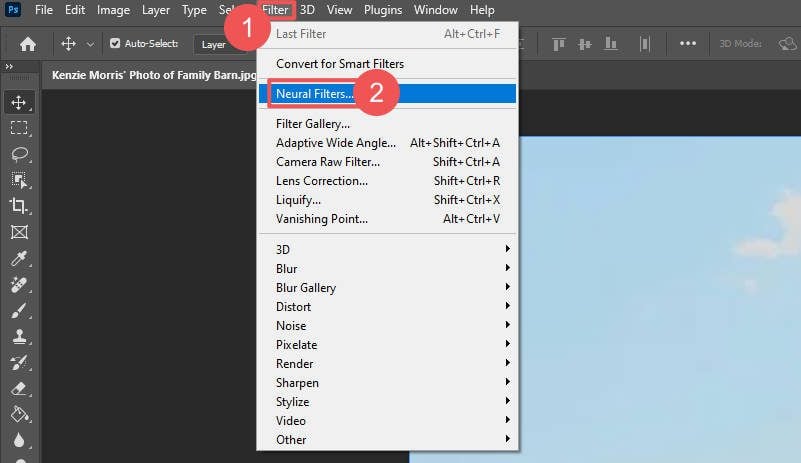
Photoshop will show a list of available Neural Filters. Find the “Photo Restoration” option. If you’ve never used it before, you may need to download it before using it.
Adjust the settings to match your images’ direct needs. The main setting to adjust is the “Photo enhancement” slider. Under “Adjustments,” there are specific settings for noise reduction, color noise reduction, halftone artifacts reduction, and JPEG artifacts reduction.

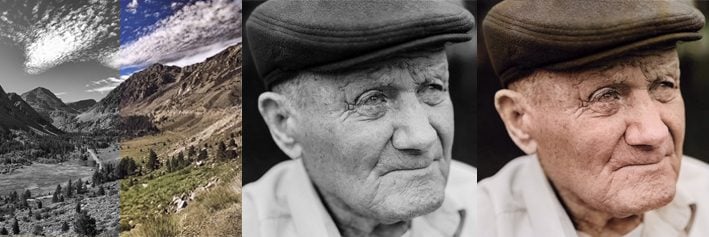
Photoshop also comes stocked with other specially trained Neural Filters that are specially trained to enhance images with particular enhancement needs. The quality and detail are most improved in the barn itself, with the sky being greatly removed from artifacts as well.

Before, Left; After, Right
Here are a few additional side-by-side comparisons of various images with AI Neural Filter enhancements.

Adobe Photoshop Neural Filter to Remove JPG Artifacts
Abode Photoshop’s Neural Filter to Colorize B&W Images
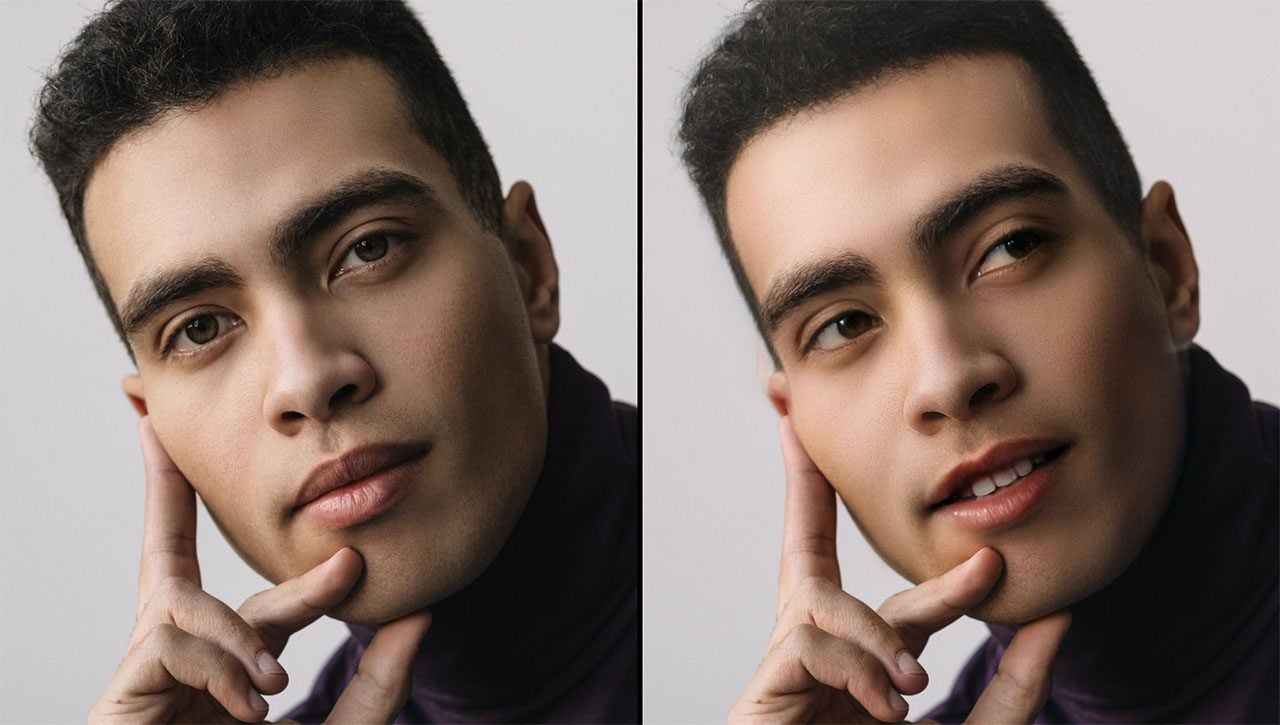
Adobe Photoshop’s Neural Filter to Enhance Portraits
3. Divi AI for Quick Website Graphics Enhancements
Ideal for web designers, Divi AI integrates directly with the Divi Builder in WordPress, streamlining the enhancement process for web graphics.

All you need to do is upload your image to your website’s Media Library (if it isn’t there already) and open any Divi Module with an image element. Then, add a photo to the module—here, we have an image inside an Image Module. Generating new images or making enhancements to the one in question is simple. Click the “AI” icon and then select “Upscale.” Choose to 2x or 4x the size of the original.
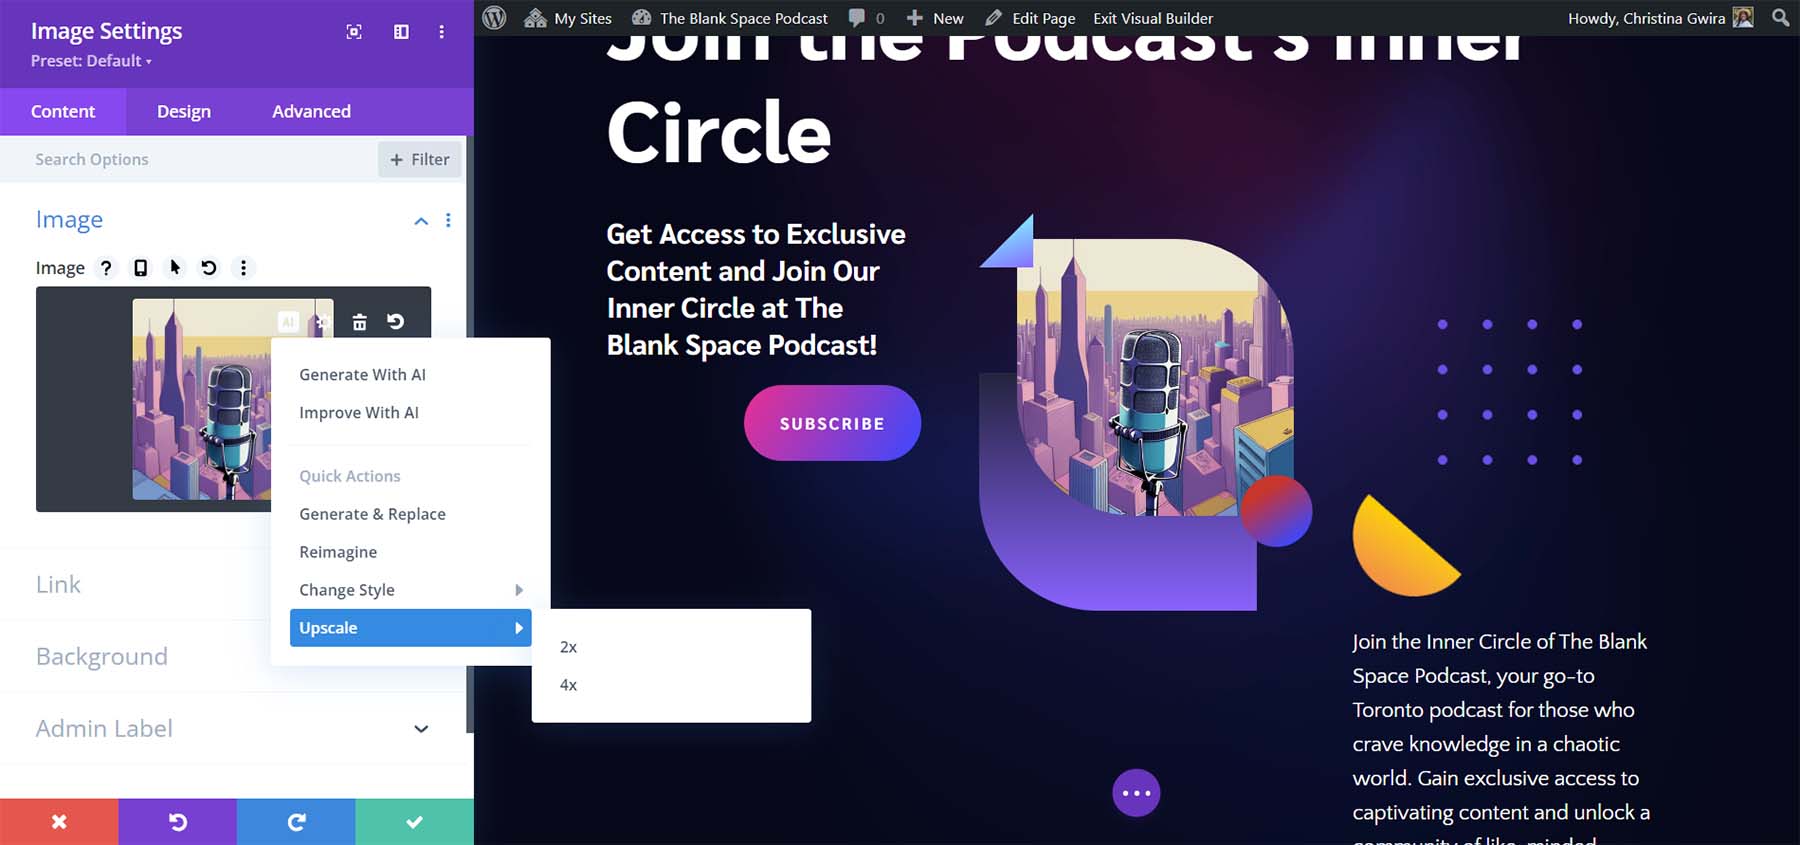
This will make a copy of the image and enhance/upscale the image. No advanced settings or configurations—just improved image quality.
Divi AI is a web designer’s best friend. Instead of fumbling through stock photo sites and Photoshop tutorials, designers can ask Divi AI to create the images they need right where they need them. And if a client hands over blurry or low-quality images, Divi AI is right there to make them more usable.
For a complete guide, check out how to upscale images in WordPress with Divi AI.
Did you know that Divi AI also builds complete web pages and writes code/text? If you didn’t, you need to look into it more to see how it can change the way you build websites.
Best AI Image Enhancers for Your Needs
With each tool offering unique strengths, selecting the right one depends on your specific needs. Here’s how you might determine exactly which AI Enhancer you need:
- Photographers: Topaz’s Gigapixel is an easy-to-use AI enhancer that might be the best choice for its simple desktop workflow. Just upload an image, set a few settings, and watch it scale (even in bulk).
- Graphic Designers: Adobe Photoshop’s AI tools provide the precision and versatility needed for high-quality visual content. Paired with Generative Fill and Photoshop’s traditional tools, it’s a powerhouse of a tool.
- Website Designers: Divi AI’s seamless integration with WordPress makes it ideal for enhancing images directly within your website’s workflow. Use the AI capabilities of the #1 WordPress theme to reduce open tabs and open applications.
Whether you’re trying to get rid of noise and artifacts in your images or simply trying to make them larger, AI is paving the way for better images. No matter what you intend to do with your images, AI is proving to be a necessary tool to get the most out of each of them.
Looking for more tools? Check out these AI image upscalers and our tutorial on how to create AI images.
Featured Image by Martial Red / shutterstock.com
The post How to Enhance Images with AI (2024 Guide) appeared first on Elegant Themes Blog.