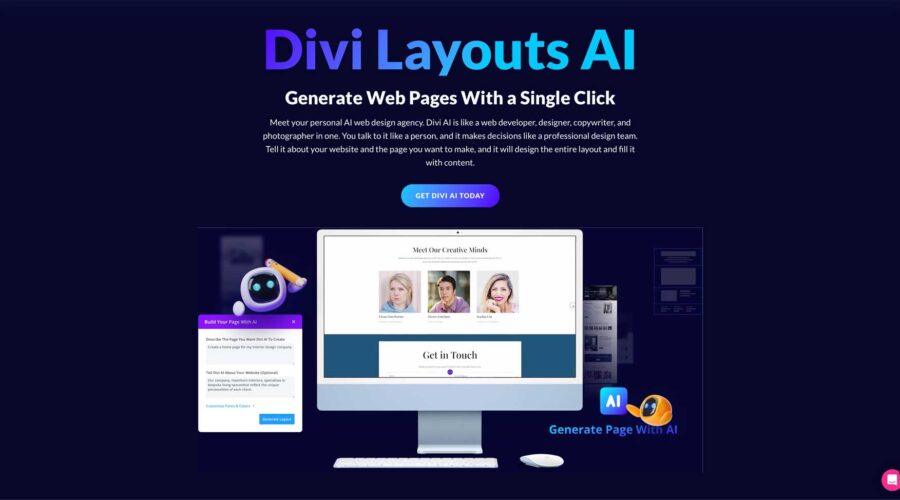
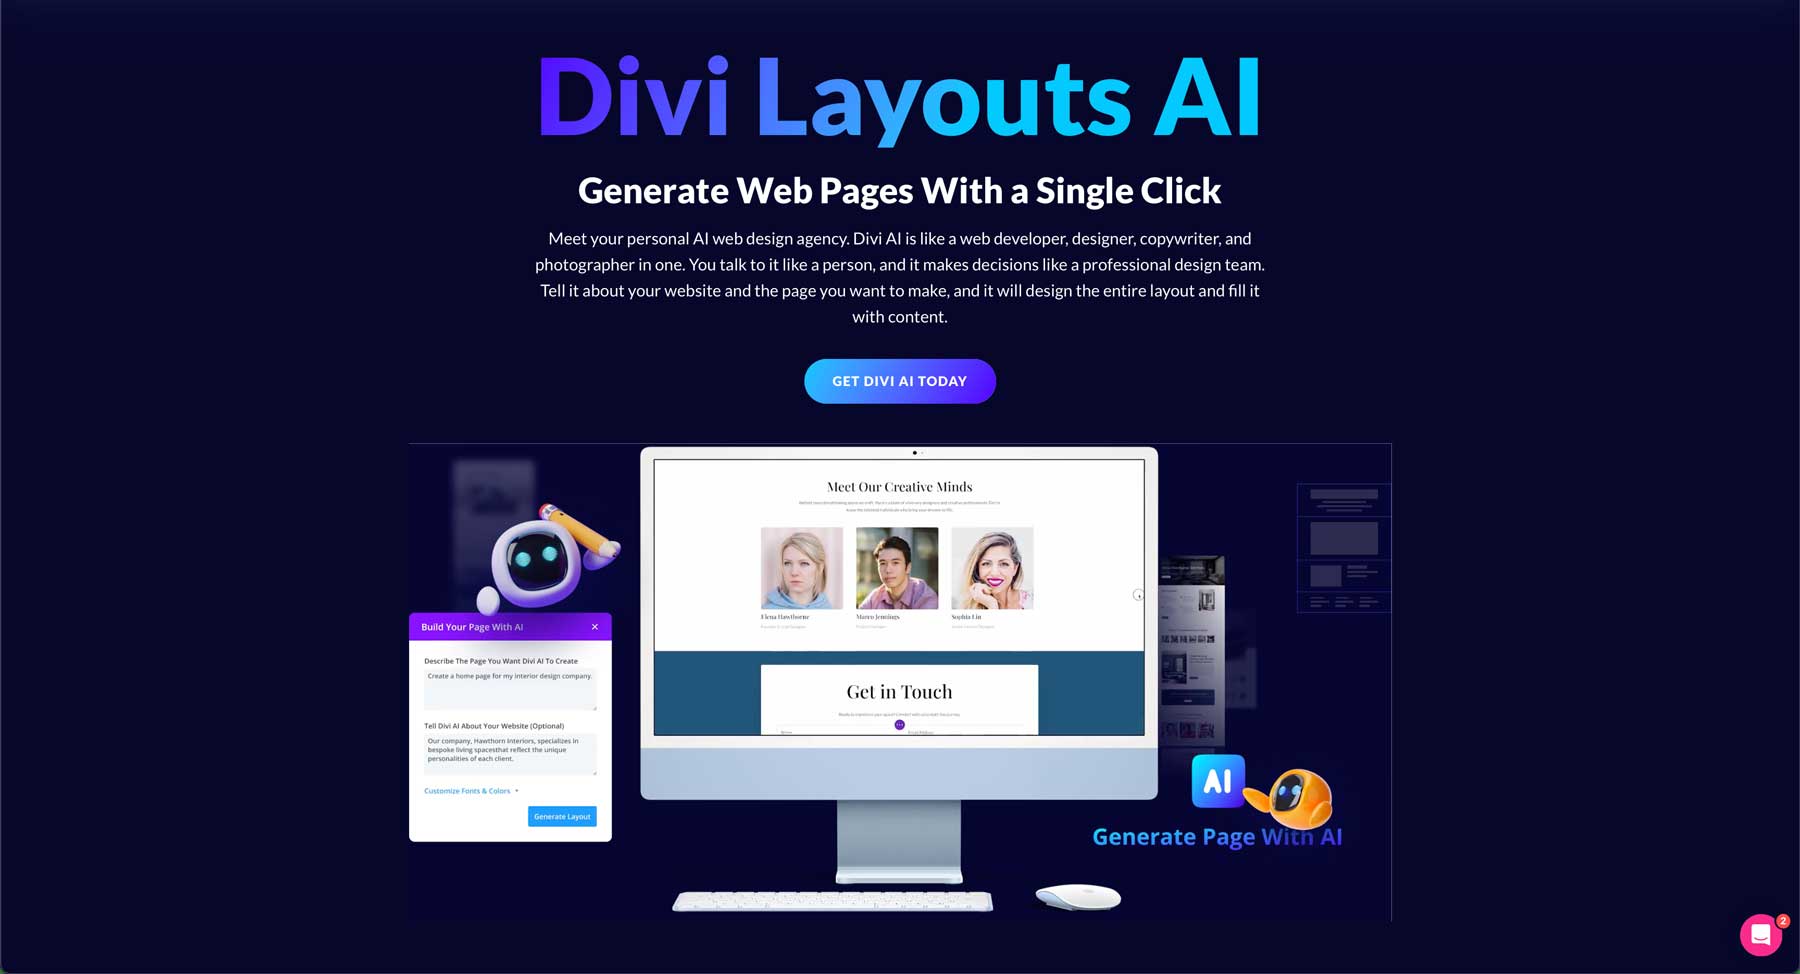
Before the artificial intelligence (AI) revolution started, building a webpage required coding skills or hiring an expensive developer. For some, that has typically been out of reach due to a lack of experience or budget. That has all changed thanks to new technology that allows you to build entire web pages with a text prompt.
This post will serve as a Divi Layouts AI guide that will show you the ins and outs of this exciting new product. We’ll explain what it does, how it works, and how to easily create gorgeous web pages.
Let’s dive in.
What Is Divi Layouts AI?
Divi Layouts AI is a new product we launched, and it works alongside our flagship WordPress theme, Divi. The power of Divi and Divi AI combined makes it one of the best AI website builders currently on the market. It can create entire pages, help you refine existing copy, generate images, and add code, all with a text prompt. Divi Layouts AI can also create pages that are aligned with your branding by allowing you to provide colors and fonts. That way, every page you generate will have a consistent look every time.
How Does Divi Layouts AI Work?
Divi Layouts AI is built directly into Divi’s framework and works seamlessly with the Visual Builder. Thanks to its deep understanding of Divi’s codebase, it can learn from your website. It understands how every line of code and design module works, making it easy to create beautiful layouts. Divi Layouts AI acts like a designer, developer, and photographer all rolled into one.
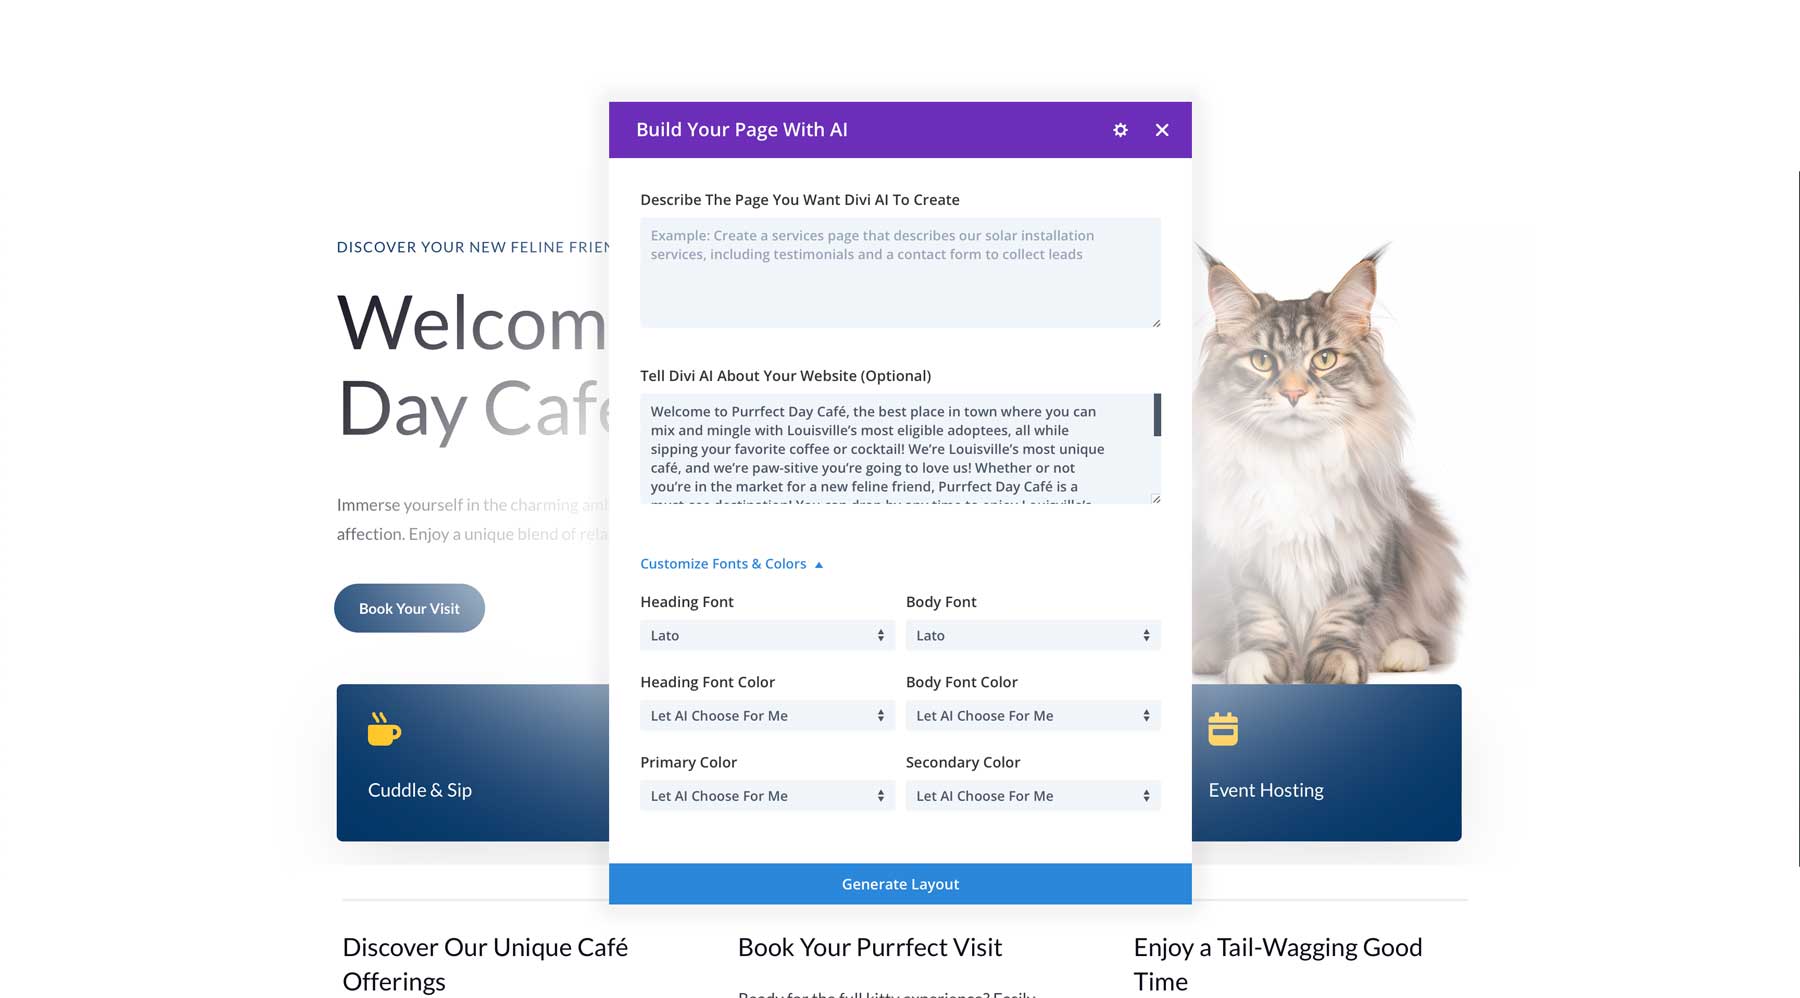
You provide a simple text prompt describing the type of page you need, and Divi Layouts AI will create an entire webpage, including text and images, complete with Divi’s design modules. It skips the initial stage of planning and building a web page structure, giving you a head start on the design process.
Creating a Complete Webpage With Divi Layouts AI
To get started with Divi Layouts AI, you must purchase an Elegant Themes membership along with Divi AI. If you are already a member, you can skip the subscription signup process and purchase Divi AI separately. It is available for $17.04 per month (if paying monthly) or $153 per year.
In this Divi Layouts AI guide, we’ll walk you through the steps needed to create a webpage with AI, from the initial creation of the page to refining the output.
Step 1: Purchasing Divi Layouts AI
Start by heading to the main Elegant Themes website and navigating to the Divi AI page. You can sign up for Divi + Divi AI or opt for Divi AI as a standalone product (if you’re already using Divi). Click the SIGN UP TODAY! button to proceed.
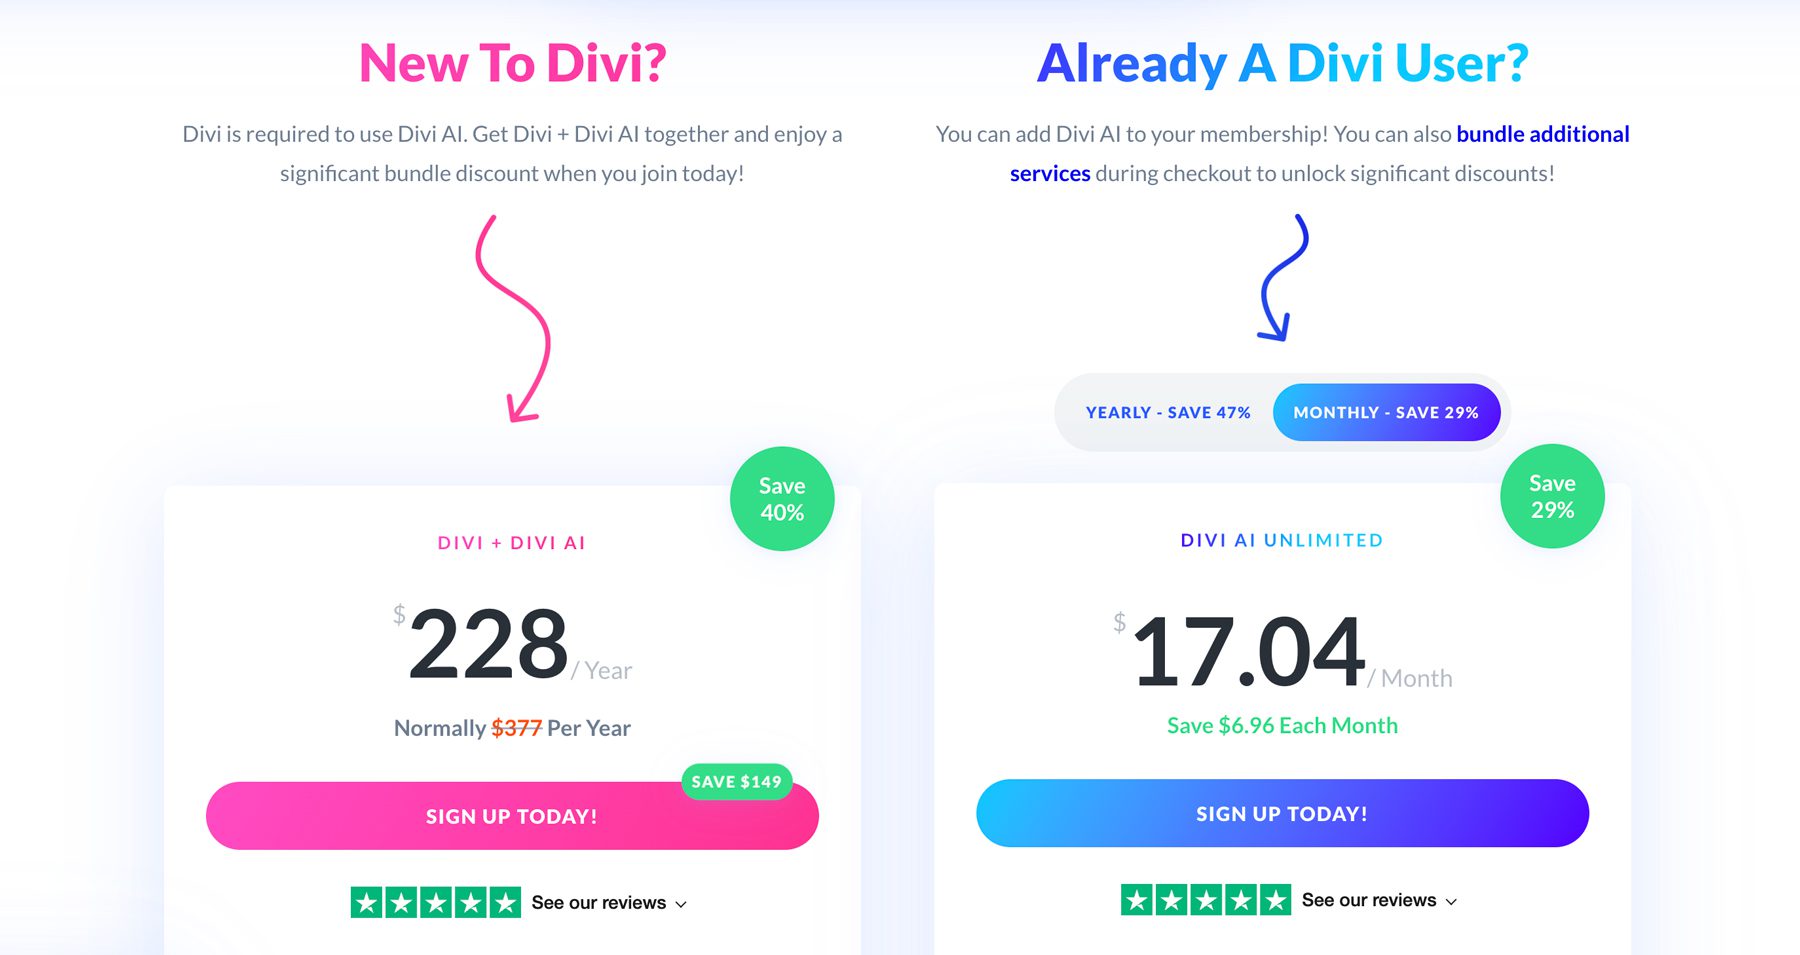
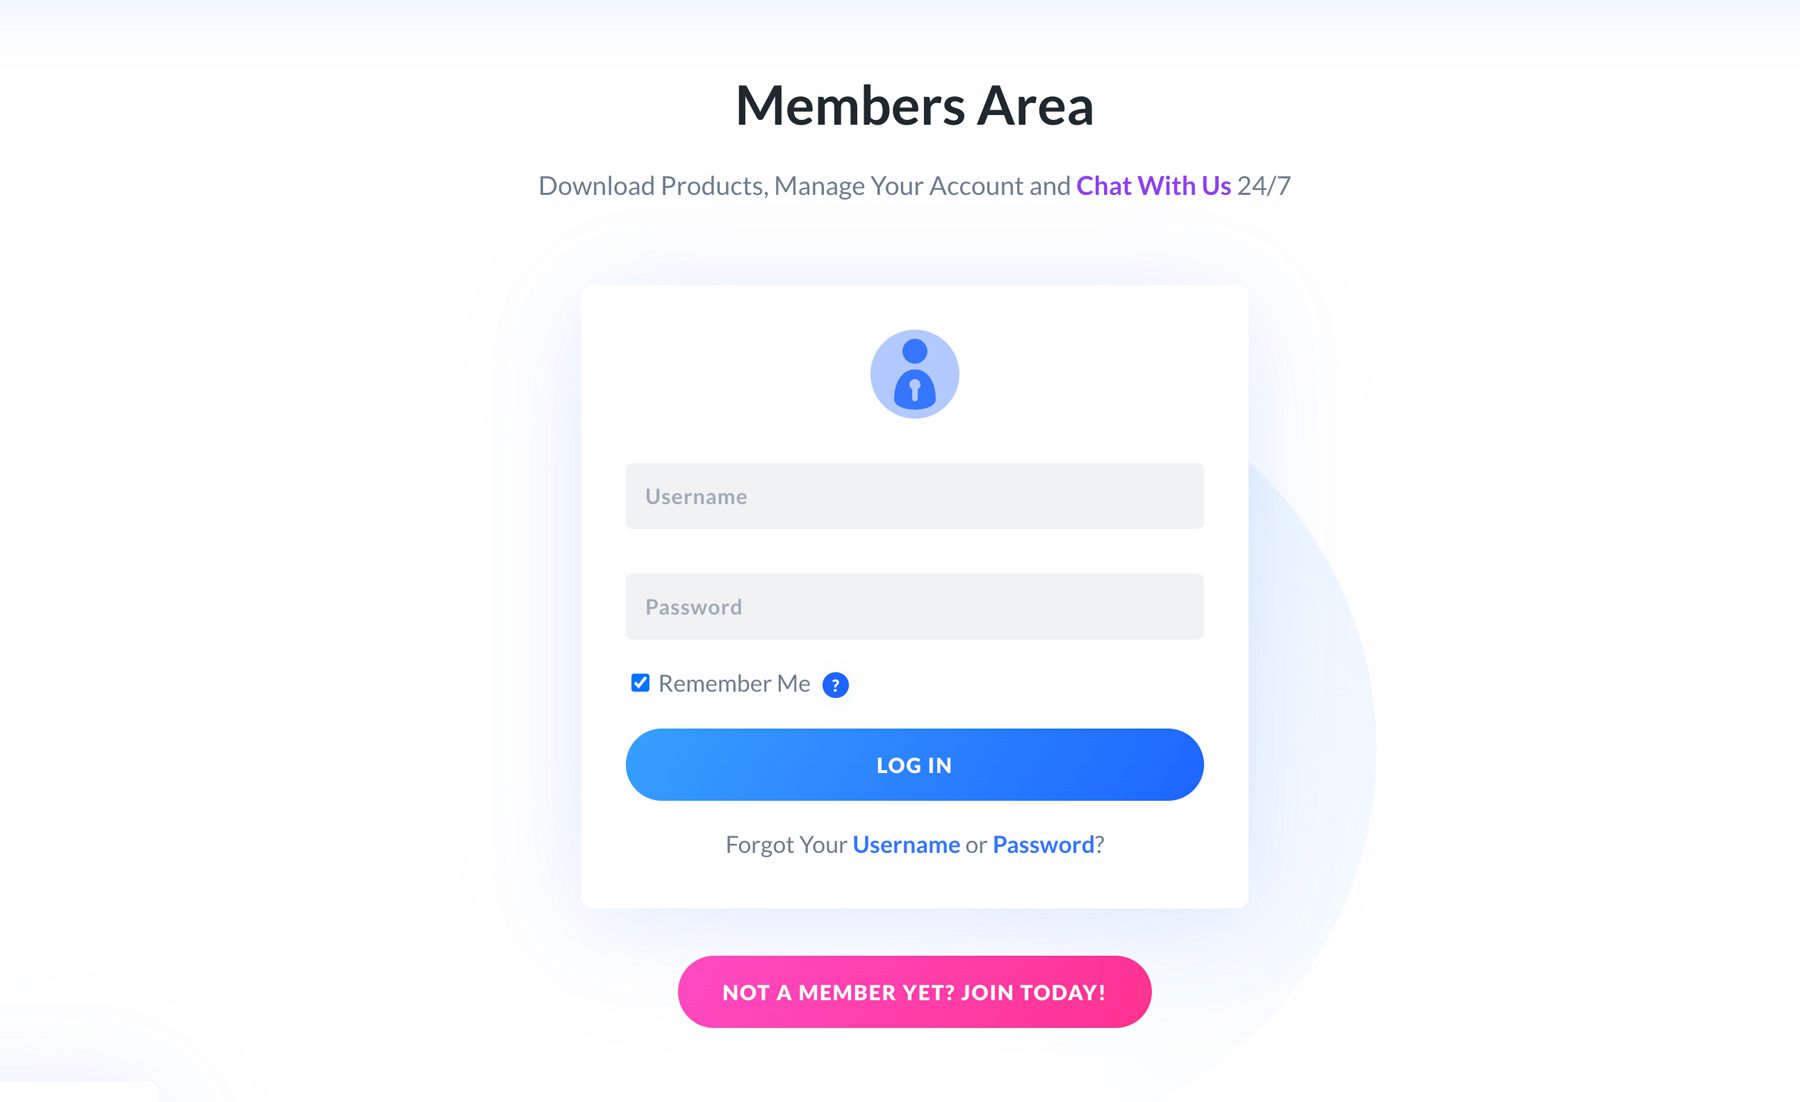
For this post, we’ll assume you’re already an Elegant Themes member. Upon clicking the signup button, you’ll be prompted to log in to your Elegant Themes account.
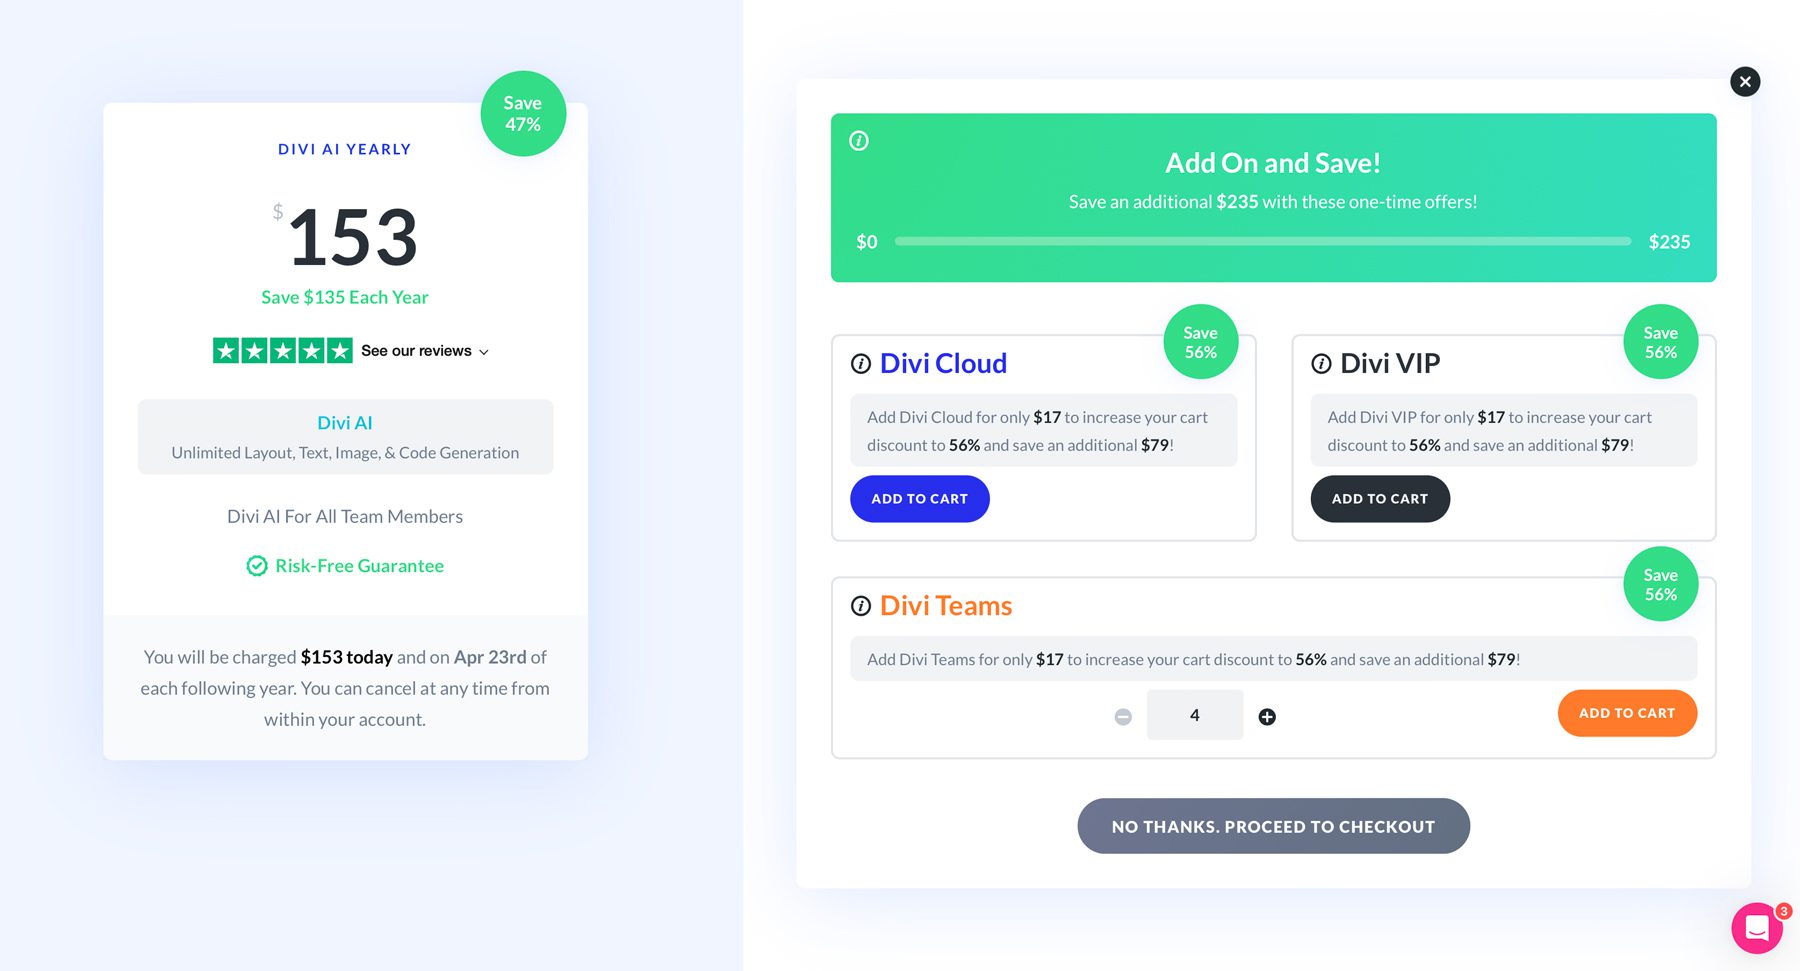
Once logged in, you’ll be redirected to the Divi AI signup page, where you can add additional services, such as Divi Cloud, Divi VIP, or Divi Teams. If proceeding without additional purchases, click NO THANKS, PROCEED TO CHECKOUT.
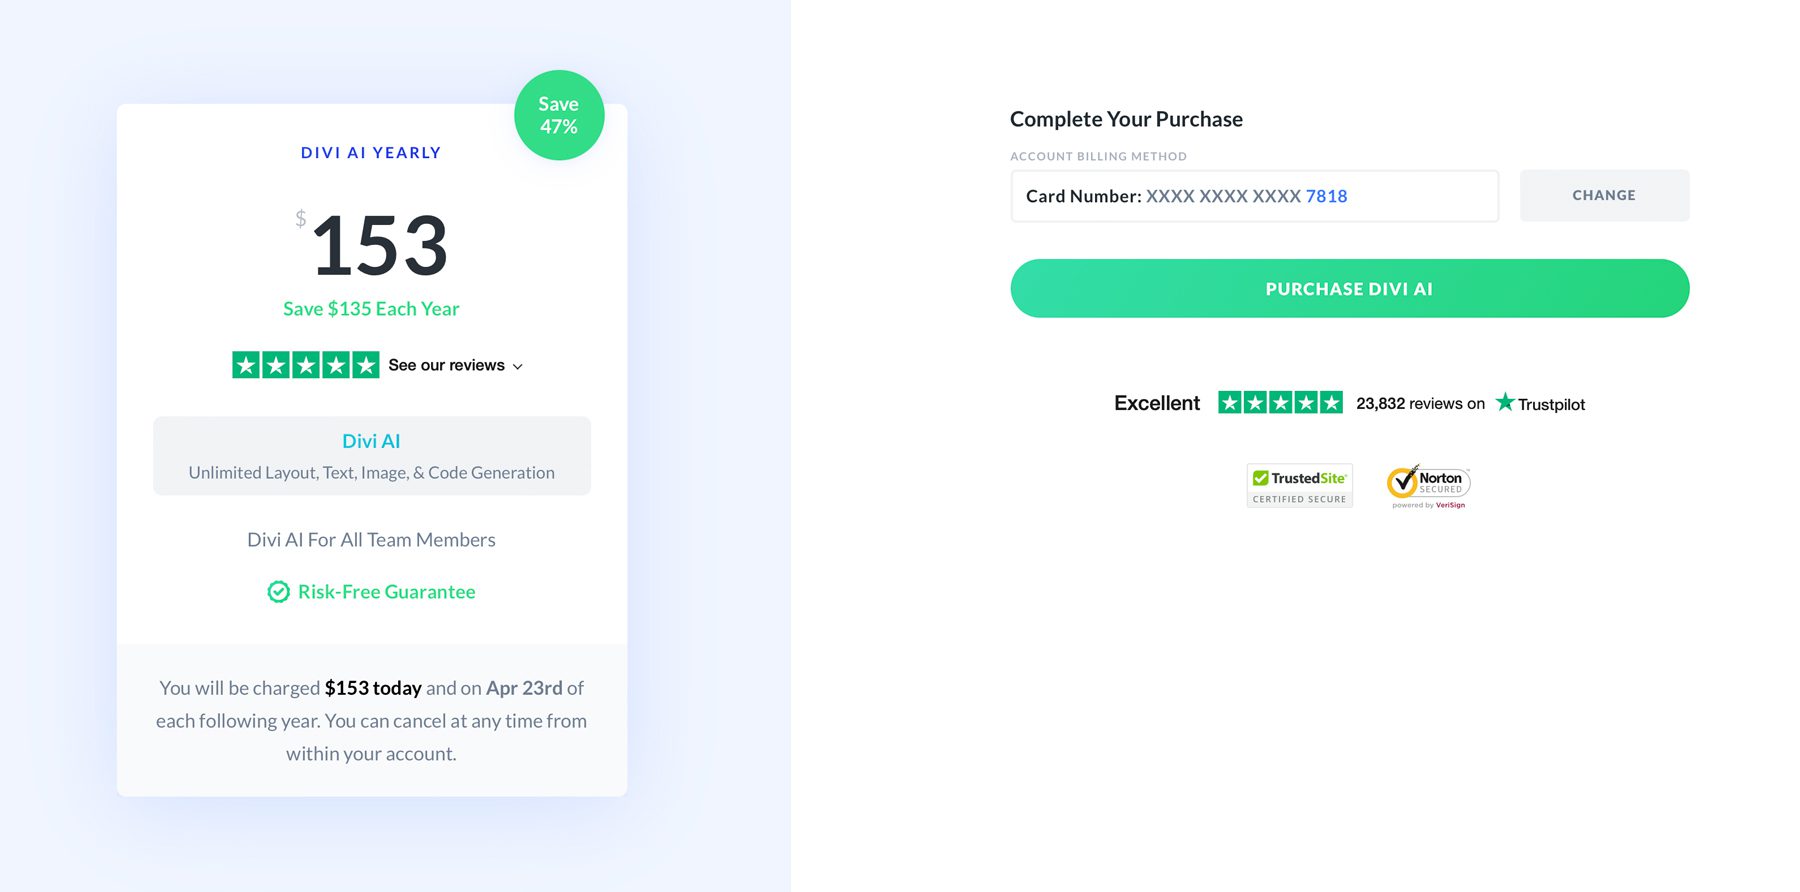
Complete your purchase by entering your credit card information, or if you have a card on file, simply click the PURCHASE DIVI AI button.
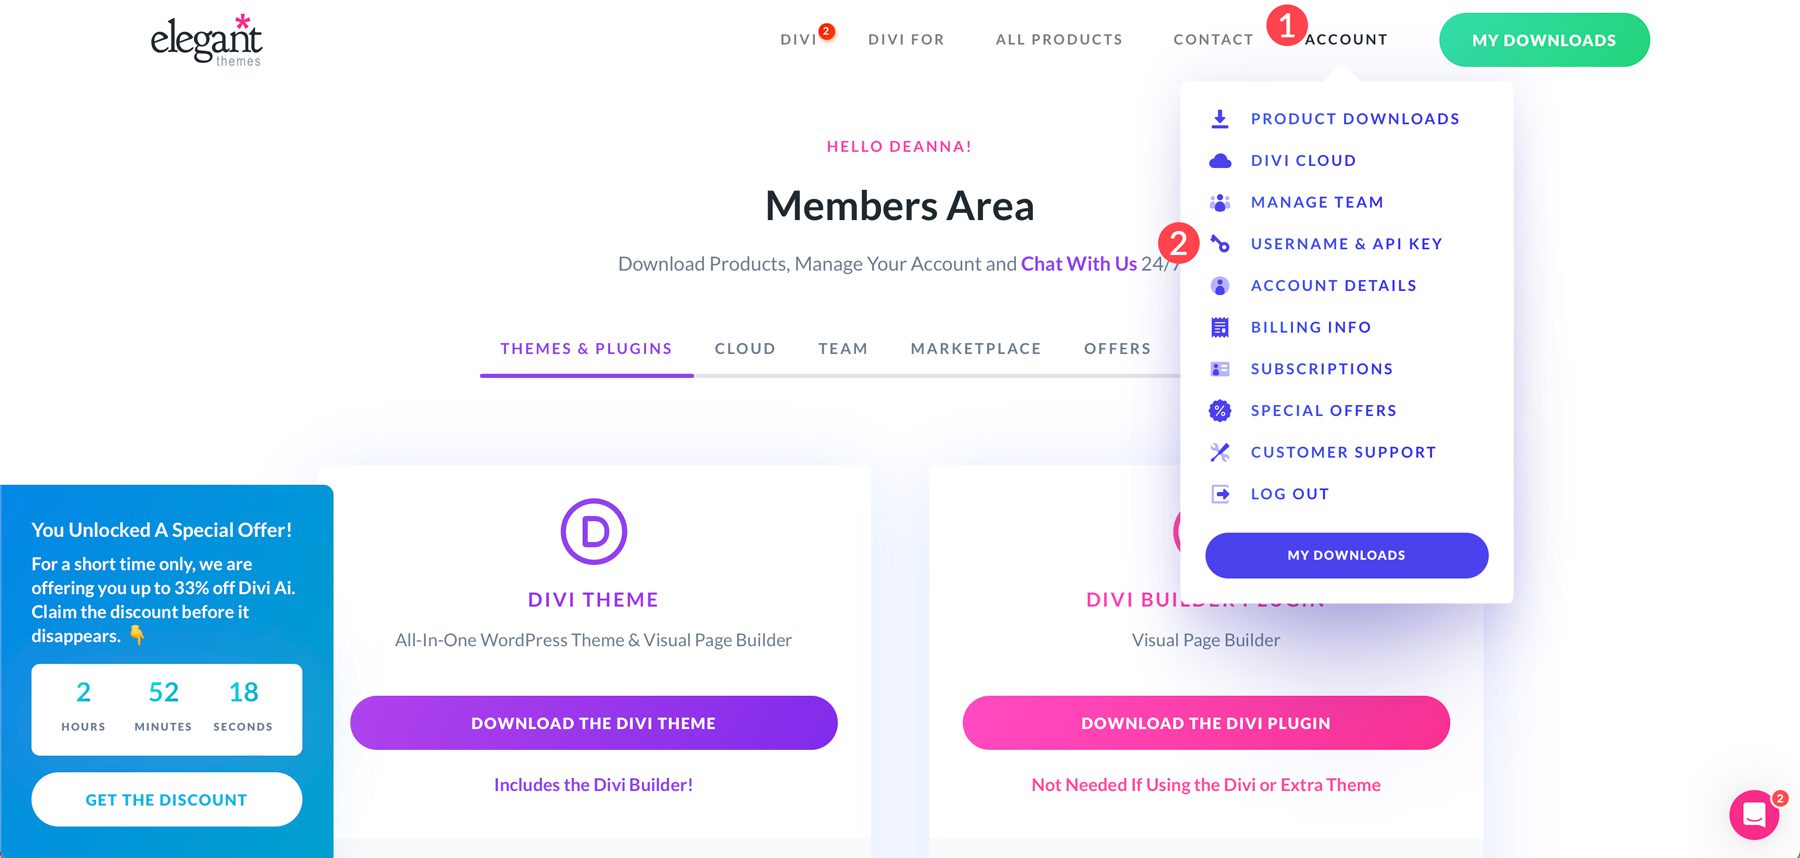
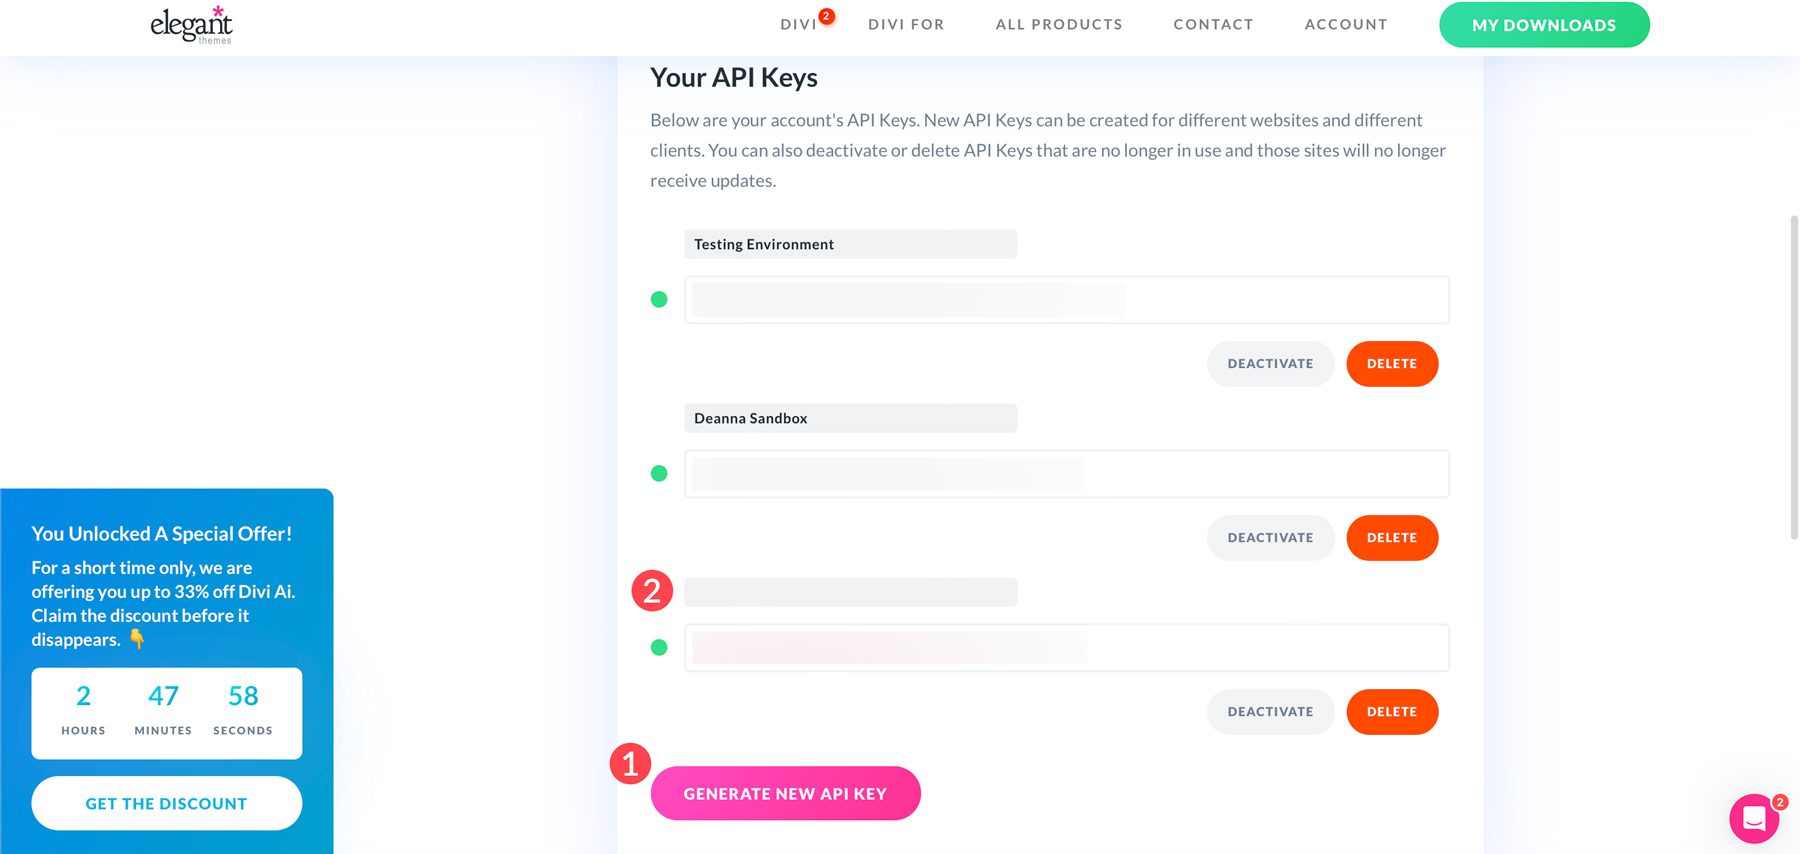
Once you’ve made your purchase, you can view your Divi AI subscription information by clicking Account > Subscriptions. You’ll need an API key to use Divi AI in your WordPress installation. Generating a unique key for each Divi install is a good idea. To do this, click the Account tab and navigate to Username & API Key.
When the page refreshes, scroll down and click the Generate New API Key button (1). Once you generate the key, it’s beneficial to provide a label for it (2). This practice is particularly useful if you intend to build multiple Divi websites.
Click on the key to copy it. You’ll need to activate Divi AI in the Divi Theme Options panel. Head to your WordPress install, log in, and navigate to Divi > Theme Options > Updates.
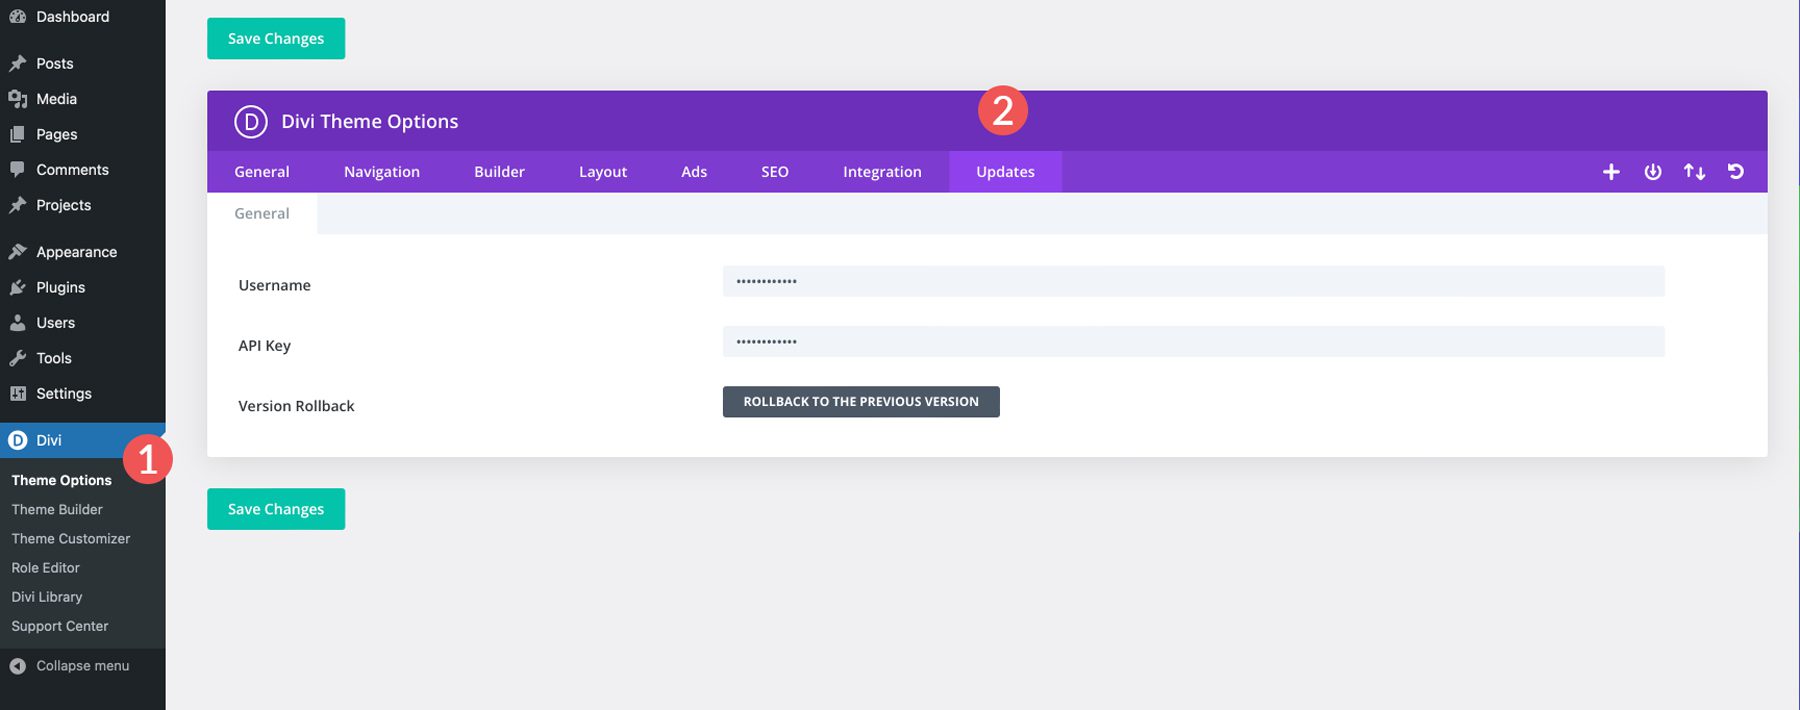
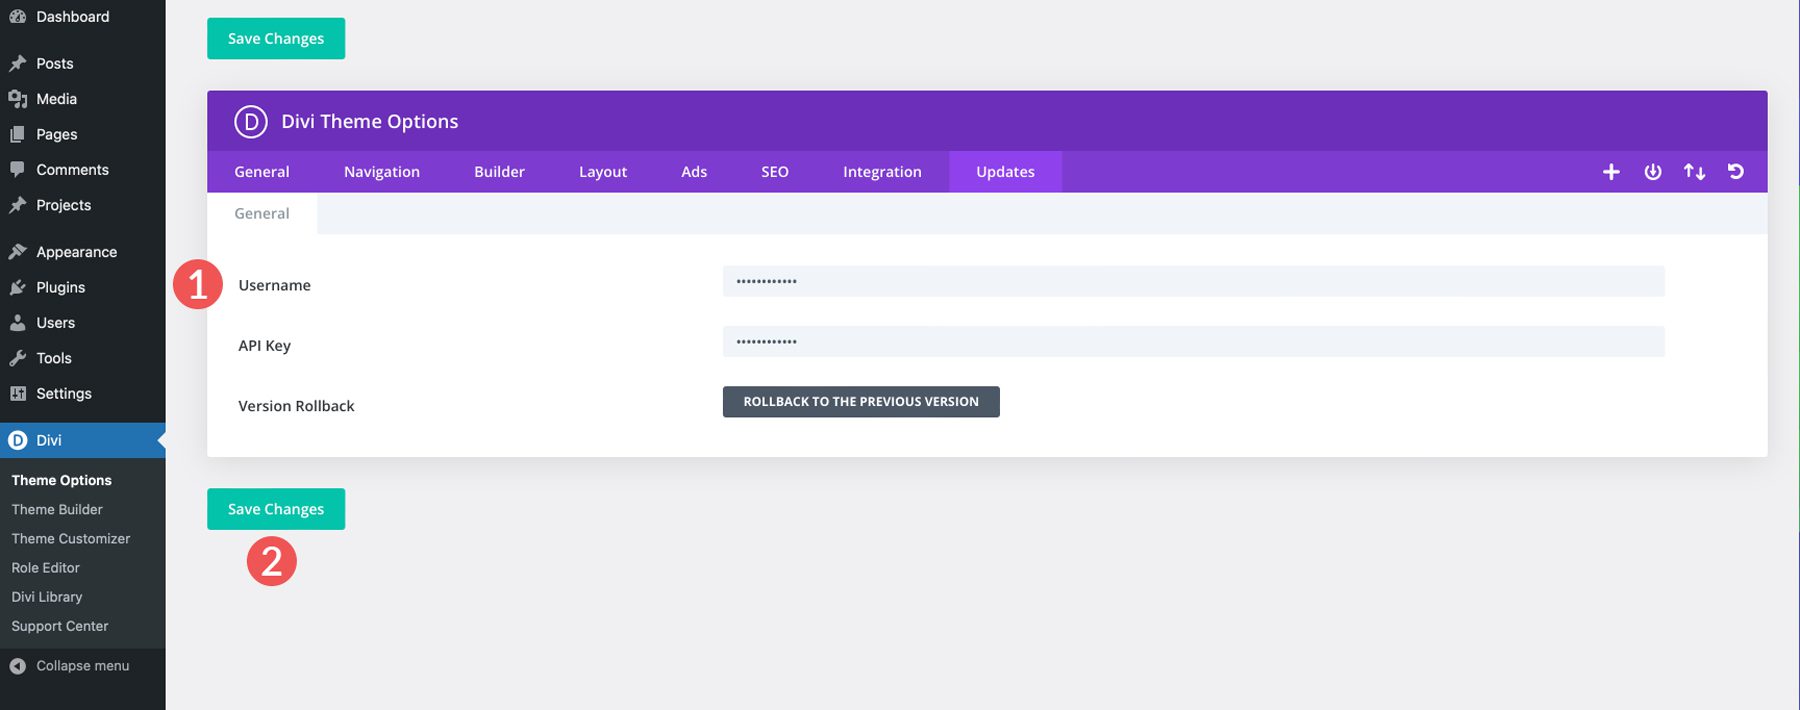
Enter your username and the API Key you copied, and click the Save Changes button to save it.
Step 2: Create a New Page
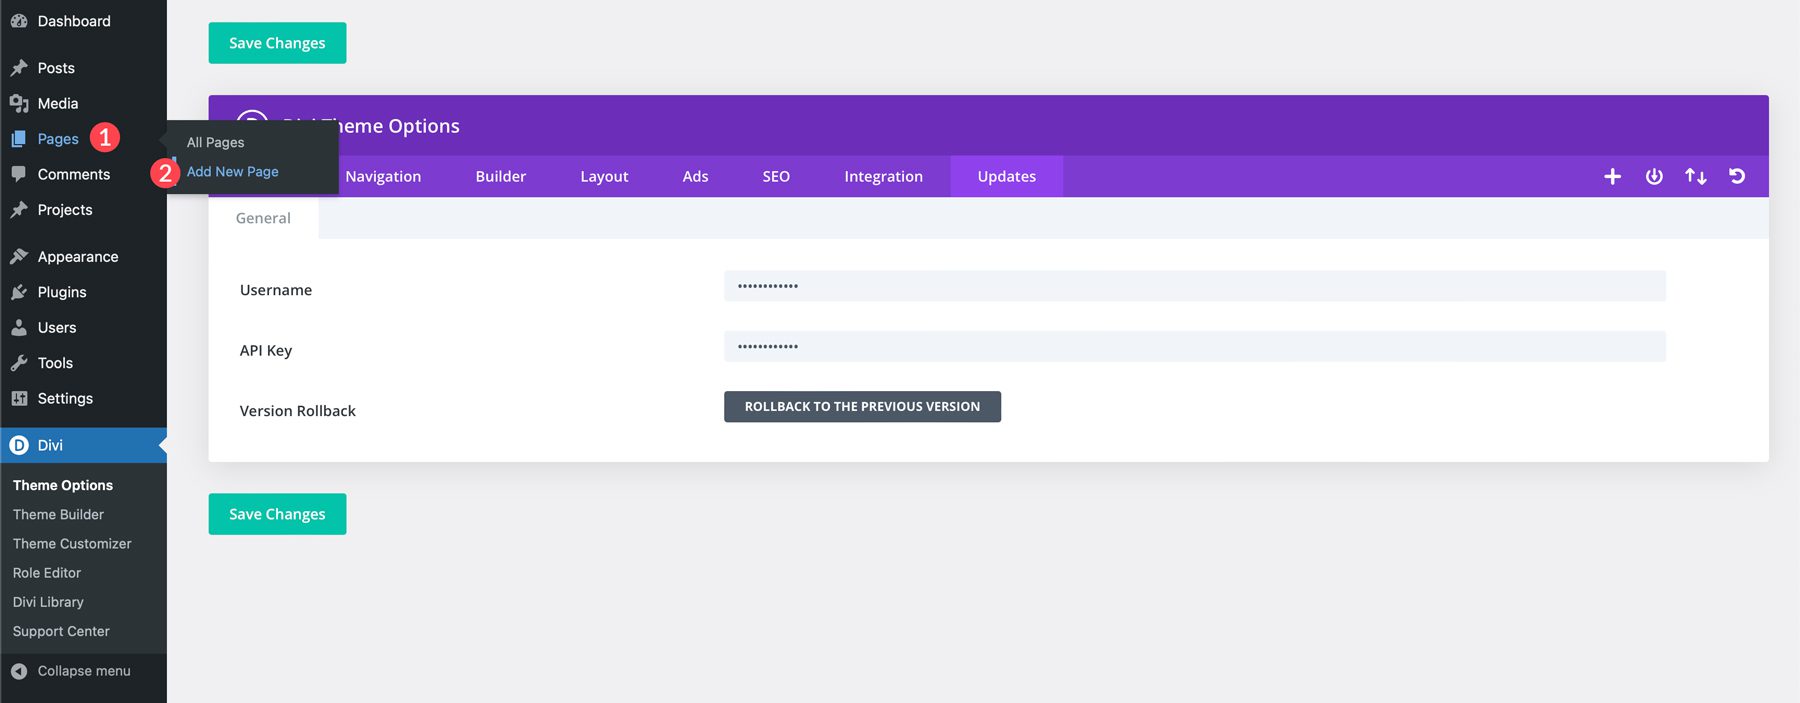
Now that you’ve added an API key, you can use Divi AI to build a webpage. Start by adding a new page to your WordPress website. Navigate to Pages > Add New Page.
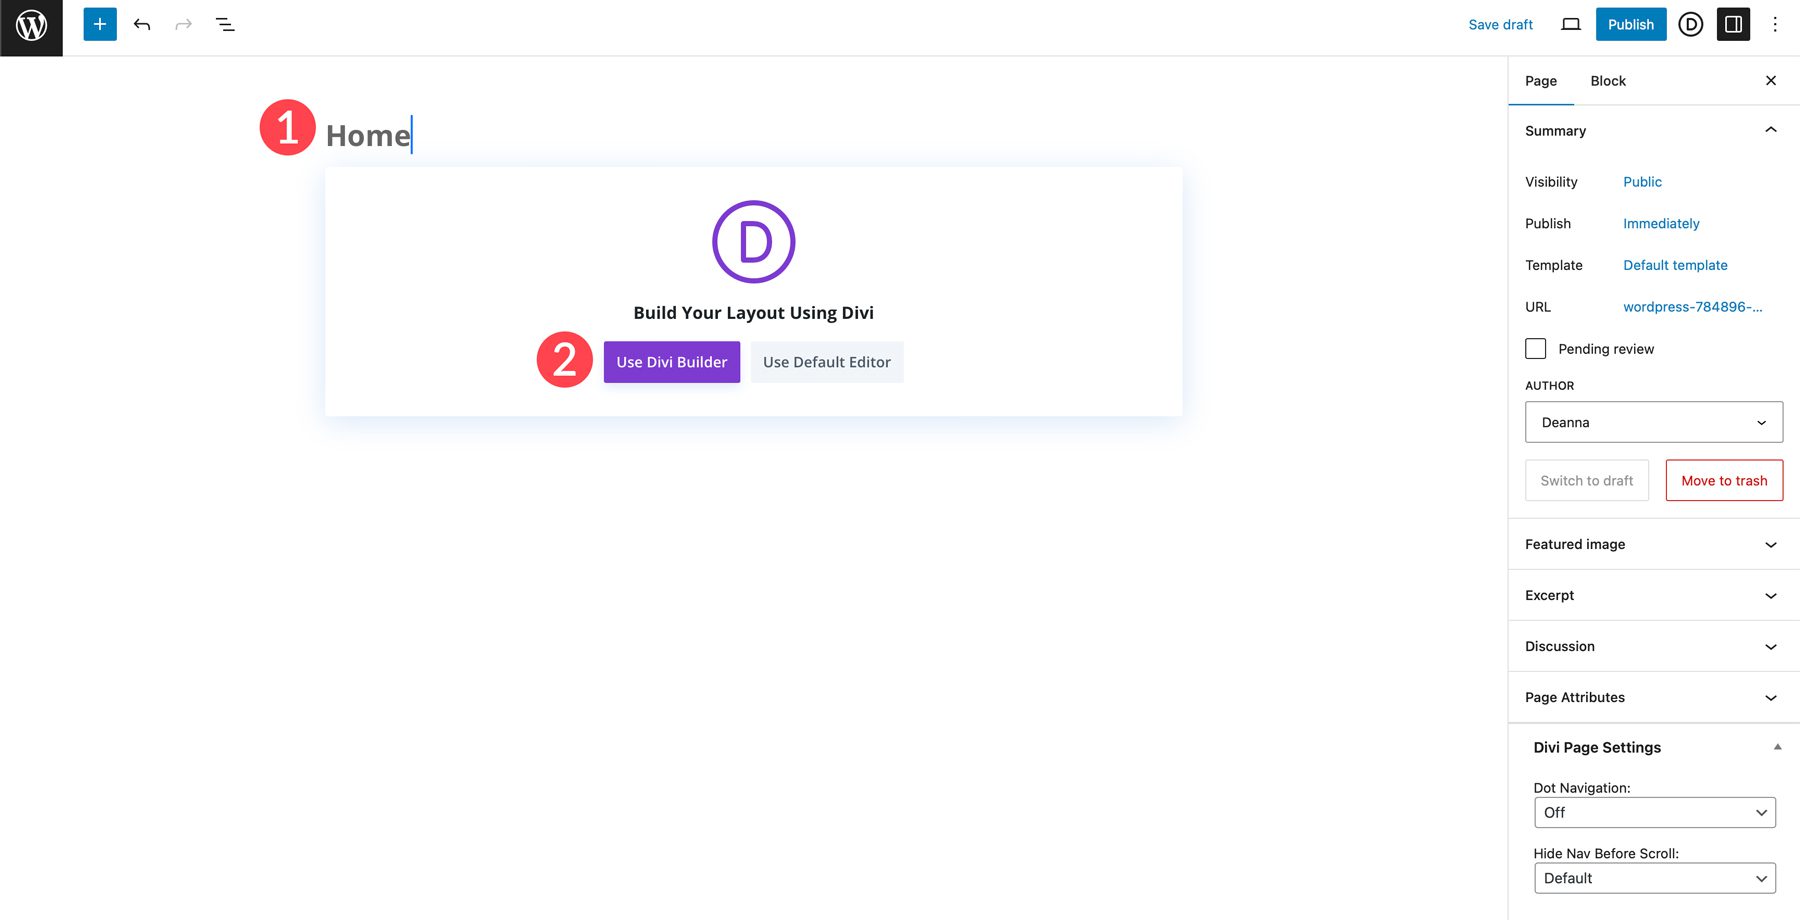
When the page refreshes, give your page a title (1) and click the Use Divi Builder button (2).
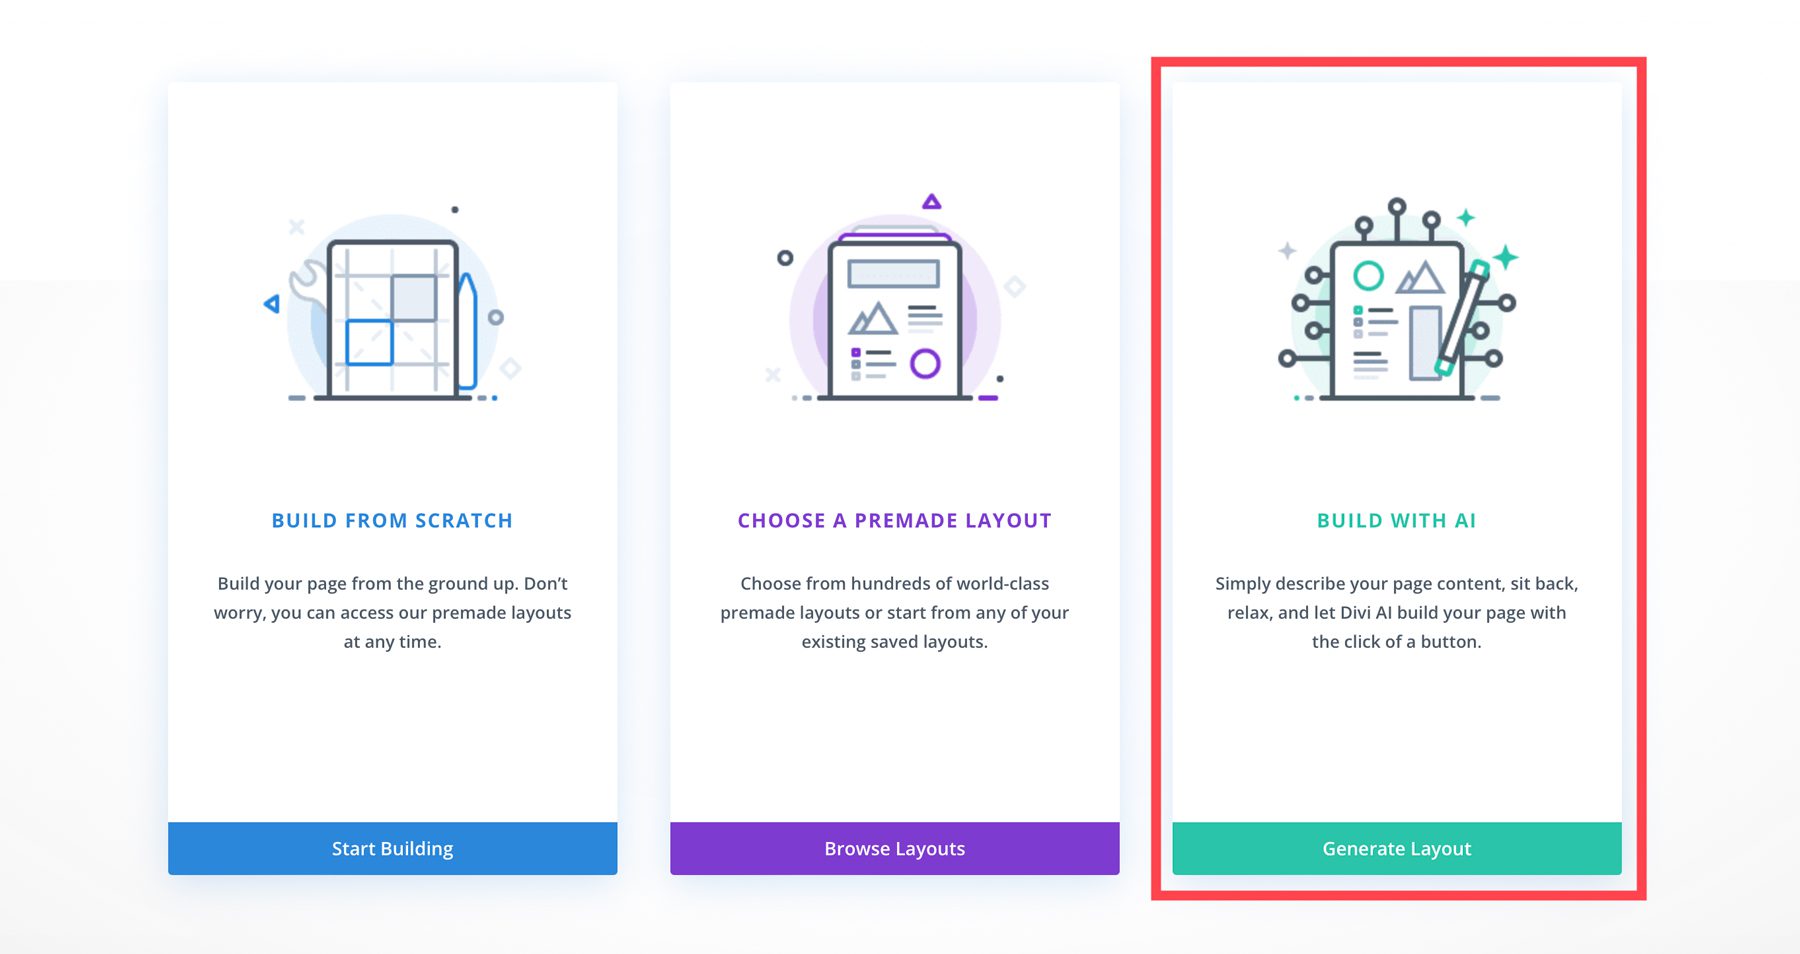
You’ll have three options to choose from. You can build a page from scratch, choose a premade layout, or build with AI. Choose Build with AI and click Generate Layout.
Step 3: Providing Divi Layouts AI With Information To Generate A Webpage
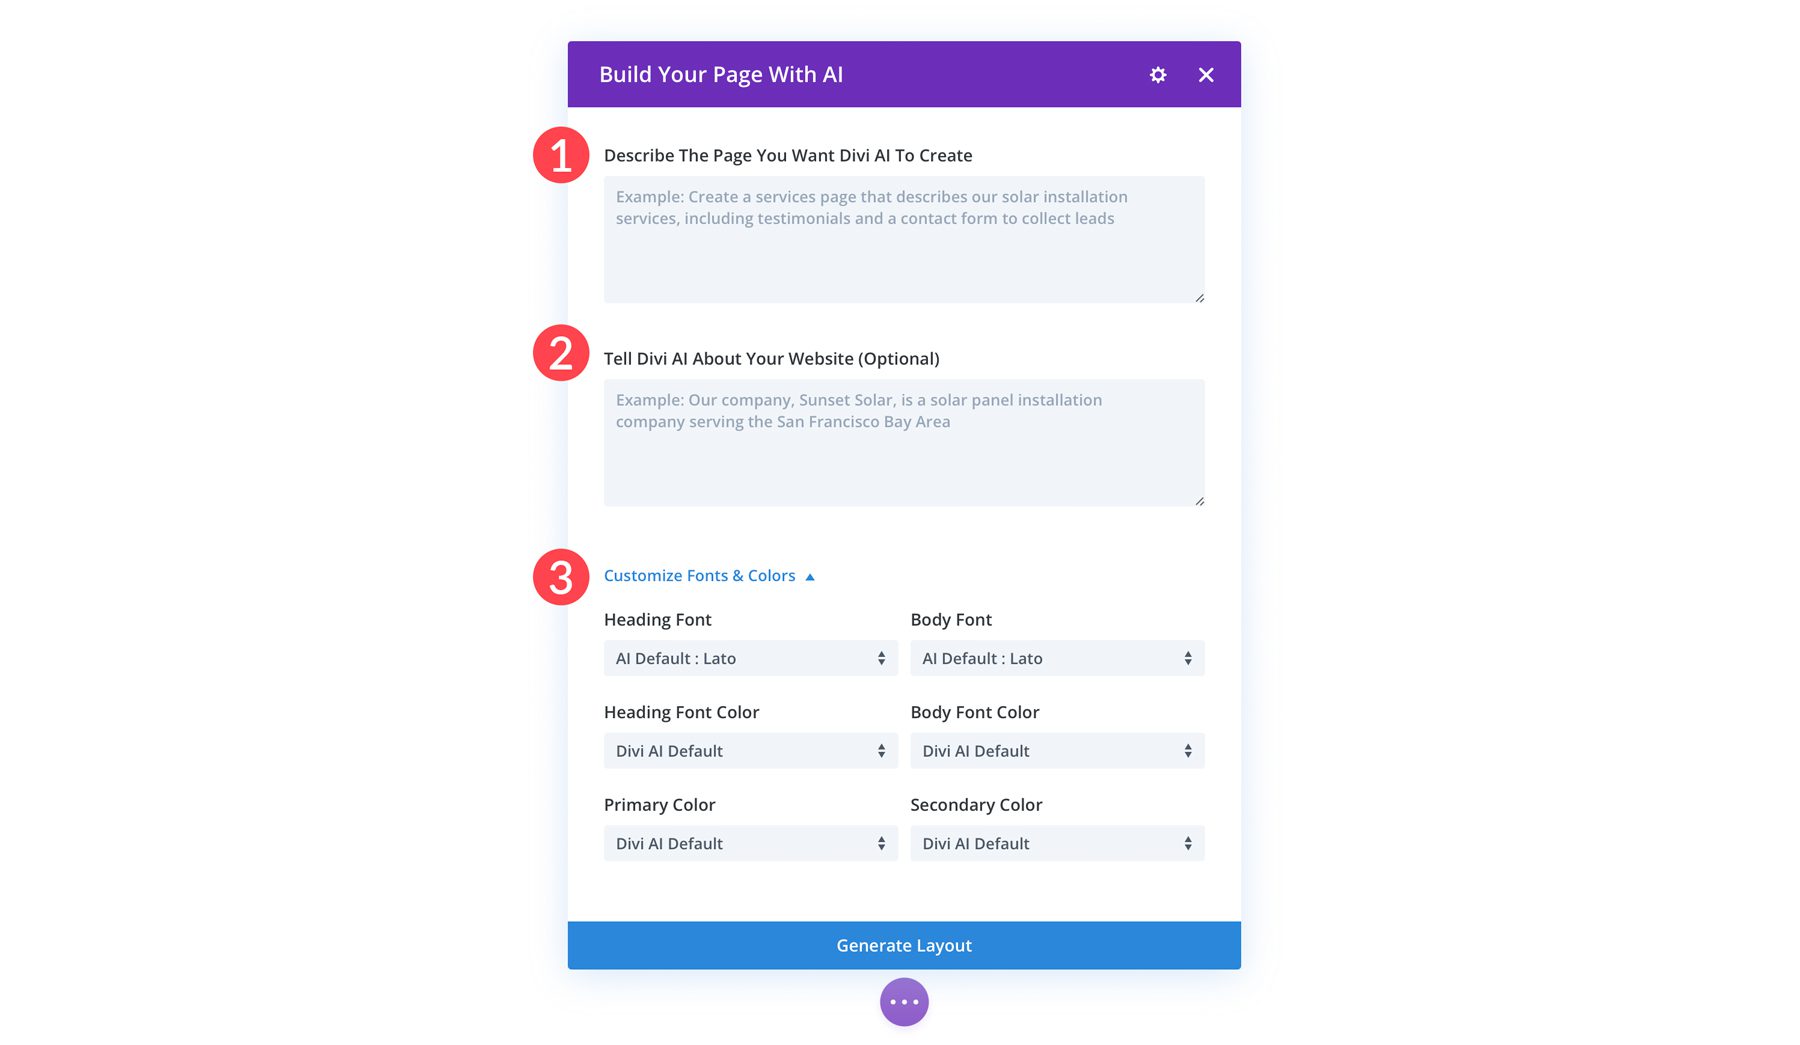
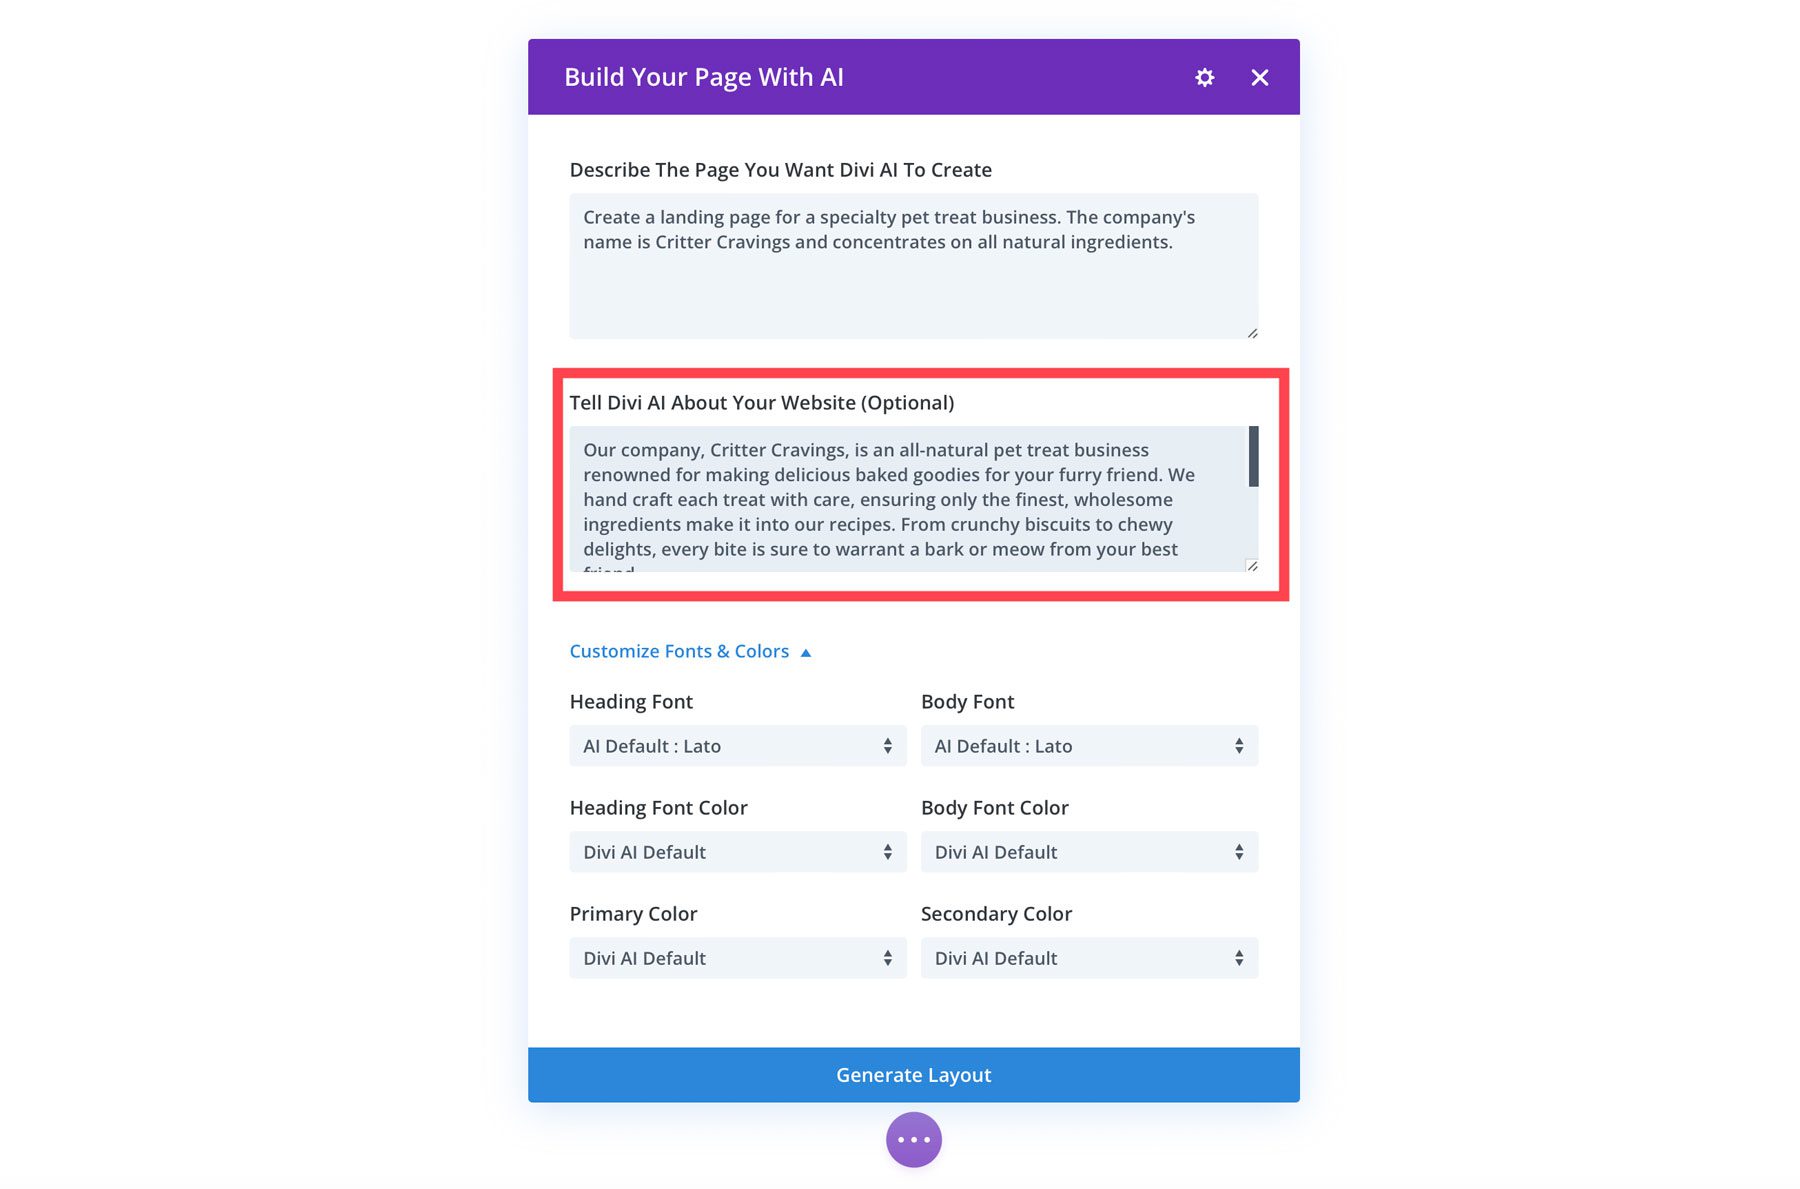
We’ll walk you through the interface in this section of our Divi Layouts AI guide. When the page first loads, a dialog box will appear. This is where you’ll describe the type of page you want to create (1). Although optional, providing Divi Layouts AI with as much context as possible is a good idea. You can enter your mission statement and value proposition or simply write a short description about what your website is for (2). You can also specify fonts and colors to match your company branding (3).
When instructing Divi Layouts AI to generate a page, start by describing your product or service and target audience. Doing so gives Divi a better idea of what to generate. You can even task it with creating compelling headlines that are SEO-optimized. Other things to consider are mentioning your ideal customer, describing any key elements you’d like to include, and mentioning any specific styles you’re fond of.
To make things easier for you, here’s a short list of tips to follow to craft the perfect prompt:
- Clarity is Key: Be clear and concise when writing your prompt. The more specific you are, the better Divi Layouts AI can understand the look you’re going for.
- Provide Context: Consider including information in the optional Tell Divi AI About Your Website field. Give as much background information about your product or service and target audience as possible.
- Use Keywords: Include relevant keywords that describe your business or service. This not only helps Divi AI write content but ensures your page is optimized for SEO.
- Refine and Regenerate: One of the best things about Divi AI is that you can generate as many layouts as you’d like. If your first attempt isn’t what you want, try again! The possibilities are endless.
Step 4: Using Divi Layouts AI to Build Your Page
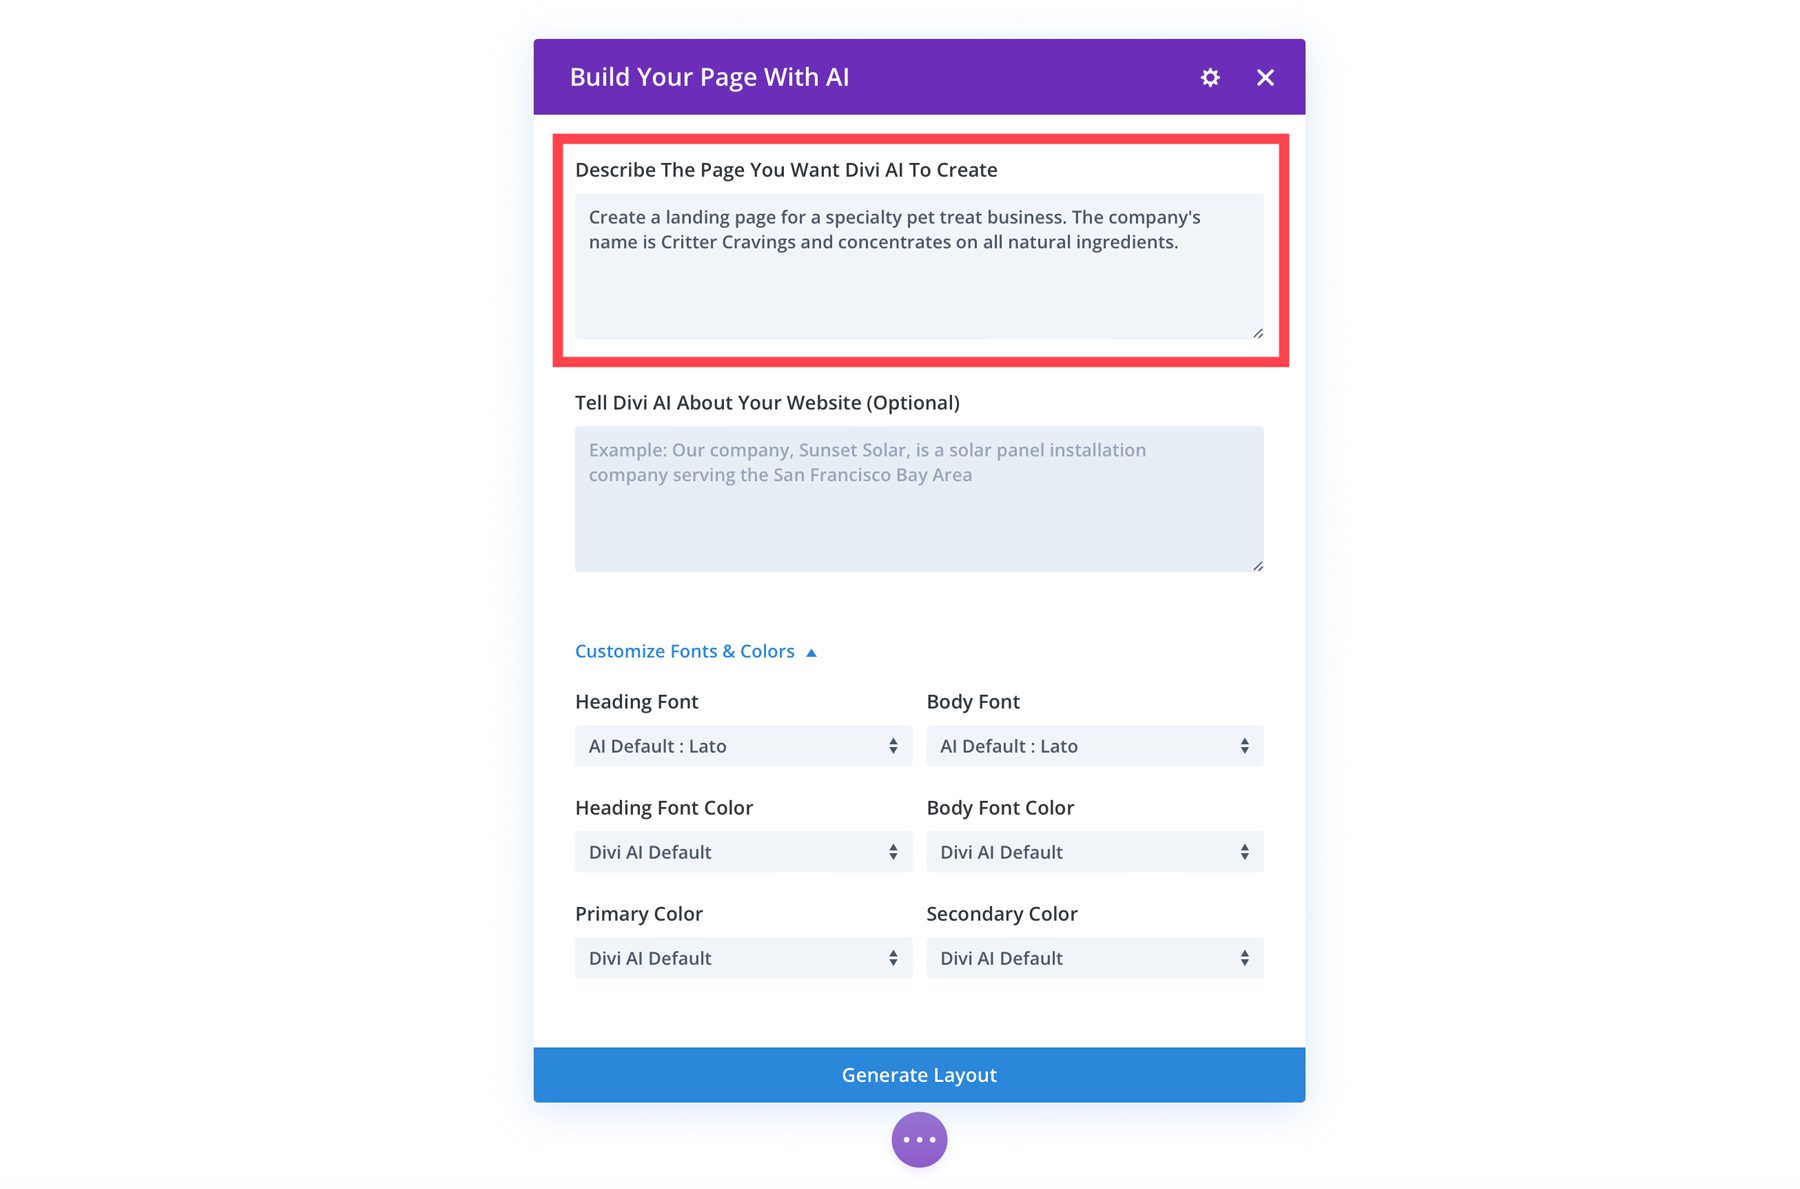
Now that you understand what Divi Layouts AI is and what it can do, the next step is to start the page generation process. For this tutorial, we’ll ask Divi to generate a layout for a pet treat business. In the first field, enter the following text: Create a landing page for a specialty pet treat business. The company’s name is Critter Cravings, and it concentrates on all-natural ingredients.
We’ll add a mission statement to the Tell Divi AI About Your Website field to give Divi AI the most information possible. Enter the following text:
Our company, Critter Cravings, is an all-natural pet treat business renowned for making delicious baked goodies for your furry friend. We handcraft each treat carefully, ensuring only the finest, wholesome ingredients make it into our recipes. From crunchy biscuits to chewy delights, every bite will surely warrant a bark or meow from your best friend.
Our treats are free of artificial additives, preservatives, and fillers, making them a wholesome choice for pets of all shapes and sizes. At Critter Cravings, we believe every pet deserves a little indulgence, and we take pride in providing treats that owners can trust and that pets will adore.
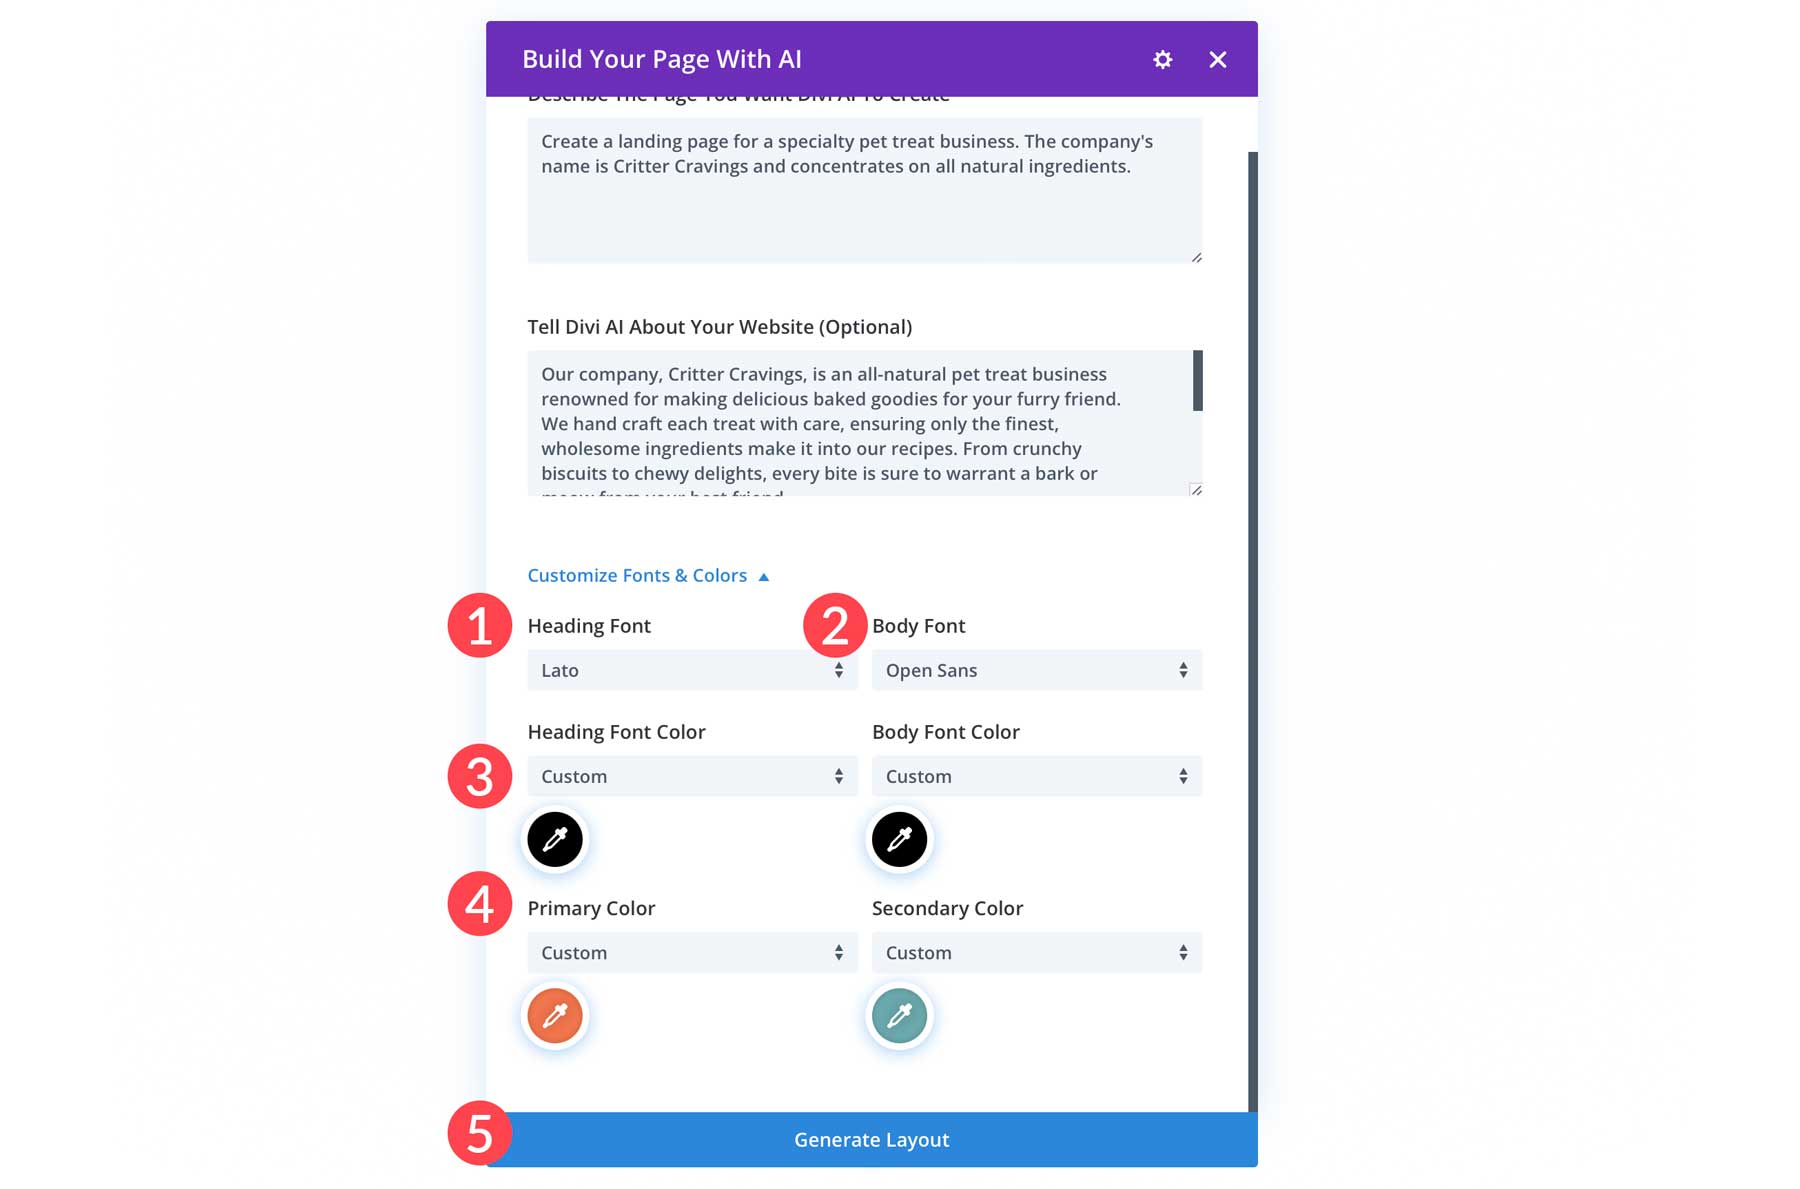
Under Customize Fonts & Colors, you can specify the fonts and colors you’d like to use in your webpage. We’ll select Lato for the headline font (1) and Open Sans for the body font (2). For colors, select custom from the dropdown list (3). Use #000000 for the heading and body fonts, and select #F3764D and #6baaae for the primary and secondary colors (4). Finally, click Generate Layout to create your webpage (5).
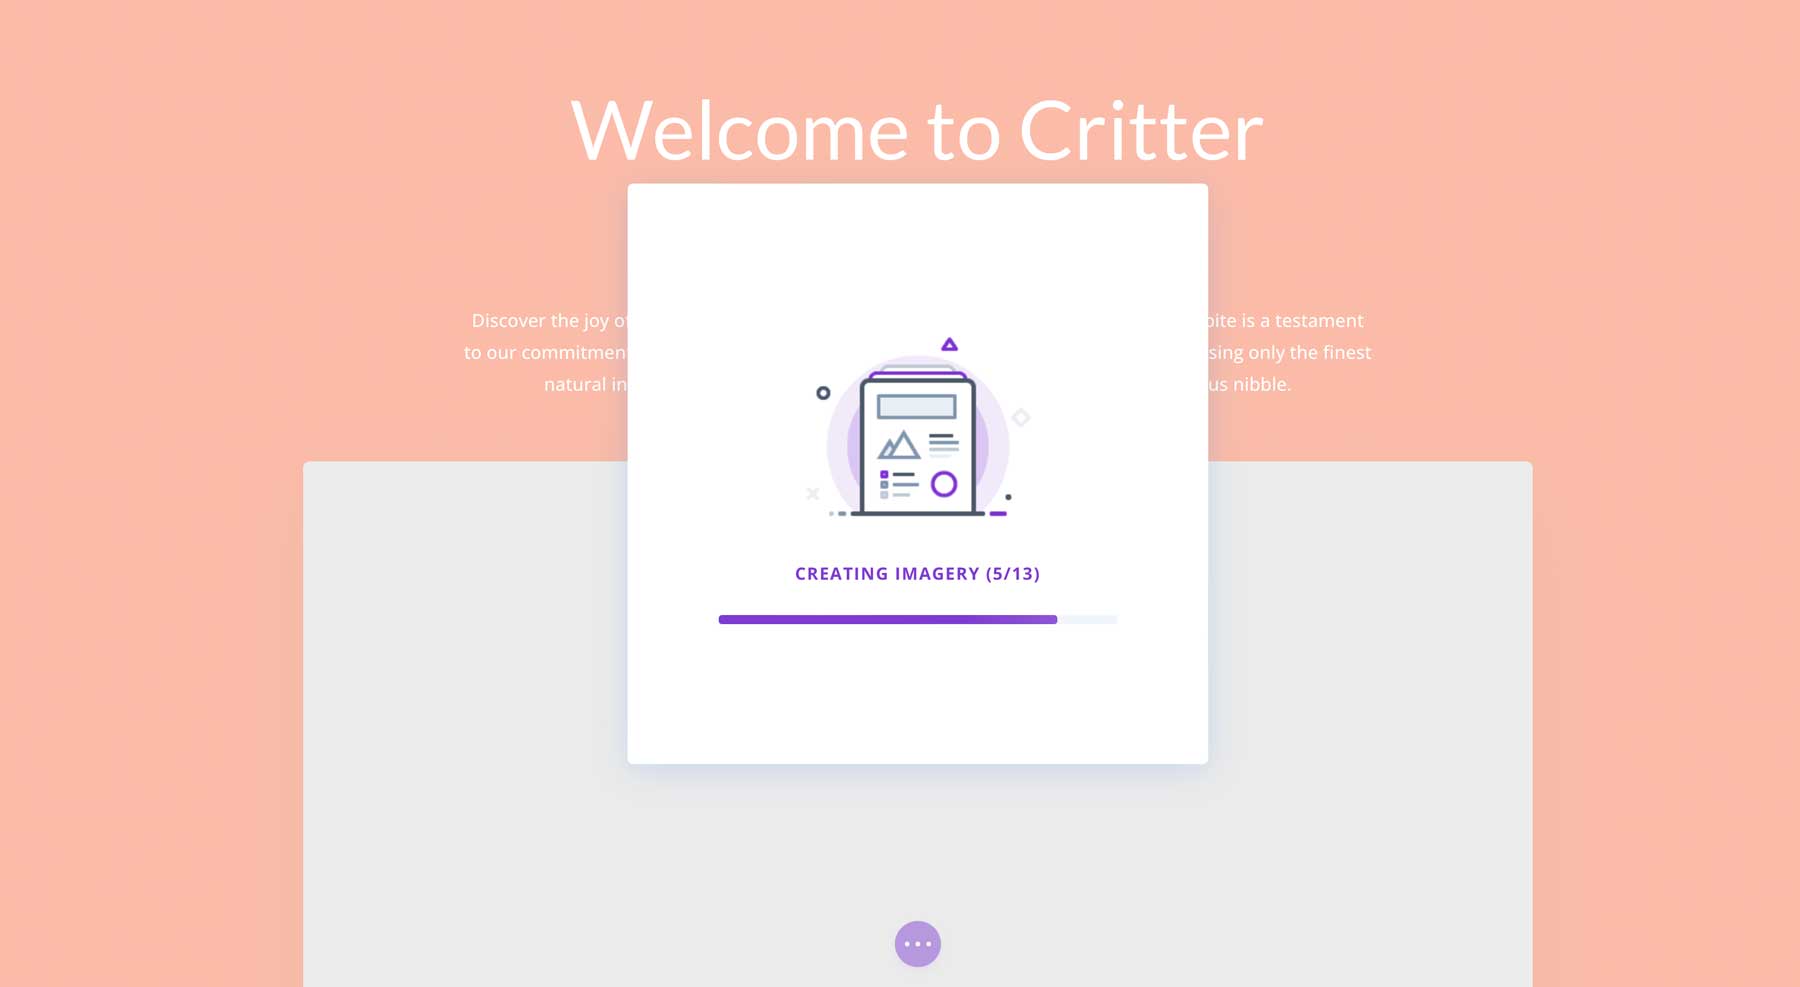
Divi AI will create the wireframe upon clicking generate, apply your fonts and colors, and generate text and images.
Step 5: Fine-Tuning and Customization
The next step in our Divi Layouts AI guide will show you how to refine your layout. Divi AI does a great job crafting beautiful pages, but sometimes, you may want to make changes.
Generating Images With Divi AI
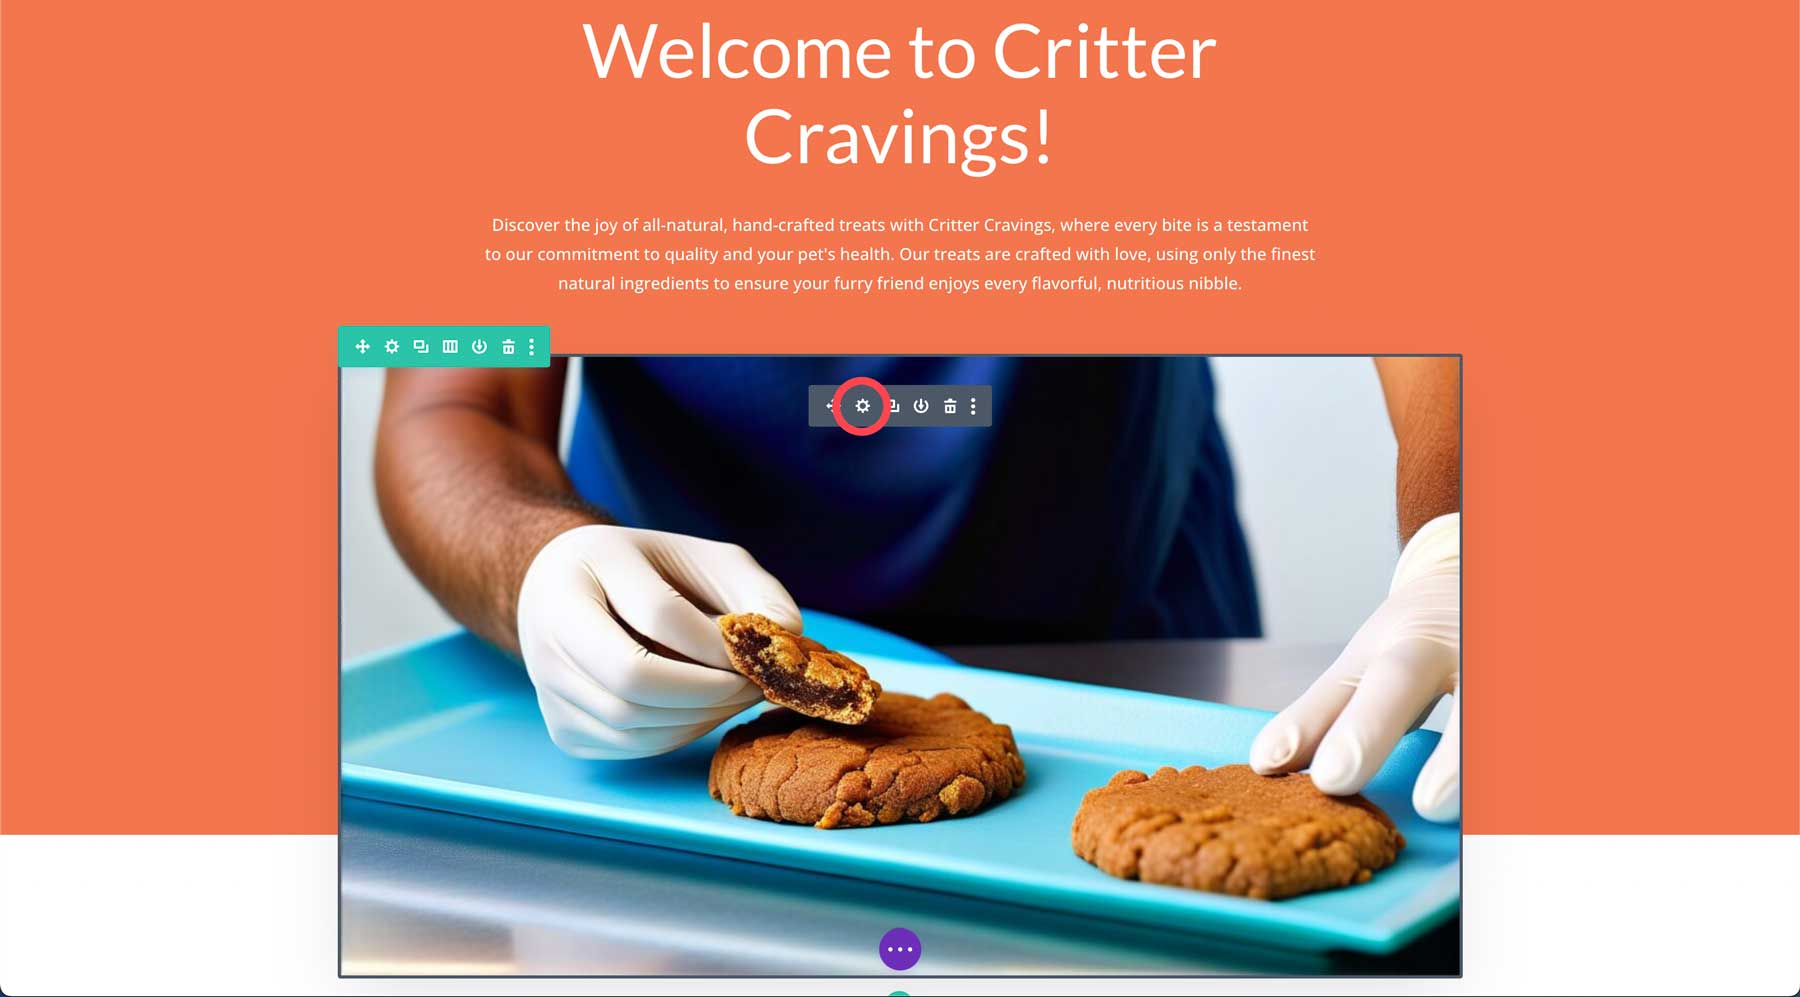
Let’s start with regenerating an image for our hero section. Hover over the hero image and click the gray settings icon to bring up the image module settings.
With the module’s popup active, hover over the image preview and click the AI button.
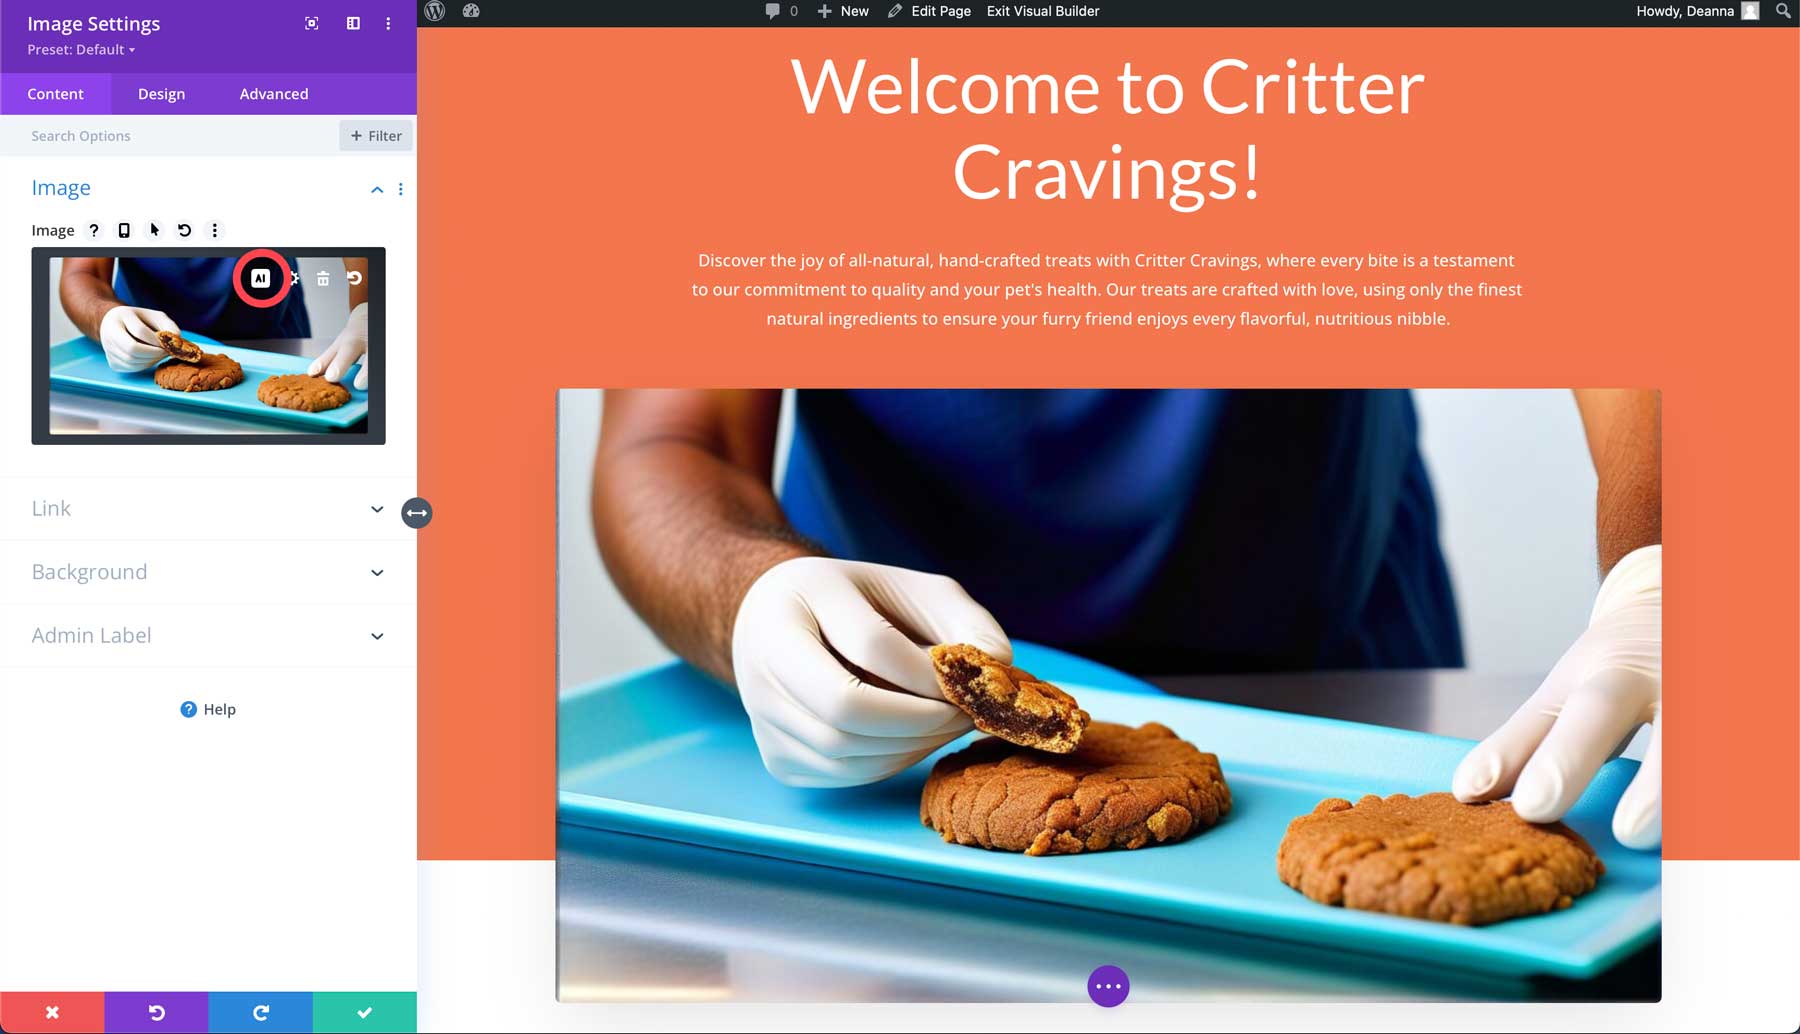
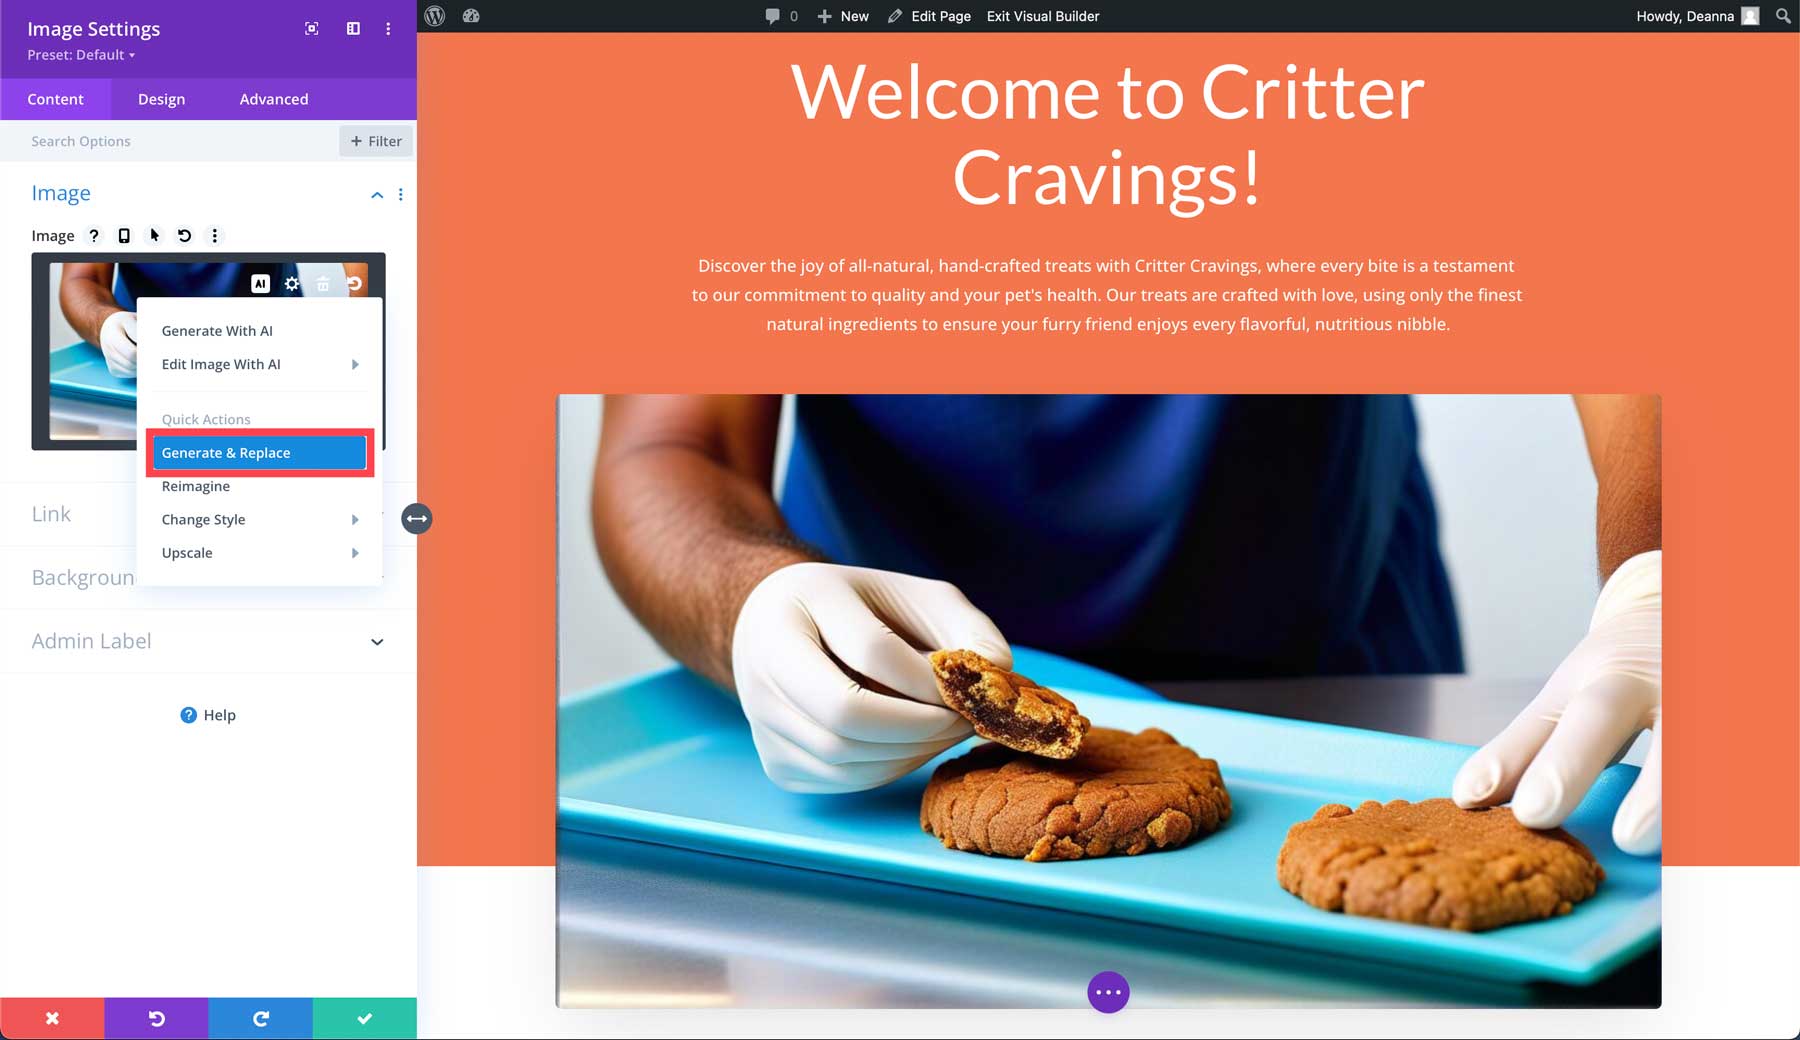
This will bring up several options: generate with AI, edit with AI (where you can modify, expand and fill, upscale, or enhance your image), generate and replace an image, change the image style, or upscale your image. Let’s choose Generate and Replace.
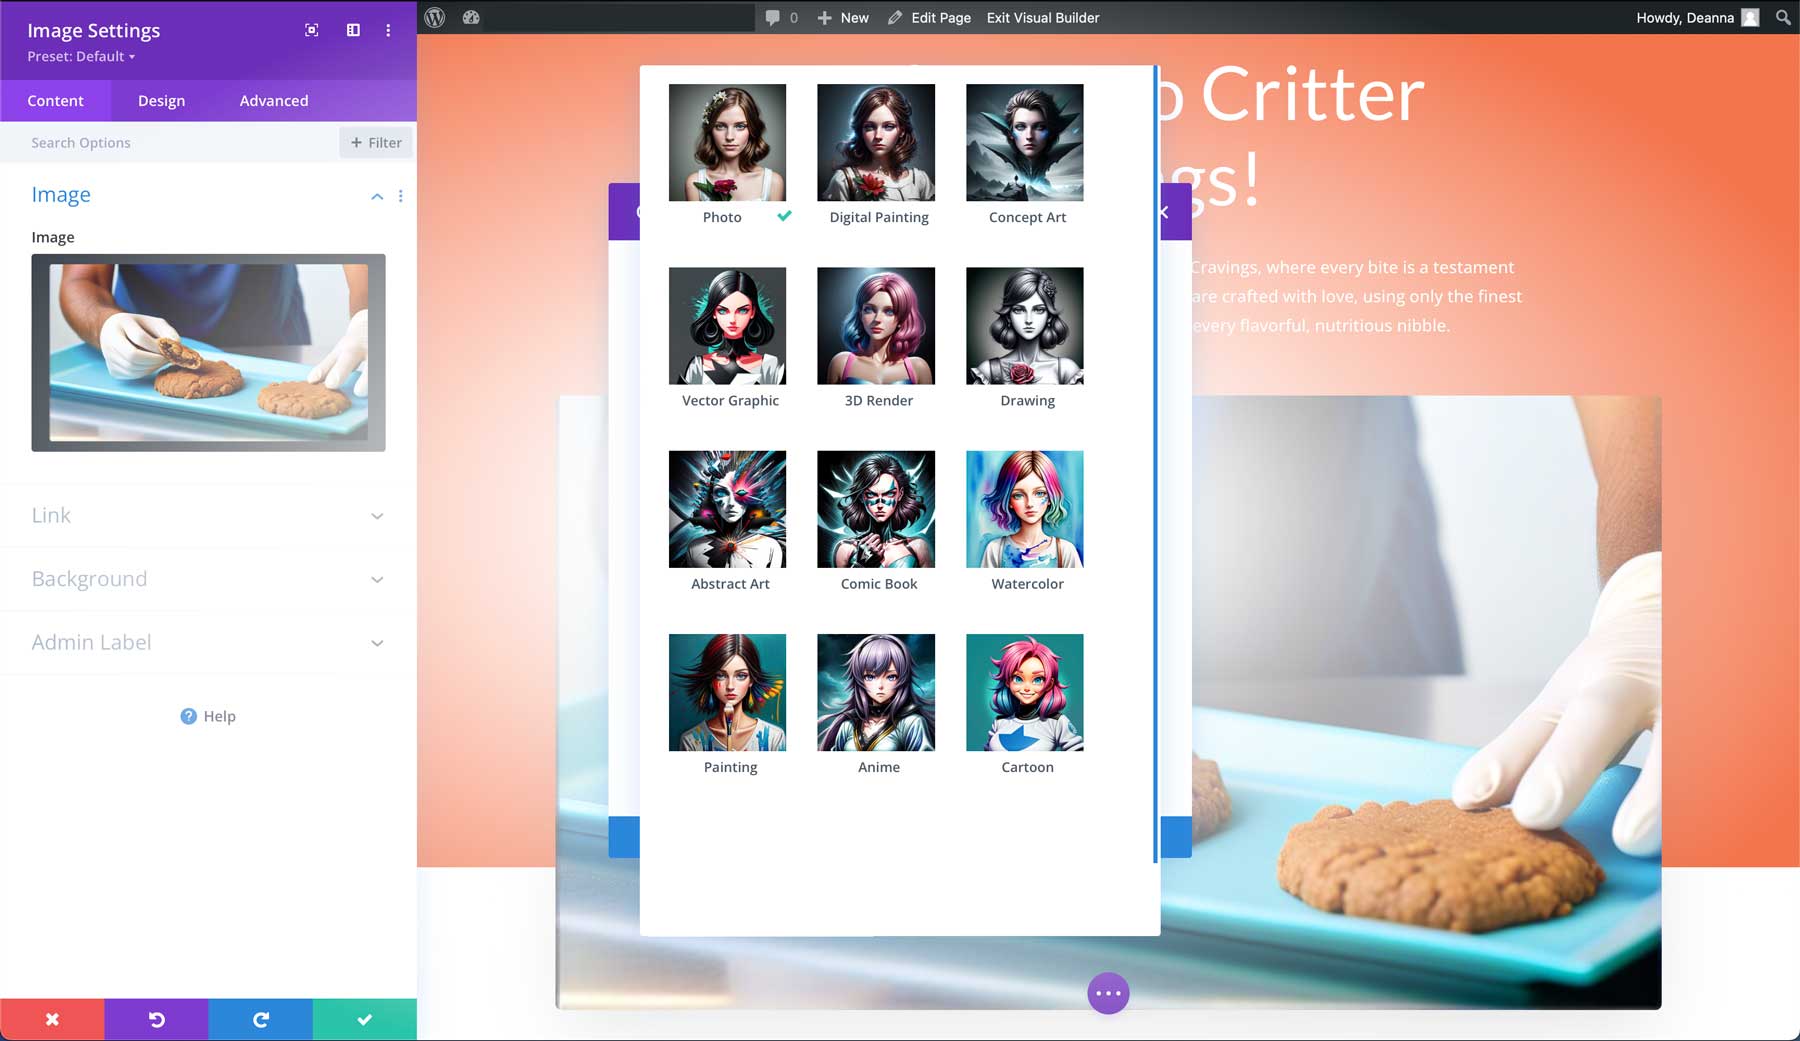
Divi AI will automatically generate 4 new images for the hero based on the original. However, you can also generate a new image, which allows you to add a new prompt, specify image size, and more. You can choose from 12 styles, including photo, 3D render, drawing, and others.
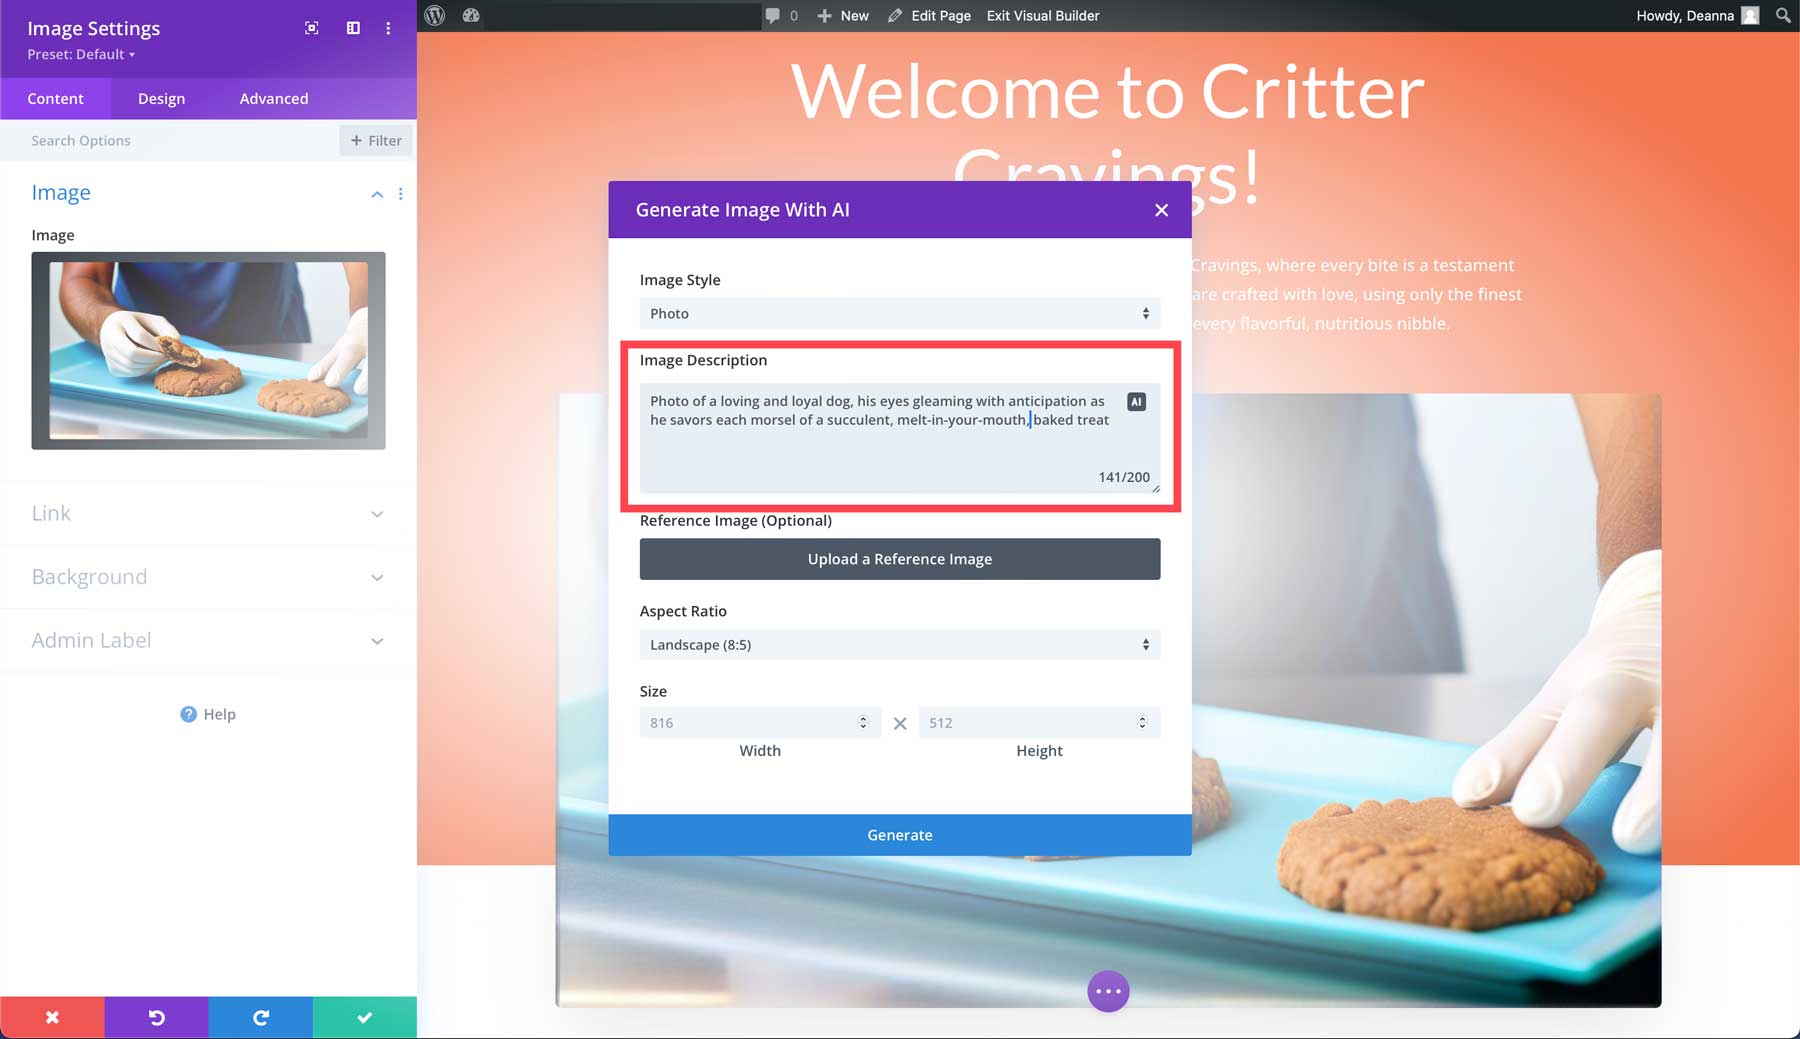
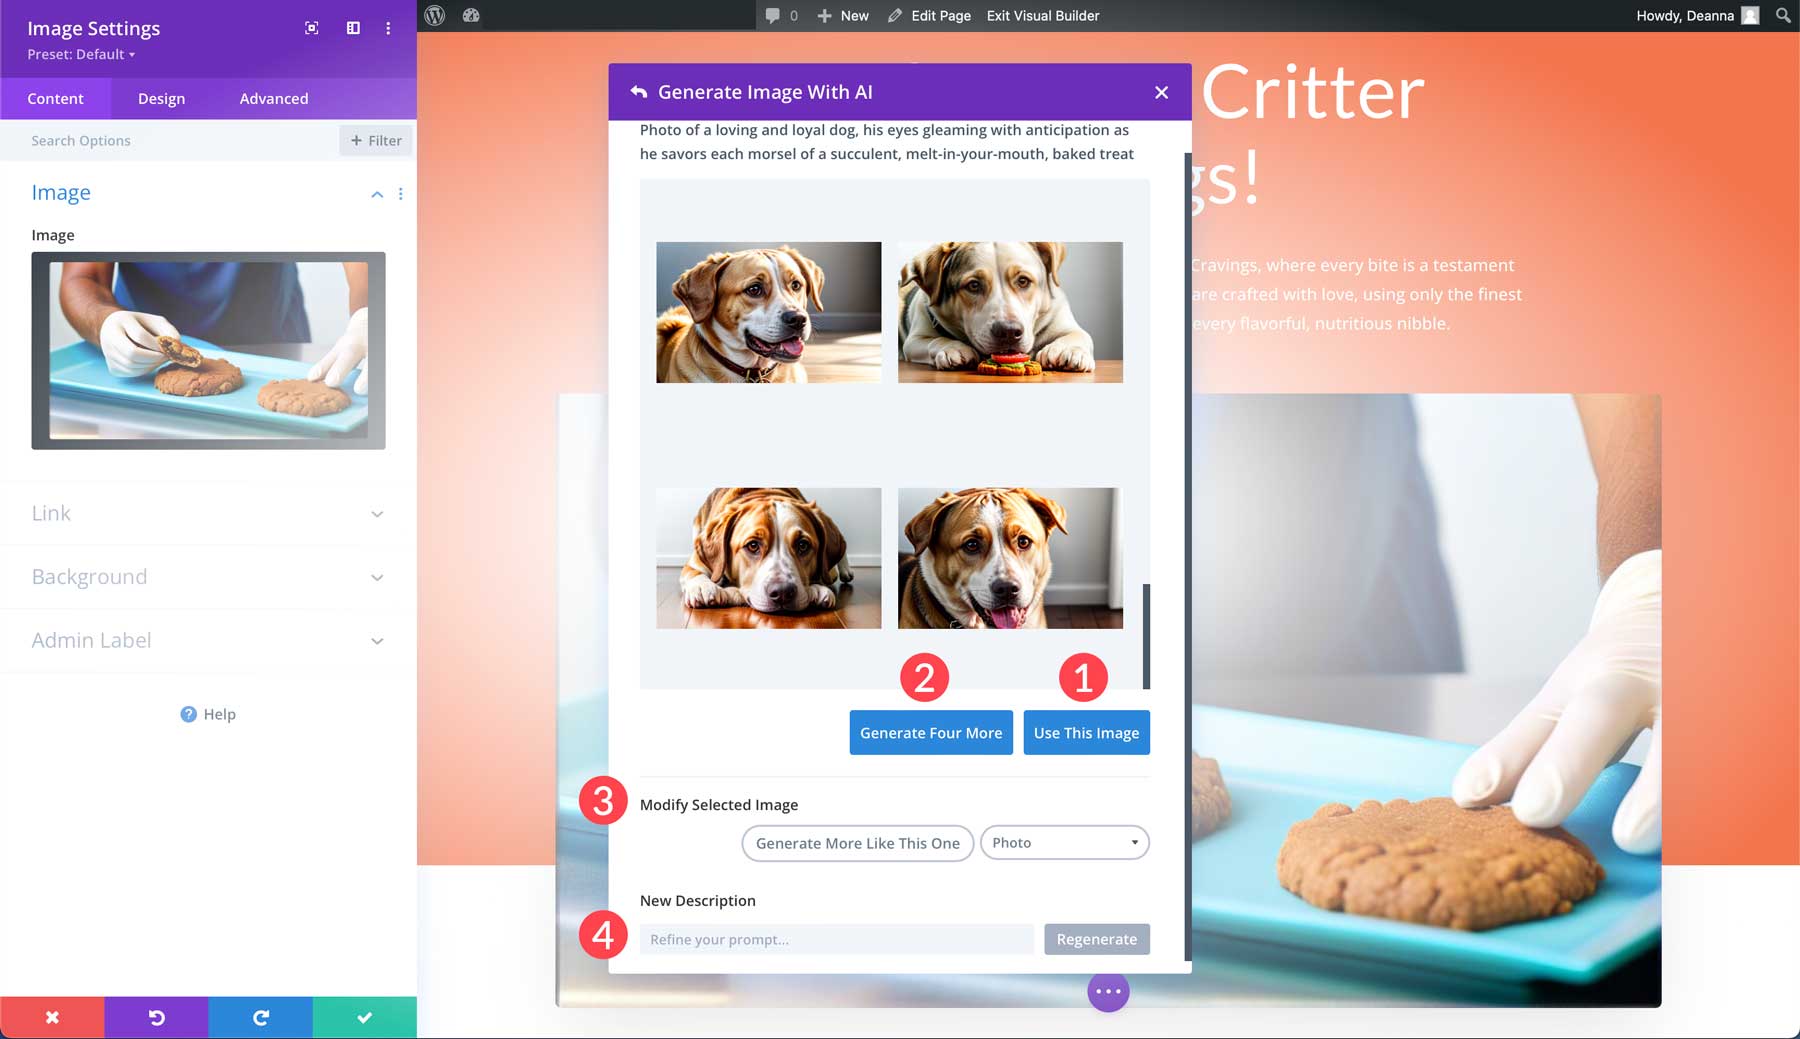
For this Divi Layouts AI guide, we’ll choose Photo for the style (1), add a brief description (2), select the landscape aspect ratio (3), and click Generate (4). For the prompt, we used photo of a loving and loyal dog, his eyes gleaming with anticipation as he savors each morsel of a succulent, melt-in-your-mouth, baked treat. You can be as detailed as you’d like, up to 200 characters. If you find yourself struggling to come up with a prompt, check out our post on the best AI prompt generators to help you come up with ideas.
Once Divi AI generates 4 images, we can click on one and select use this image (1) to insert it into the module. You can also generate four more (2), modify the image by generating more like the selected one (3), or enter a new description (4) to start over.
Refining Text With Divi AI
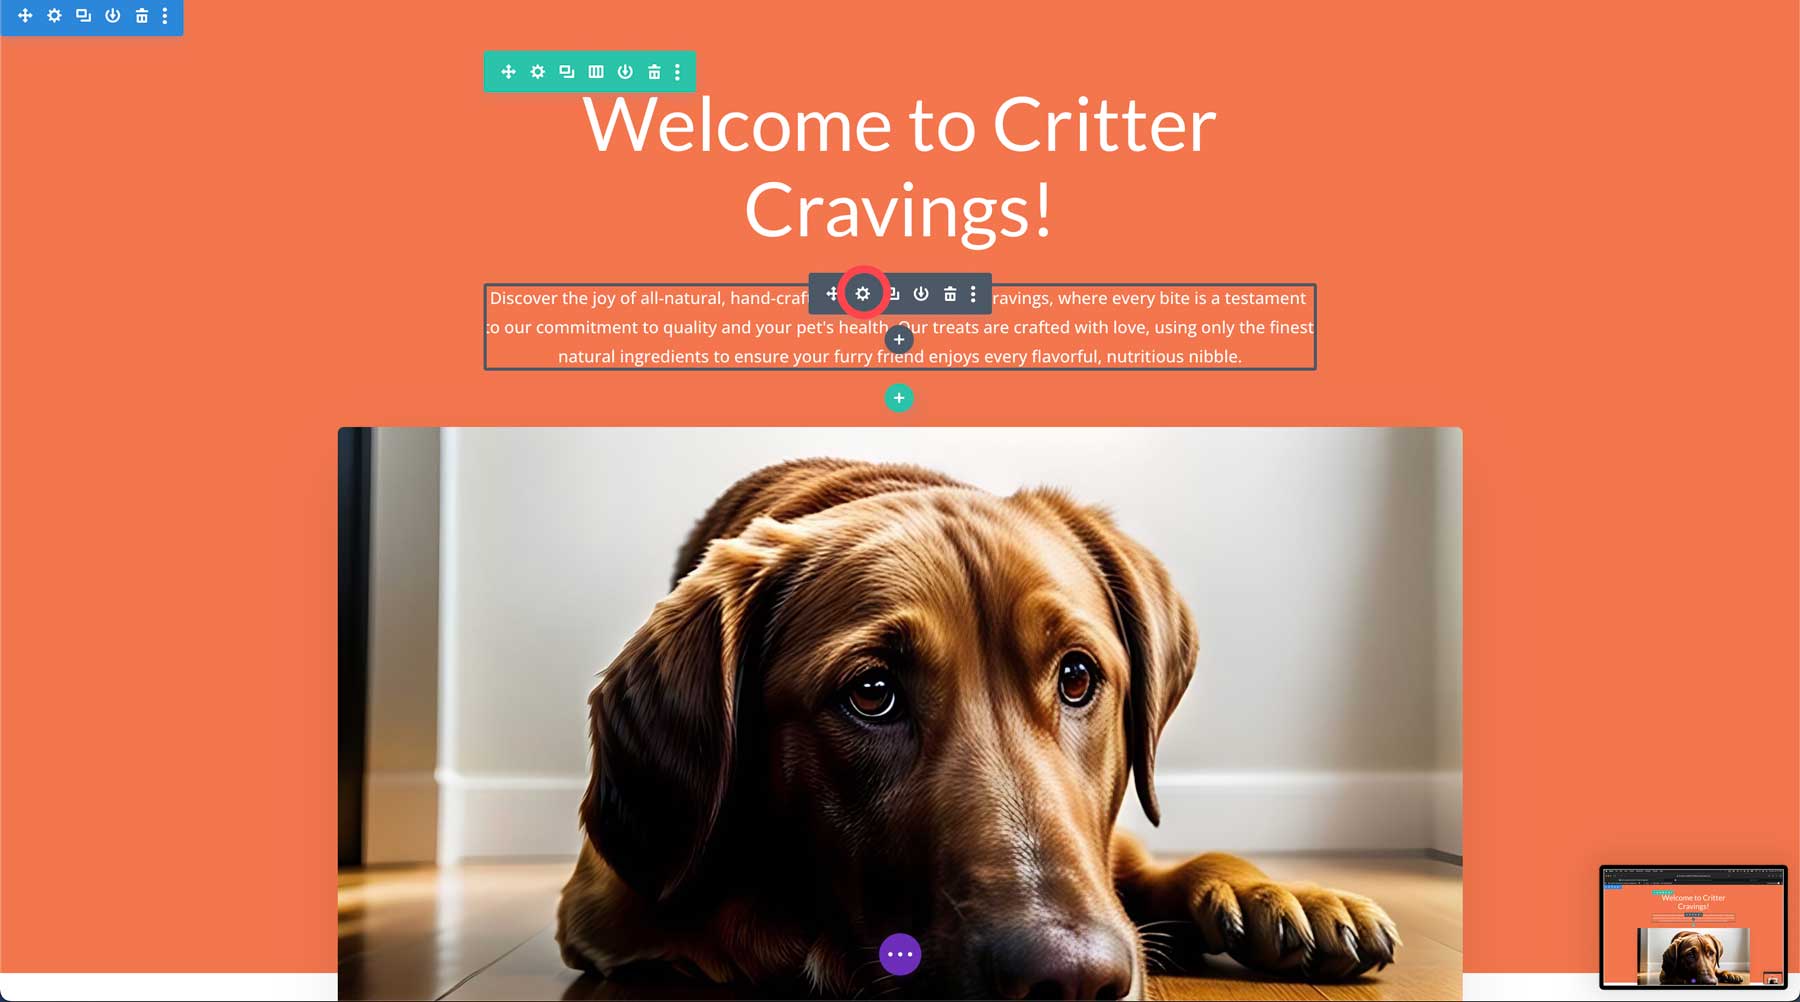
Another great feature of Divi AI is its ability to refine text. Start by clicking the grey settings icon in the text module directly beneath the headline in the hero section.
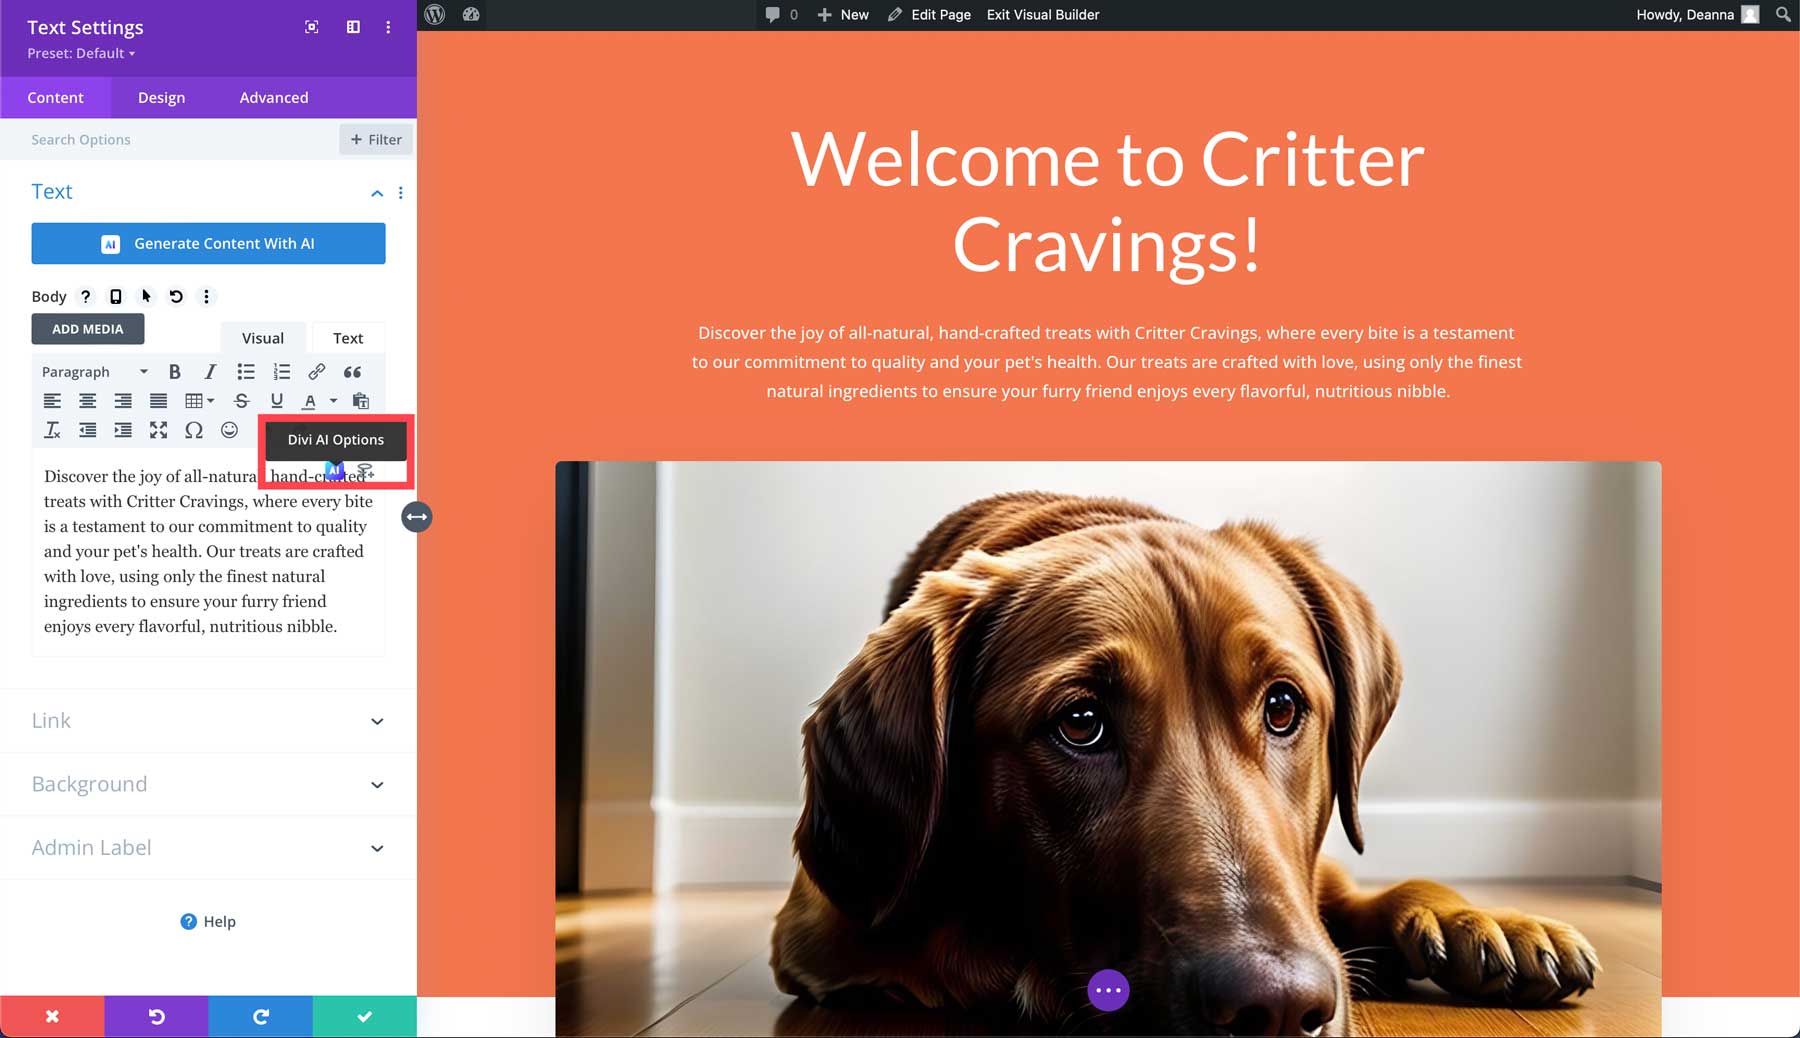
Click the AI button within the text module to bring up the AI options.
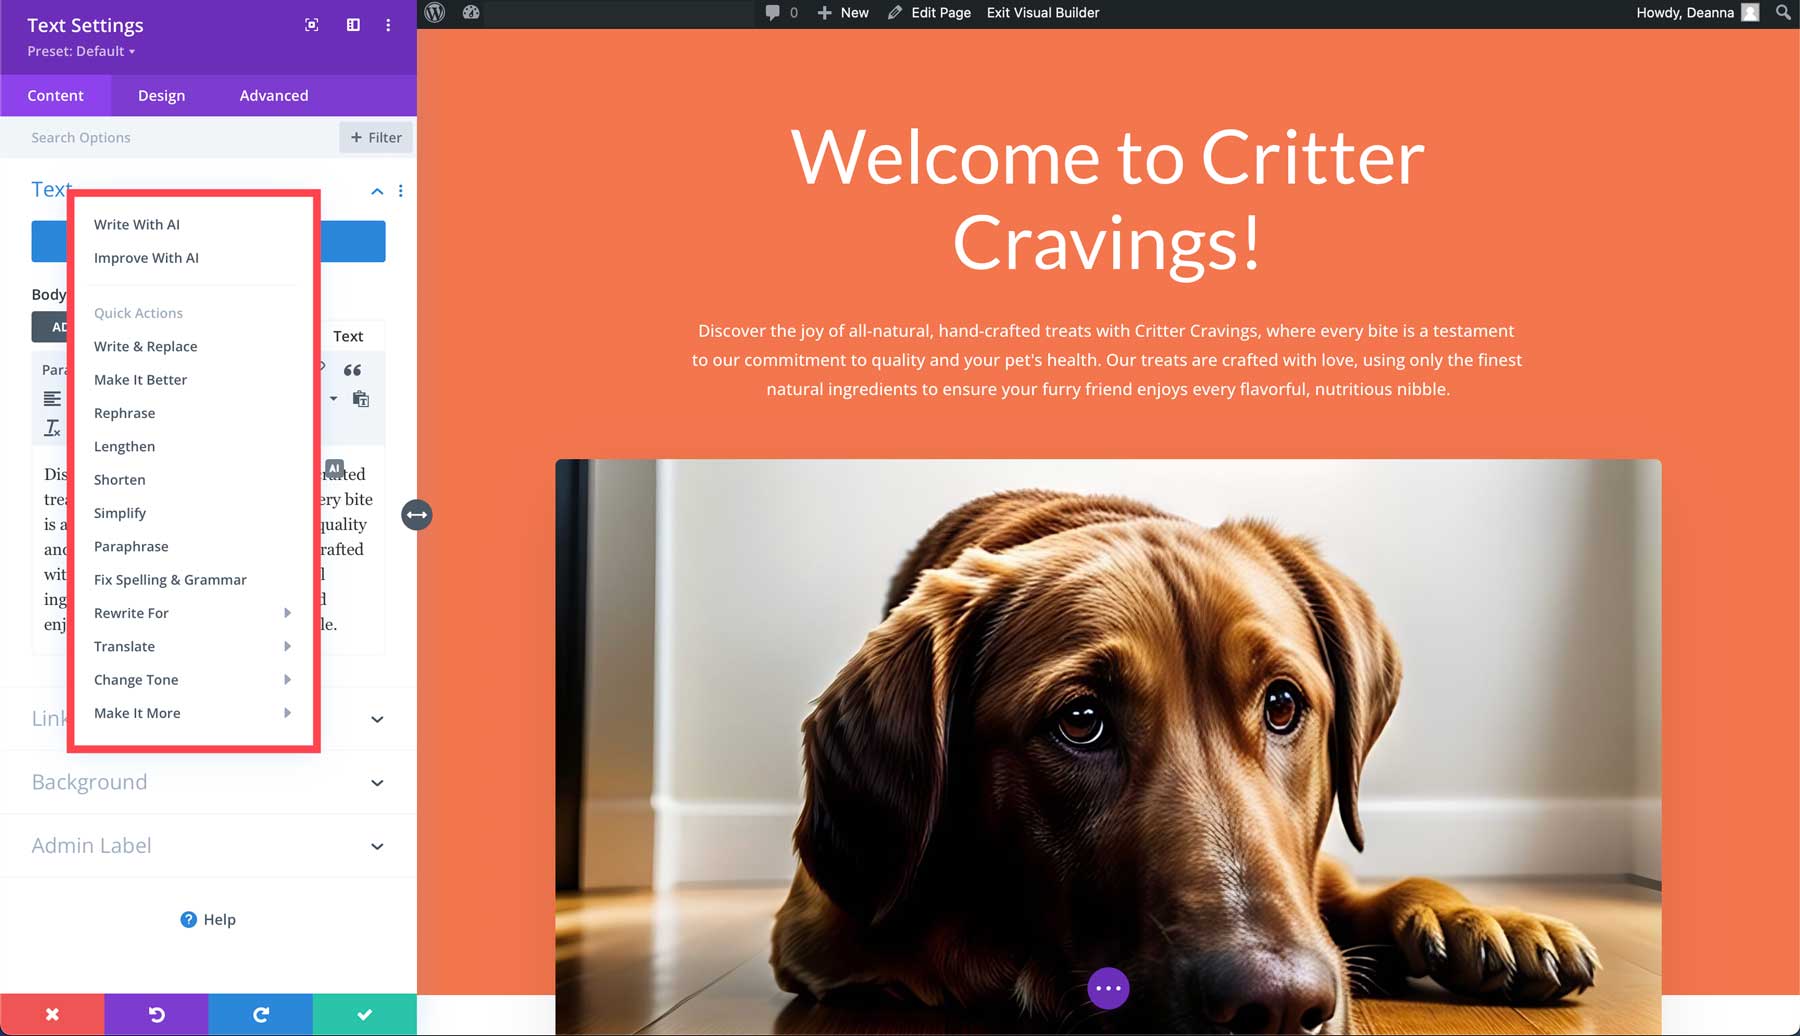
This will bring up a series of options for editing the existing text. Options include writing with AI, improving with AI, writing & replacing, and other options to edit your text with Divi AI.
Let’s select improve with AI for this Divi Layouts AI guide. A dialog box will appear, allowing you to choose the content type (1), what you’re writing about (2), and whether you want Divi AI to apply added context from the page’s content (3). You can also click the AI button (4) to have Divi AI generate a prompt for you.
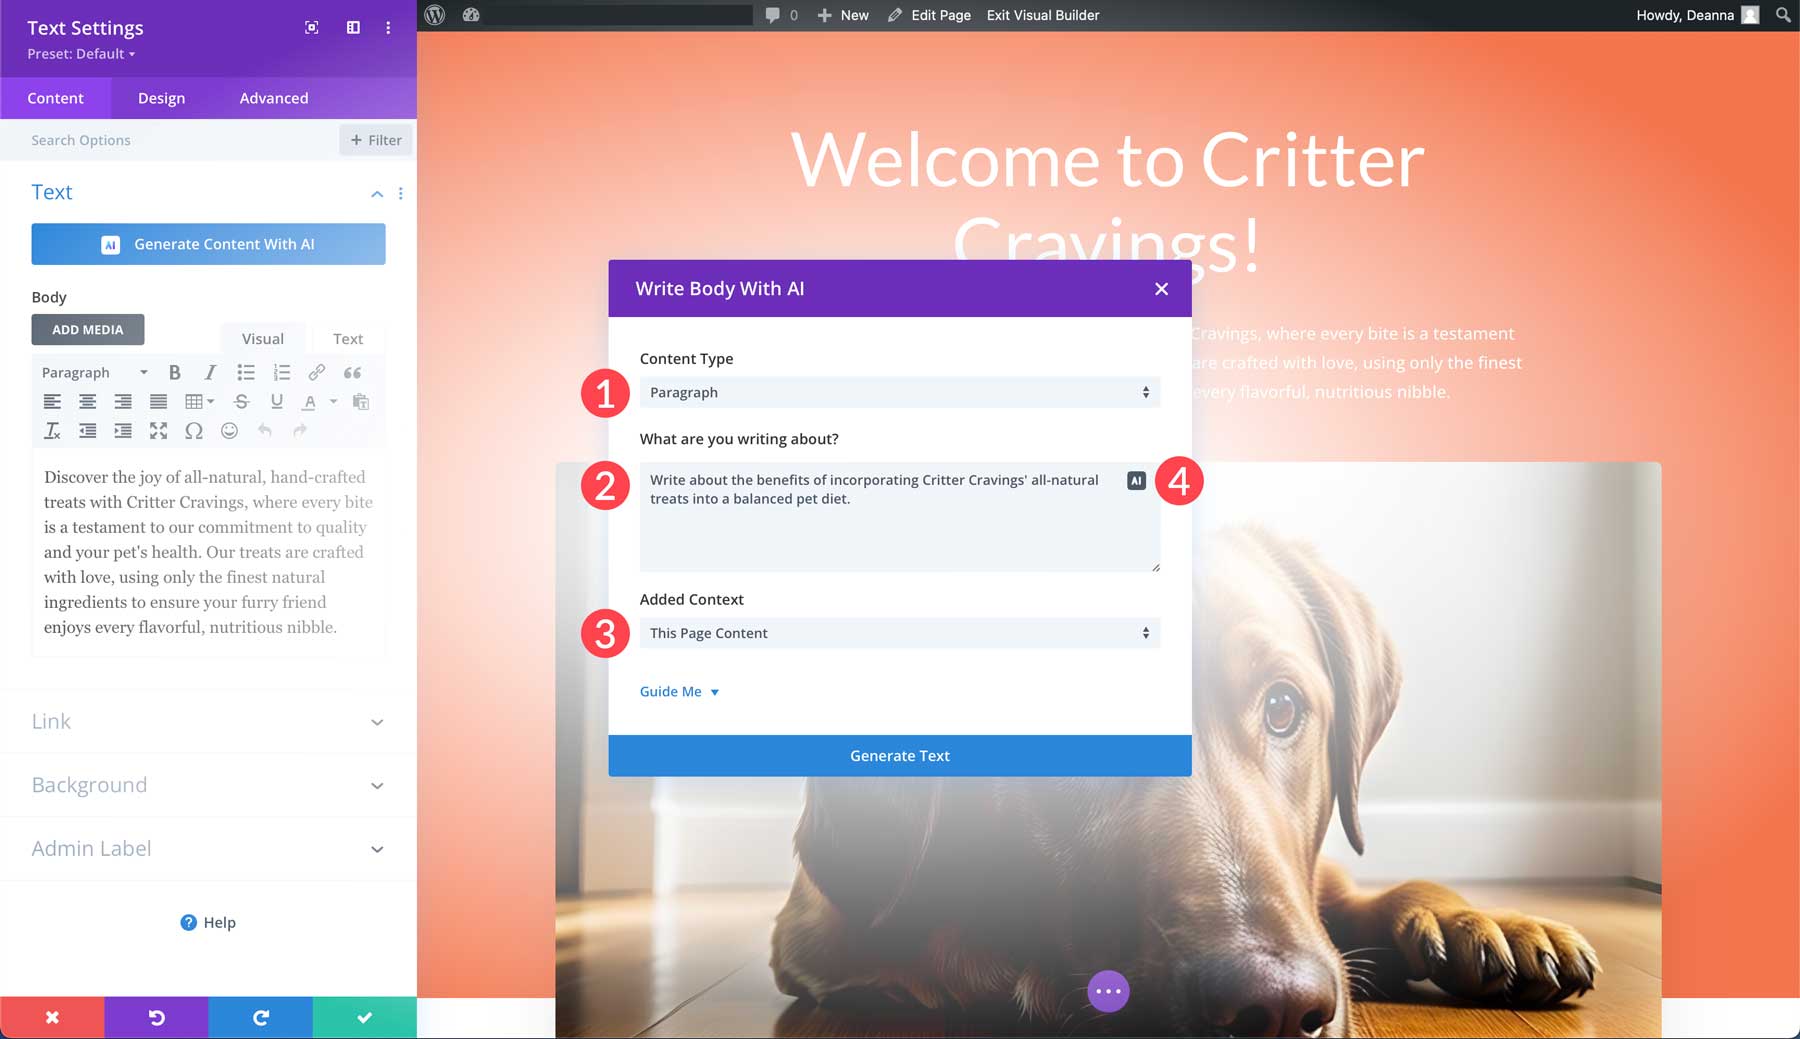
Regardless of what type of content you want to generate, Divi AI can handle it.
Generating Code With Divi AI
Another huge benefit of Divi AI is its ability to generate code. It’s solely training on Divi’s codebase, making it unique from other large language models. This makes Divi and Divi AI a powerful tool for all types of users, from beginners to seasoned developers. You can also use Divi AI to build a code snippet library, help with existing code, and add all types of effects, including text animations. For example, if you’d like to add a typewriter effect to our page’s main headline, Divi AI can easily handle it.
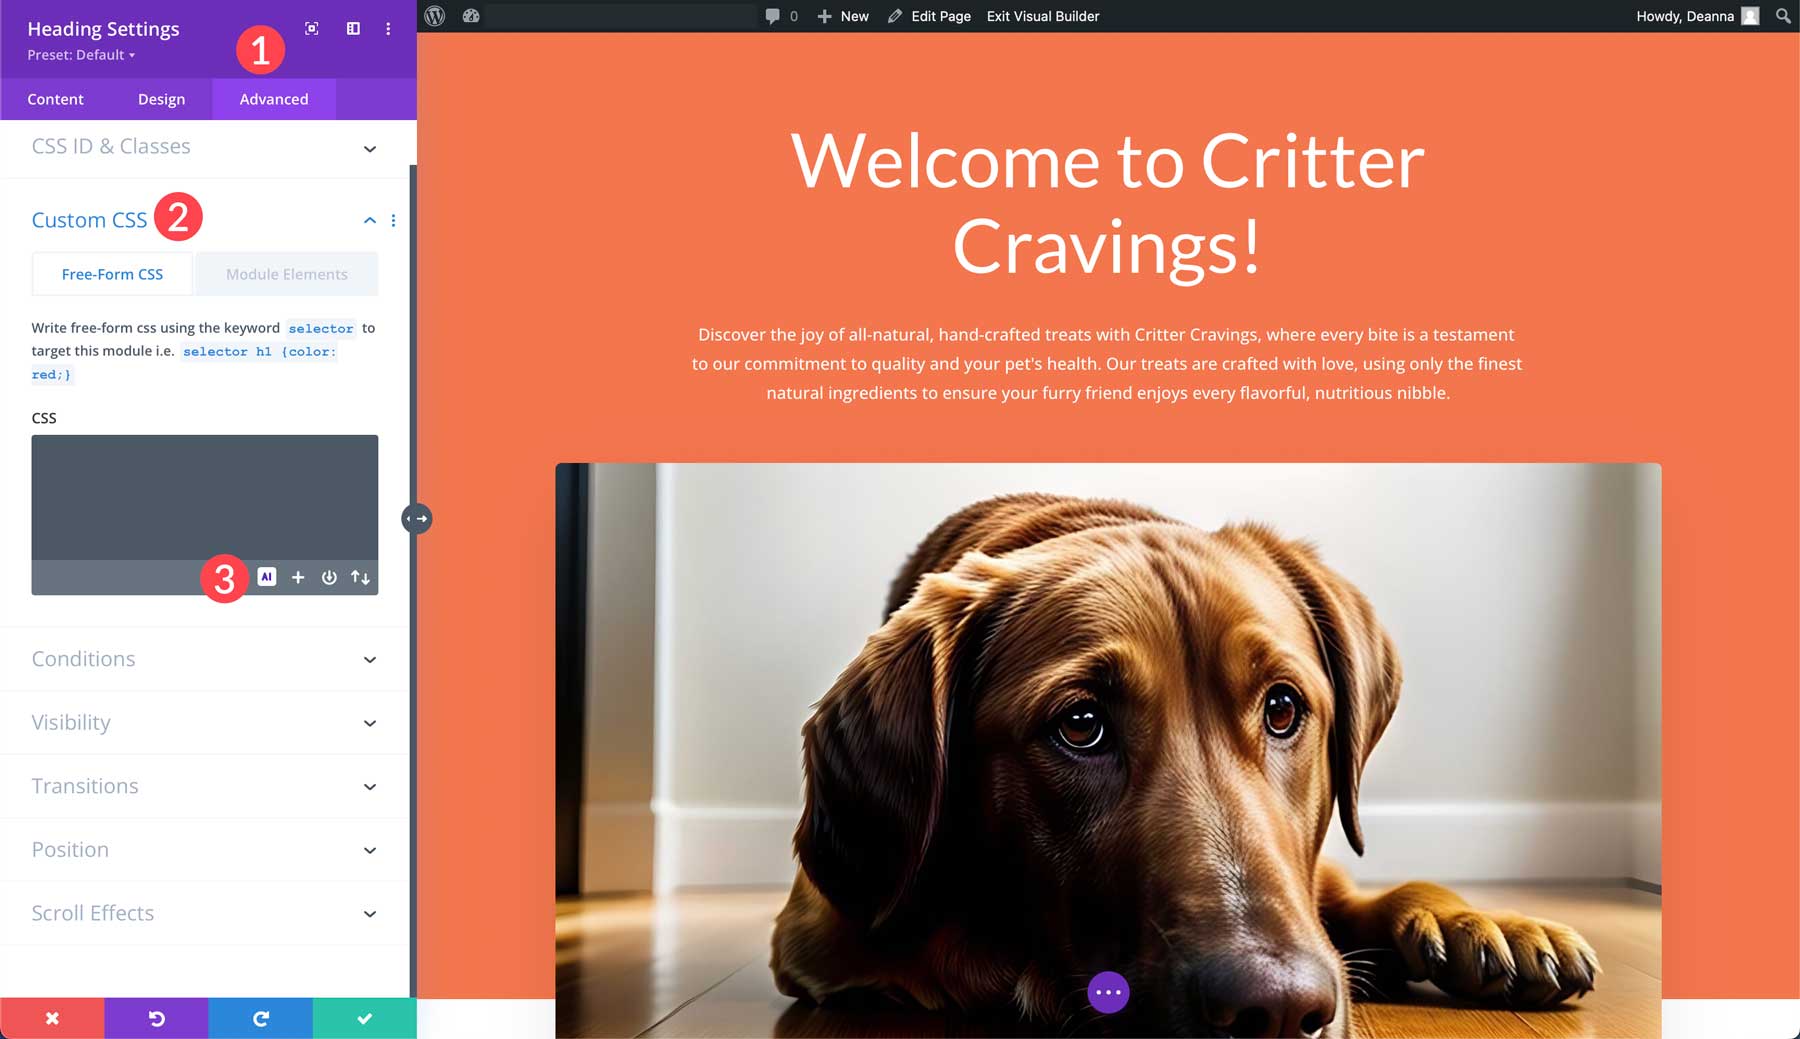
To start using Divi AI for coding, simply open a module’s settings, navigate to the advanced tab (1), open the Custom CSS dropdown (2), and click the AI button (3).
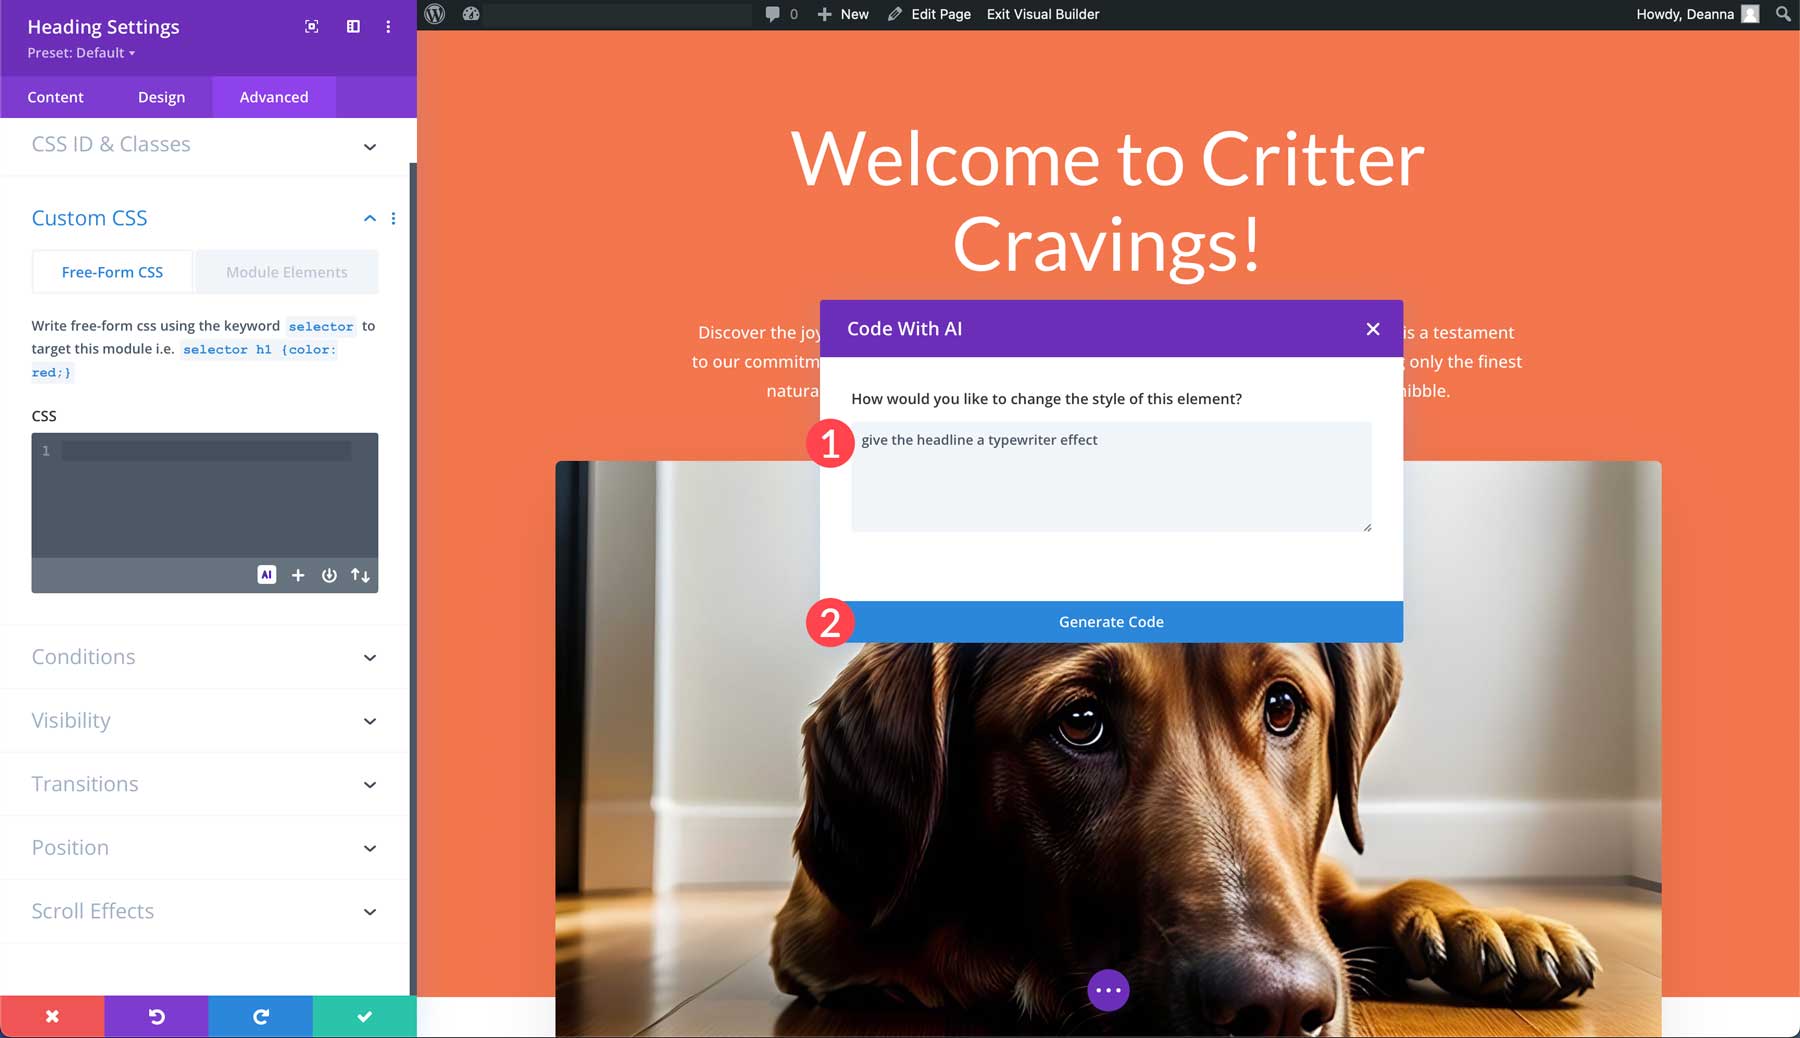
When the dialog box appears, simply type in the effect you’d like to create (1) and click the generate code button (2). In our example, we’ll use the prompt give the headline a typewriter effect.
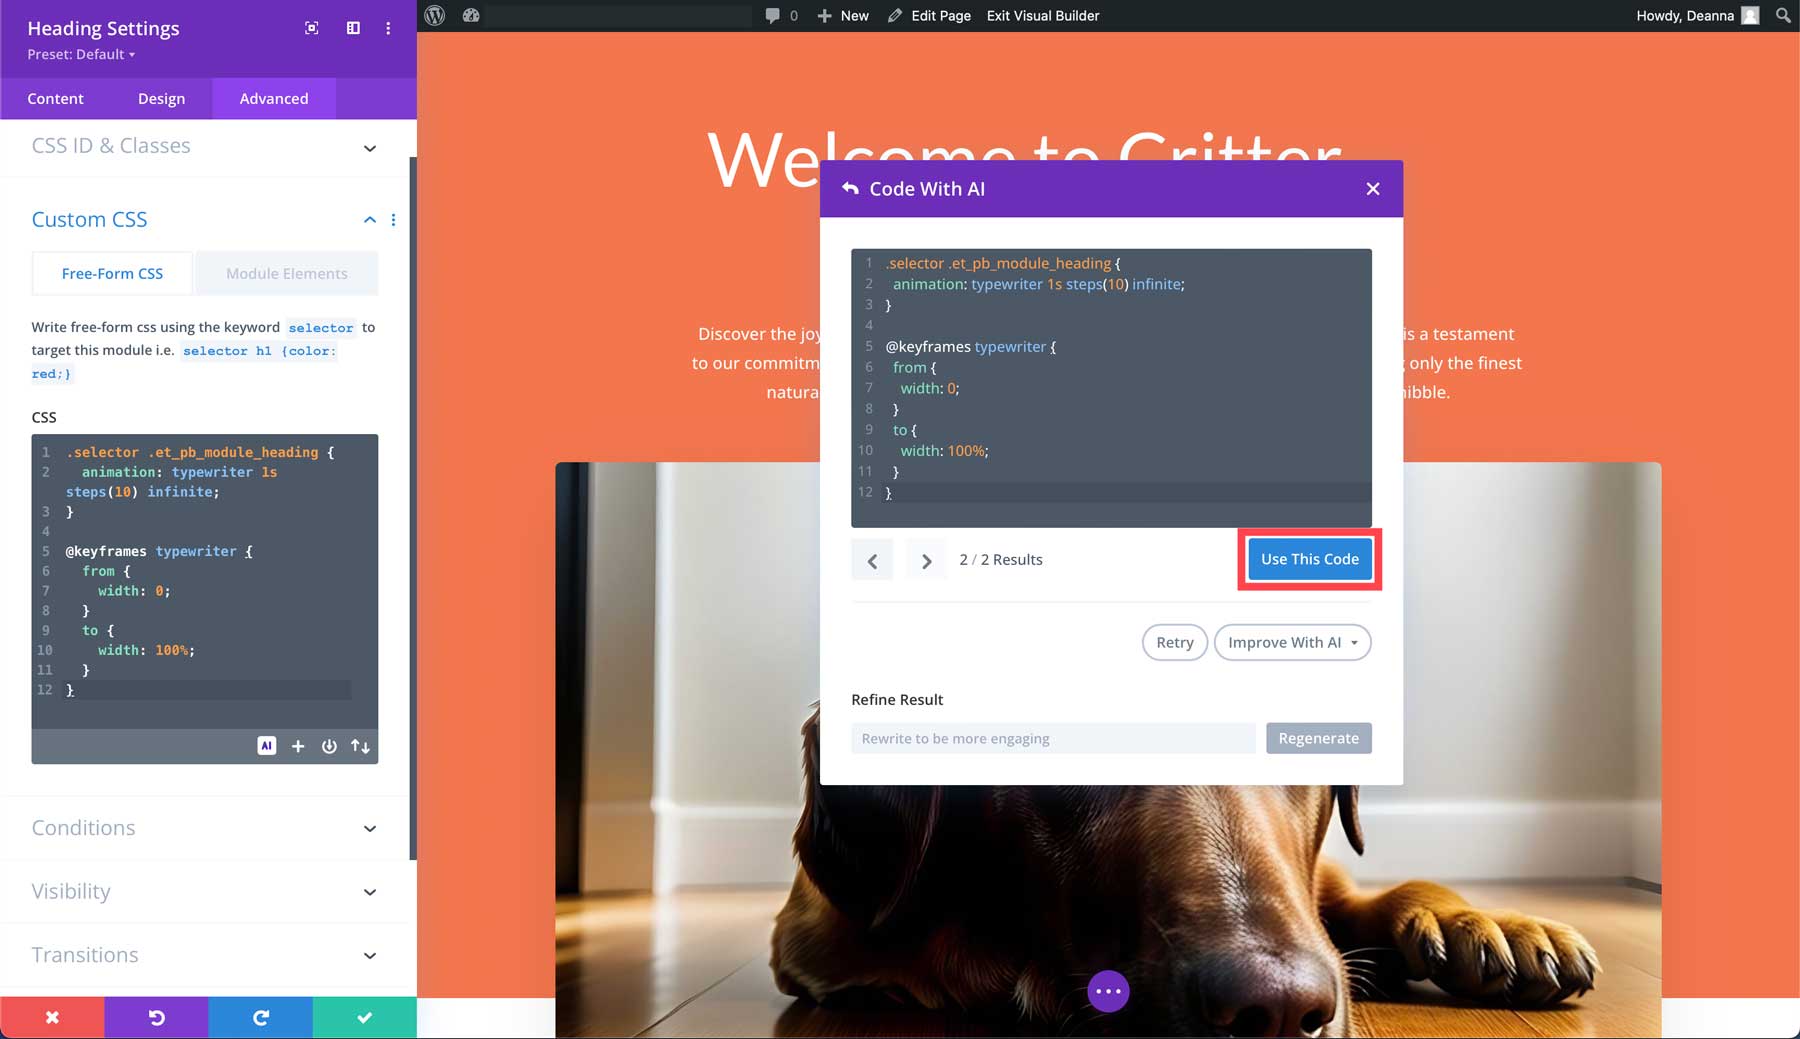
Divi AI will generate and apply code with selectors and add it to the free-form CSS field. Click the Use This Code button to implement the code.
Step 6: Saving Your Webpage
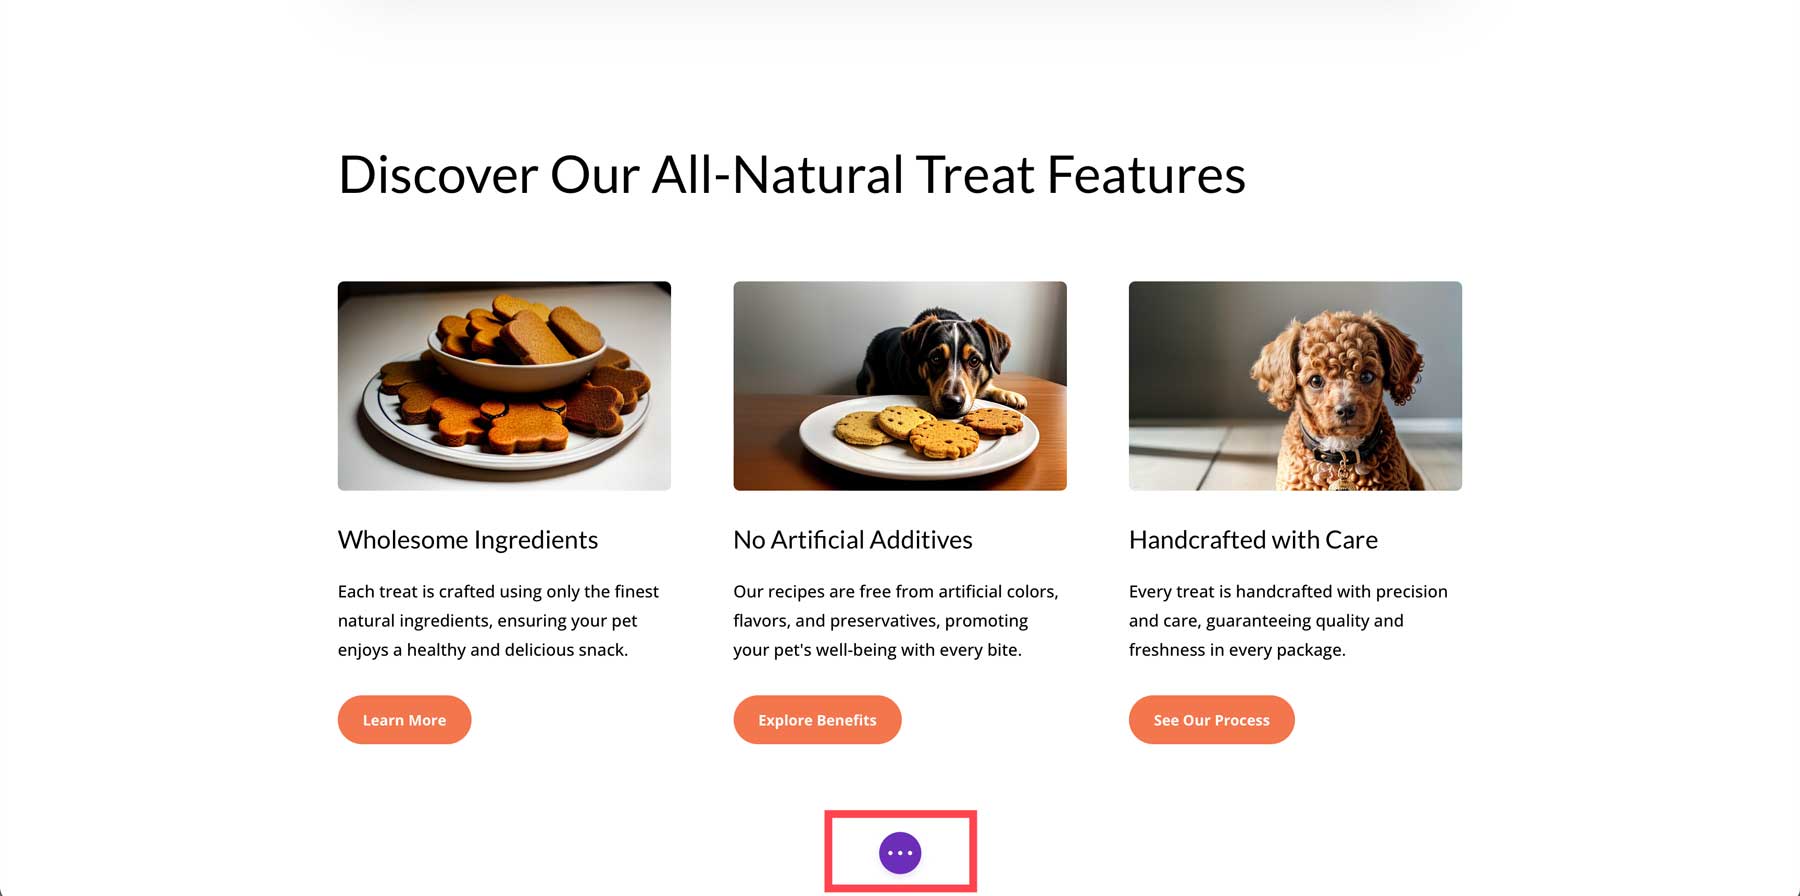
Once you’ve generated a layout and made refinements to suit your needs, the last step on our Divi Layouts AI guide is to save the page. Thankfully, Divi makes that part easy. With the Visual Builder active, hover over the purple ellipsis menu at the center bottom of your screen.
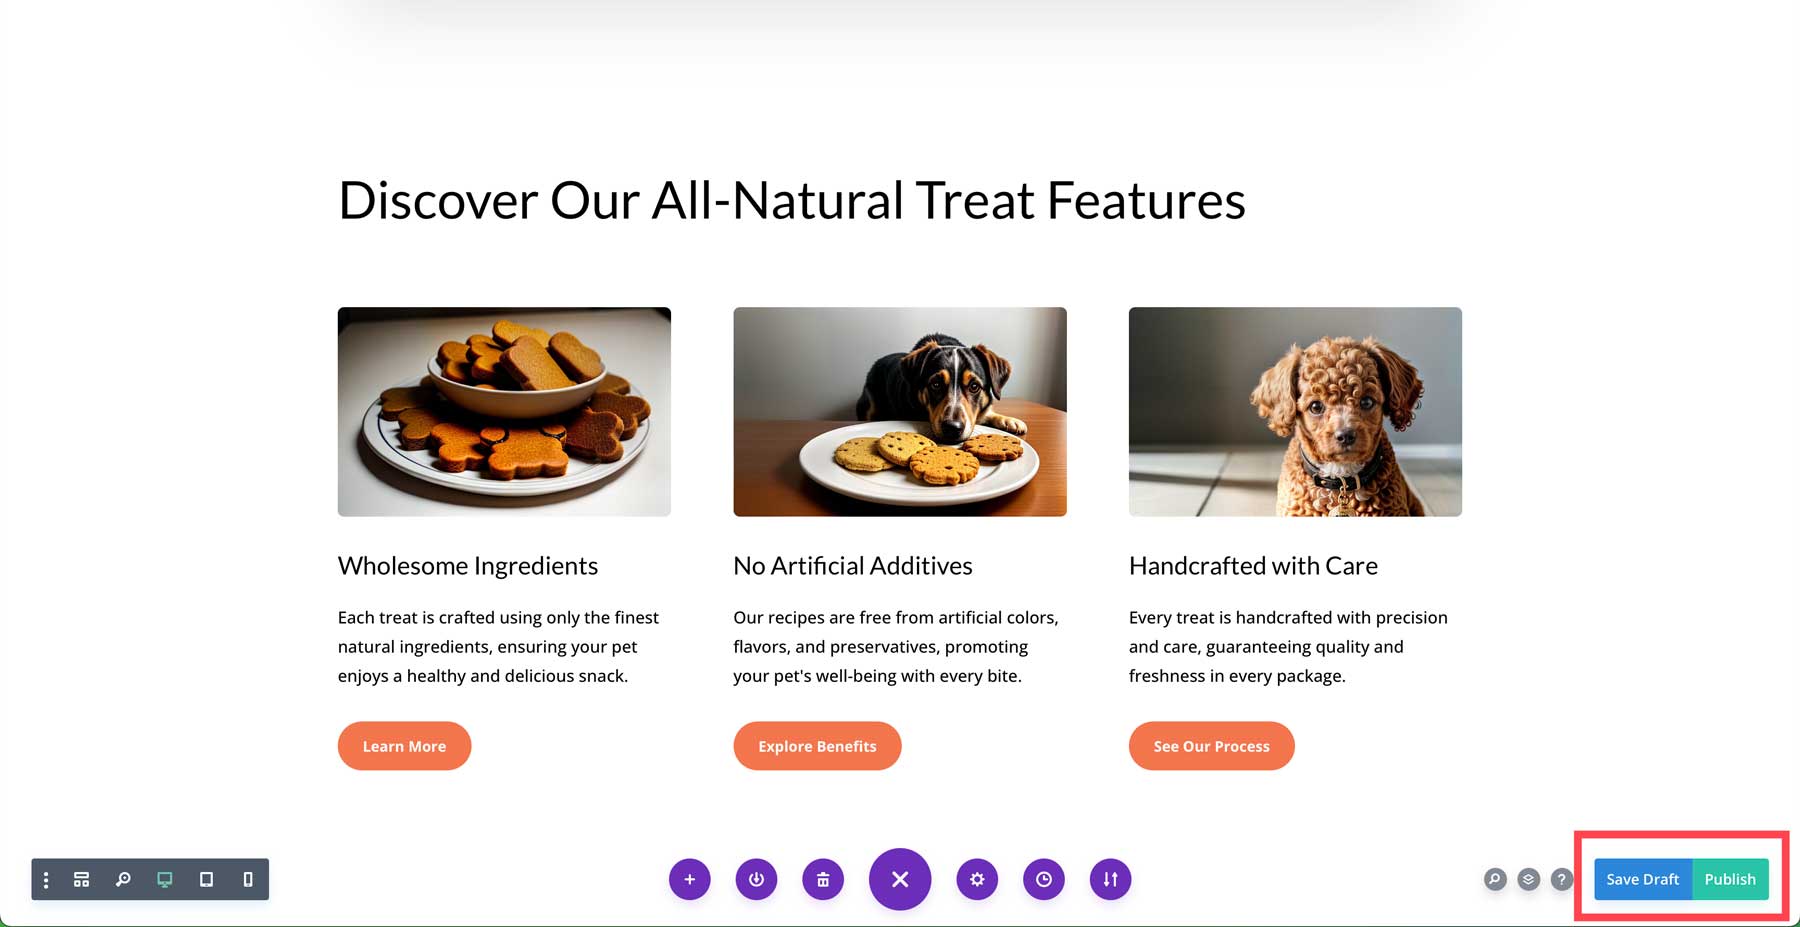
You can save the page as a draft or publish it using the corresponding button at the bottom right of your screen.
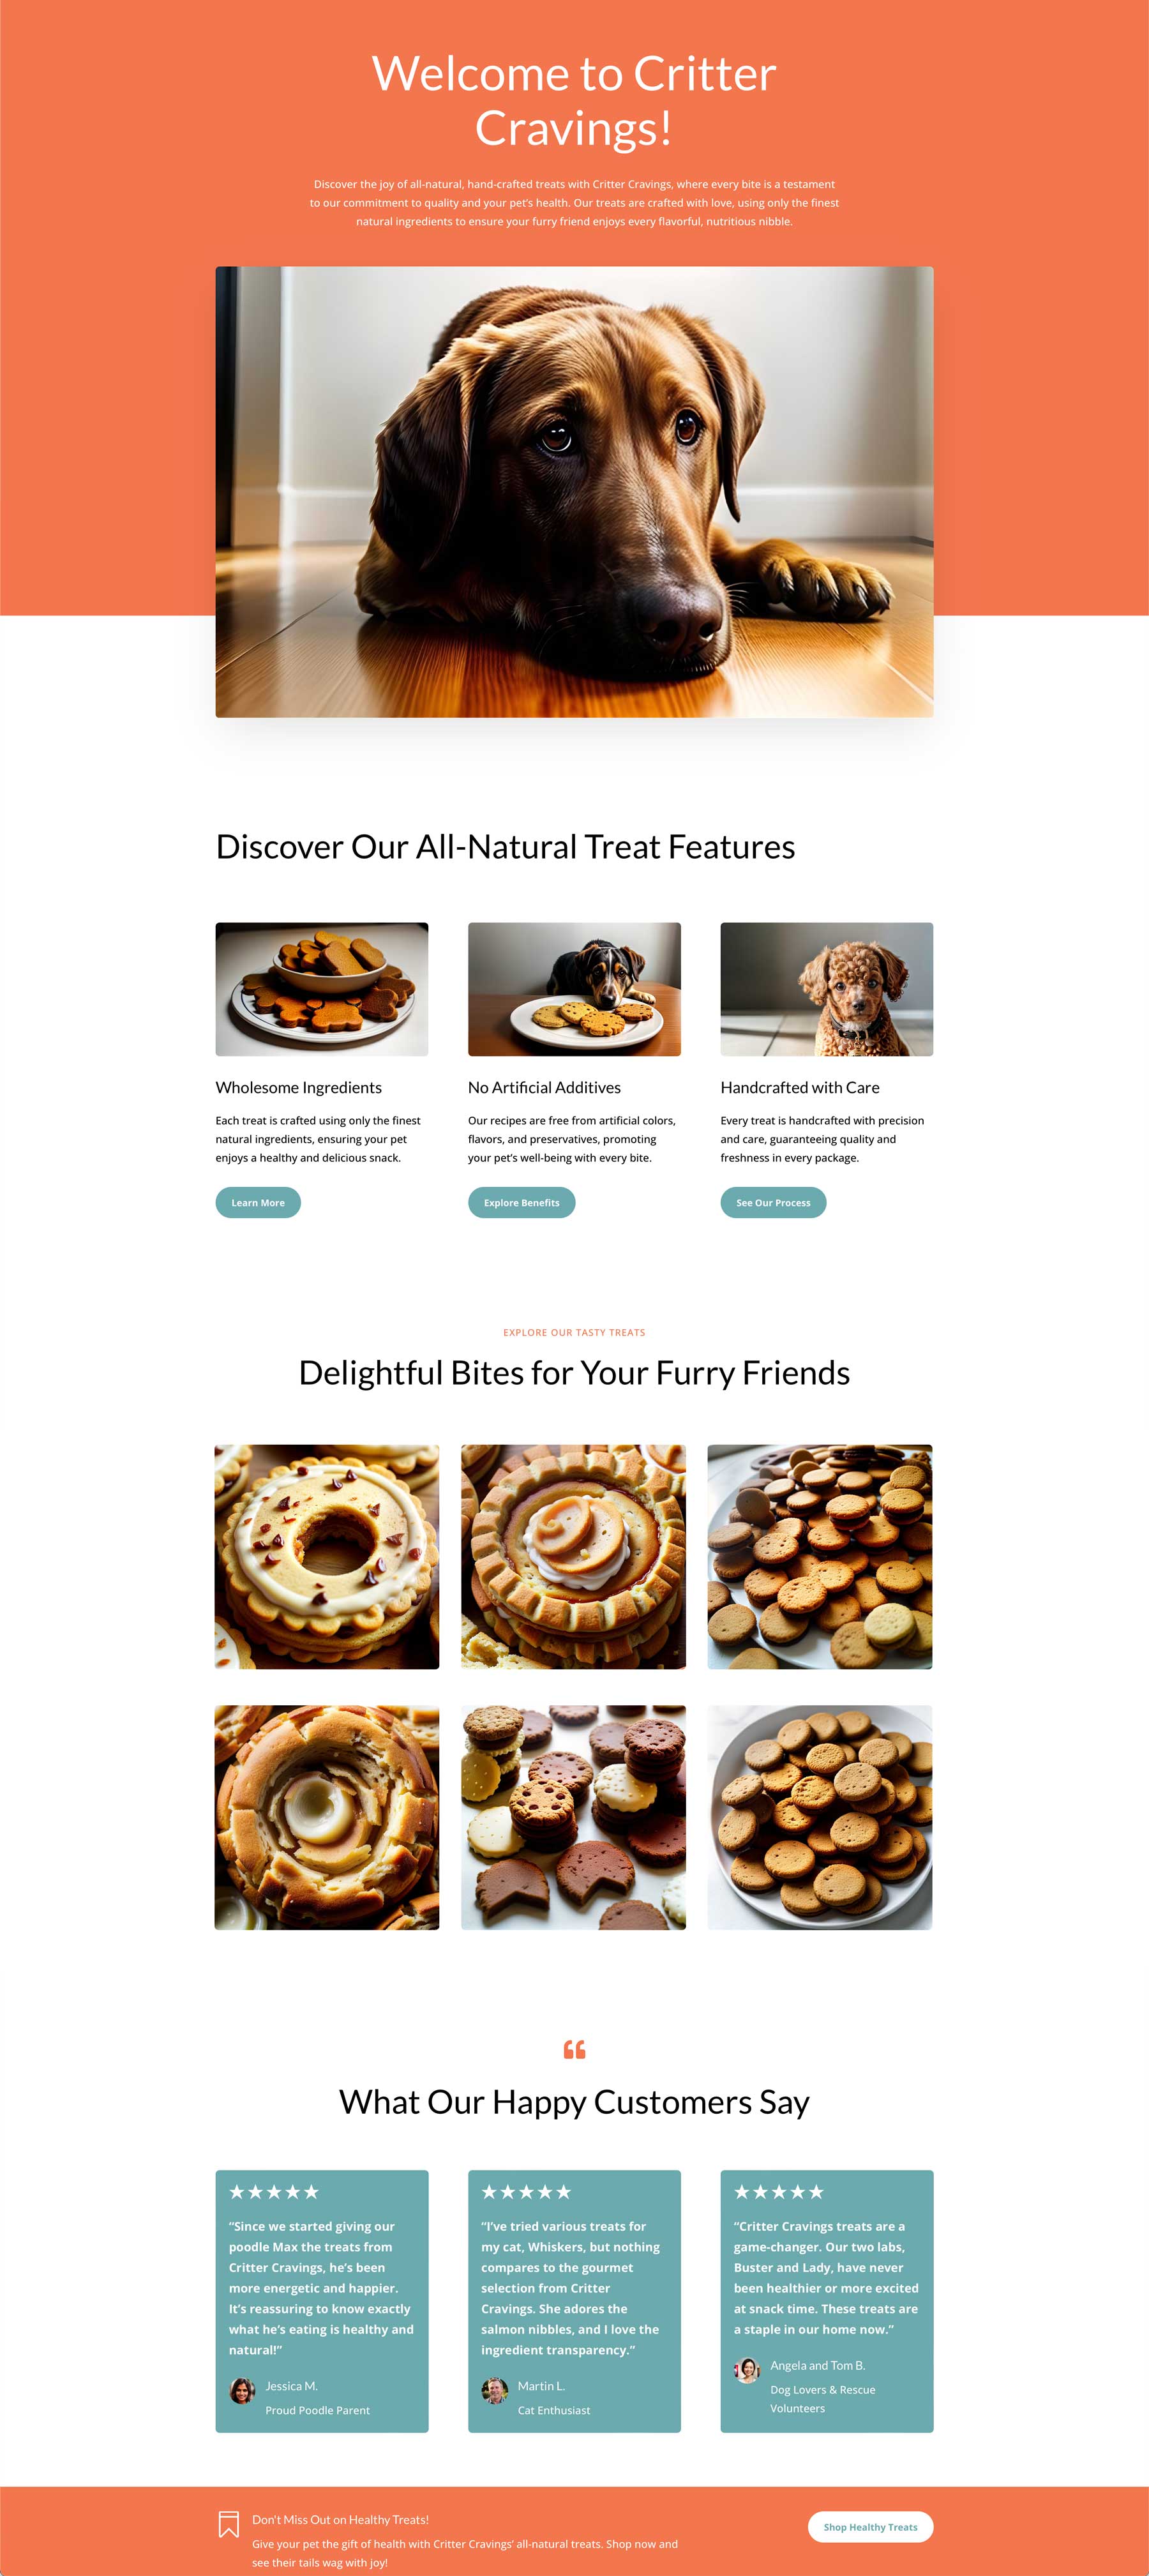
Here’s final look at our layout after generating the layout and making a few edits:
Divi Layouts AI Examples
Before we wrap things up, we included a few layouts and text prompts to show you the ultimate power of Divi AI.
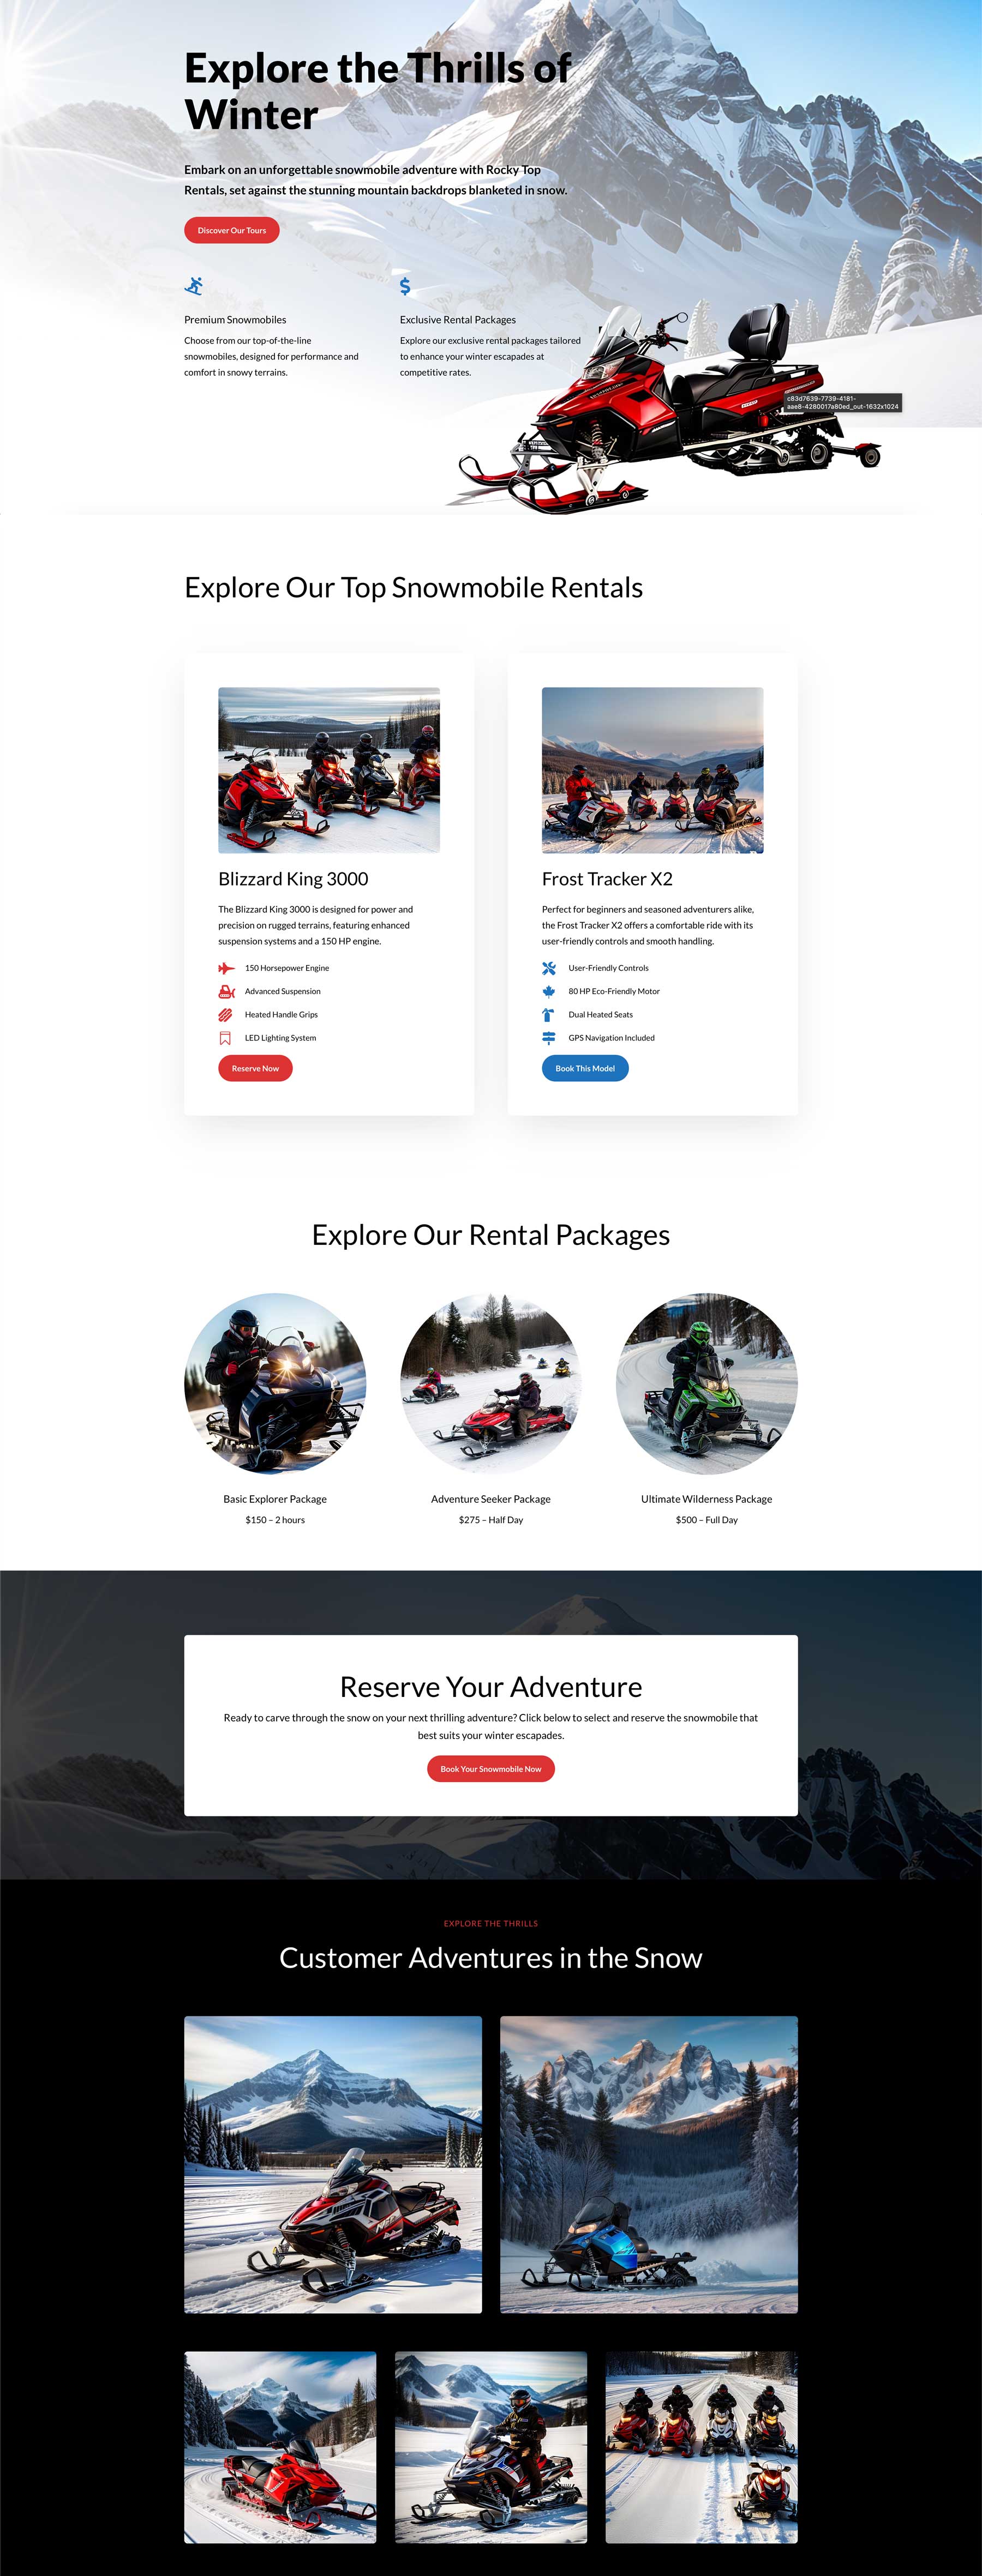
Prompt: Create a landing page featuring snowmobile rentals, packages, and experiences. Use brightly colored snowmobiles, mountain backdrops, and fluffy white snow

Prompt: Create a contact page for a power washing business. Include a map, a hero section with a background image, and three phone, email, and address blurbs.

Prompt: Create a shop page for a plant nursery. Include a services section, a contact form, a featured products section with prices, and a visually appealing hero section with a vibrant background image. Include a blurb for free delivery, upcoming sales events, and one for the plant of the month.

Prompt: Create an about page for an IT Services company. Include a section outlining their services, a value proposition, a mission statement, and a contact form. Also, include a newsletter signup in the footer. Add a large hero section with a background image and a headline with the keyword “cyber security”
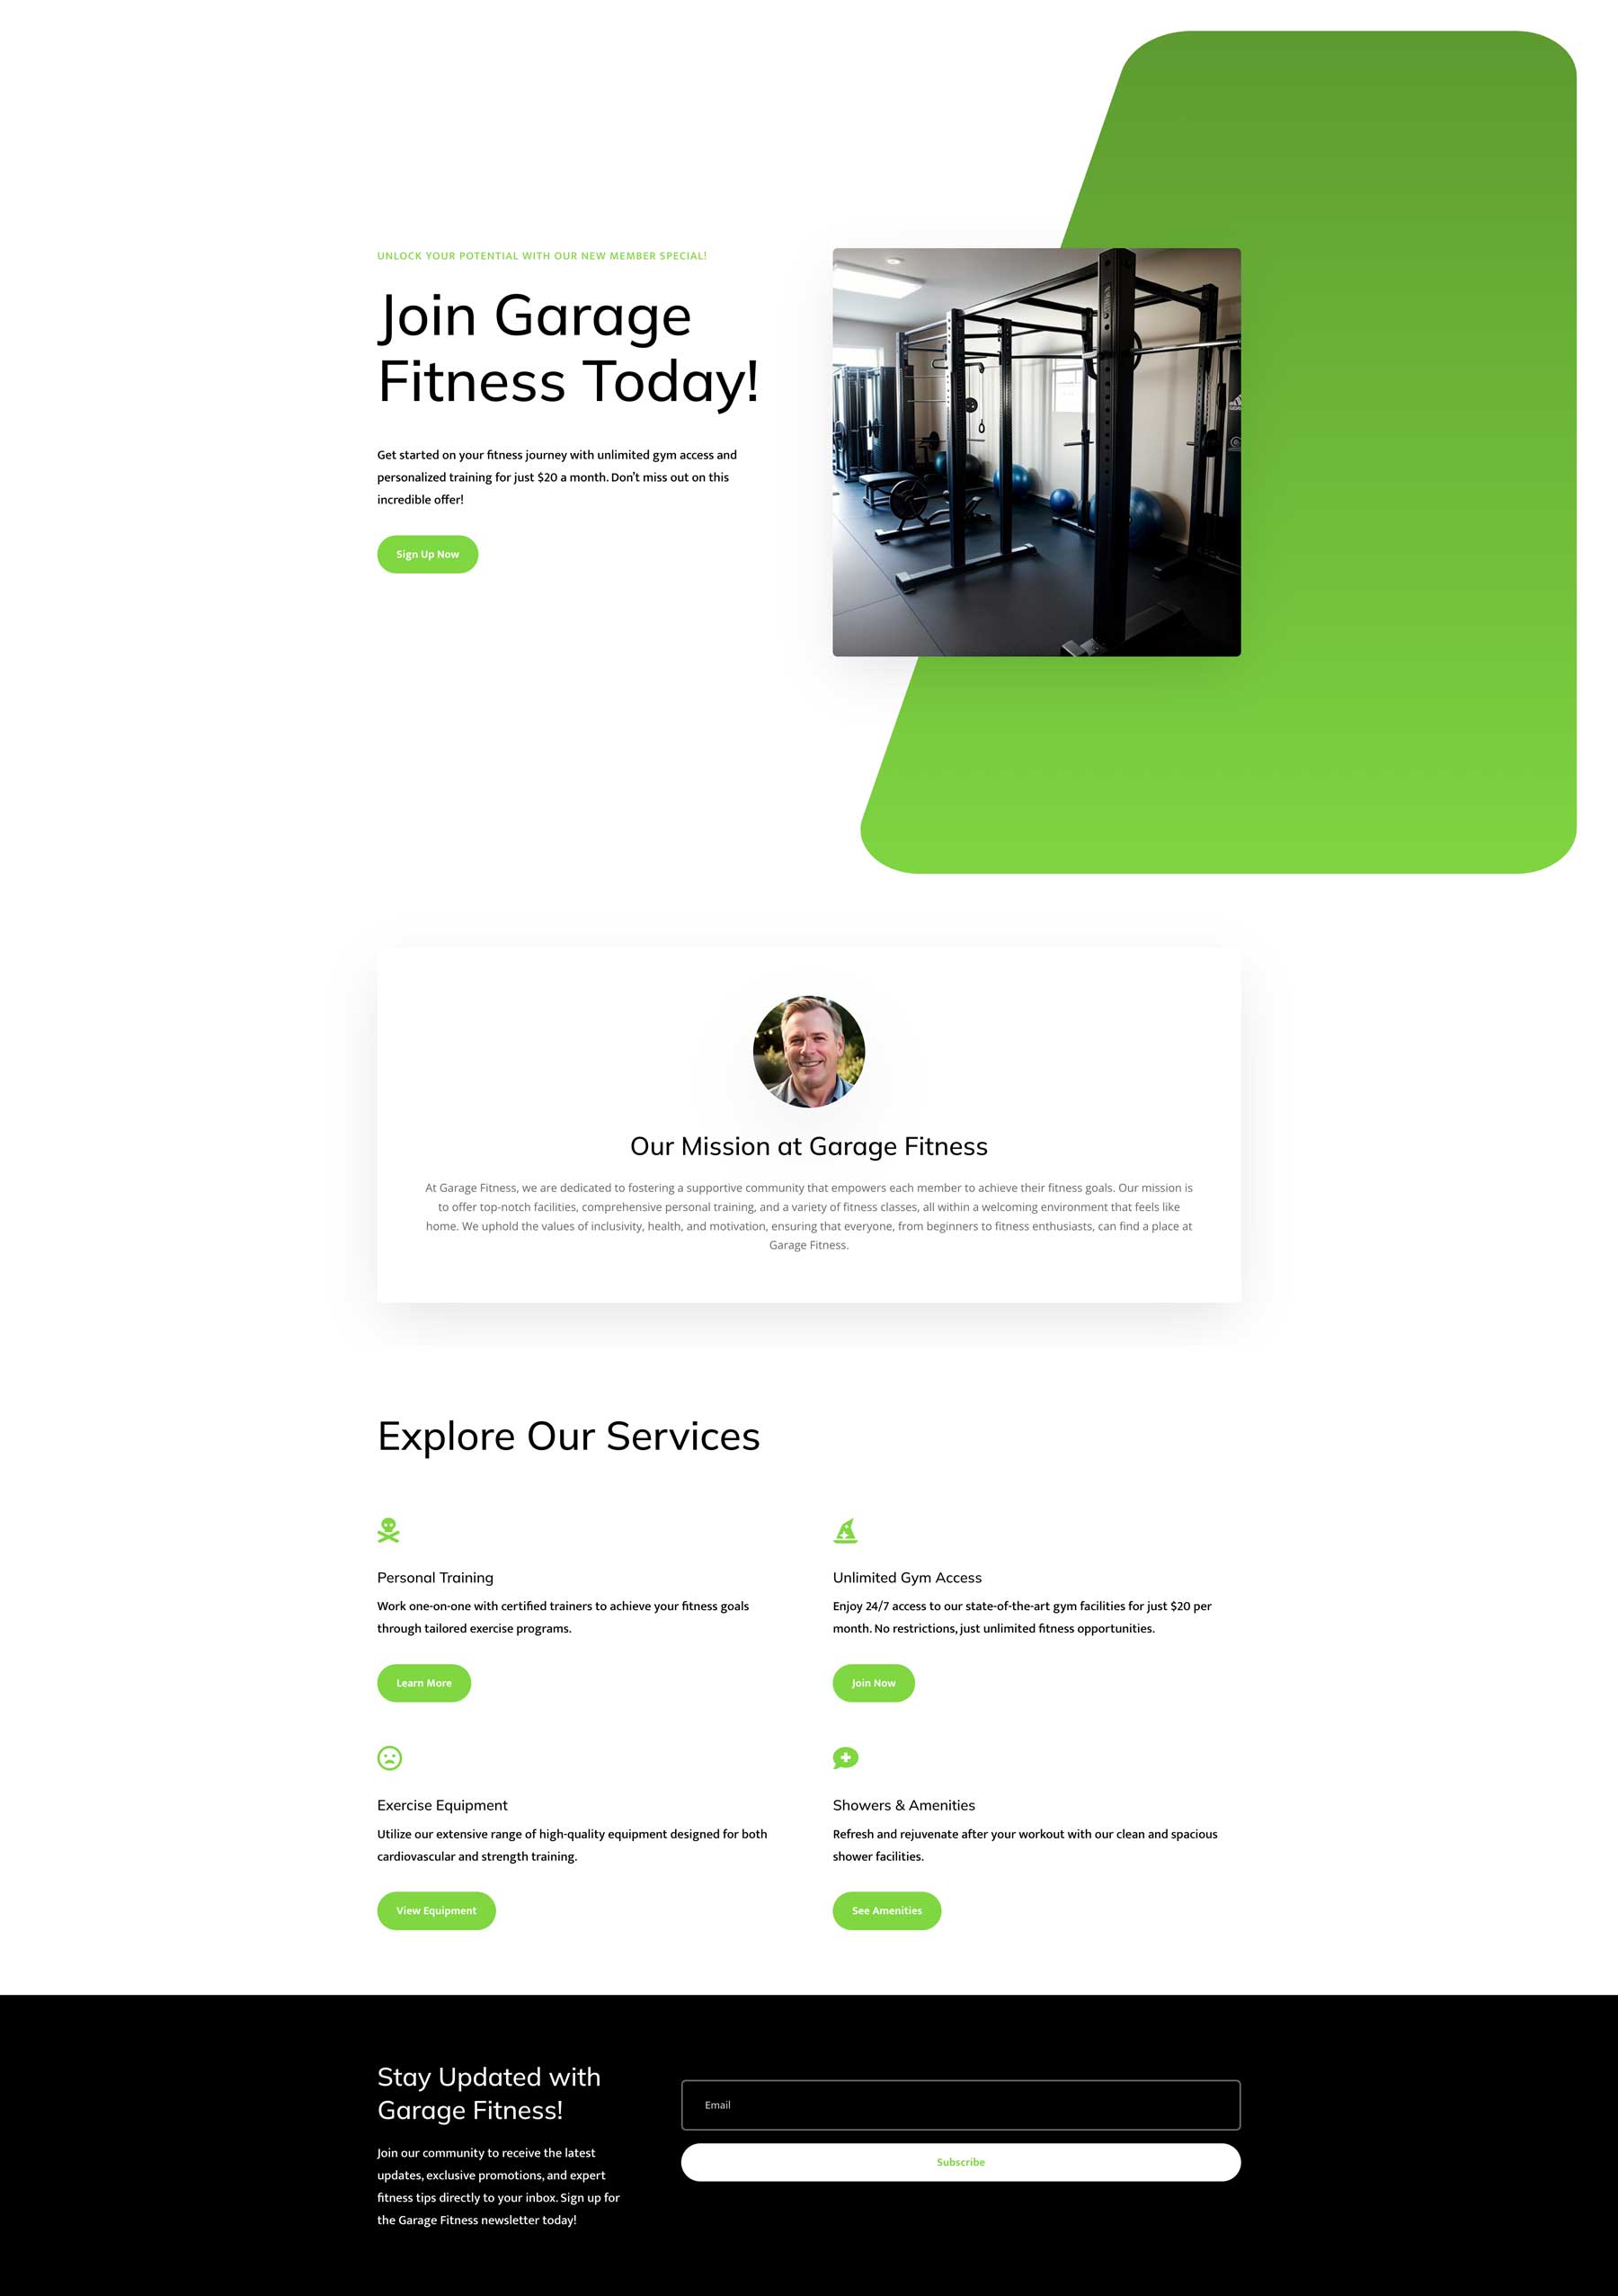
Prompt: Create a landing page for a neighborhood gym. Include a new member offer in the hero, along with an image of gym equipment. Also include an “about us” section, list out each service, and include a newsletter signup form.
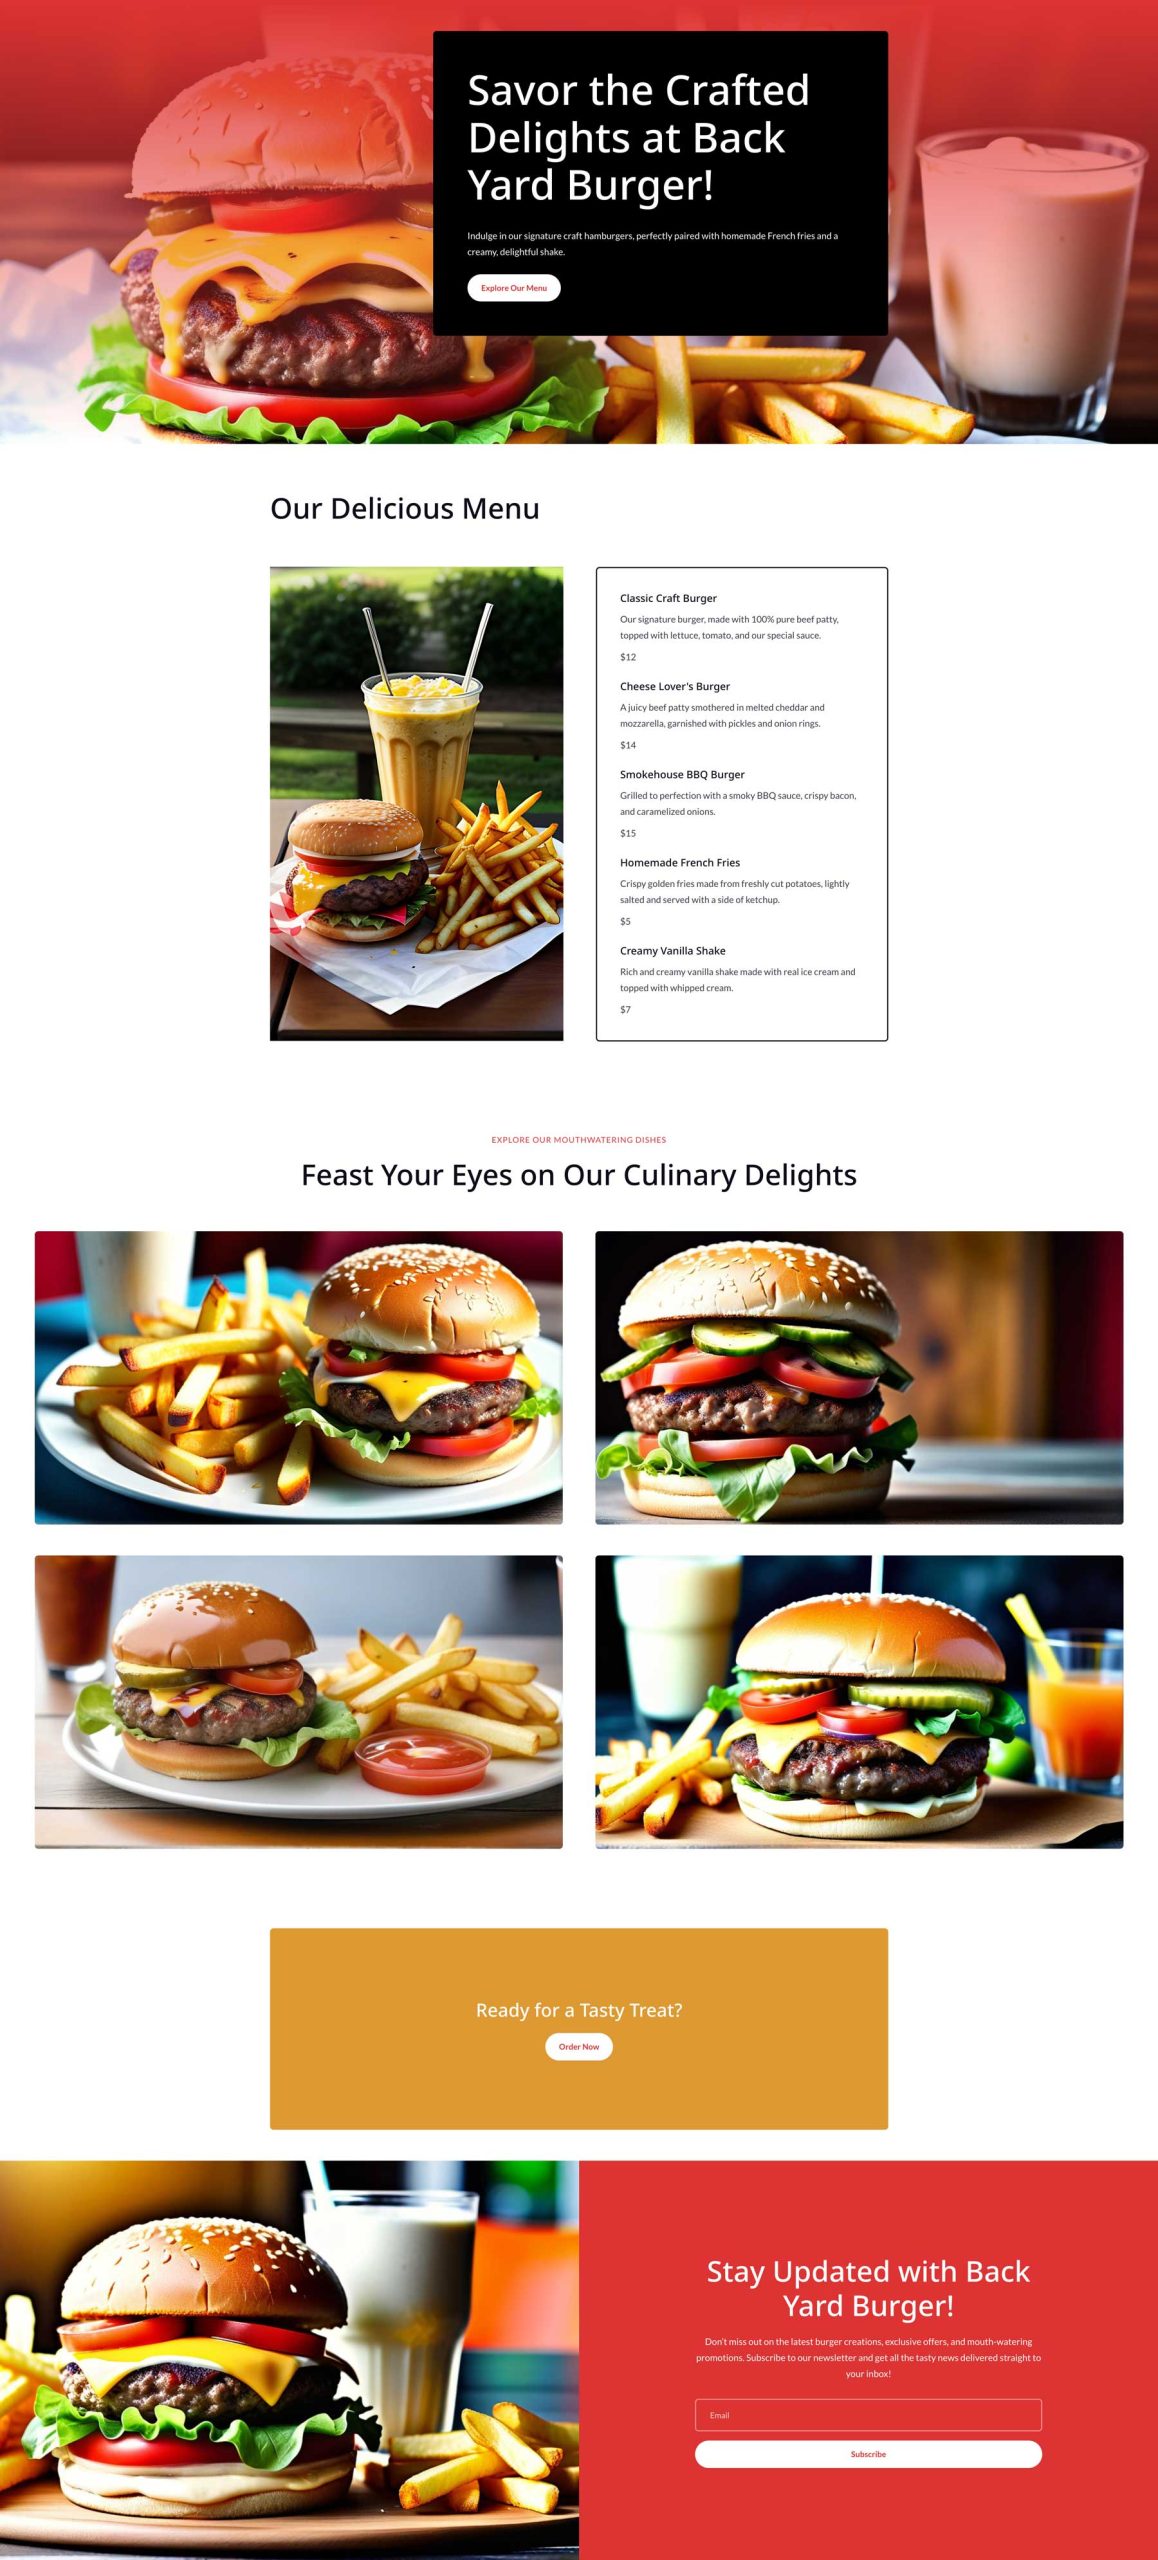
Prompt: Create a menu page for a burger joint. Include delicious food images, a menu, a order online section, and a footer with a newsletter signup
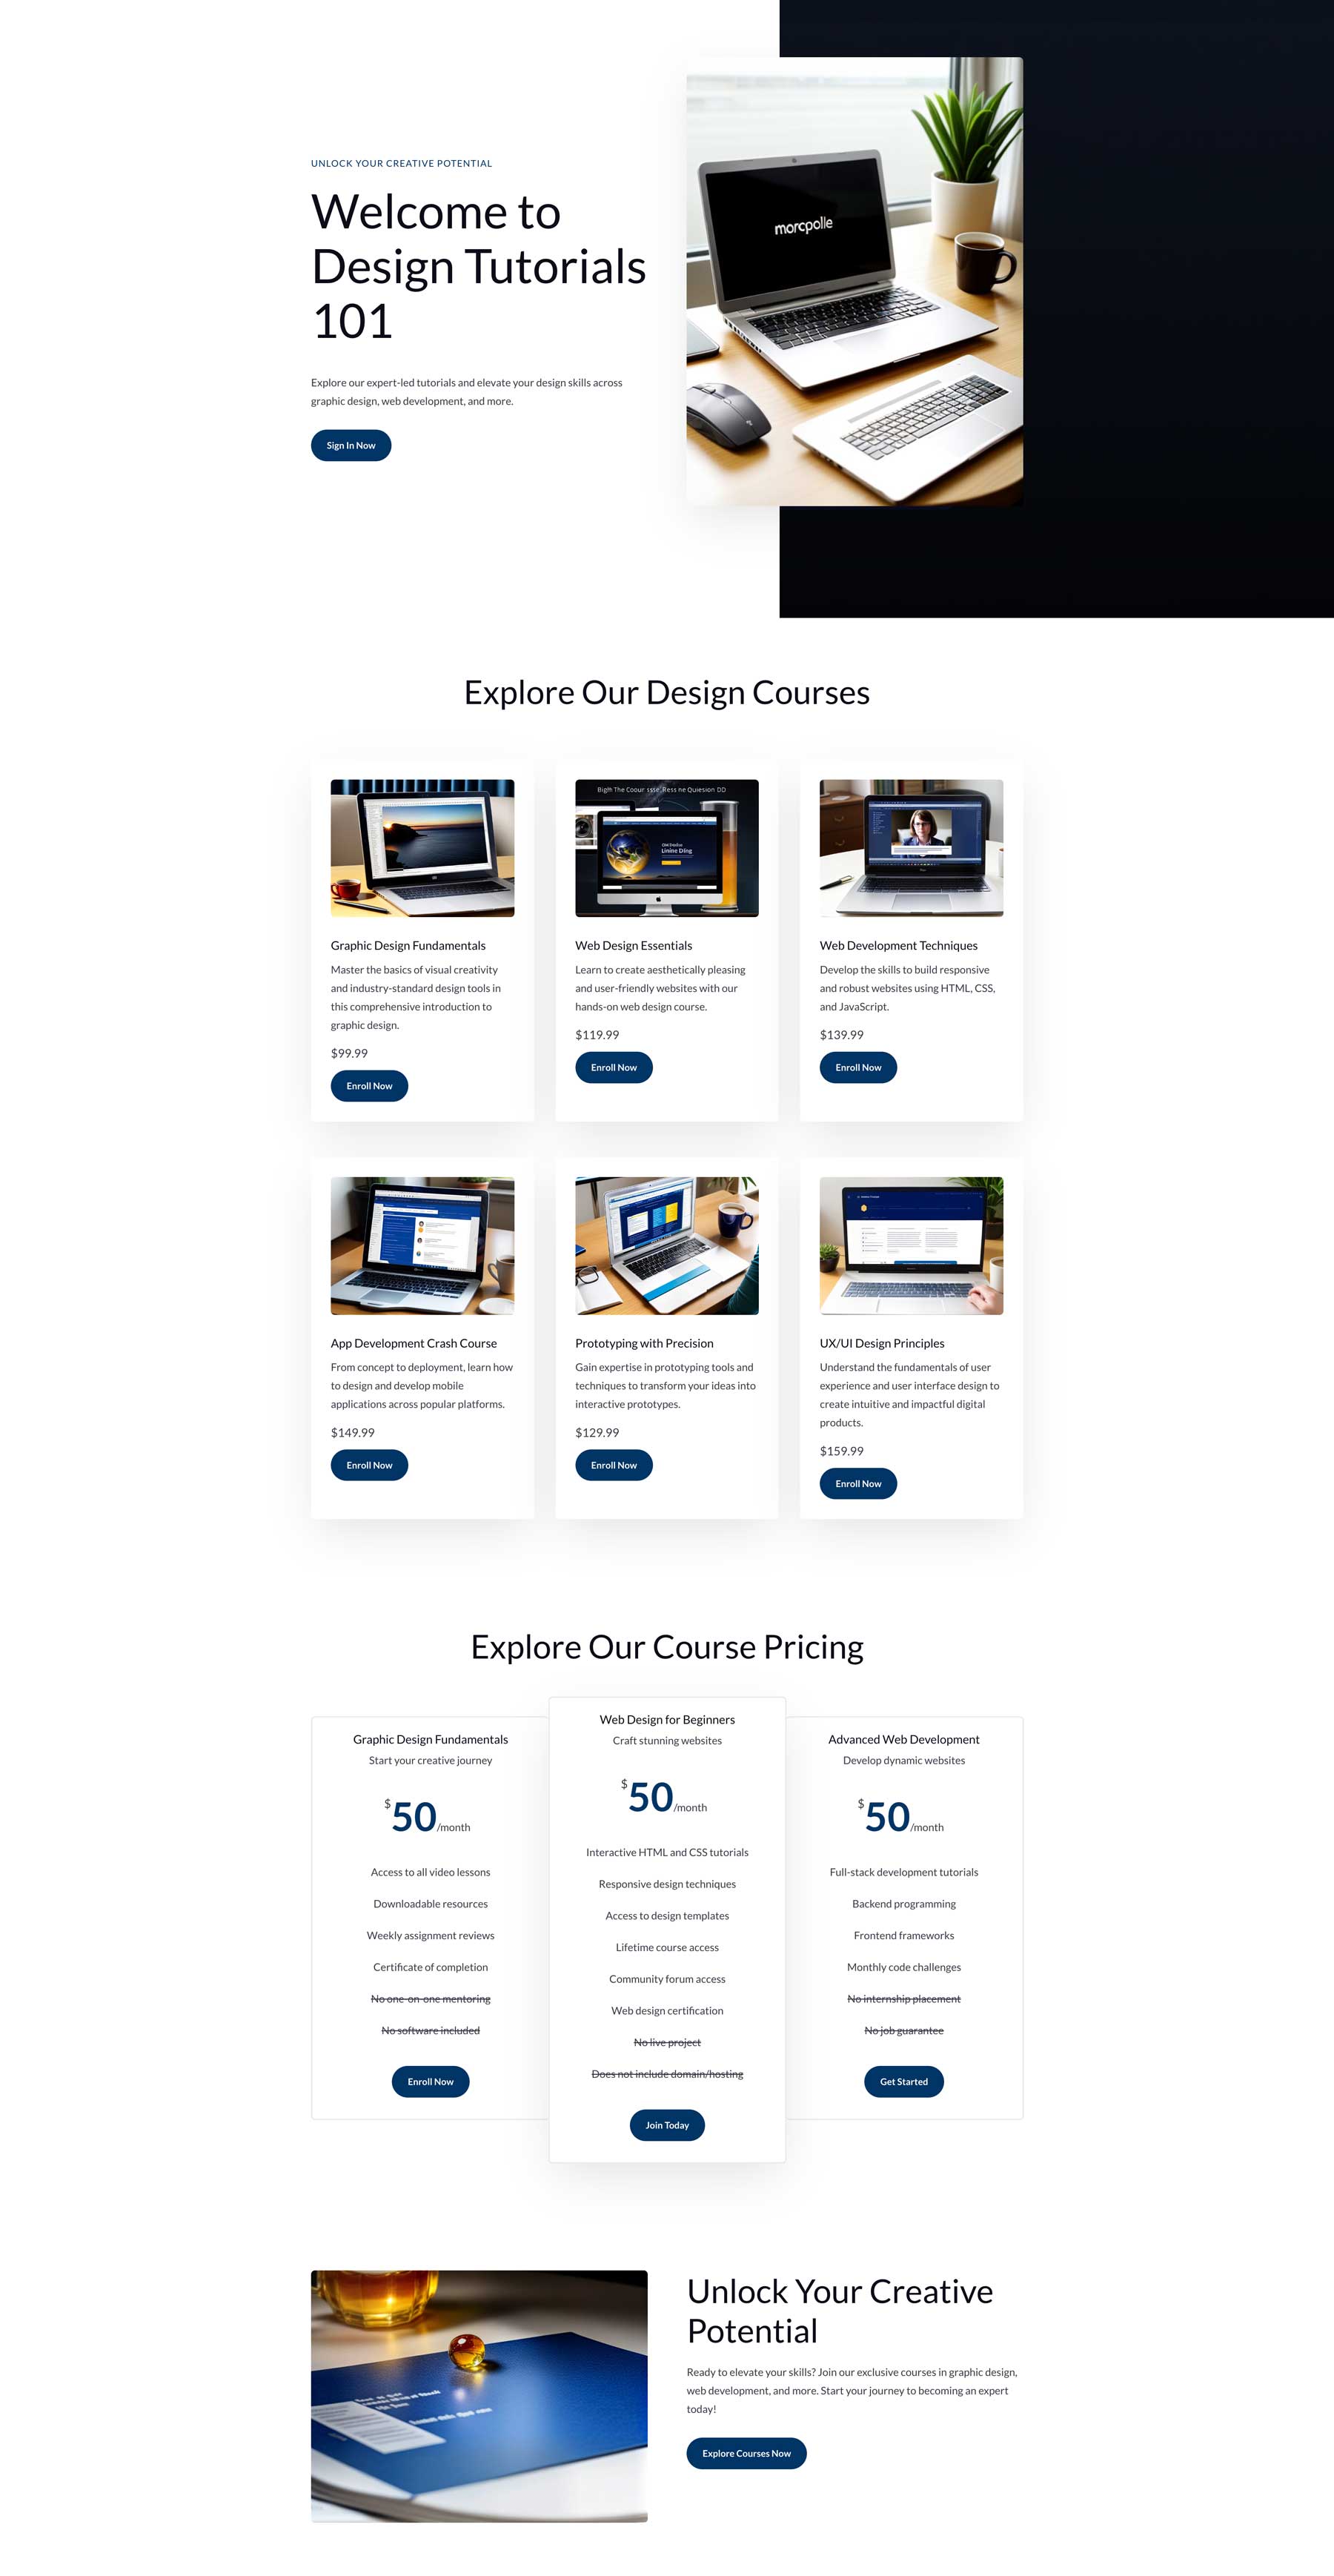
Prompt: Create an online learning courses page. Showcase 6 classes for graphic design, web design, web development, app development, prototyping, and UX/UI. Also showcase pricing for each class, a hero with a background image and a sign in form for registered users.

Prompt: Create a landing page for an automobile repair business. Make the theme dark, with pops of red. Include a hero section with a black and white background image of a car, an over-sized headline with the key word “Auto Repair”, and an image gallery. Also include a services section, a what we do section, and a call to action section.
What Are The Benefits of Using Divi Layouts AI?
As we’ve demonstrated in our Divi Layouts AI guide, creating webpages with artificial intelligence is easy, quick, and intuitive. It helps beginners and seasoned designers create layouts faster than it would normally take to design one from scratch. It’s also a great way to inspire creativity because Divi AI can generate images, text, and code, which gives you a great starting point. Another benefit of Divi AI is that you can generate unlimited photos, text, code, and layouts without usage limits. Divi AI is also the perfect companion for any Divi website because it understands Divi to its core. Ultimately, Divi AI is an incredible creative assistant that can streamline the layout creation process, saving you valuable time and effort.
Divi Layouts AI Will Revolutionize How You Use Divi
Divi is the most popular, feature-rich WordPress theme available. Whether you want to design webpages from scratch or use a premade layout, Divi provides the tools to do it. With the introduction of Divi Layouts AI, you can create full web pages with just a text prompt. The entire process of creating a new page to launching it is incredibly streamlined, allowing you to create beautiful, effective landing pages in minutes. With Divi + Divi AI, you can use the front-end, no-code Visual Builder to generate images, text, code, and full layouts in minutes, allowing you to spend time focusing on other aspects of your business. With Divi, the sky is the limit on what you can create.
Frequently Asked Questions
What is Divi AI and what can it do?
How does Divi AI generate content that fits my website?
Is Divi AI difficult to use?
What are the advantages of Divi AI over other AI content generation tools?
Is Divi AI free to use?
The post Divi Layouts AI: The Complete Guide appeared first on Elegant Themes Blog.
