Sometimes, you may want your website’s contact form submissions sent to multiple email addresses instead of just one. Luckily, this is very easy to do with Divi! In this tutorial, we will show you how to include multiple email addresses in your Divi contact form module. Additionally, we will also show you how to add and customize the design of a contact form to match the design of your website.
Let’s get started!
Sneak Peek
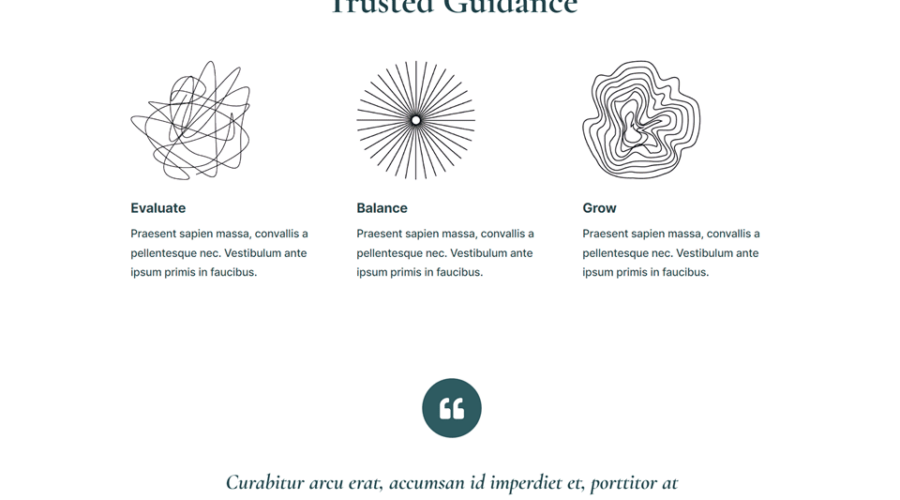
Here is a preview of what we will design
What You Need to Get Started
Before we begin, install and activate the Divi Theme and make sure you have the latest version of Divi on your website.
How to Include Multiple Email Addresses in Your Divi Contact Form Module
Now, you are ready to start! We’ll go through this tutorial step by step.
Create a New Page with a Premade Layout
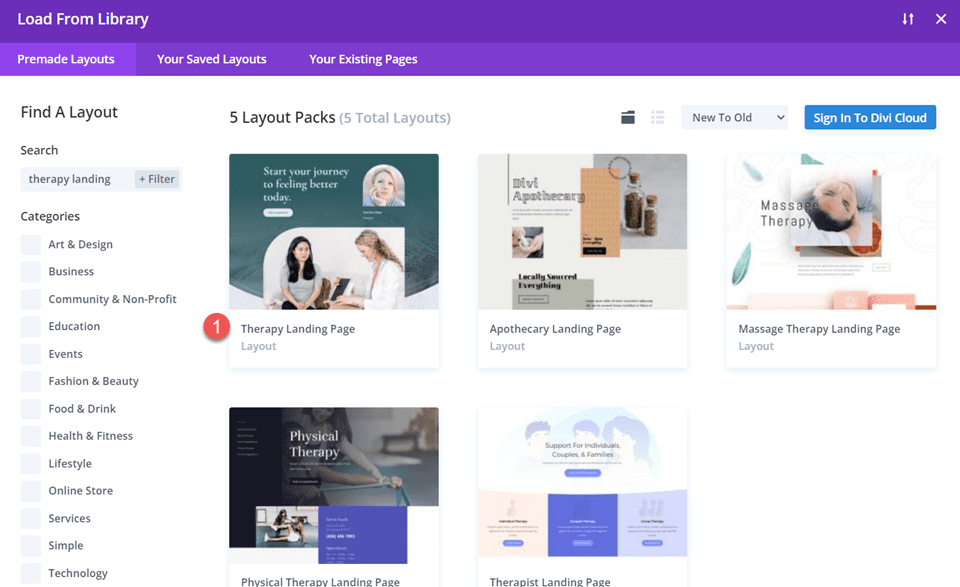
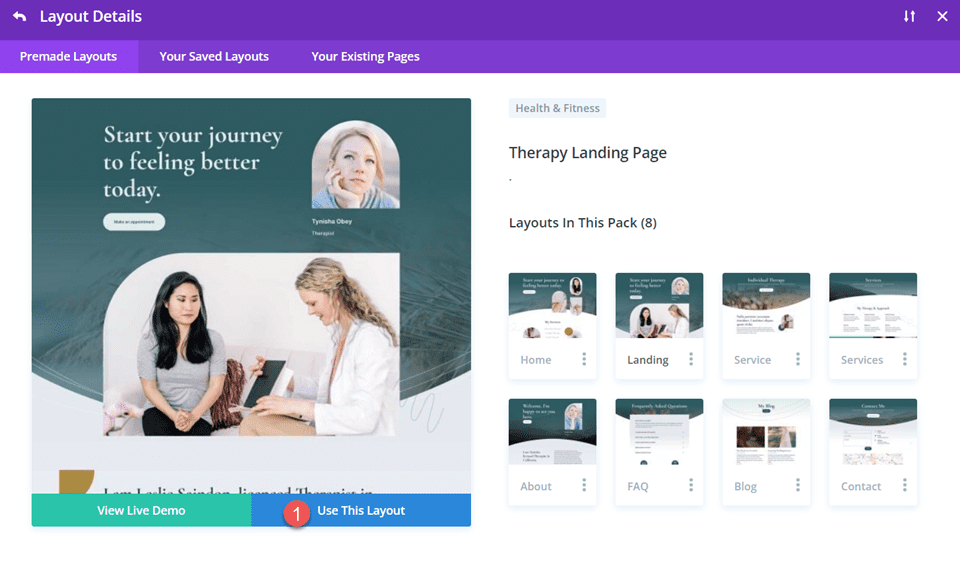
Let’s start by using a premade layout from the Divi library. For this design, we will use the Therapy Landing Page from the Therapy Layout Pack.
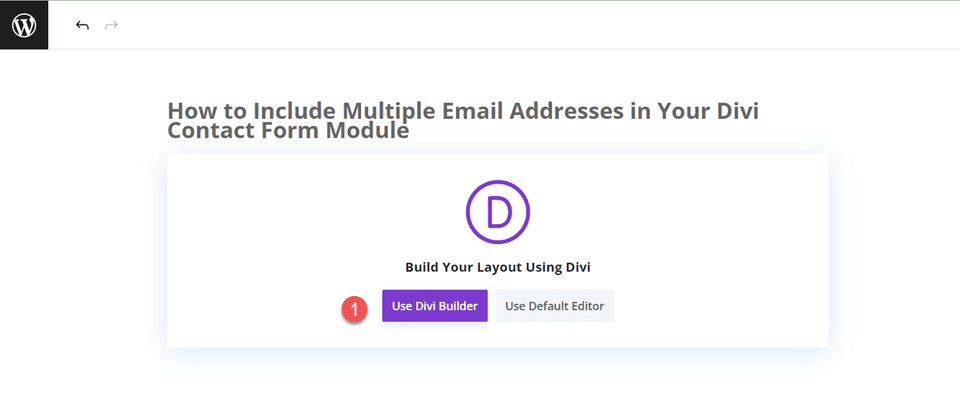
Add a new page to your website and give it a title, then select the option to Use Divi Builder.
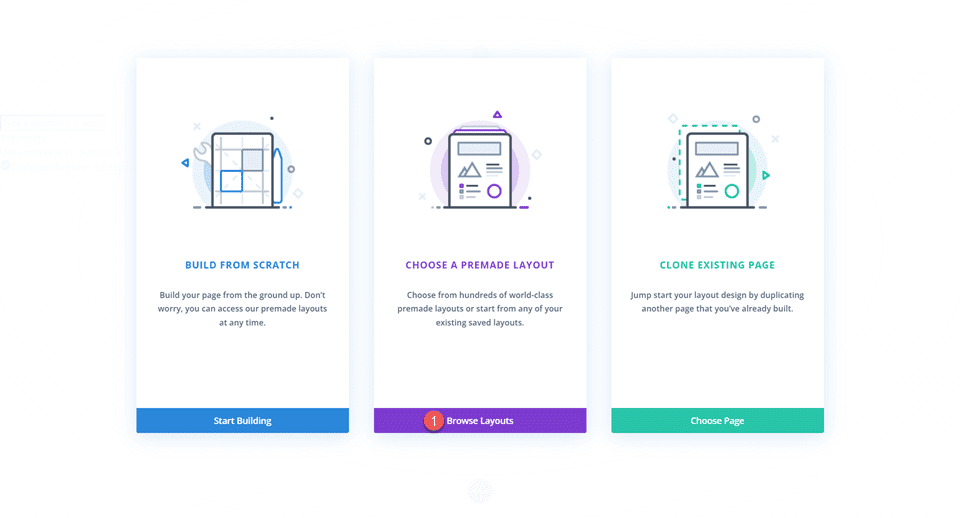
We will use a premade layout from the Divi library for this example, so select Browse Layouts.
Search for and select the Therapy Landing Page.
Select Use This Layout to add the layout to your page.
Now, we are ready to build our design.
Modify the Layout for the Contact Form Module
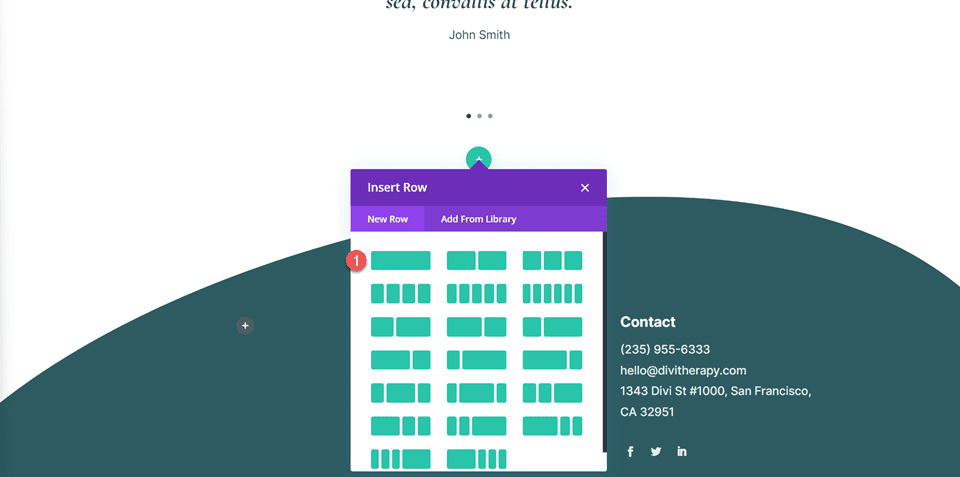
First, we need to add a contact form to this page. Scroll to the bottom of the layout. We will add a contact form between the testimonial section and the footer. Add a new row with a single column below the testimonial section.
Row Settings
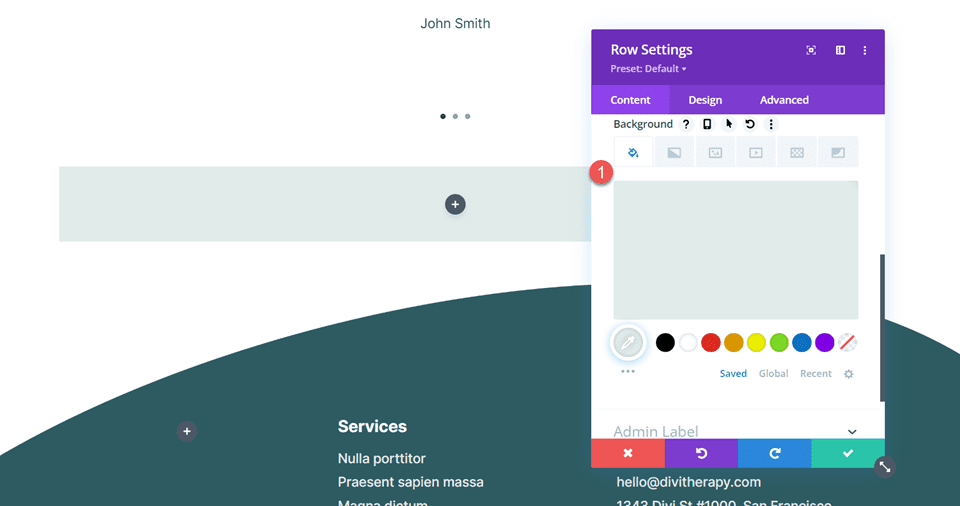
Open the row settings. We are going to add a background for the contact form. Set the background color.
- Background: #e1ecea
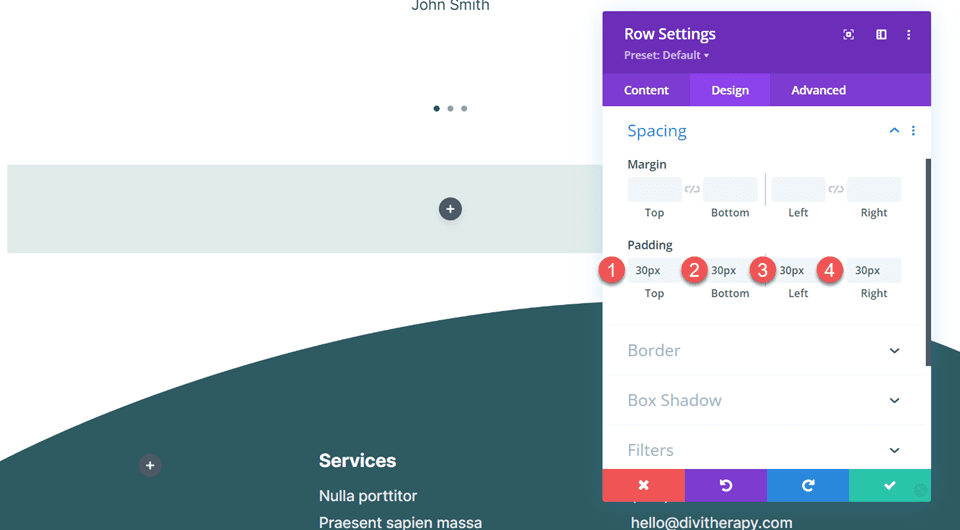
Next, open the spacing settings under the Design tab and add padding.
- Padding Top: 30px
- Padding Bottom: 30px
- Padding Left: 30px
- Padding Right: 30px
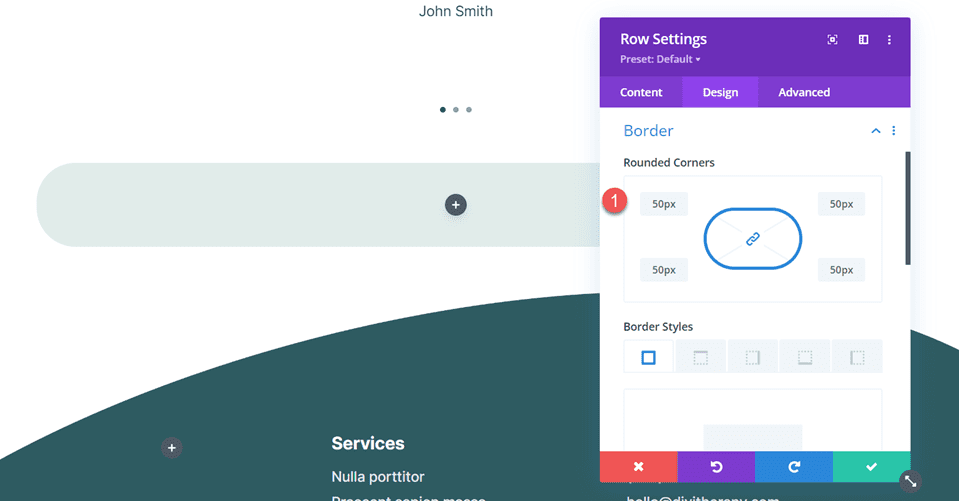
Then, open the border settings and add rounded corners.
- Rounded Corners: 50px
Add Heading Text
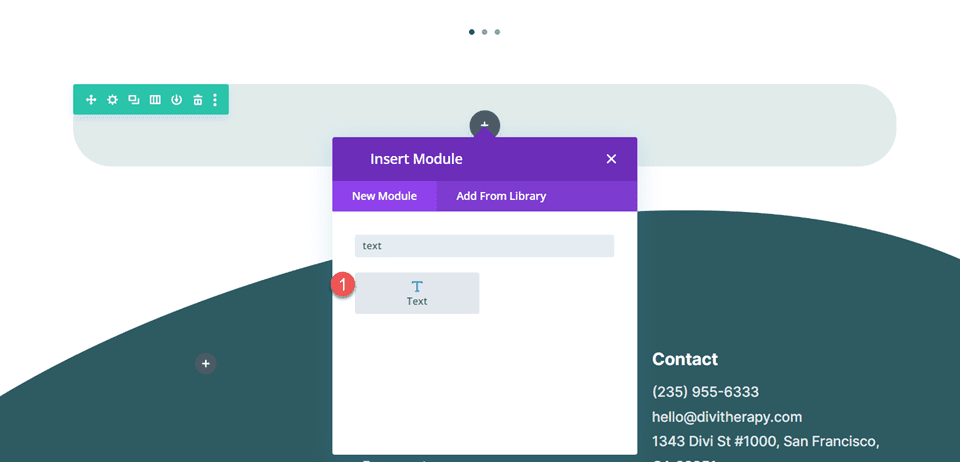
Next, add a text module to the row. We are going to add some heading text.
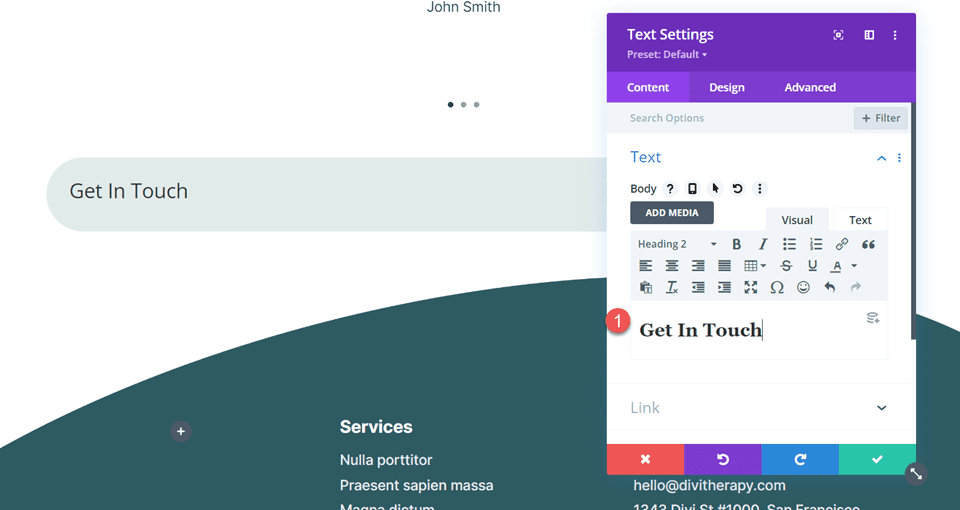
Add the heading text.
- H2: Get In Touch
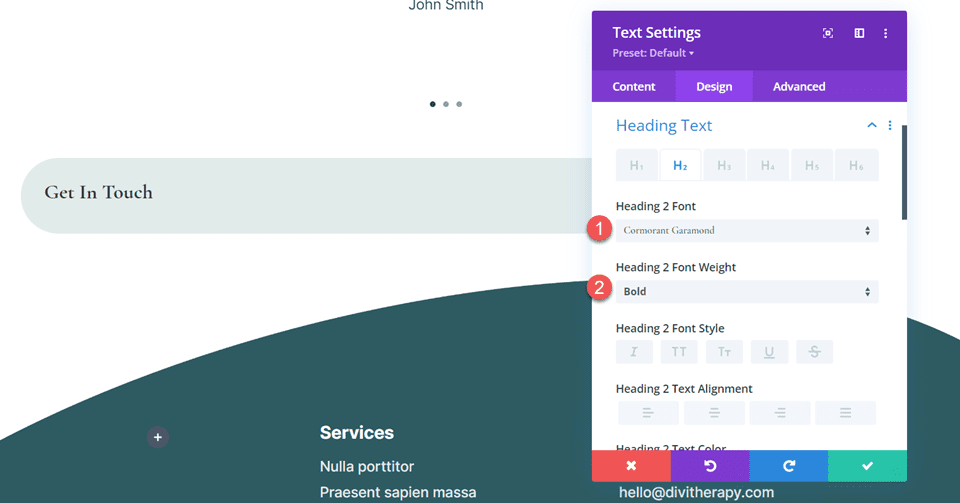
Open the heading text settings under the design tab and modify the font and font weight.
- Heading 2 Font: Cormorant Garamond
- Heading 2 Font Weight: Bold
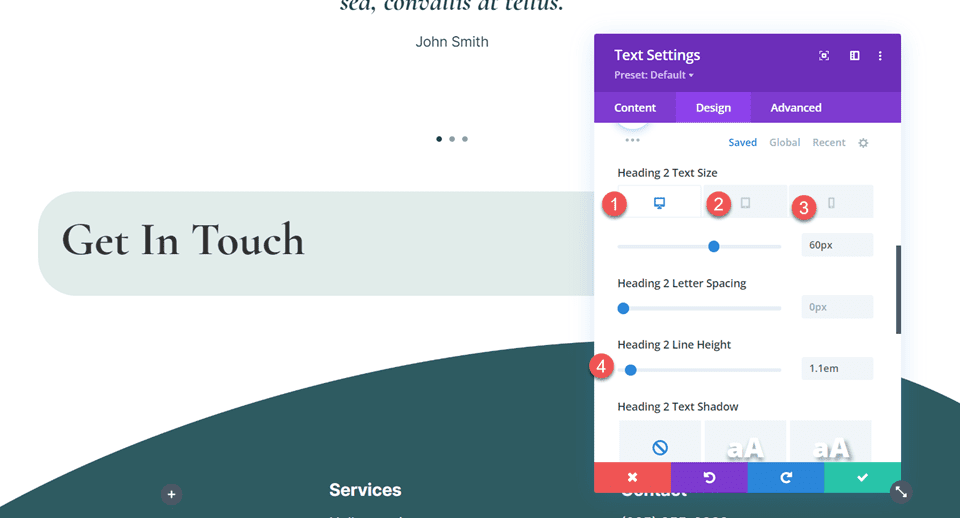
Next, adjust the heading text size using the responsive options to set smaller text sizes on smaller screens. Additionally, adjust the line height.
- Heading 2 Text Size Desktop: 60px
- Heading 2 Text Size Tablet: 32px
- Heading 2 Text Size Mobile: 26px
- Heading 2 Line Height: 1.2em
Add and Customize the Contact Form Module
Add the Contact Form Module
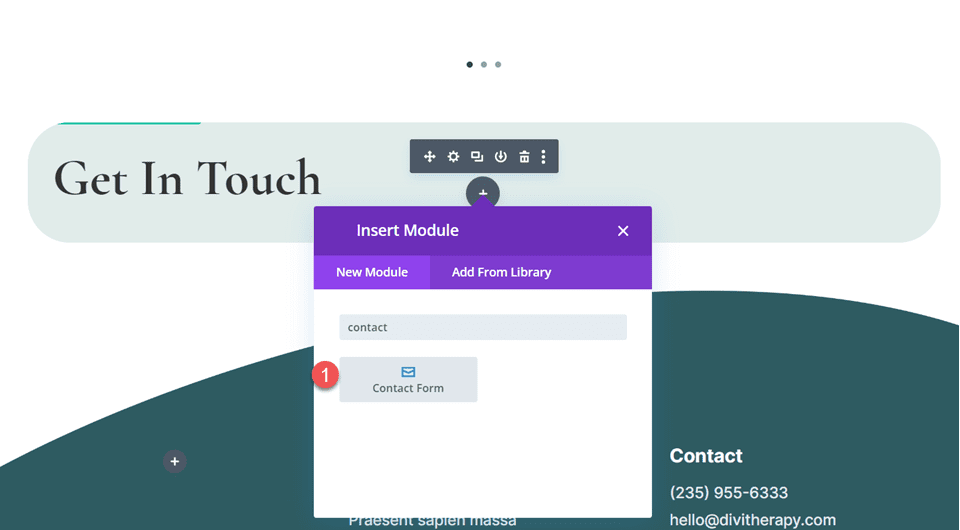
Now that the row settings have been customized and the header text is in place, we can add the contact form module to the row. Add the module below the heading text.
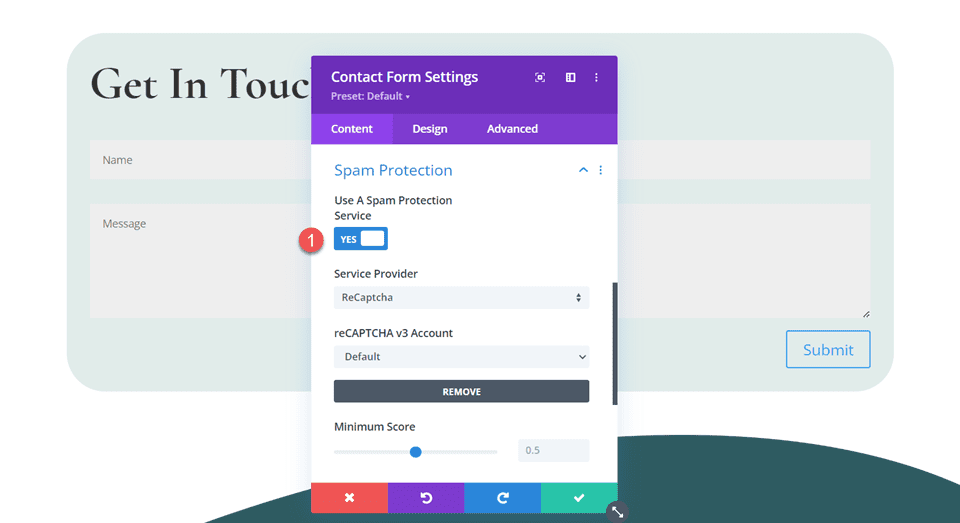
Open the contact form settings. Under the Spam Protection options, enable “Use A Spam Protection Service” to enable ReCaptcha and remove the Basic Captcha requirement from the form.
- Use A Spam Protection Service: Yes
- Use Basic Captcha: No
Customize the Contact Form Module Design
Fields Settings
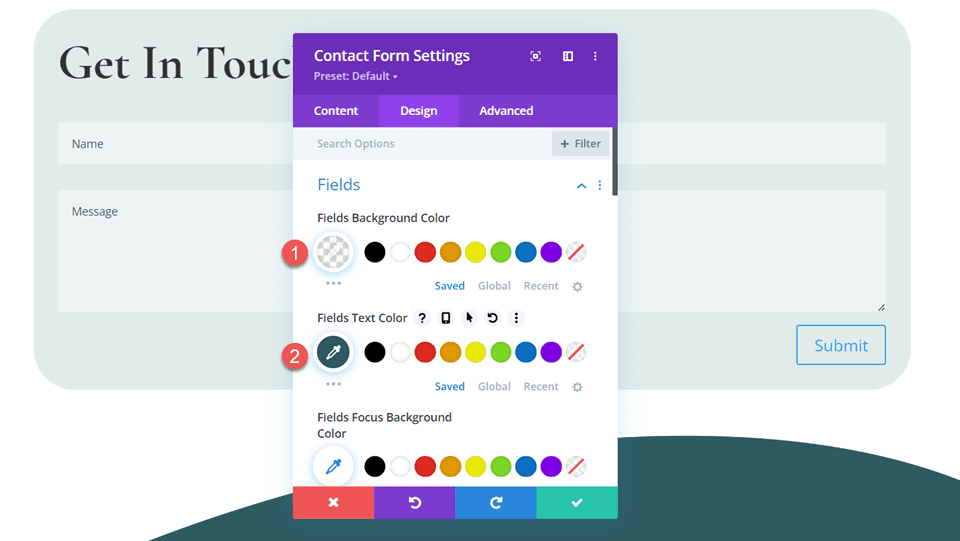
Move over to the design tab and open the Fields settings. Change the background color and text color.
- Fields Background Color: rgba(255,255,255,0.42)
- Fields Text Color: #2e5b61
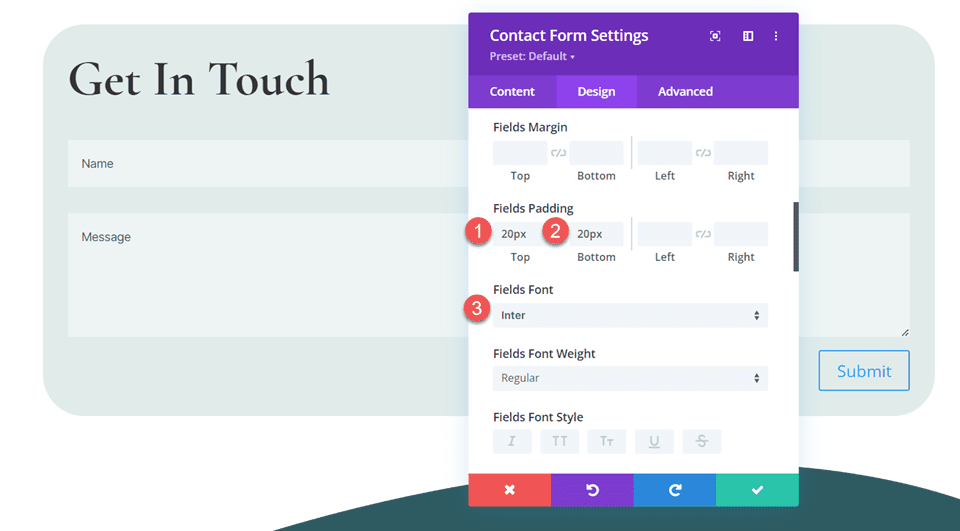
Next, modify the field’s padding and font.
- Fields Padding Top: 20px
- Fields Padding Bottom: 20px
- Fields Font: Inter
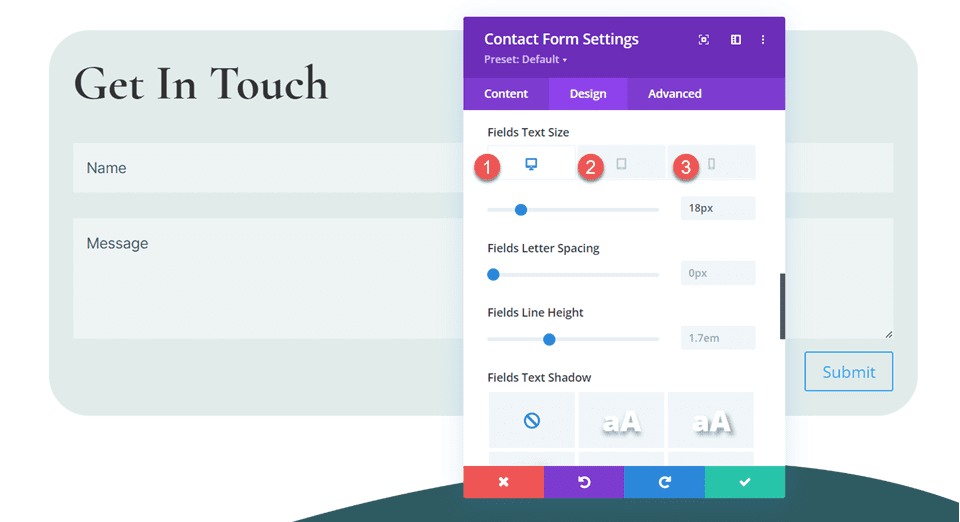
Then, change the field’s text size. Use the responsive options to set different text sizes on smaller screens.
- Fields Text Size Desktop: 18px
- Fields Text Size Tablet: 16px
- Fields Text Size Mobile: 14px
Button Settings
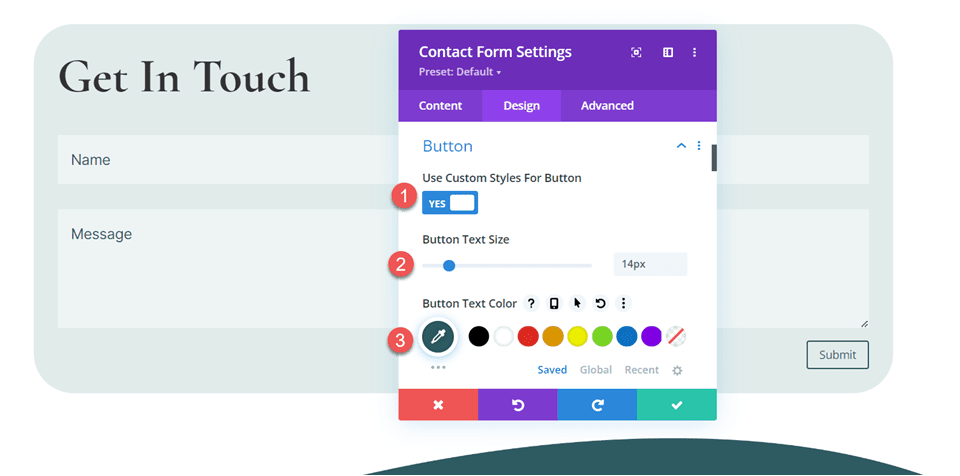
Move over to the button settings and enable custom styles. Then, change the text size and text color.
- Use Custom Styles for Button: Yes
- Button Text Size: 14px
- Button Text Color: #2e5b61
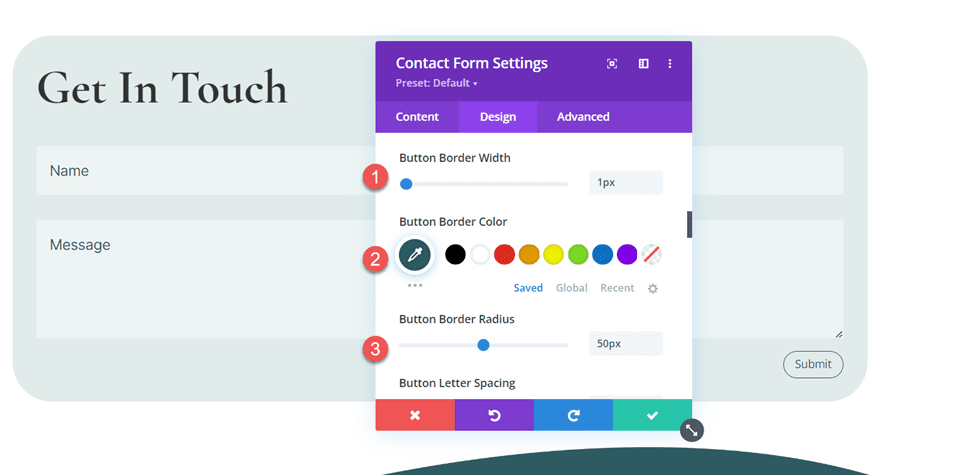
Next, set the border width, color, and radius.
- Button Border Width: 1px
- Button Border Color: #2e5b61
- Button Border Radius: 50px
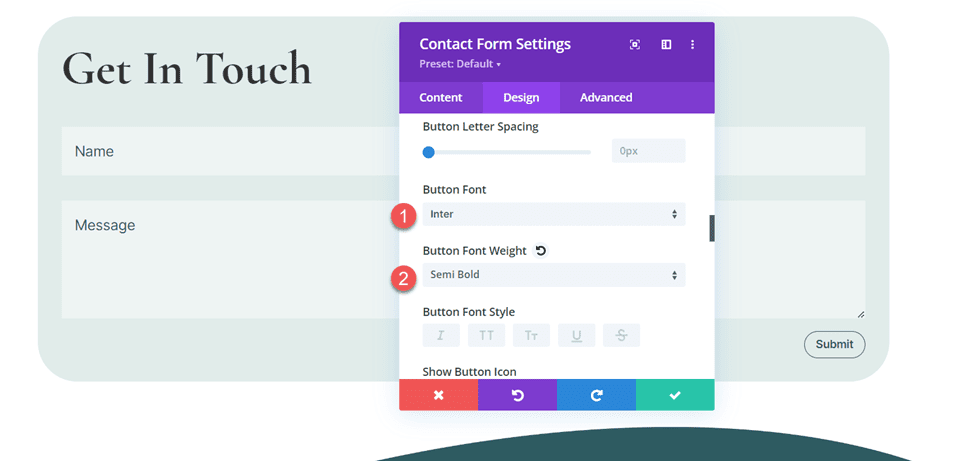
Modify the button font and font weight.
- Button Font: Inter
- Button Font Weight: Semi Bold
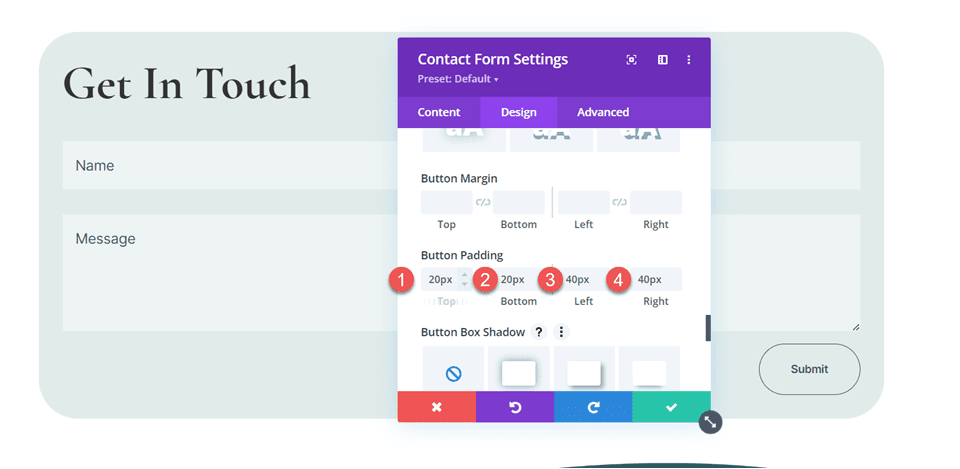
Finally, add padding to the button.
- Button Padding Top: 20px
- Button Padding Bottom: 20px
- Button Padding Left: 40px
- Button Padding Right: 40px
Border Settings
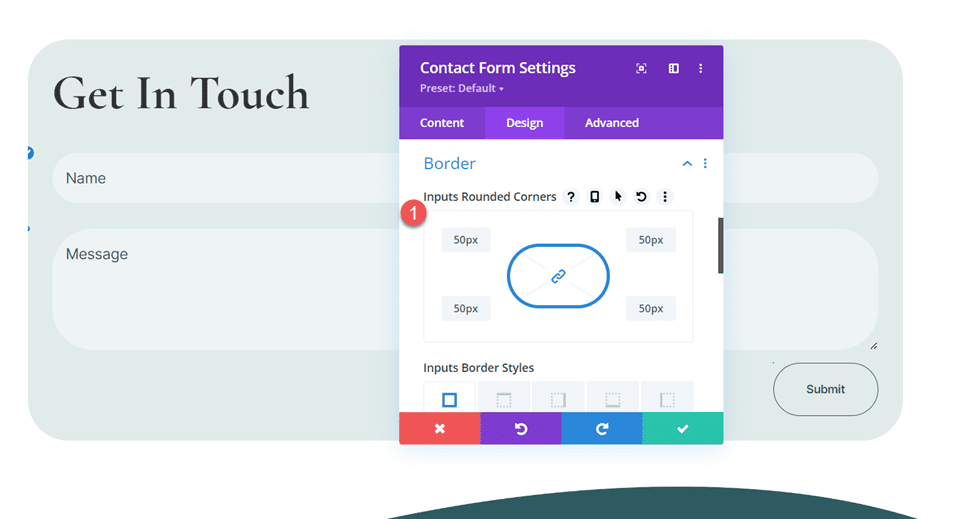
Now open the Border settings and add rounded corners to the inputs.
- Inputs Rounded Corners: 50px
This completes the design for the contact form module.
Include Multiple Email Addresses in Your Divi Contact Form Module
Including multiple email addresses in your Divi contact form module can be helpful if you want multiple people to be able to receive incoming messages from your website or if you need the message sent to multiple email addresses. If you are working with multiple people on a team or have multiple inboxes that the messages should be delivered to, this feature may come in handy. Thankfully, it is straightforward to include multiple email addresses in your contact form module using Divi.
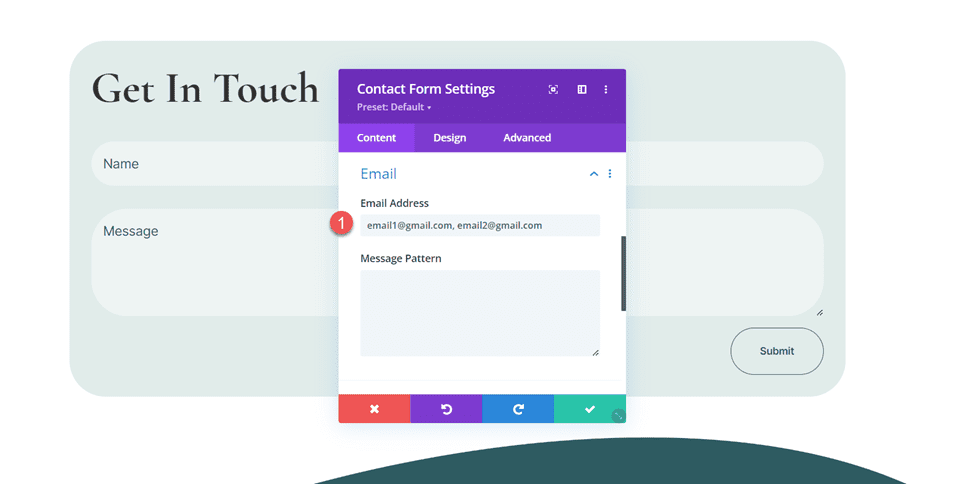
First, open the contact form settings. Navigate to the Email settings located under the Content tab. To add multiple email addresses, separate them with a comma and add them to the “Email Address” field. You can have a space in between like this:
“email1@gmail.com, email2@gmail.com”
Or simply have a comma separating the emails:
“email1@gmail.com,email2@gmail.com”
Once you add your emails to your contact form, be sure to fill it out and, submit a test message and check that the message was delivered to all of the email addresses listed on the form.
Final Result
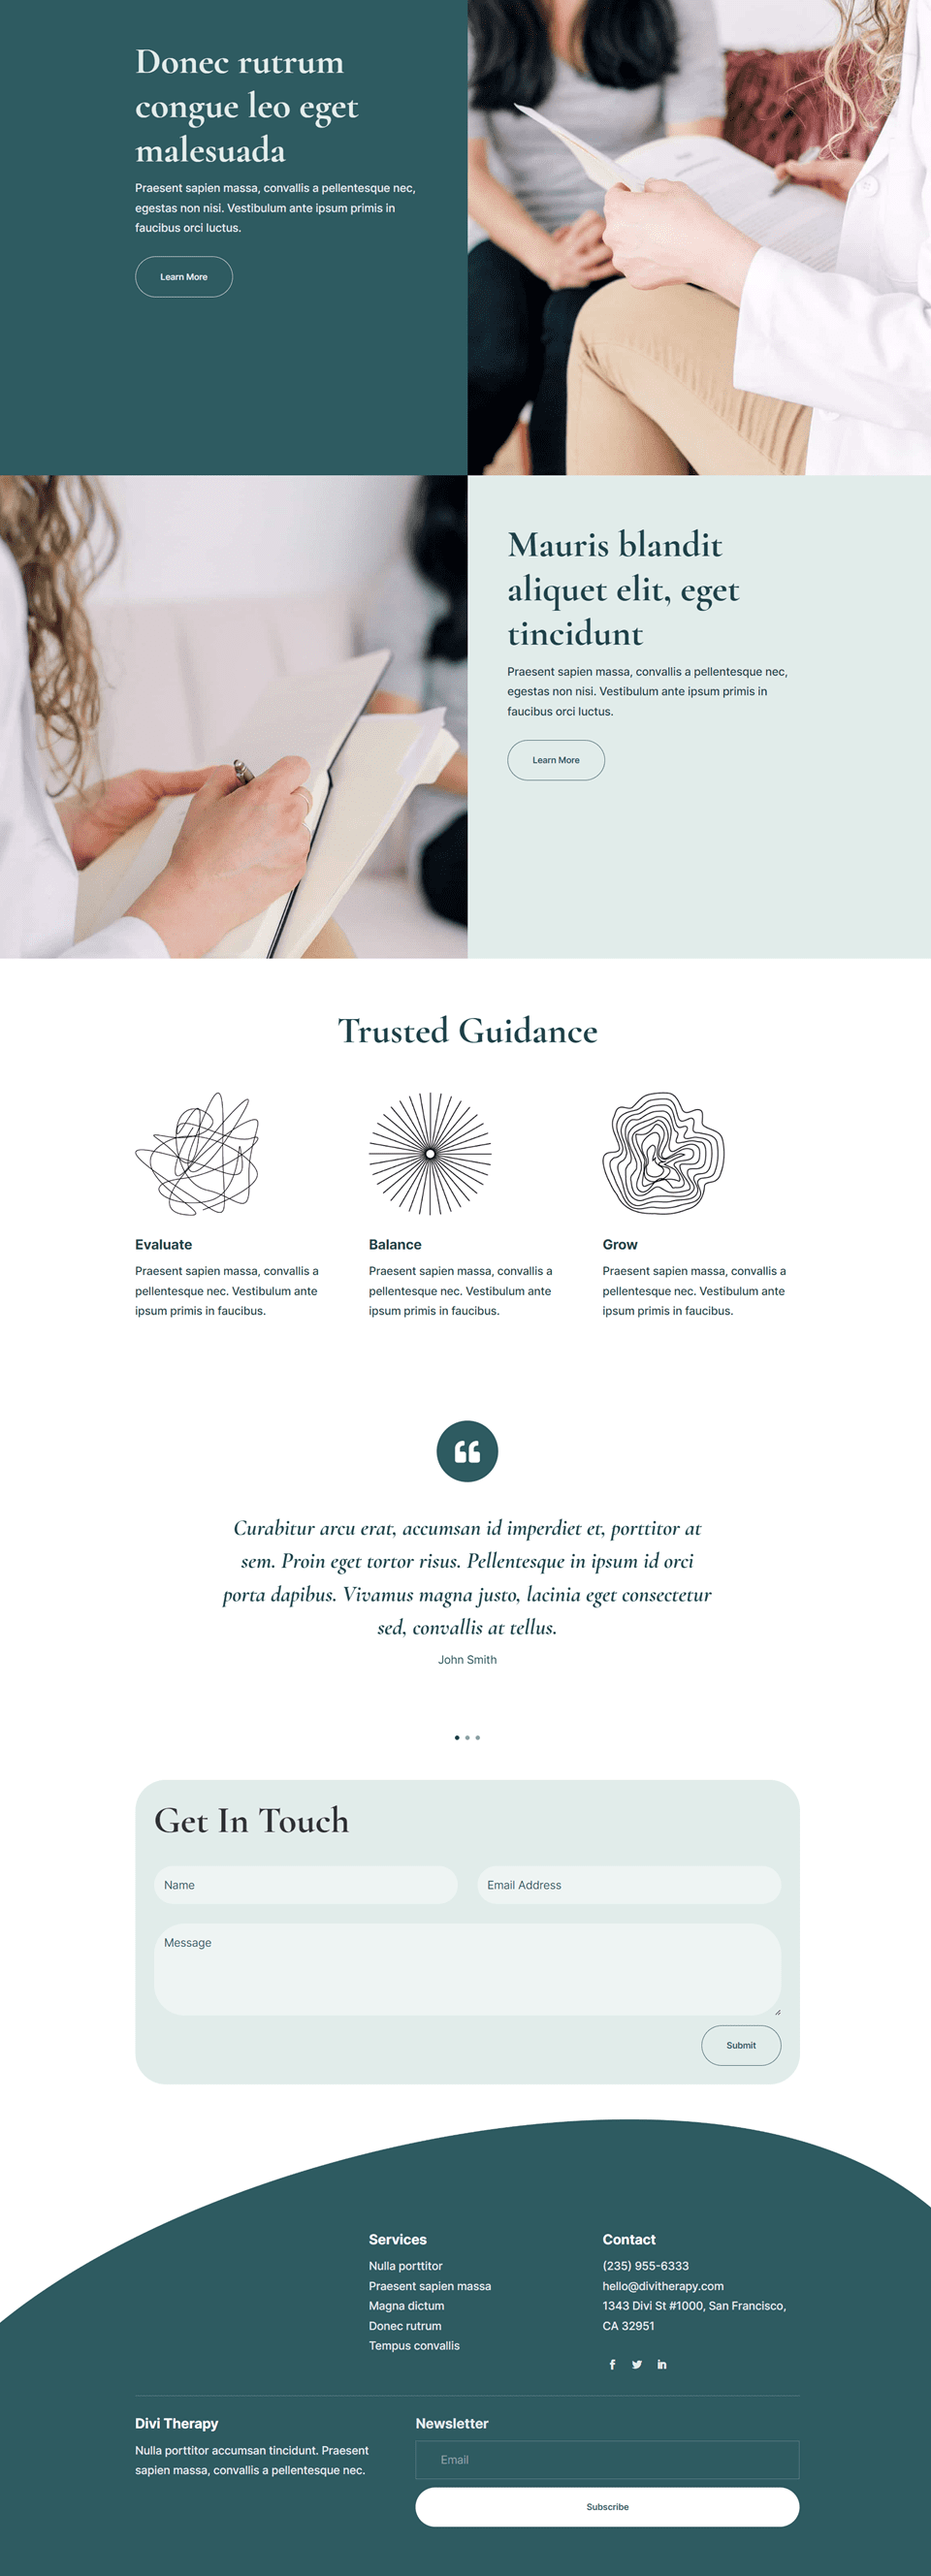
Now, let’s look at the final design for our contact form.
Final Thoughts
It can be convenient to send your contact form submissions to multiple emails, especially if you have multiple people needing a copy of the message. Thankfully, this is very easy to implement using Divi’s contact form module. To learn more about what you can do with Divi’s contact form module, check out this article on how to create a versatile form with conditional logic and how to include a slide-in contact form in a hero section. How have you customized your website’s contact form? We’d love to hear from you in the comments!
The post How to Include Multiple Email Addresses in Your Divi Contact Form Module appeared first on Elegant Themes Blog.
