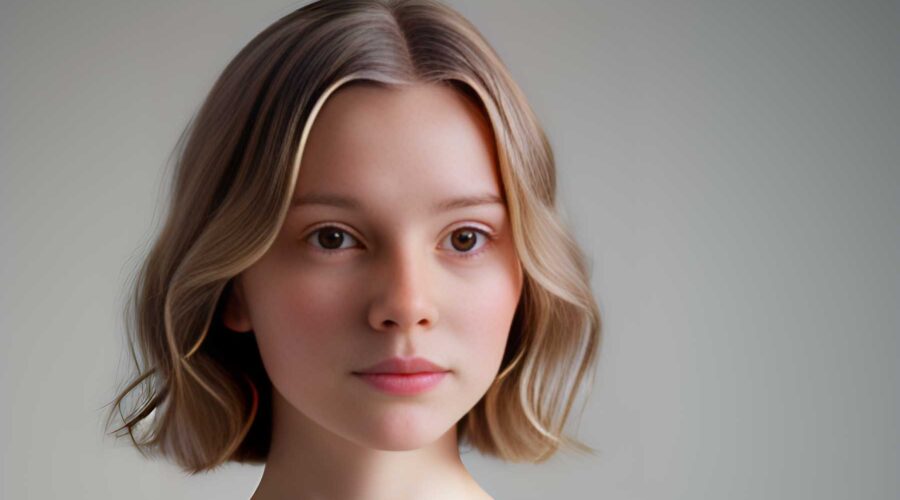
Freelancers and web agencies alike have long struggled to find good stock images to use in web projects. They either require an expensive photography membership, a keen eye for photography, or having to depend on the client to provide them. Thanks to artificial intelligence (AI), creating your own images is possible, often with incredible results. In this post, we’ll explain what AI is, tell you how to use it to generate AI images for WordPress, and provide tips and best practices for generating them.
Let’s dive in.
What is AI?
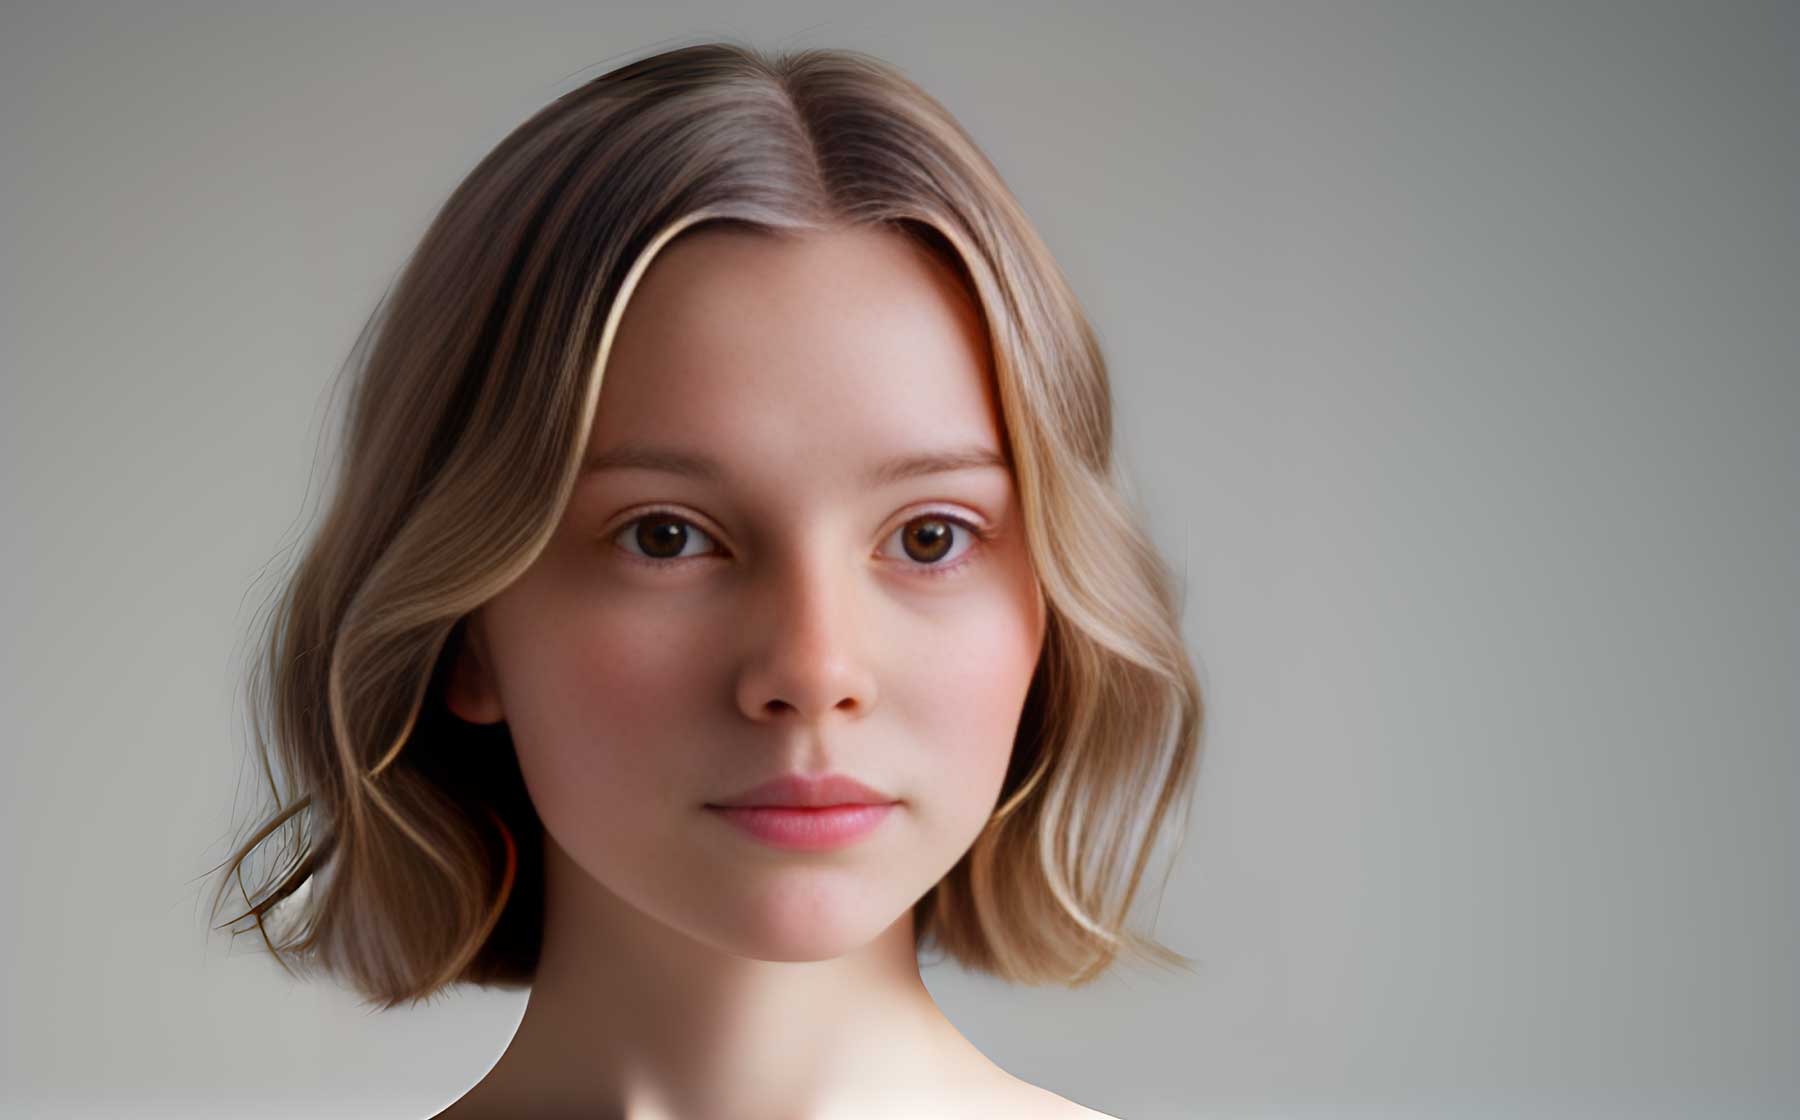
image created with Divi AI
AI is a field within computer science and engineering that focuses on making smart machines capable of mimicking human-like actions and thinking. With AI, machines can learn from their experiences, adapt to new information, and accomplish tasks usually involving human smarts. A particularly popular form of AI for creative purposes is known as generative AI.
What is Generative AI?
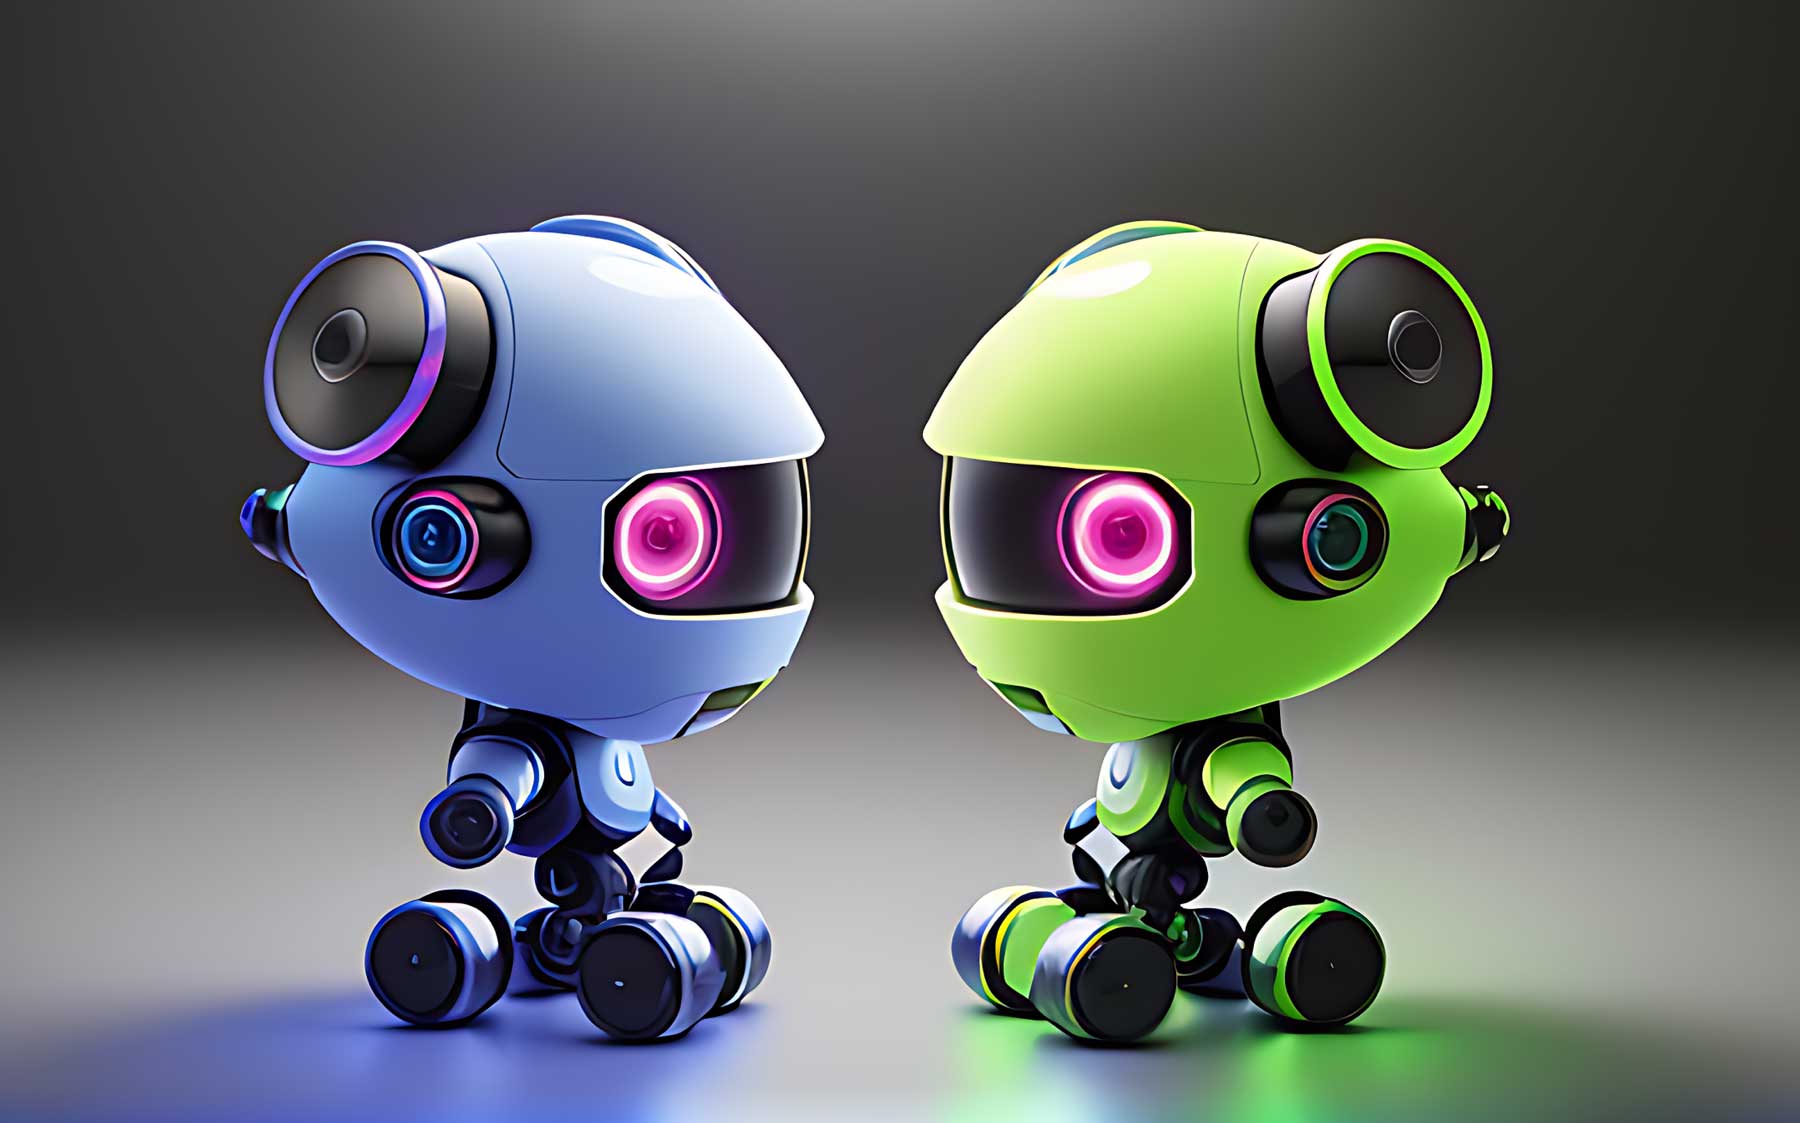
image created with Divi AI
Generative AI is a type of artificial intelligence that is used to create content based on a text prompt. You can make all kinds of AI art through text-to-image software, generate AI music, create videos, and more. Generative AI works by training highly intelligent systems on large amounts of data. It also used neural networks (much like the human brain) and machine learning models such as a discriminator and generator.
The end goal in training is for the generator to fool the discriminator. During the training process, the discriminator and generator play a game where the discriminator has to determine whether the output (image, music, text, etc) is real or fake. These steps are repeated to the point where the discriminator can’t distinguish between real and artificial data.
Benefits of Using AI to Generate Images for WordPress
You might want to use generative AI to create photos for your WordPress websites for many reasons. First, it’s a lot more cost-effective than other options. If you’ve been a web developer for long, you know that finding quality stock photography at a decent price is a challenging task. Additionally, by using AI to make your photos, you can get high-quality results that look like they were taken by a professional photographer.
Another benefit of using AI to generate WordPress images is taking the stress out of procuring assets from clients. More often than not, clients will provide grainy or low-quality photos for use on their sites. While smaller images will sometimes work, you’re out of luck if you want to create hero sections with background images or call-to-actions (CTAs) where bigger images are required. This is where AI images come in handy.
How to Generate Images For WordPress With AI
There are dozens of AI art generators on the market, with more popping up seemingly daily. However, there are only a few that integrate directly into WordPress. In this post, we’ll demonstrate the best ways to incorporate AI art into your website. As an added bonus, we’ll provide you with an additional option to create images outside WordPress.
1: Divi AI
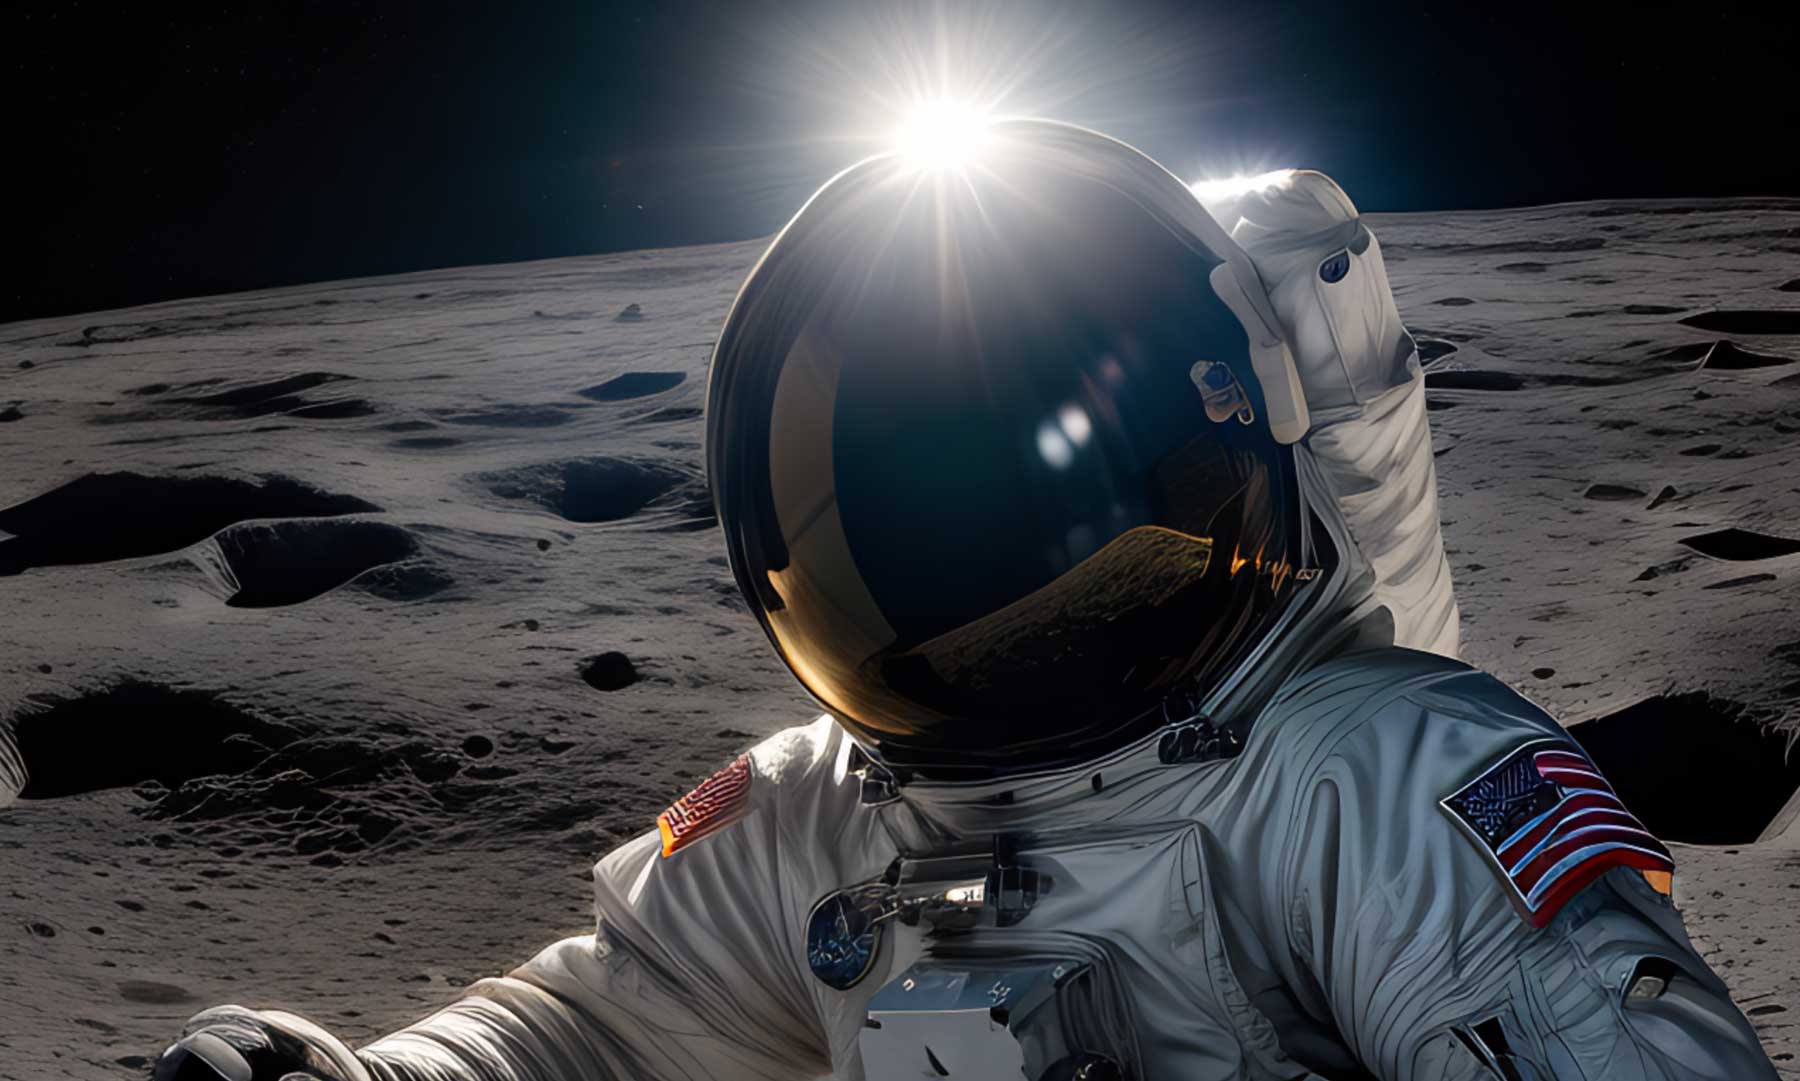
image created with Divi AI
Up first on our list is Divi AI, Elegant Theme’s new flagship AI product that was designed specifically to work within the Visual Builder. In just a few clicks, Divi can generate text and images for any module containing those elements. In addition to creating images, Divi AI can also improve existing copy and images in a snap. Think of Divi AI as your personal web-building assistant.
Divi AI is built on the backbone of Stable Diffusion and includes several base models, such as the more popular 1.5. But to understand how Divi AI works, we must dig deeper. In addition to its Stable Diffusion roots, Divi AI integrates fully within Divi’s core files. Because of this, it can generate content based on various factors, including pulling the context directly from your site’s title and tagline, as well as content on pages, sections, and modules. Basically, Divi AI can generate content based on your site’s specific niche.
Activating Divi AI
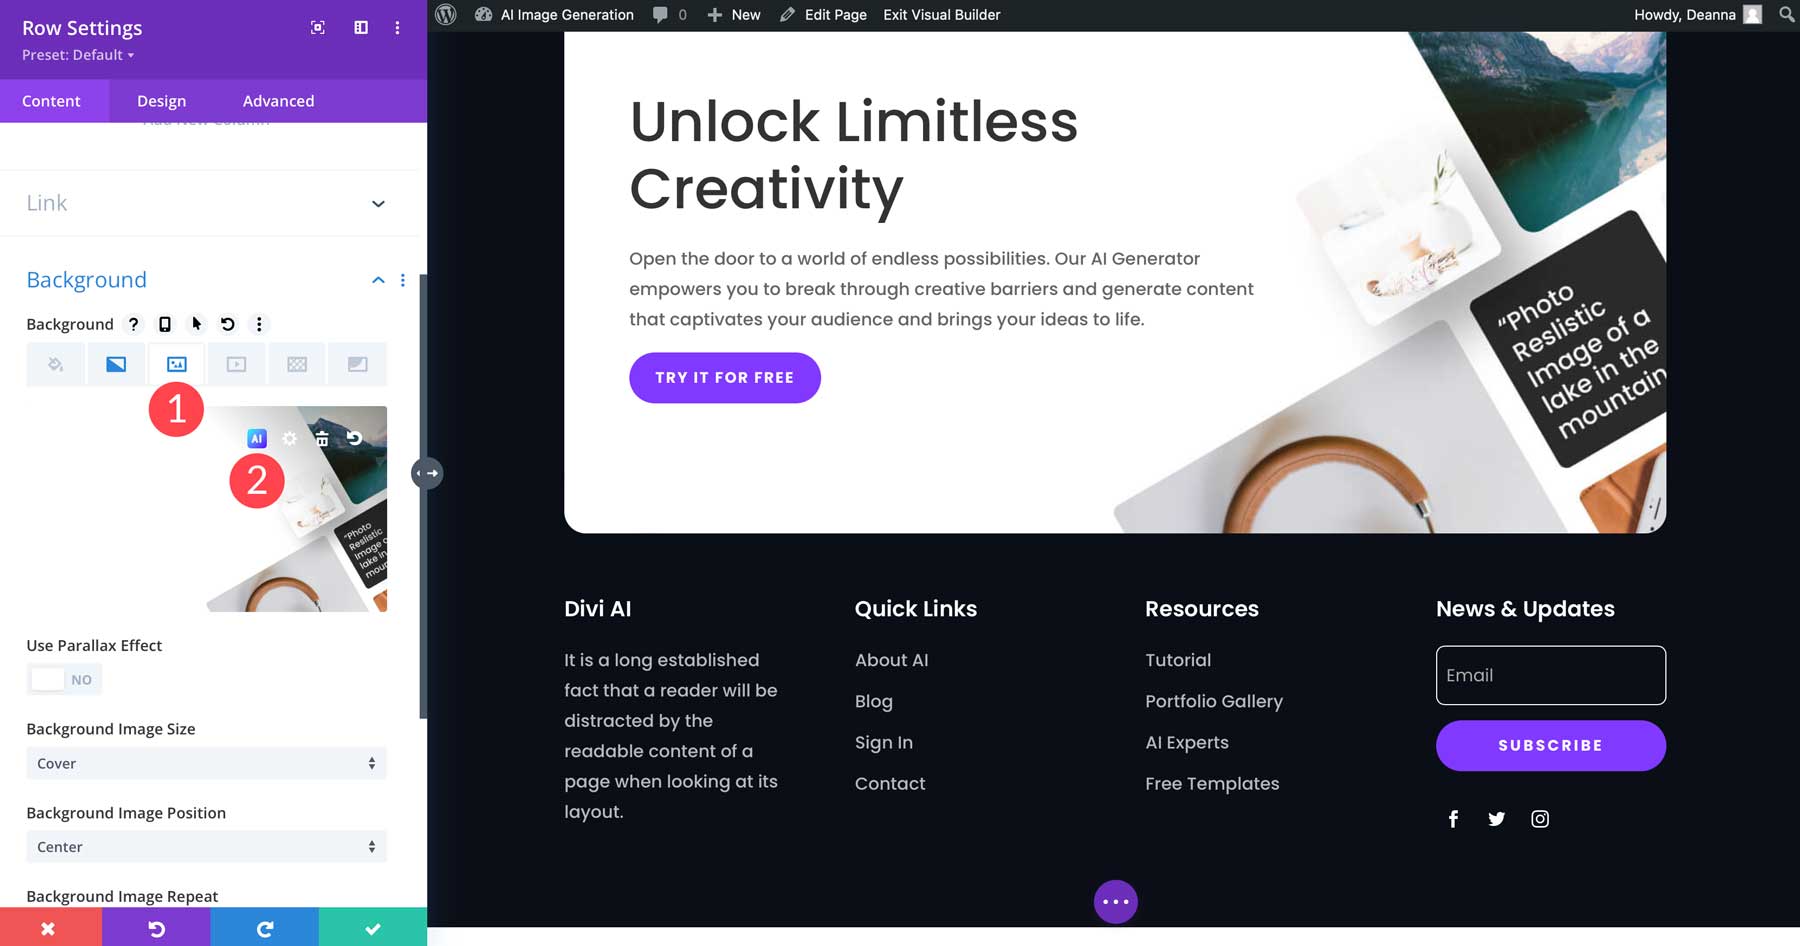
Before we delve into creating images with Divi AI, we should give you a rundown of the interface. Once the Visual Builder is activated, you can click on any module with an image field to reveal the settings. To demonstrate, we’ll apply a background image to a row within the AI Generator Layout Pack for Divi. To activate the Divi AI options, click on the row near the bottom of the landing page layout design, then click on the background tab (1). Next, click the AI icon within the image placeholder (2).
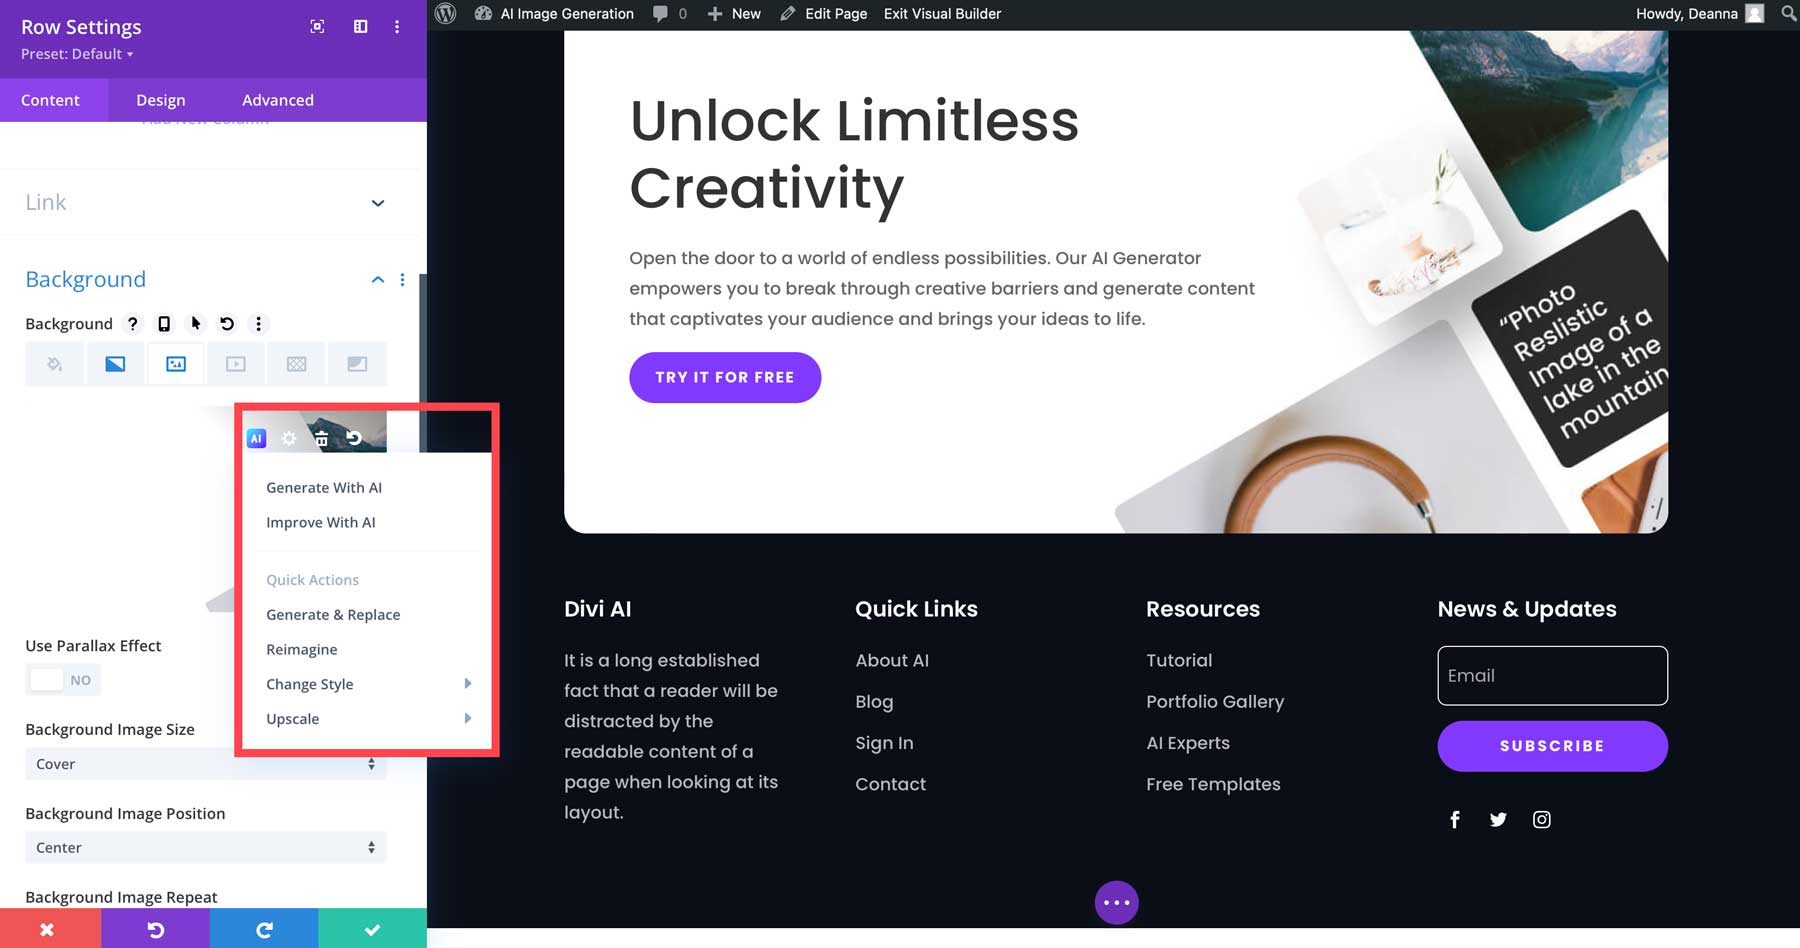
This will bring up a few options:
- Generate with AI: Create a new image
- Improve with AI: Improve an existing image
- Generate & replace: Automatically generate a new image to replace an existing one
- Reimagine: After an image is generated, you can reimagine the image with a new prompt
- Change Style: Change the style of a generated image (more on this in a bit)
- Upscale: Increase the quality of the photo through upscaling (this increases file size)
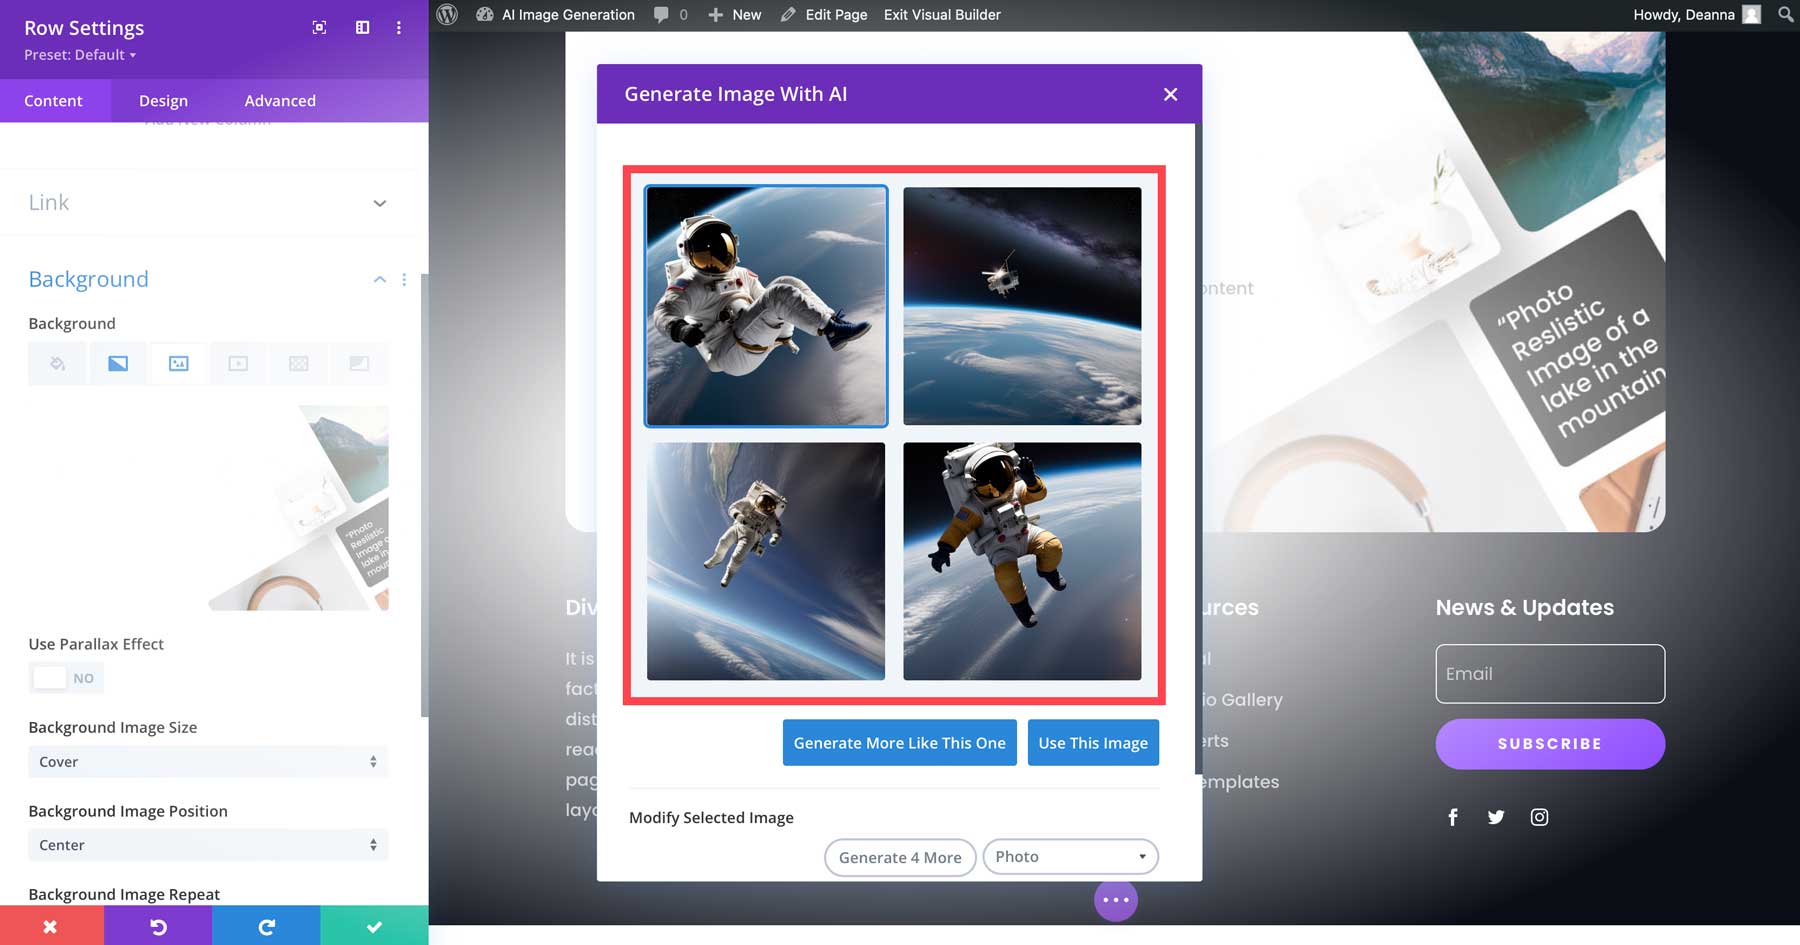
For example, if you choose Generate & Replace, Divi AI will create four new images that are based on the page’s current content:
Understanding the Divi AI Interface
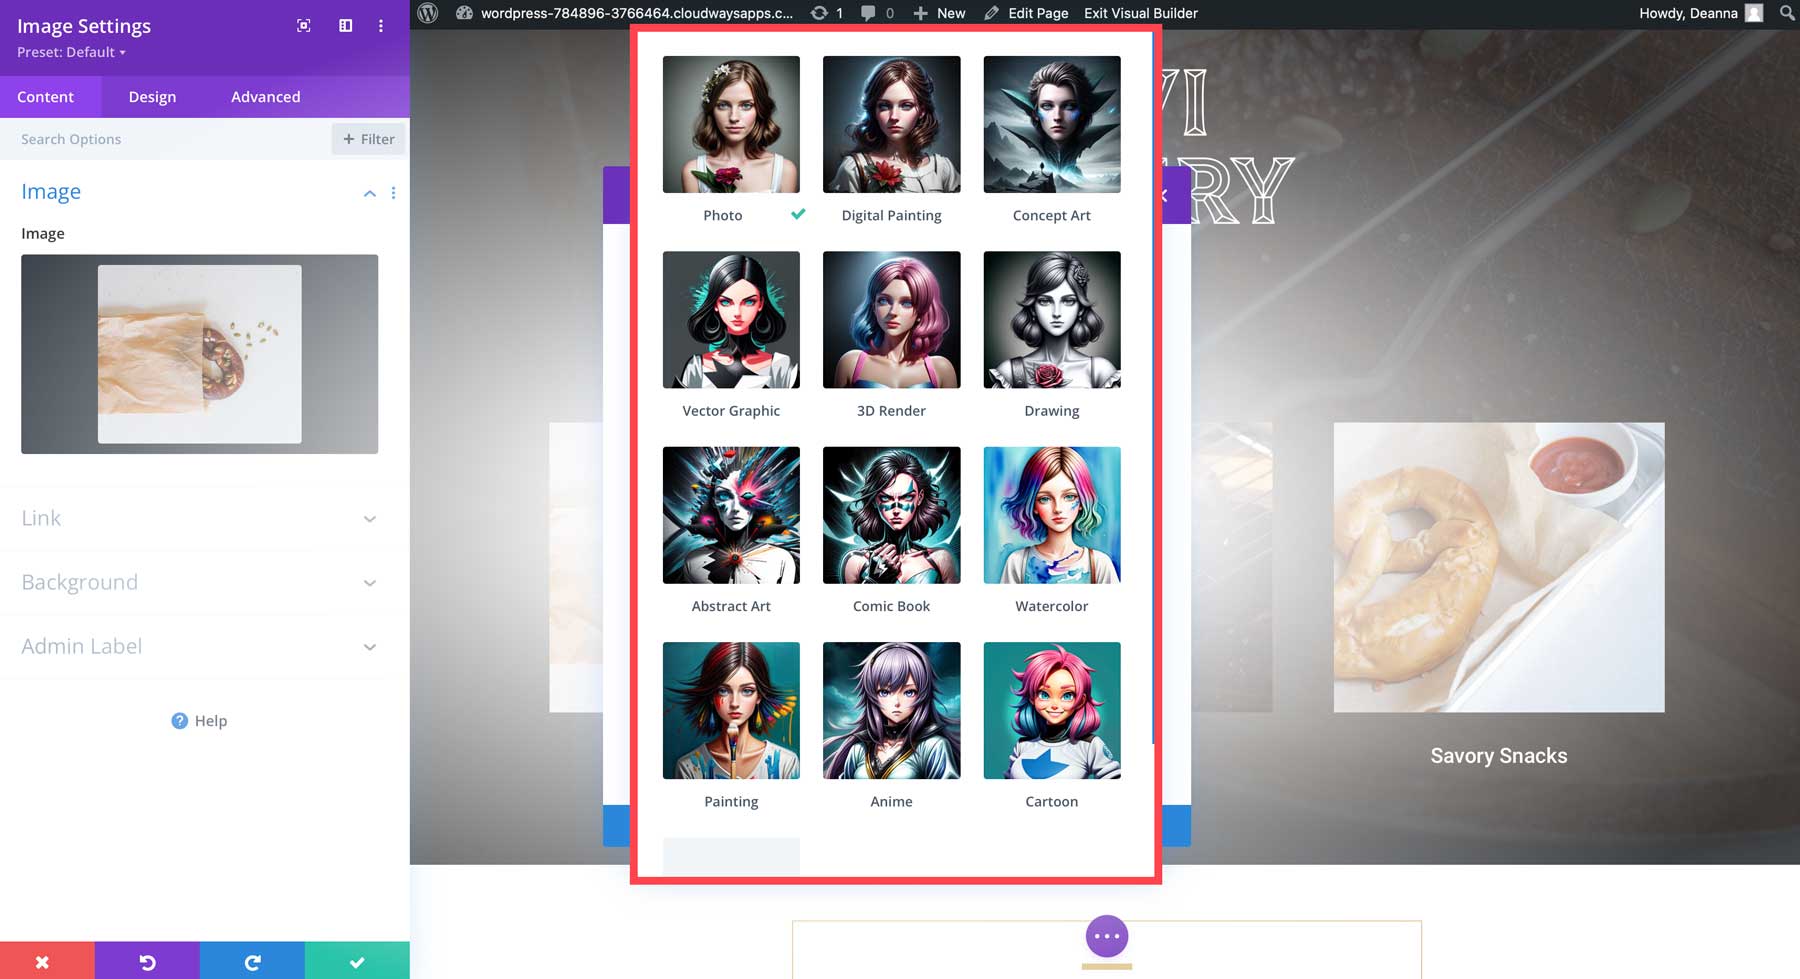
Upon clicking Generate with AI, the interface will greet you with several options:
- Image style: Allows you to choose from 12 different image styles as a basis for your image.
- Image description: Text field to add your prompt. Alternatively, you can let Divi do that for you by clicking the AI button.
- Reference image: If you have an image in mind but want to improve it, you can upload it here.
- Aspect ratio: Choose from square (1:1), landscape (8:5), portrait (3:4), or custom.
- Size: Choose the dimensions for your image.
- Generate: Creates an image based on the settings chosen.
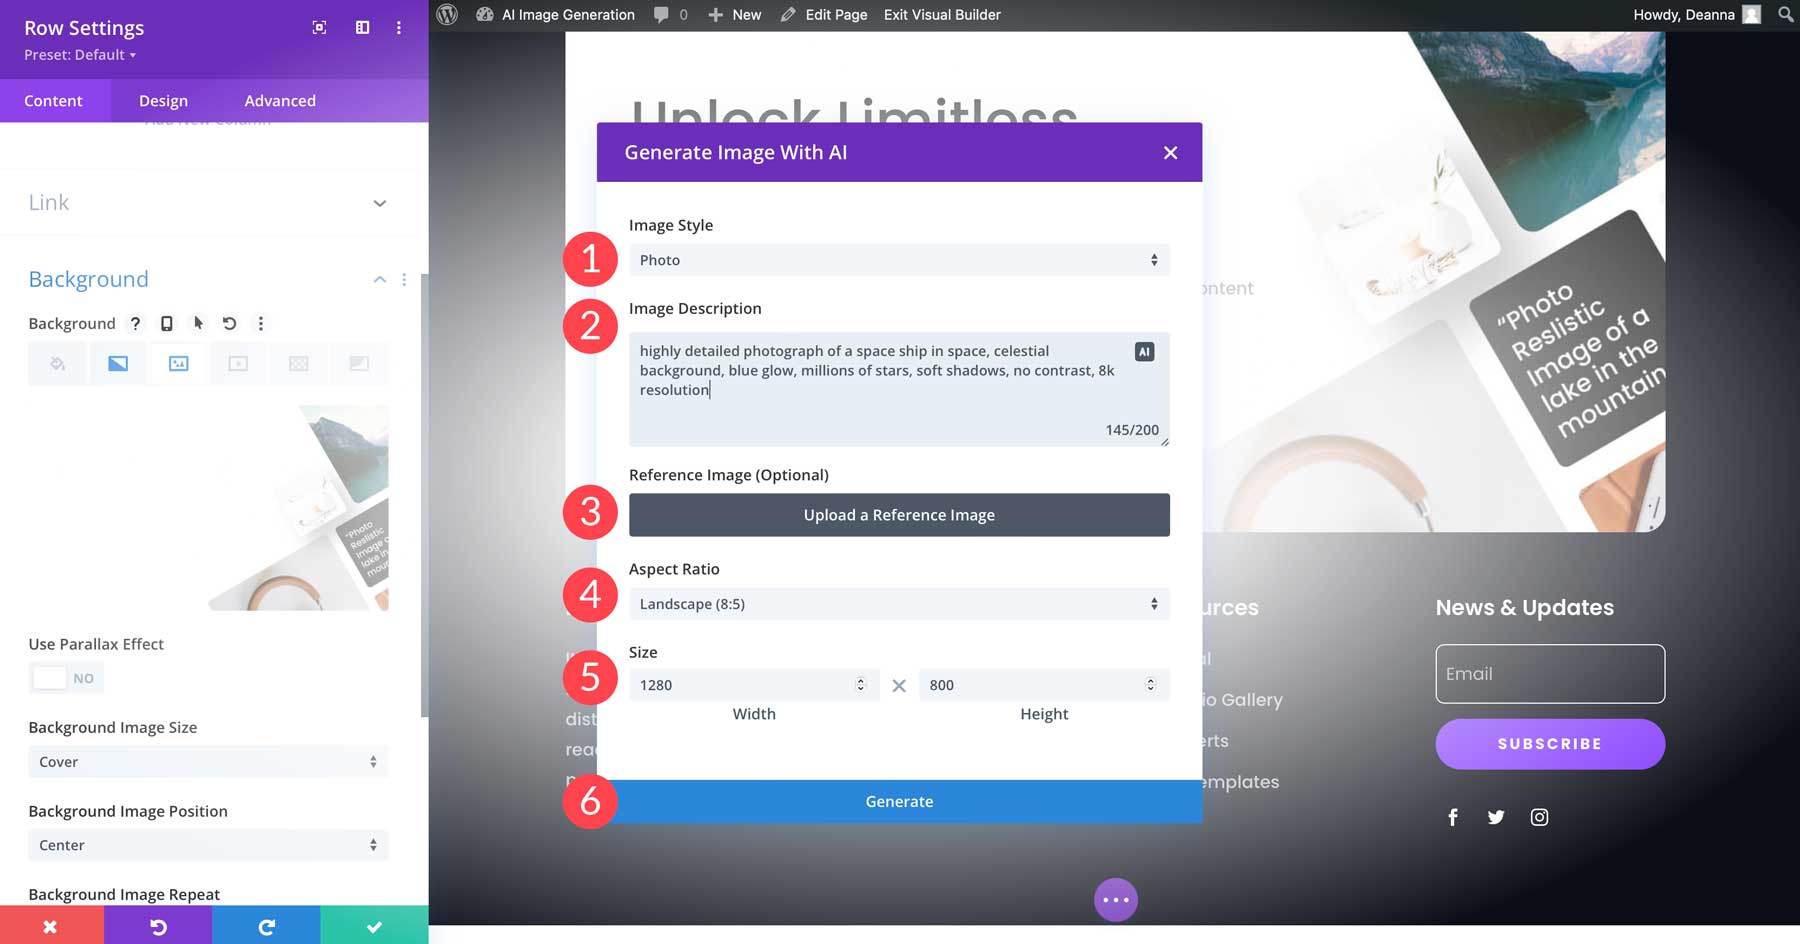
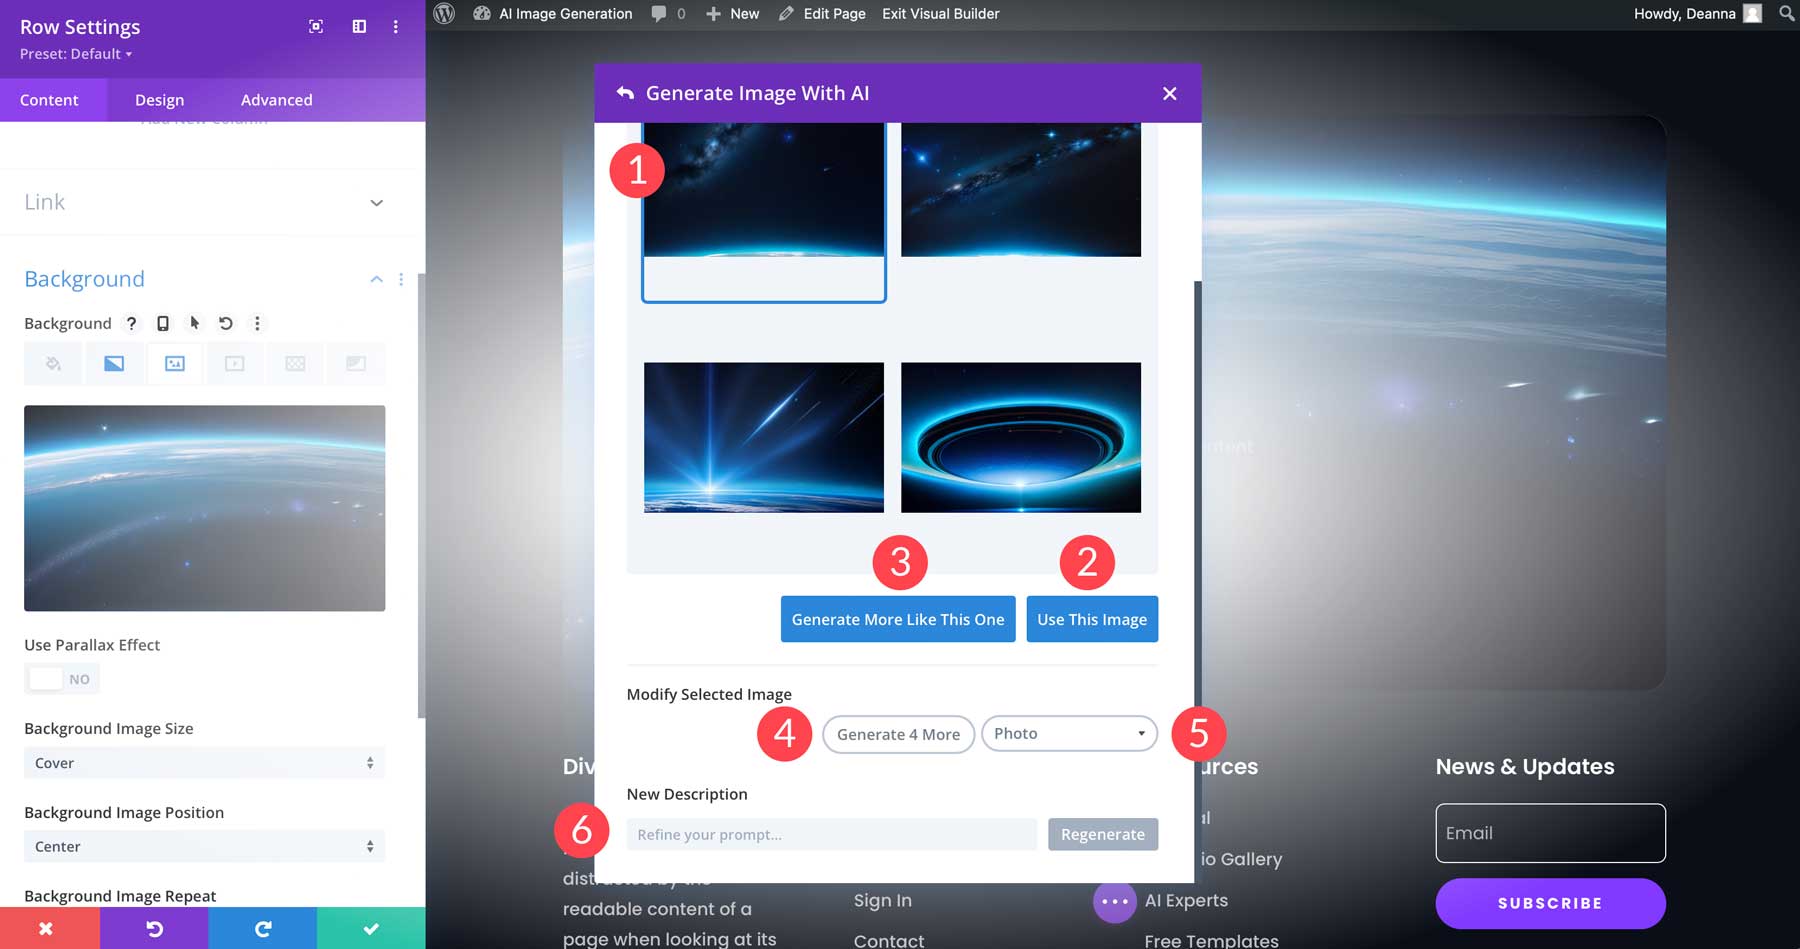
We’ll select photo as the style, use the prompt highly detailed photograph of a spaceship in space, celestial background, blue glow, millions of stars, soft shadows, no contrast, 8k resolution, select the landscape aspect ratio, and set the size as 1280×800 pixels. When we click generate, Divi AI will create four new images for our background in less than a minute.
From there, we can choose our favorite by clicking on it and selecting use this image (1). Alternatively, we can create four more by clicking generate more like this one (2), generate 4 more (3), change the style (4), or add a new description (5) to regenerate more images (6).
Here’s a look at the final result:
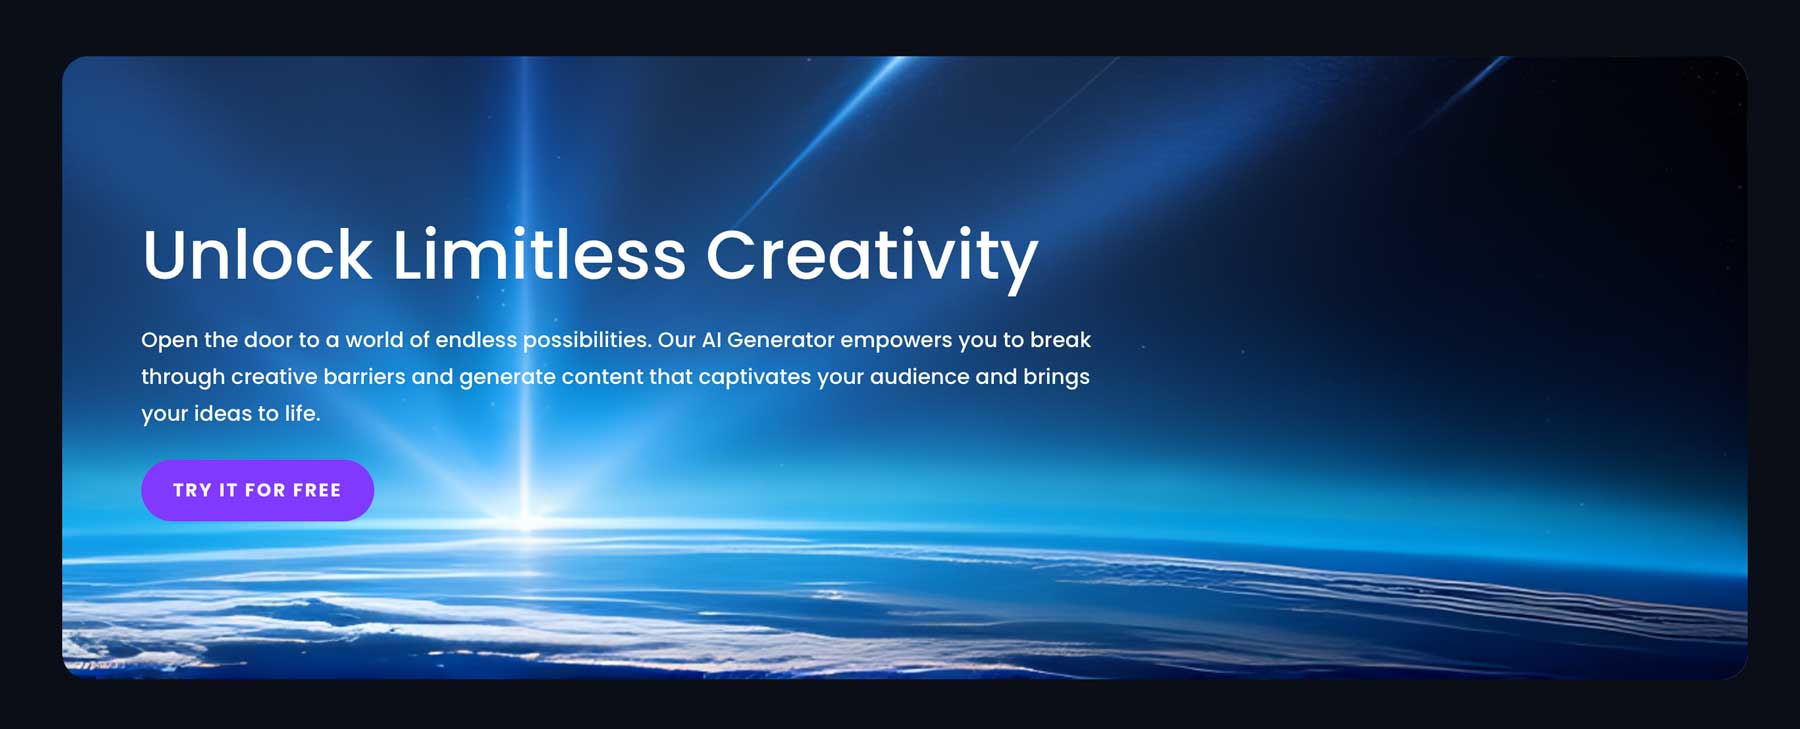
Note: The larger the size, the longer it takes for Divi AI to generate images.
2. AI Power
Our next option, AI Power, is a WordPress AI plugin that uses DALL-E or Stable Diffusion to generate images within the WordPress dashboard. That said, you’ll need an active OpenAI account and an API or SD API key to generate them. Let’s walk through the steps necessary to get AI Power up and running. For this post, we’ll demonstrate setting things up with OpenAI.
Setting Up the AI Power Interface
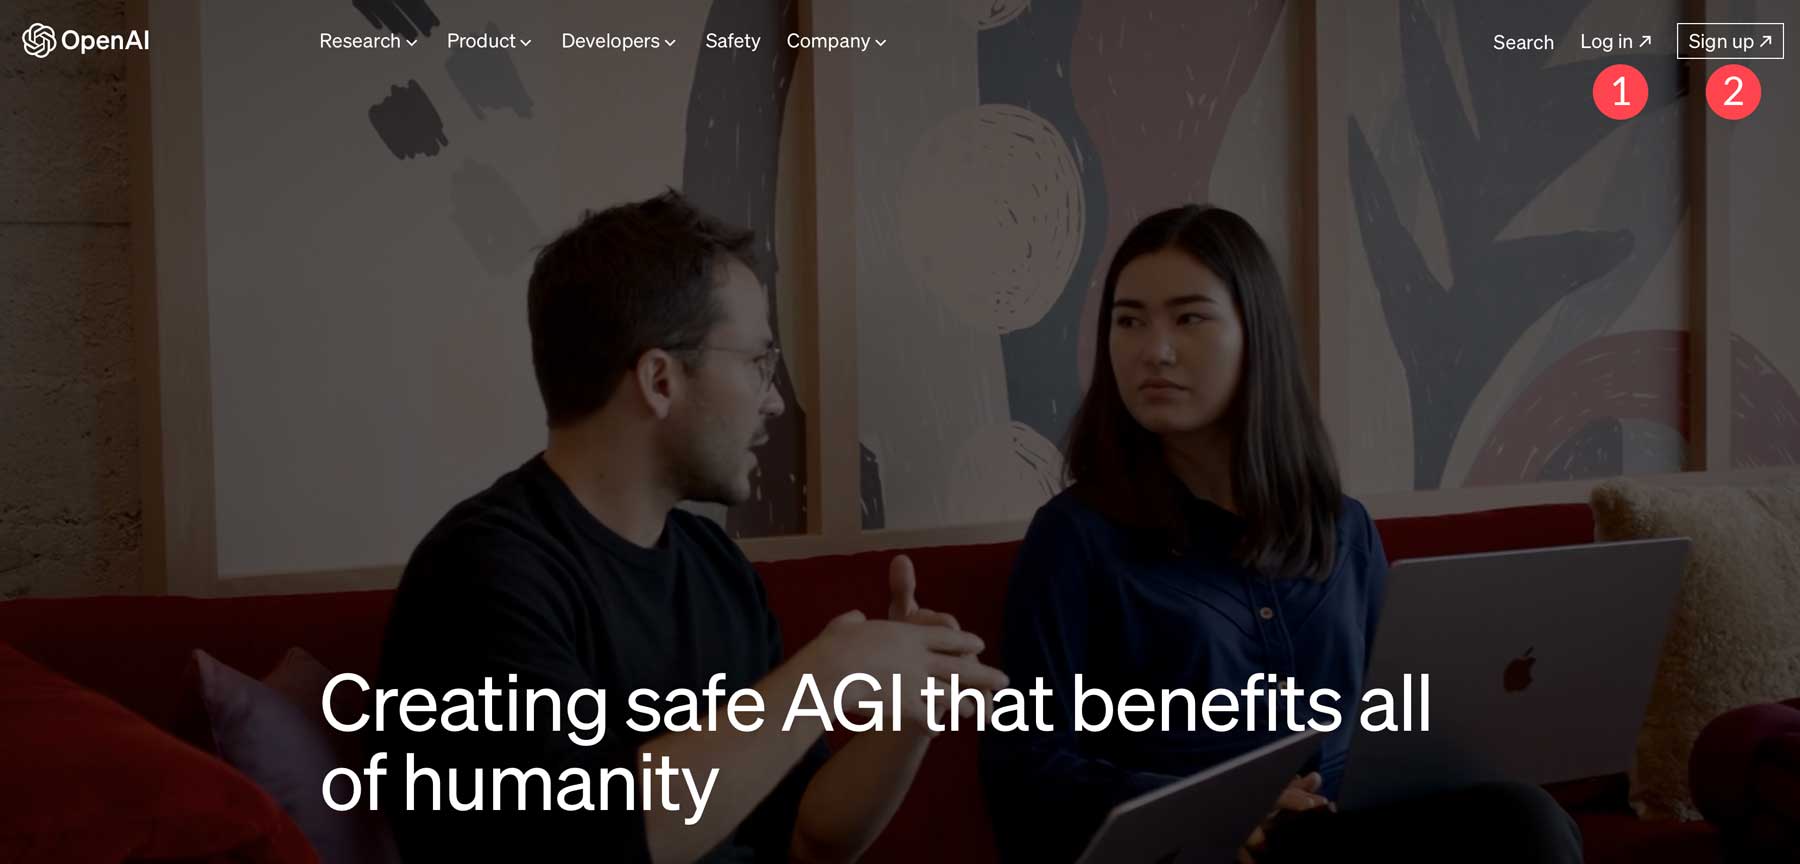
First, start by logging in to your OpenAI account (1). If you don’t have an account, you can sign up for one for free (2).
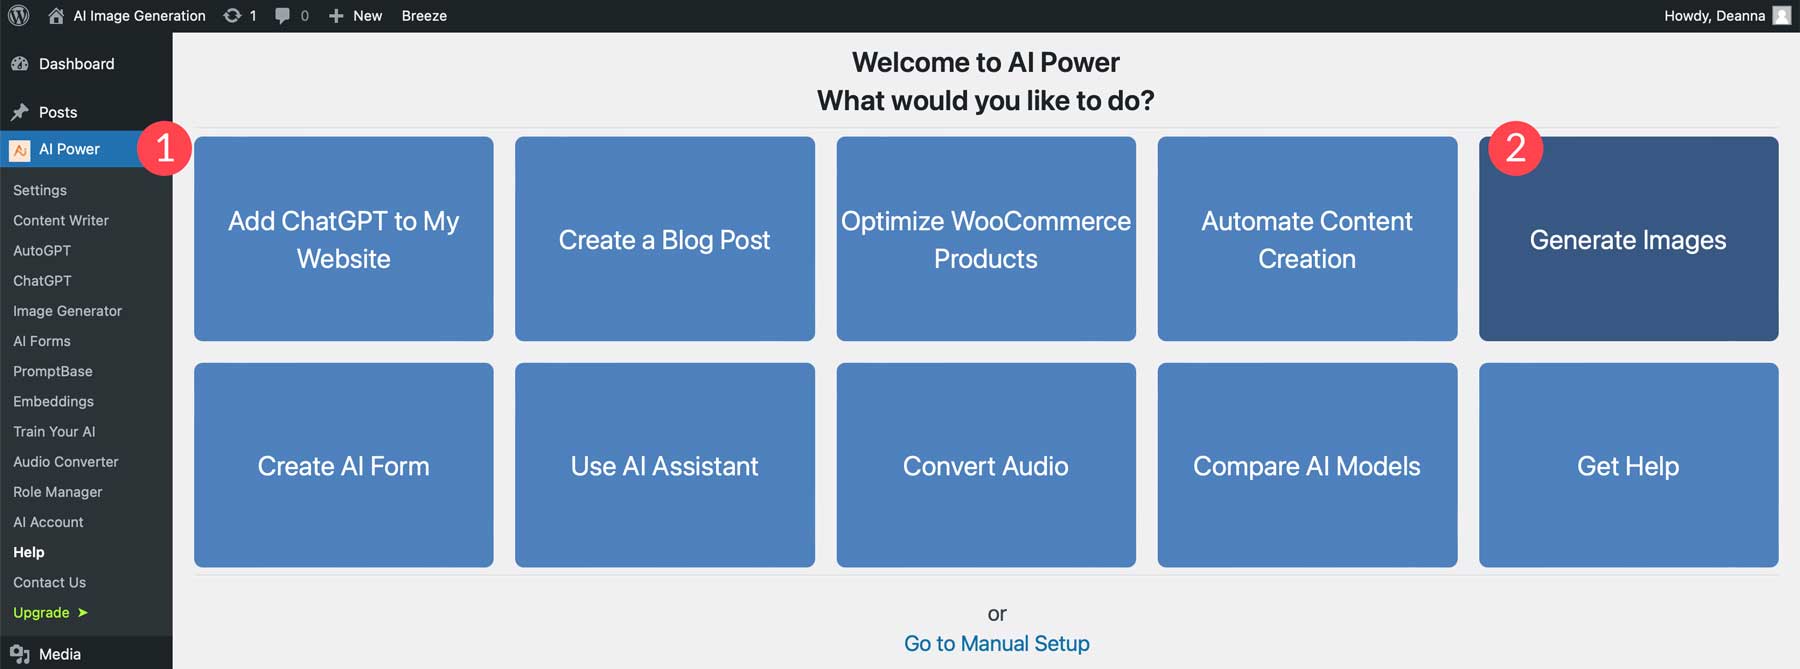
Next, head back to your WordPress dashboard, then search for and install the AI Power WordPress plugin. Once installed an activated, click the AI Power tab (1), then click Generate Images (2).
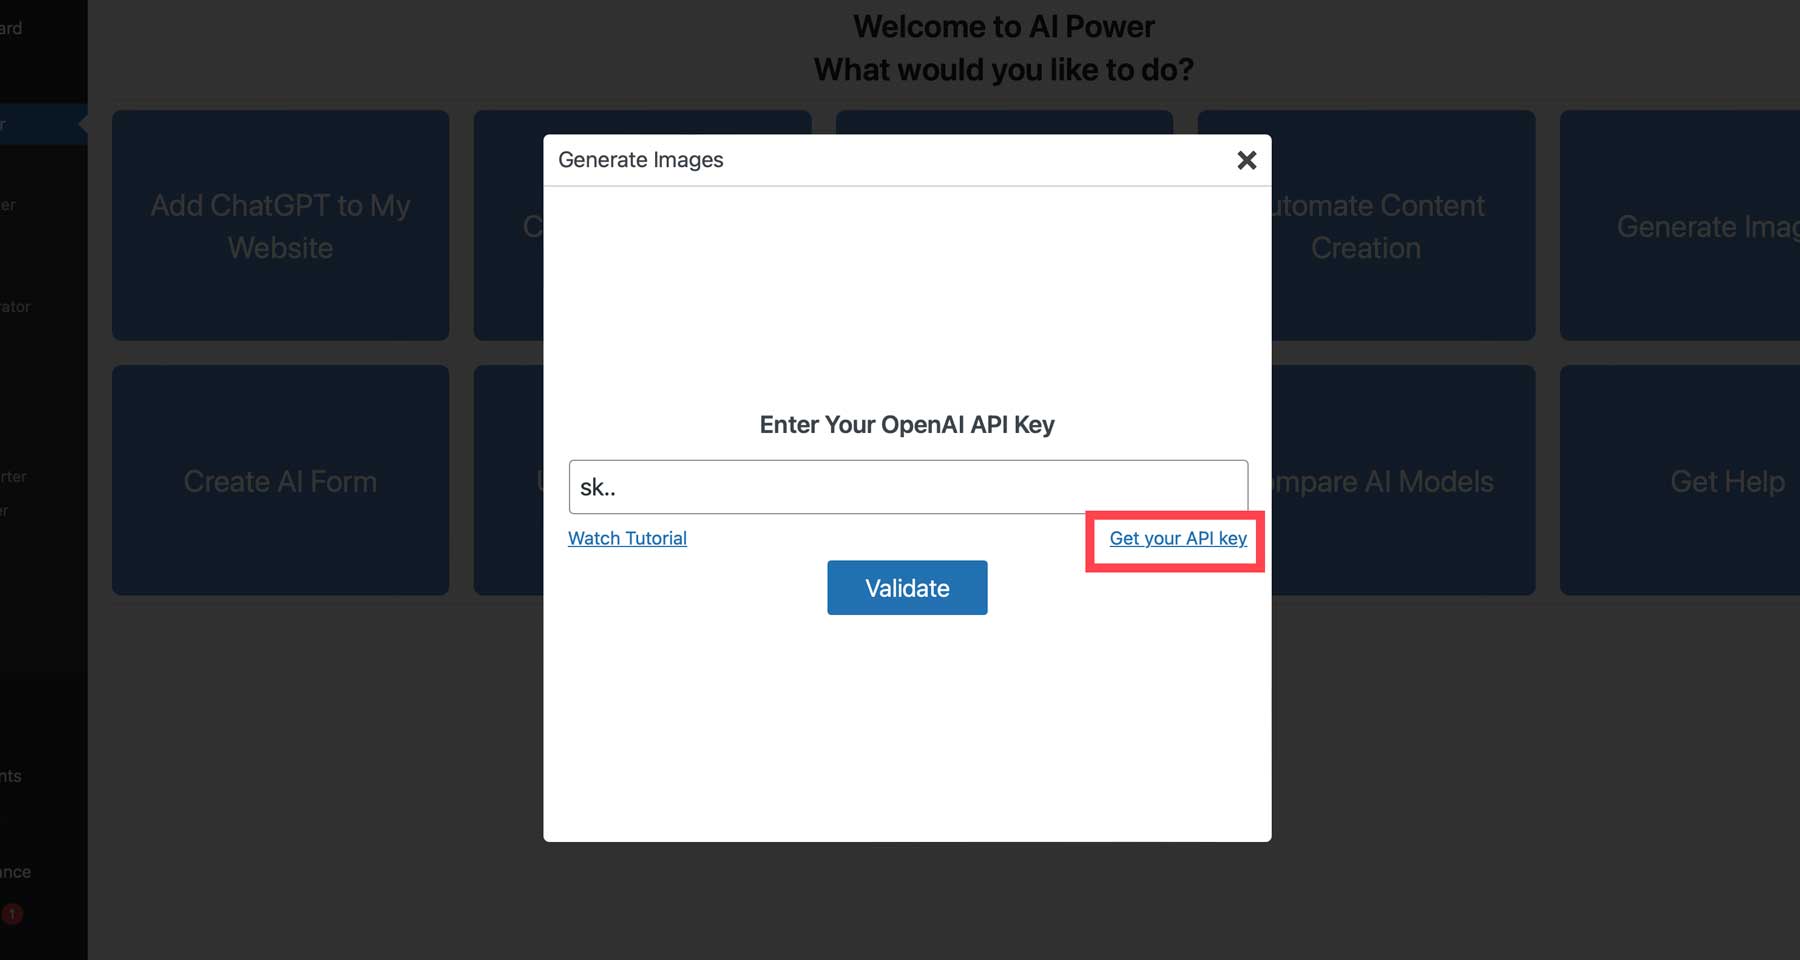
Once your screen refreshes, you’ll see a dialog box requesting your OpenAI key. Click the Get your API key link to head over to OpenAI to generate one.
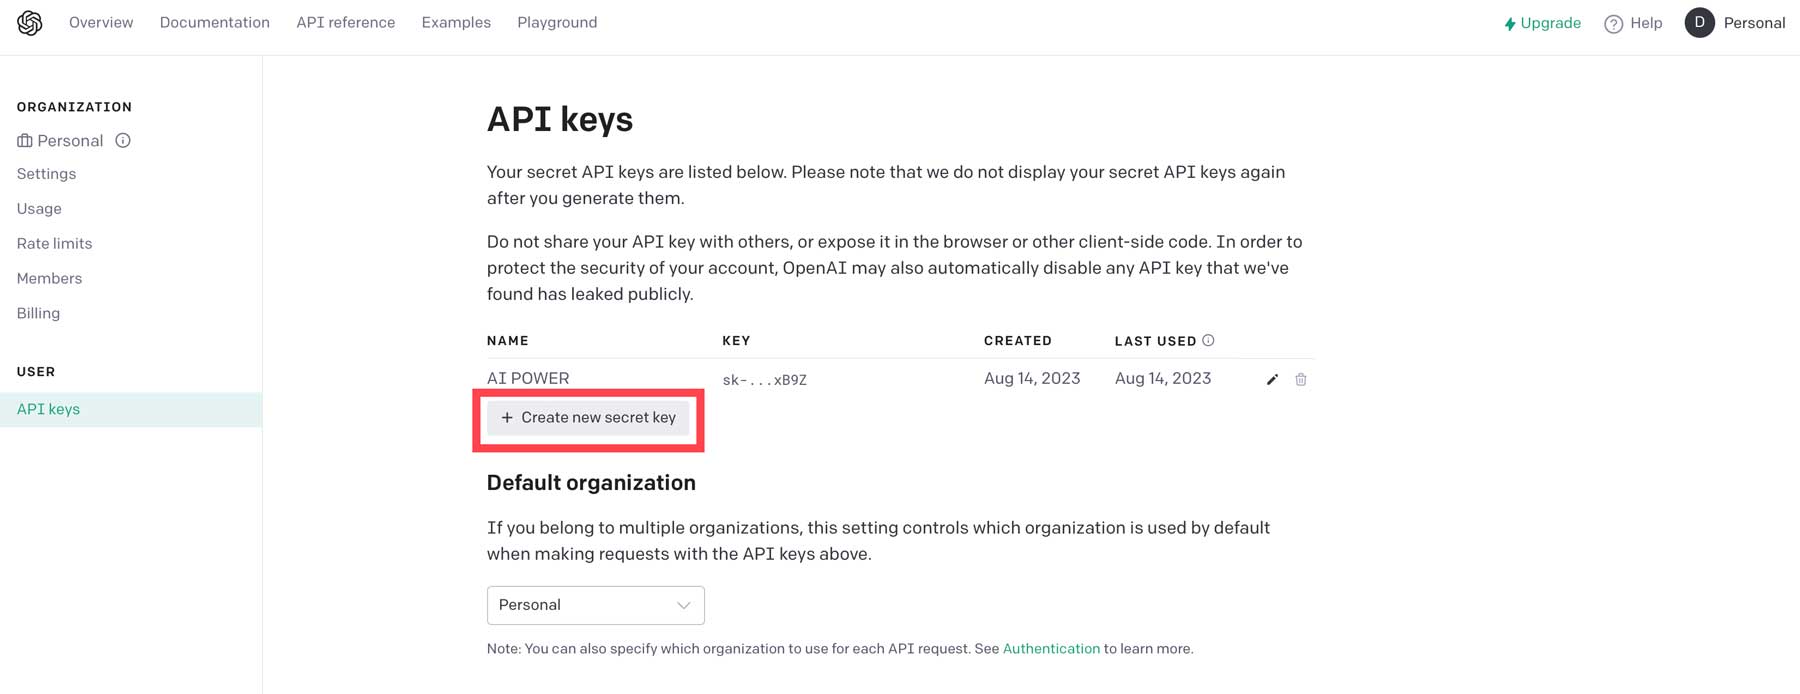
Click the + Create new secret key button to generate a new API key.
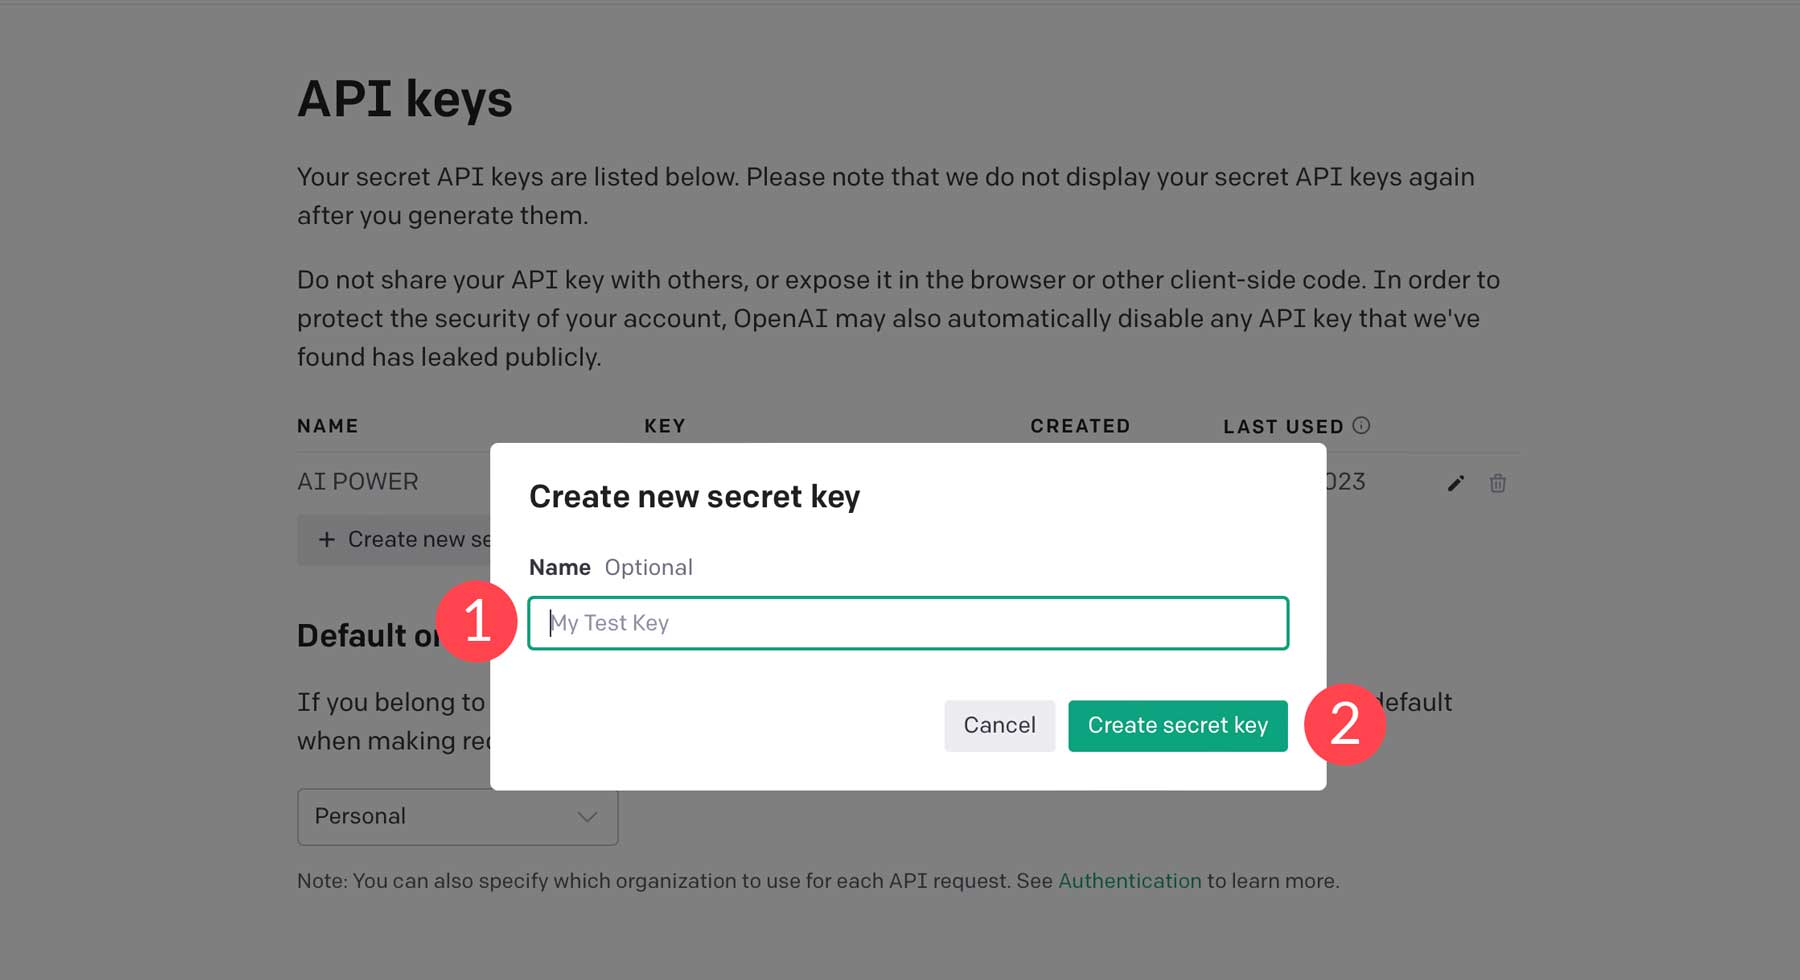
Next, give your key a name (1), then click Create Secret Key (2).
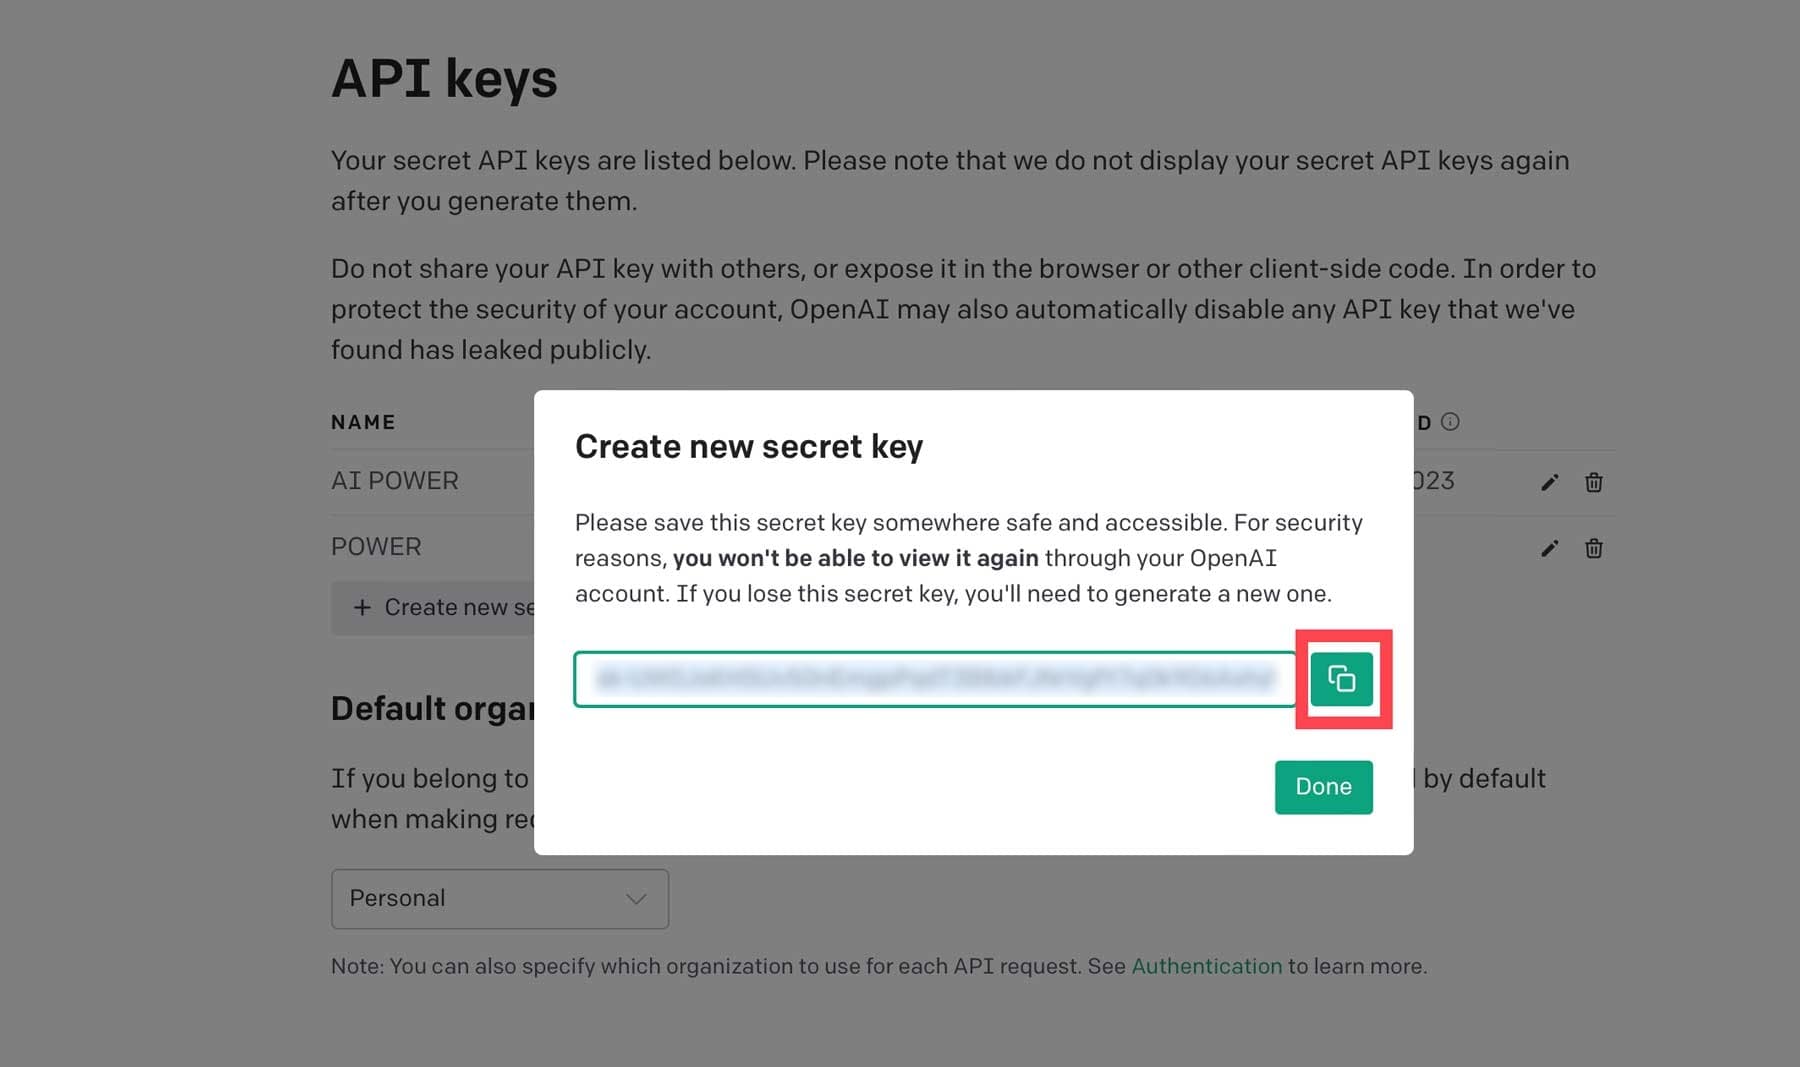
Copy the key, then head back over to your WordPress dashboard.
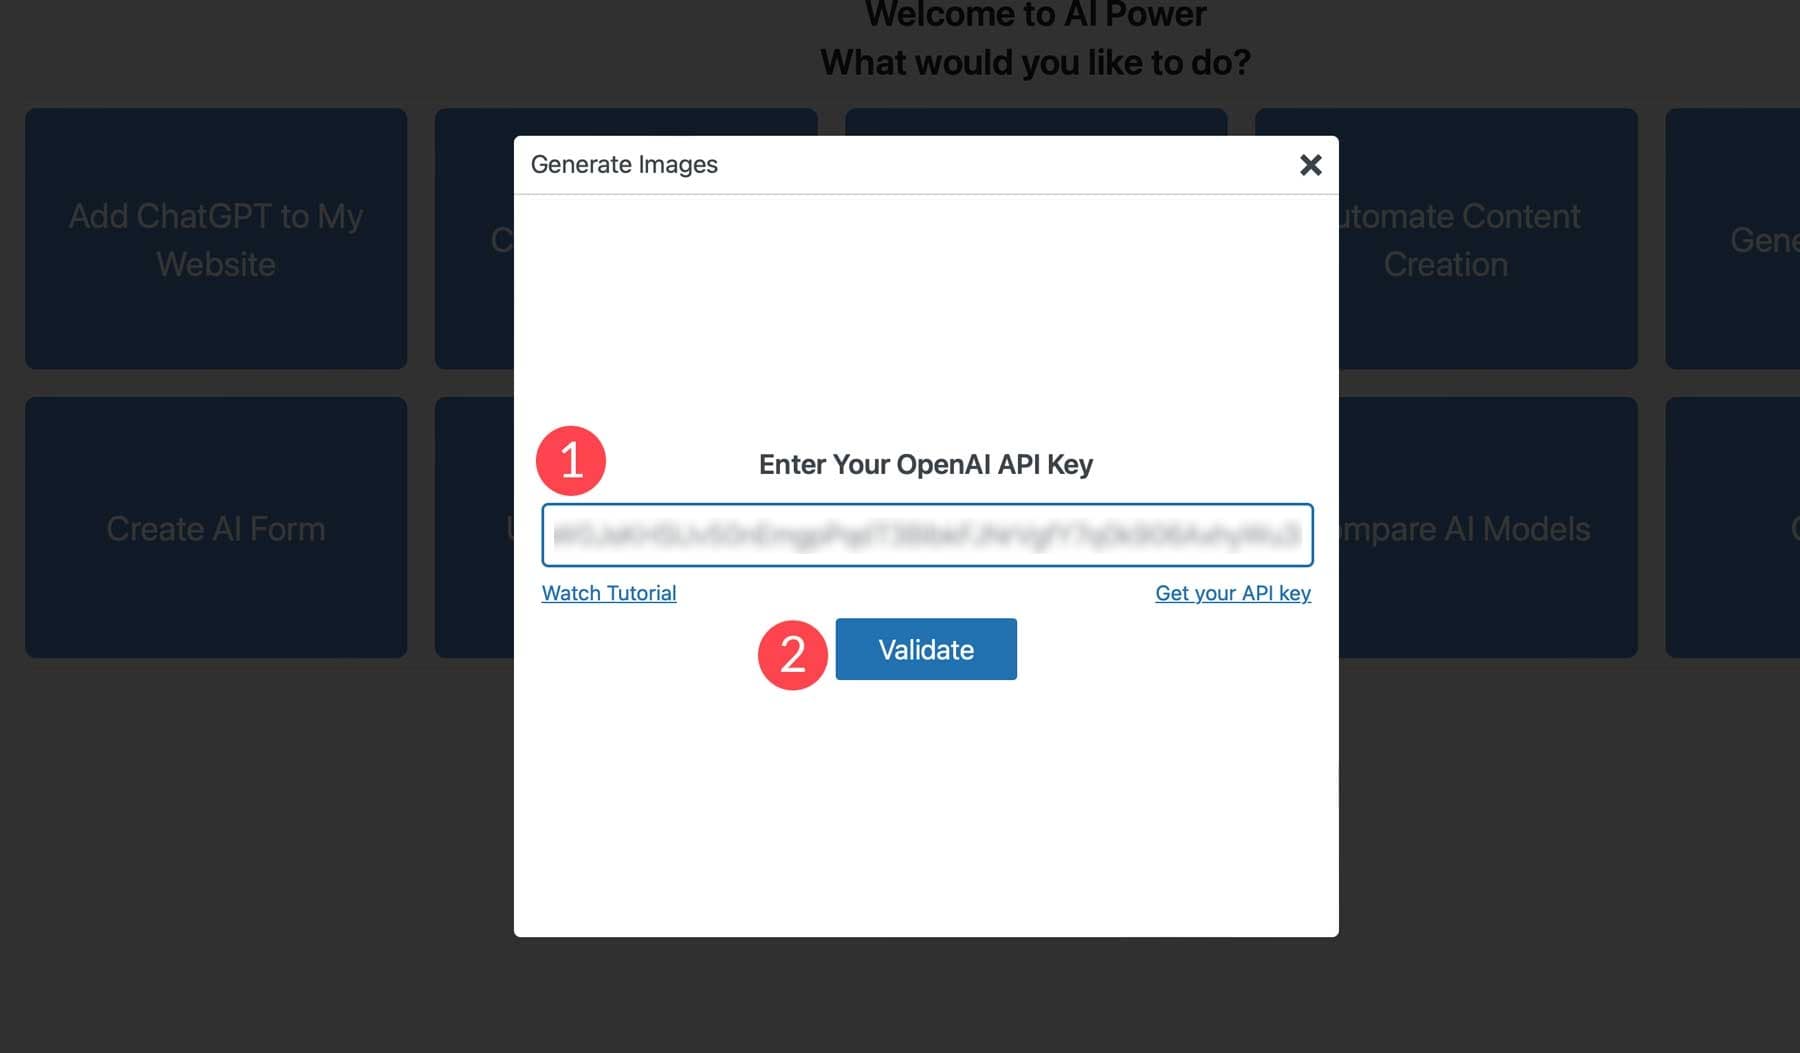
Lastly, paste the API key into the field (1), then click Validate (2).
Finally, we can start generating images with AI Power. One of the cool things about AI Power is that it allows you to choose between generating images with DALL-E (OpenAI) or Stable Diffusion. To help you understand the interface, we’ll give you an overview of the settings for DALL-E. While we won’t review the Stable Diffusion settings, they are the same, except for adding a negative prompt and image resolution options.
DALL-E Interface
The interface is quite simple. You have a basic text prompt field (1), the generate button (2), and some additional settings to help DALL-E understand what you’re looking for (3):
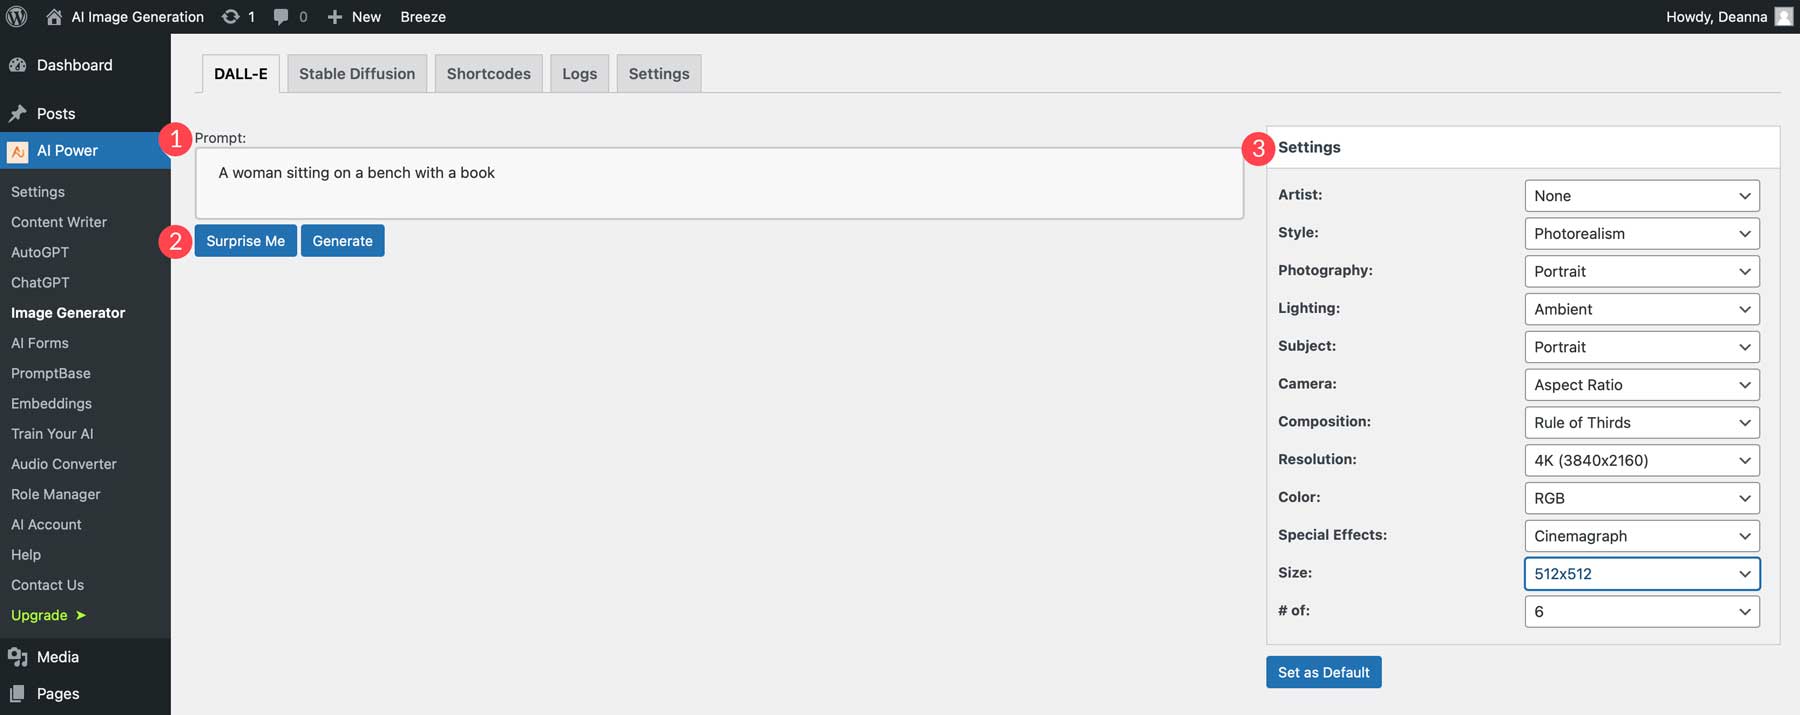
- Artist: Choose from over 40 artist styles, such as Salvador Dali, Andy Warhol, and more.
- Style: There are over 40 styles available, including surrealism, cubism, photorealism, and more.
- Photography: Allows you to choose the photography composition. Some options include animal, portrait, nature, product, and more.
- Lighting: Choose from over 55 lighting styles, including ambient, candlelight, fog, golden hour, and more.
- Subject: Allows you to pick the type of subject you wish to feature in your image.
- Camera: Provides a list of different camera settings.
- Composition: Choose the composition for your photo. Some options include closeup, fill the frame, and panning.
- Resolution: Choose how detailed you’d like your image to be. For example, choose 4K for the highest possible resolution.
- Color: Select from options such as RGB, CMYK, HEX, and grayscale.
- Special Effects: You can add options such as cinemagraph, 3D, bokeh, black/white, and more.
- Size: Determines the output size for your image. 512 pixels is the default, with a maximum of 1024×1024.
- Number of images: Adjust this setting to tell AI Power how many images to create.
Generating an Image With Ai Power
Now that you are comfortable with the settings let’s generate our first set of images. For the prompt, add 3D rendering of an astronaut wearing a space suit, then add the following settings:
- Artist: none
- Style: Photorealism
- Photography: none
- Lighting: Reflected light
- Subject: People
- Camera: none
- Composition: close-up
- Resolution: 4K
- Color: RGB
- Special Effects: 3D
- Size: 1024×1024
- Number of images: 4
Here are the results:
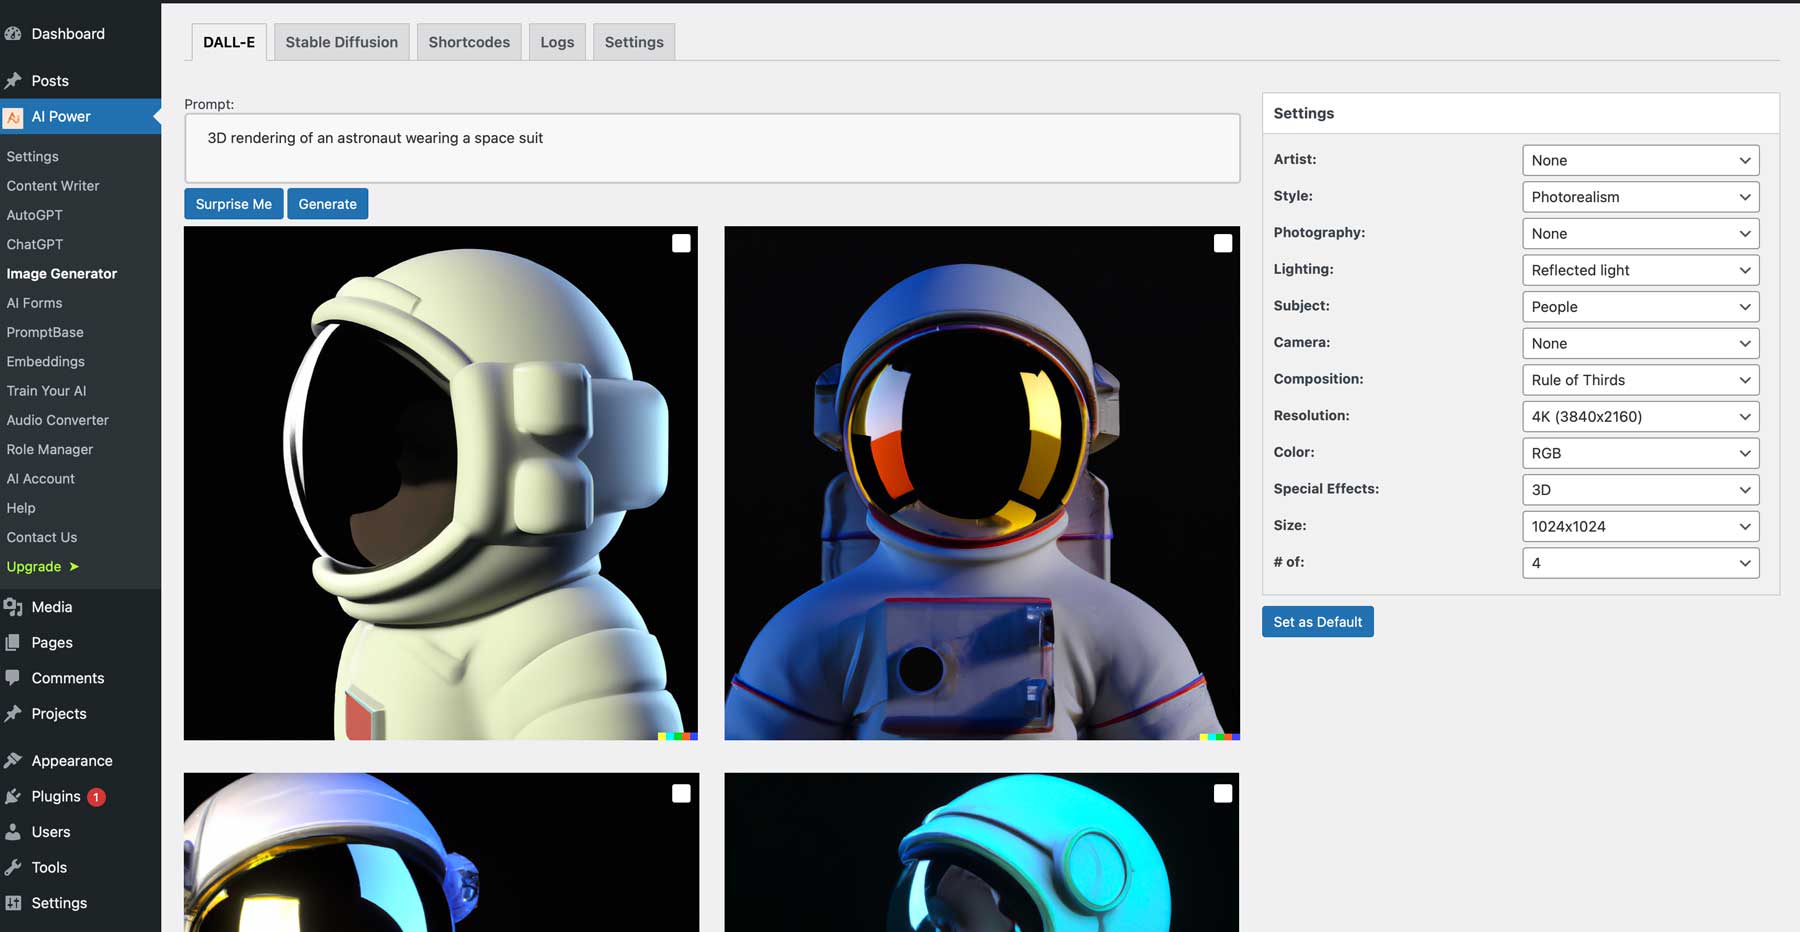
To use your image, click your favorite to add it to the WordPress media gallery.
3. Generate Image Outside of WordPress
In addition to generating AI images within WordPress, there are multiple other ways to create them. Two more popular options are Midjourney and Photoshop AI.
Midjourney
A widely popular choice is Midjourney, which lets you make images for your site through a text prompt. While learning the interface is a bit more time intensive, the image quality is quite good. By default, images are created at 512×512 pixels, then upscaled to 1024×1024. However, you can use the –ar command, which lets you change the aspect ratio of your images.
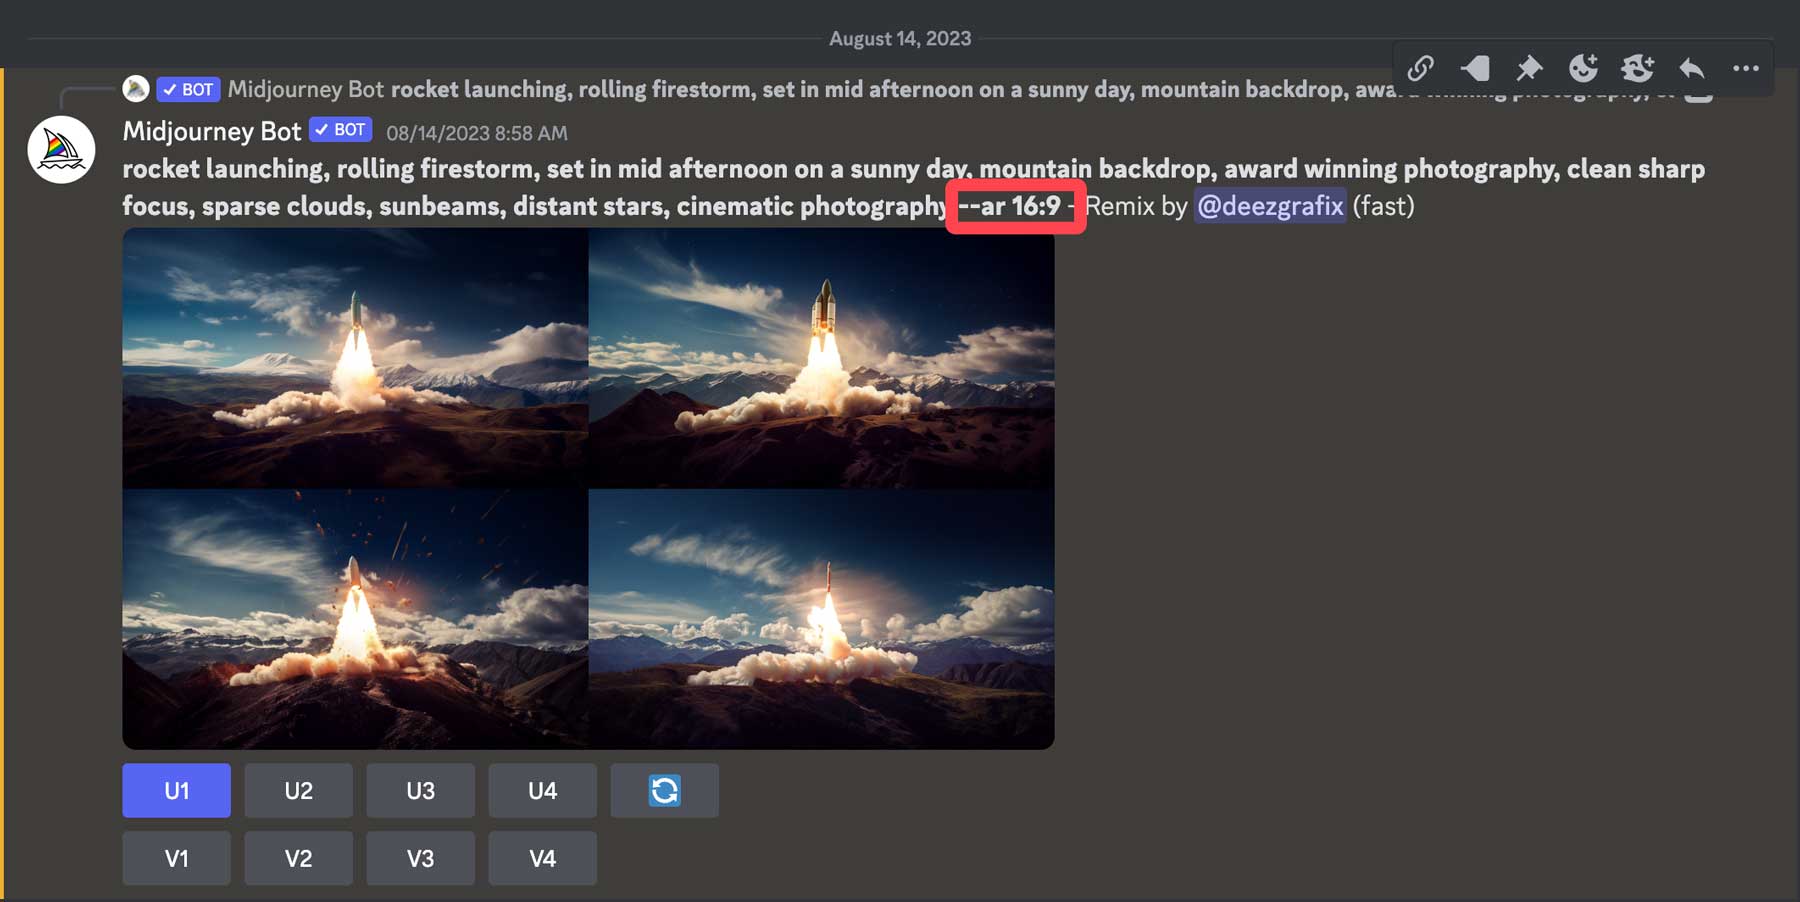
With Midjourney, you can create images, webpage designs, logos, and more. That said, creating images takes a bit of practice and knowledge of all the associated commands.
Photoshop AI
Another excellent way to create images is via Adobe Photoshop AI. The generative fill tool allows you to create images from a text prompt. Using the crop tool, you can also use it to create complete photo compilations or extend the photo’s dimensions.
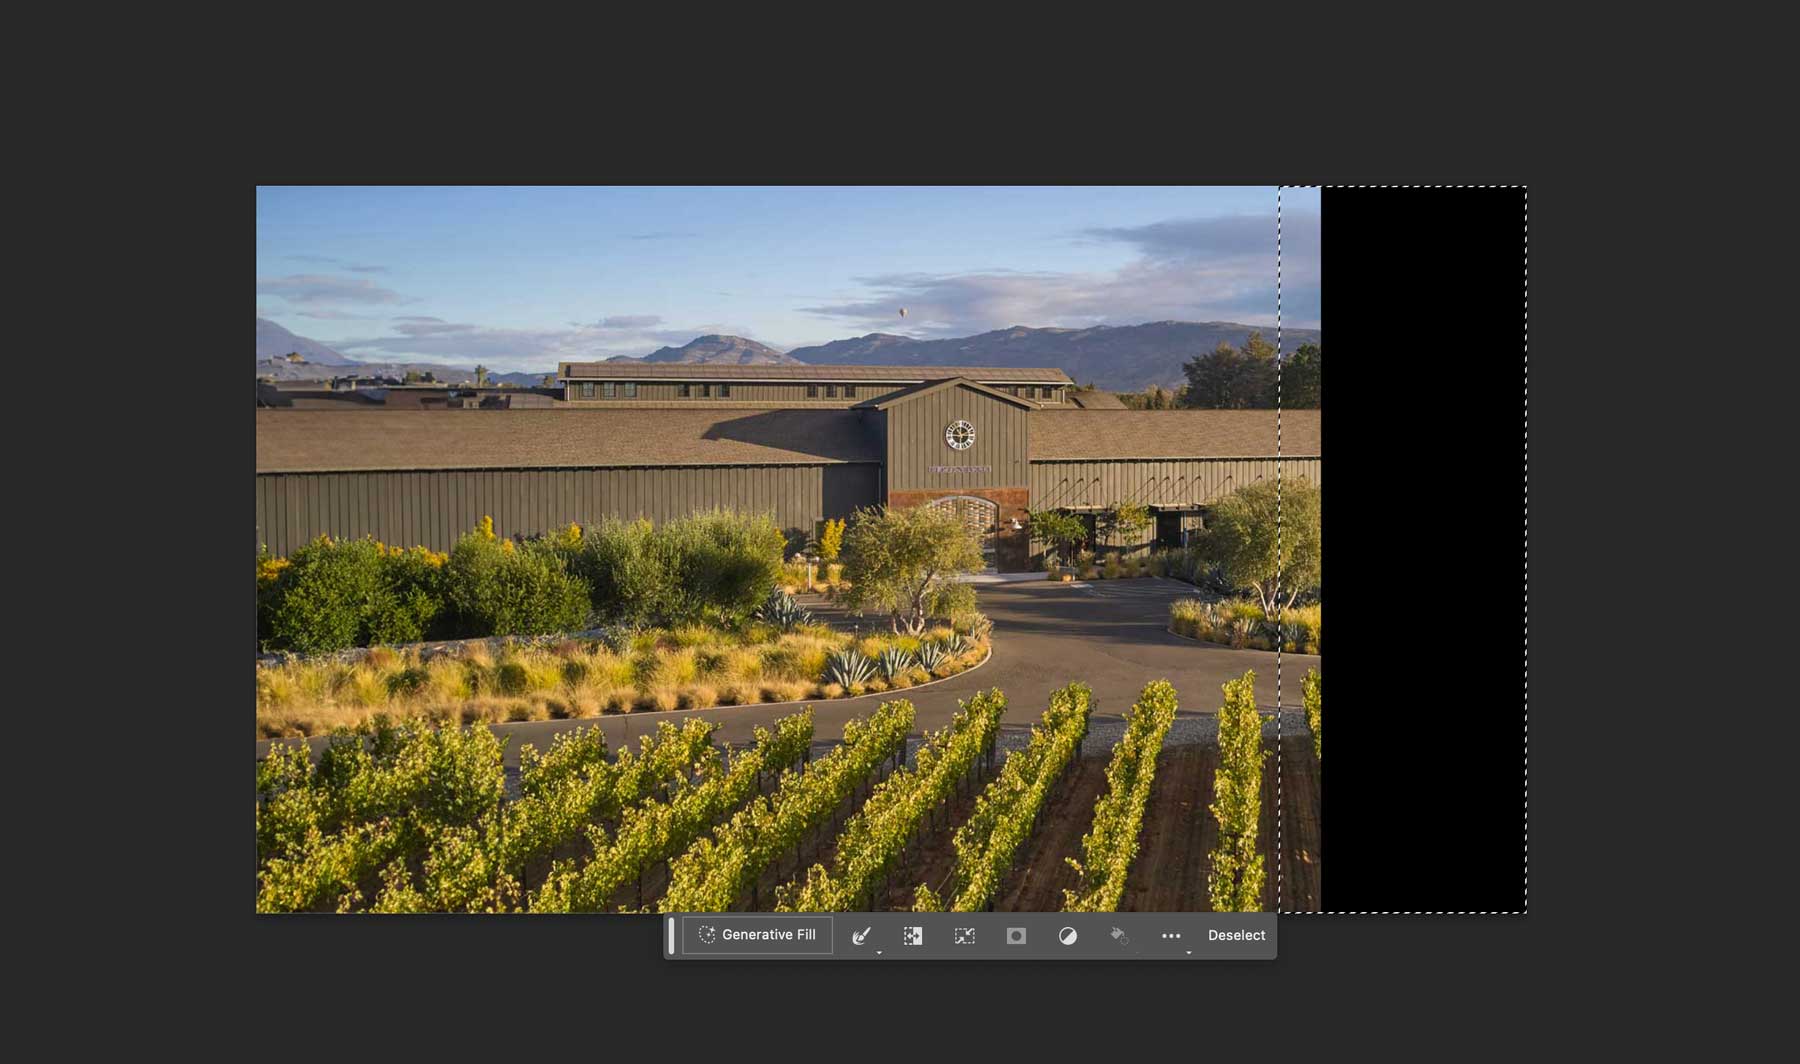
It is an excellent tool for enlarging photos for your web projects. However, we should note that Photoshop AI is currently still in beta, so creating commercial images isn’t allowed. We do anticipate that changing soon, though, since Adobe’s AI feature is entirely trained on Adobe Stock images.
AI Image Generation Tips
Regardless of the platform you choose, there are a few image prompting tips and best practices to follow to get the best results to generate AI images for WordPress.
Be Descriptive
When crafting a prompt for your images, it’s best to be as descriptive as possible. Concentrate most on using nouns, verbs, and adjectives within your prompts. For example, if you want to create an image depicting a landscape scene, think of it as looking at the scenery through your own eyes. What do you see? Take that thought and transcribe it into words. However, you don’t want to use too many words. You aren’t writing a book, just describing a scene for AI to follow. Let’s look at the following prompts so you can understand our meaning.
Prompt: Underwater scene
While this will produce an image of an underwater landscape, it leaves AI to determine what should be within the scene.
Result:
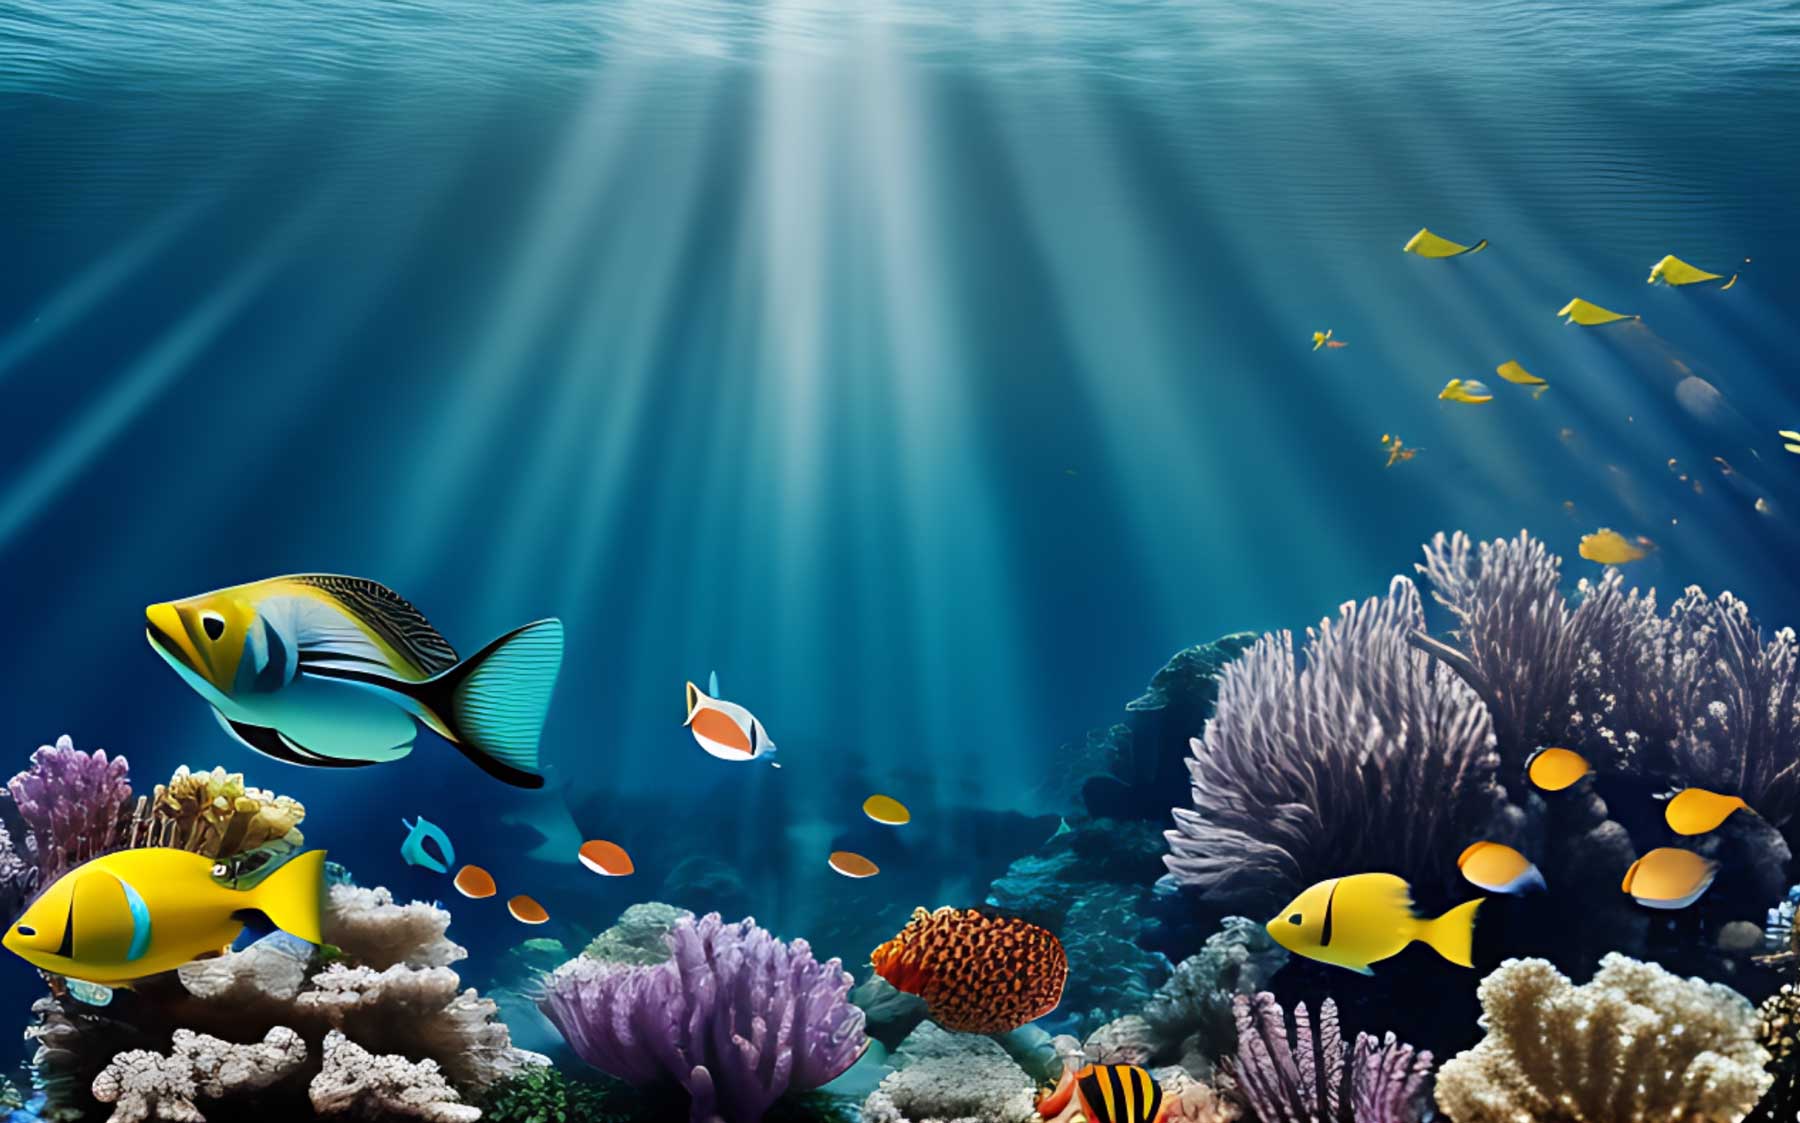
image created with Divi AI
On the other hand, when you add descriptive elements to your prompt, you’ll get a much better result:
Prompt: highly detailed photographic still shot deep underwater, coral reef, brightly colored fish, fisheye lens, cool muted colors, sun filtering down into the water, cinematic photography
Result:
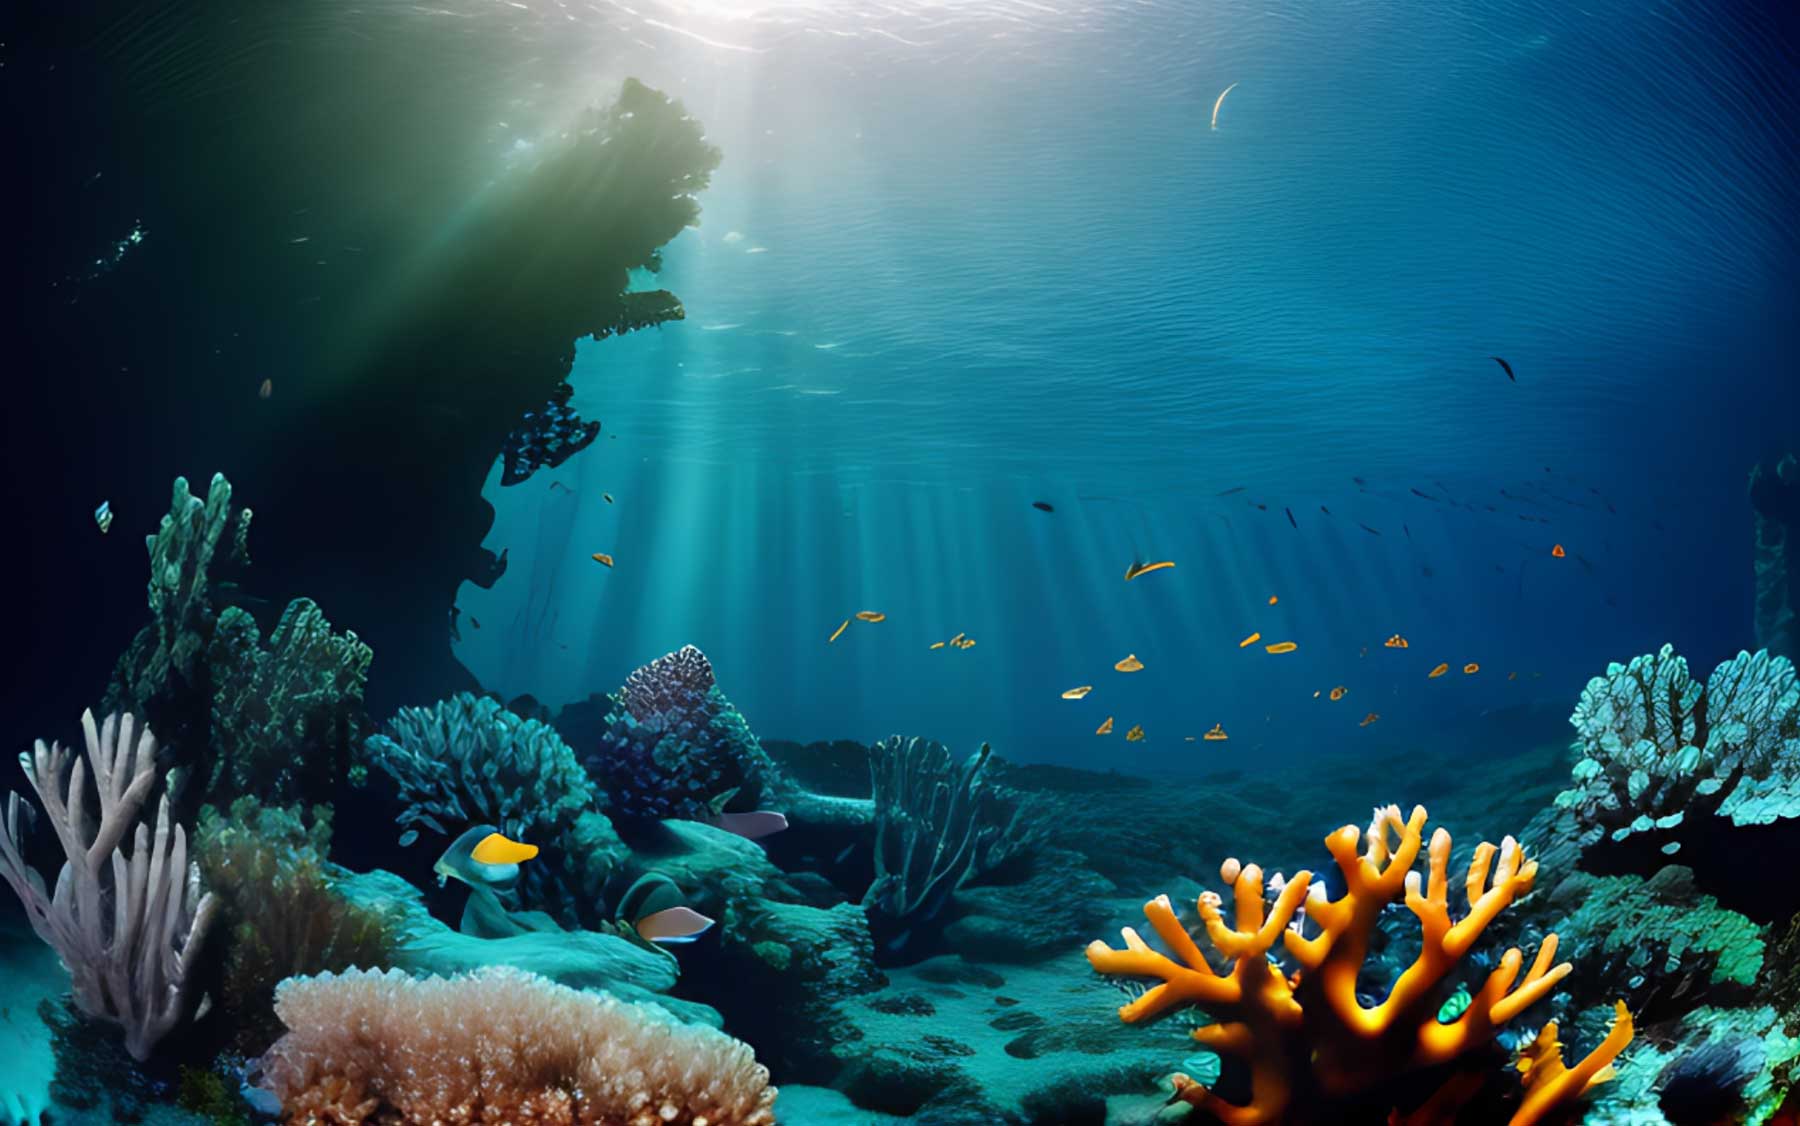
image created with Divi AI
Avoid Being Repetitive
Being descriptive is important, but try not to be overly repetitive. For most AI art generators, it’s best to place important descriptors first, such as the subject, then finish the prompt with details about the environment, followed by lighting, camera angles, and other composition elements. When you add repetitive words, it tends to confuse or overwhelm the AI. For example, if you are using Divi AI, there’s no need to note style repeatedly (like in Midjourney). You can select the style you want, then add descriptive elements.
Refine Your Images
When using AI to create images, you won’t always get a stellar result the first time. Refining your prompts or regenerating images is usually necessary to get the best possible output. Start with your chosen prompt, review the images, and then make changes as necessary. When we created Divi AI, we had this very point in mind. When you sign up for Divi AI, you’ll get unlimited generations. With other AI art generators, you will get a set number of tokens, which will run out quickly when refining images. For a mere $24 per month, you can generate as many photos as you like without worrying about loading more credits into your account.
AI Image Examples
To better understand what AI can do, here are a few examples, along with their prompts to showcase the power of generative artificial intelligence.
Style: 3D Render
Prompt: Spooky cottage set in moonlit woods full of trees, full moon, ambient lighting, spooky clouds.
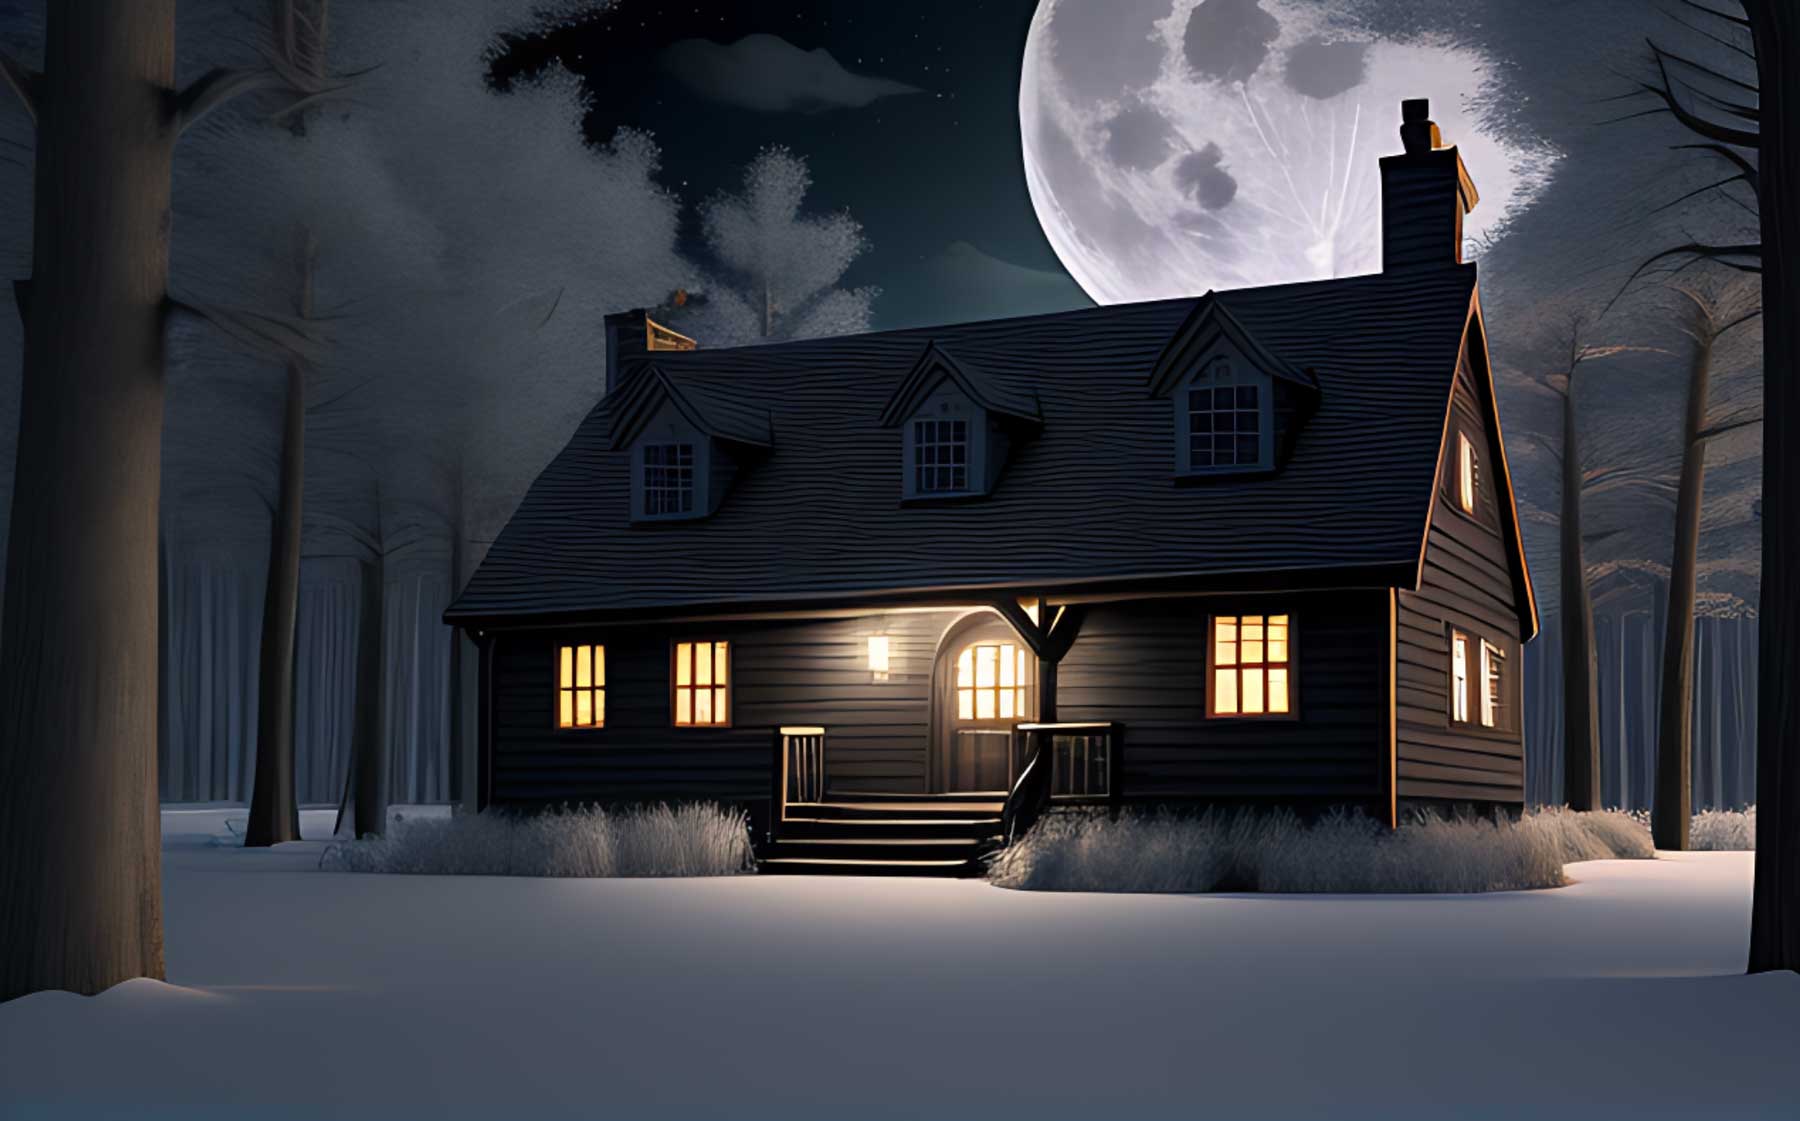
image created with Divi AI
Style: Photo
Prompt: Red Fox in nature, National Geographic, highly detailed fur, hyper-realistic photography, cinematic lighting.
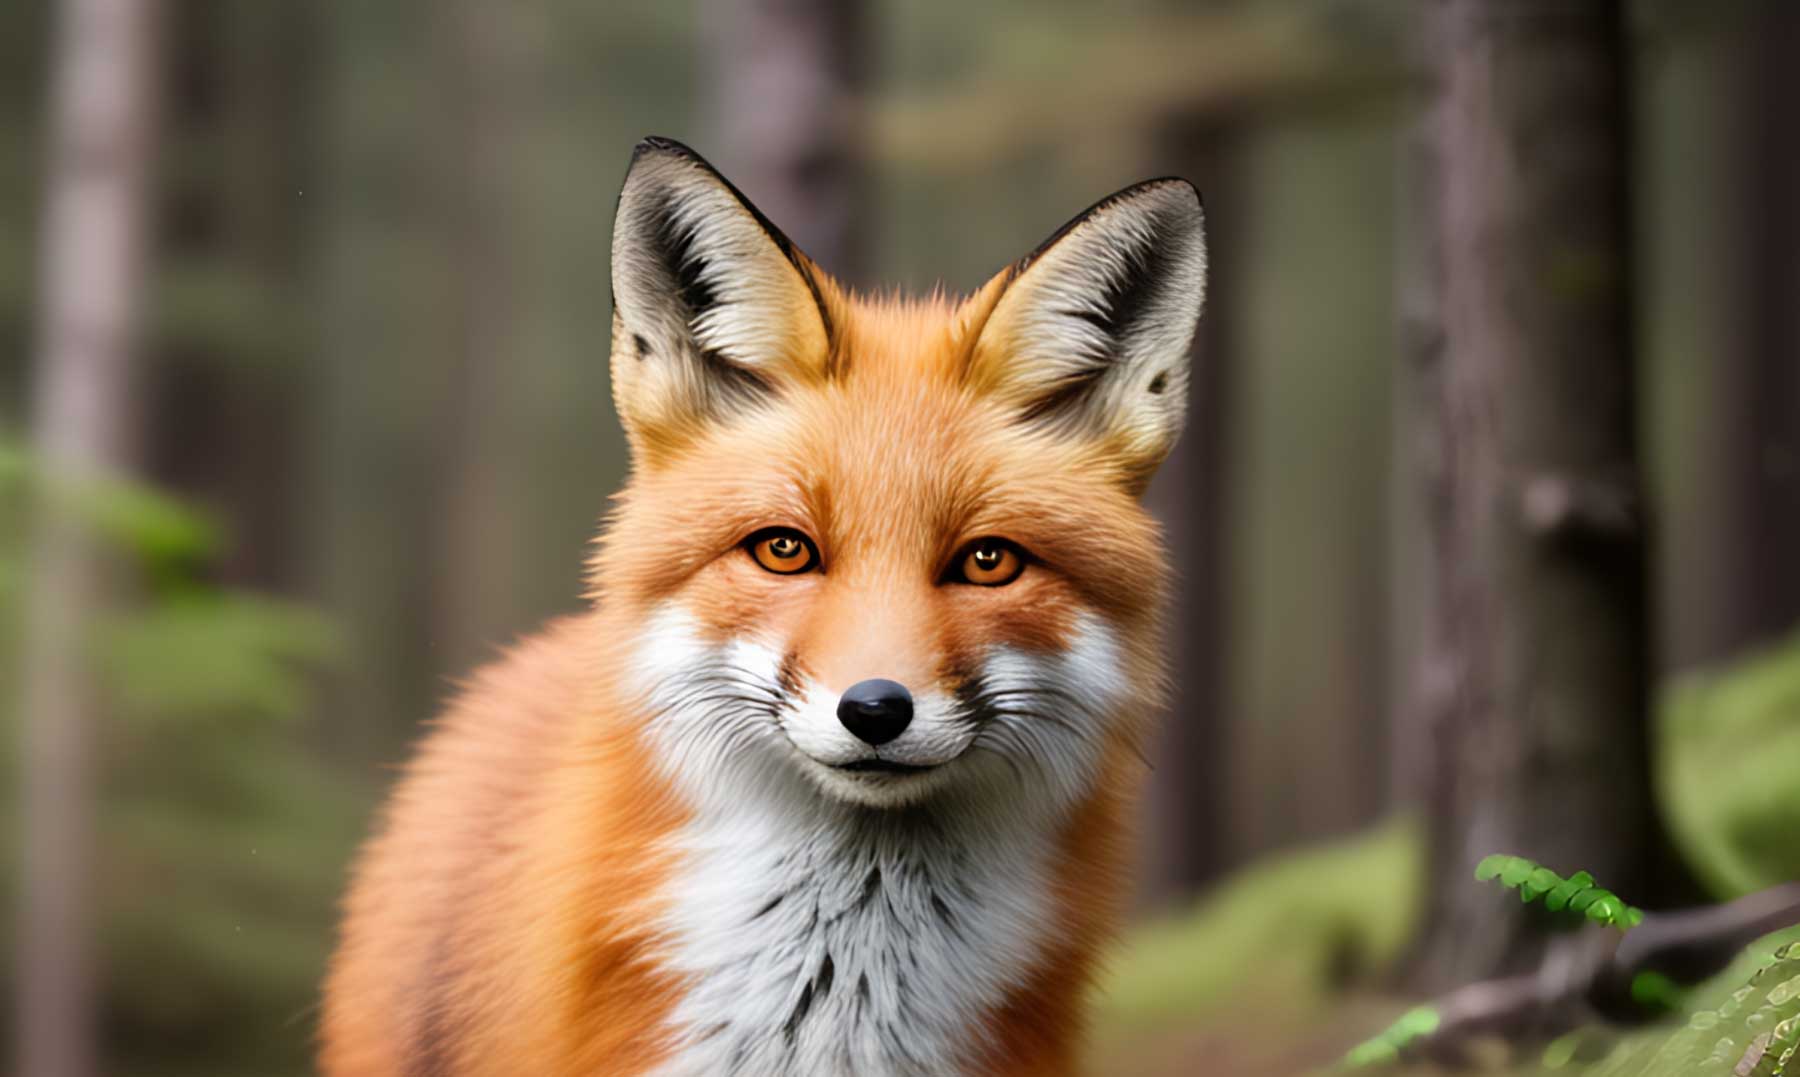
image created with Divi AI
Style: Comic Book
Prompt: Group of superheroes fighting an alien
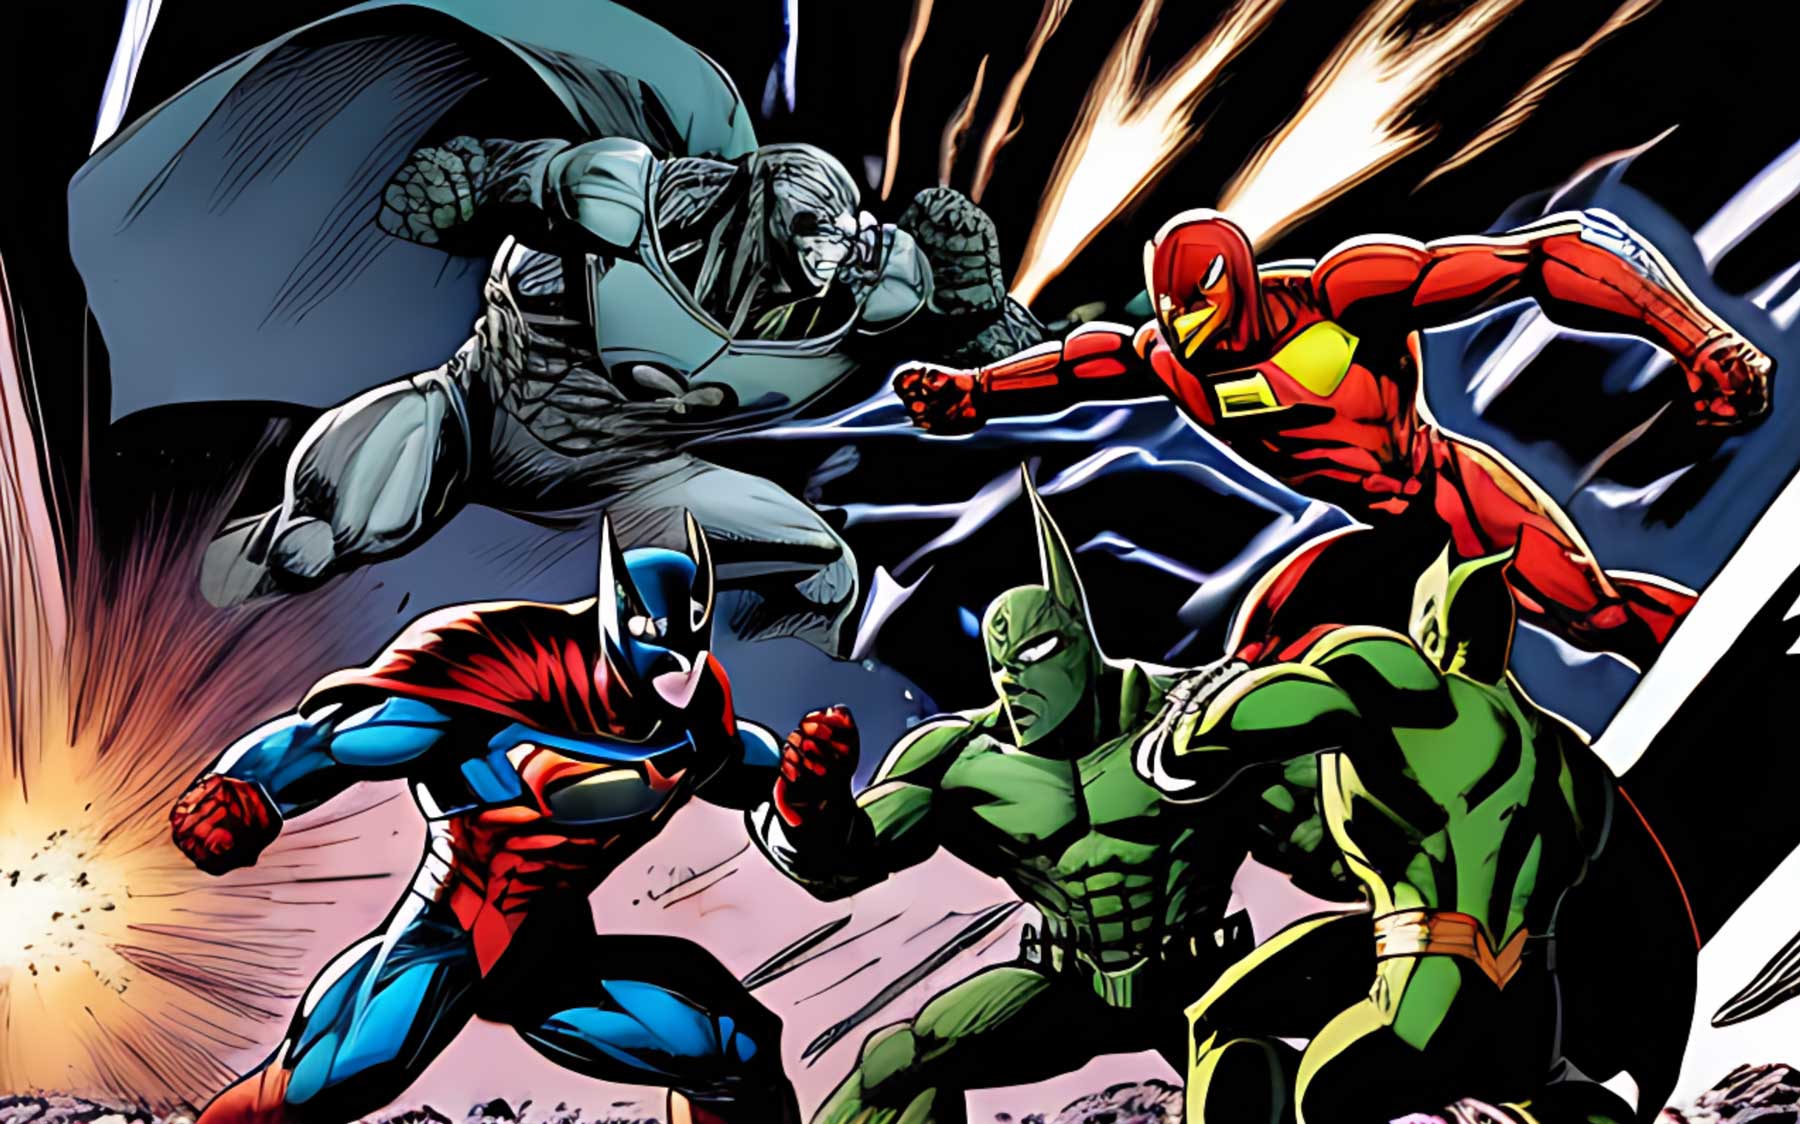
image created with Divi AI
Style: Painting
Prompt: Sunset on the moon, earth in the background, dramatic lighting, dynamic lighting, octane rendering
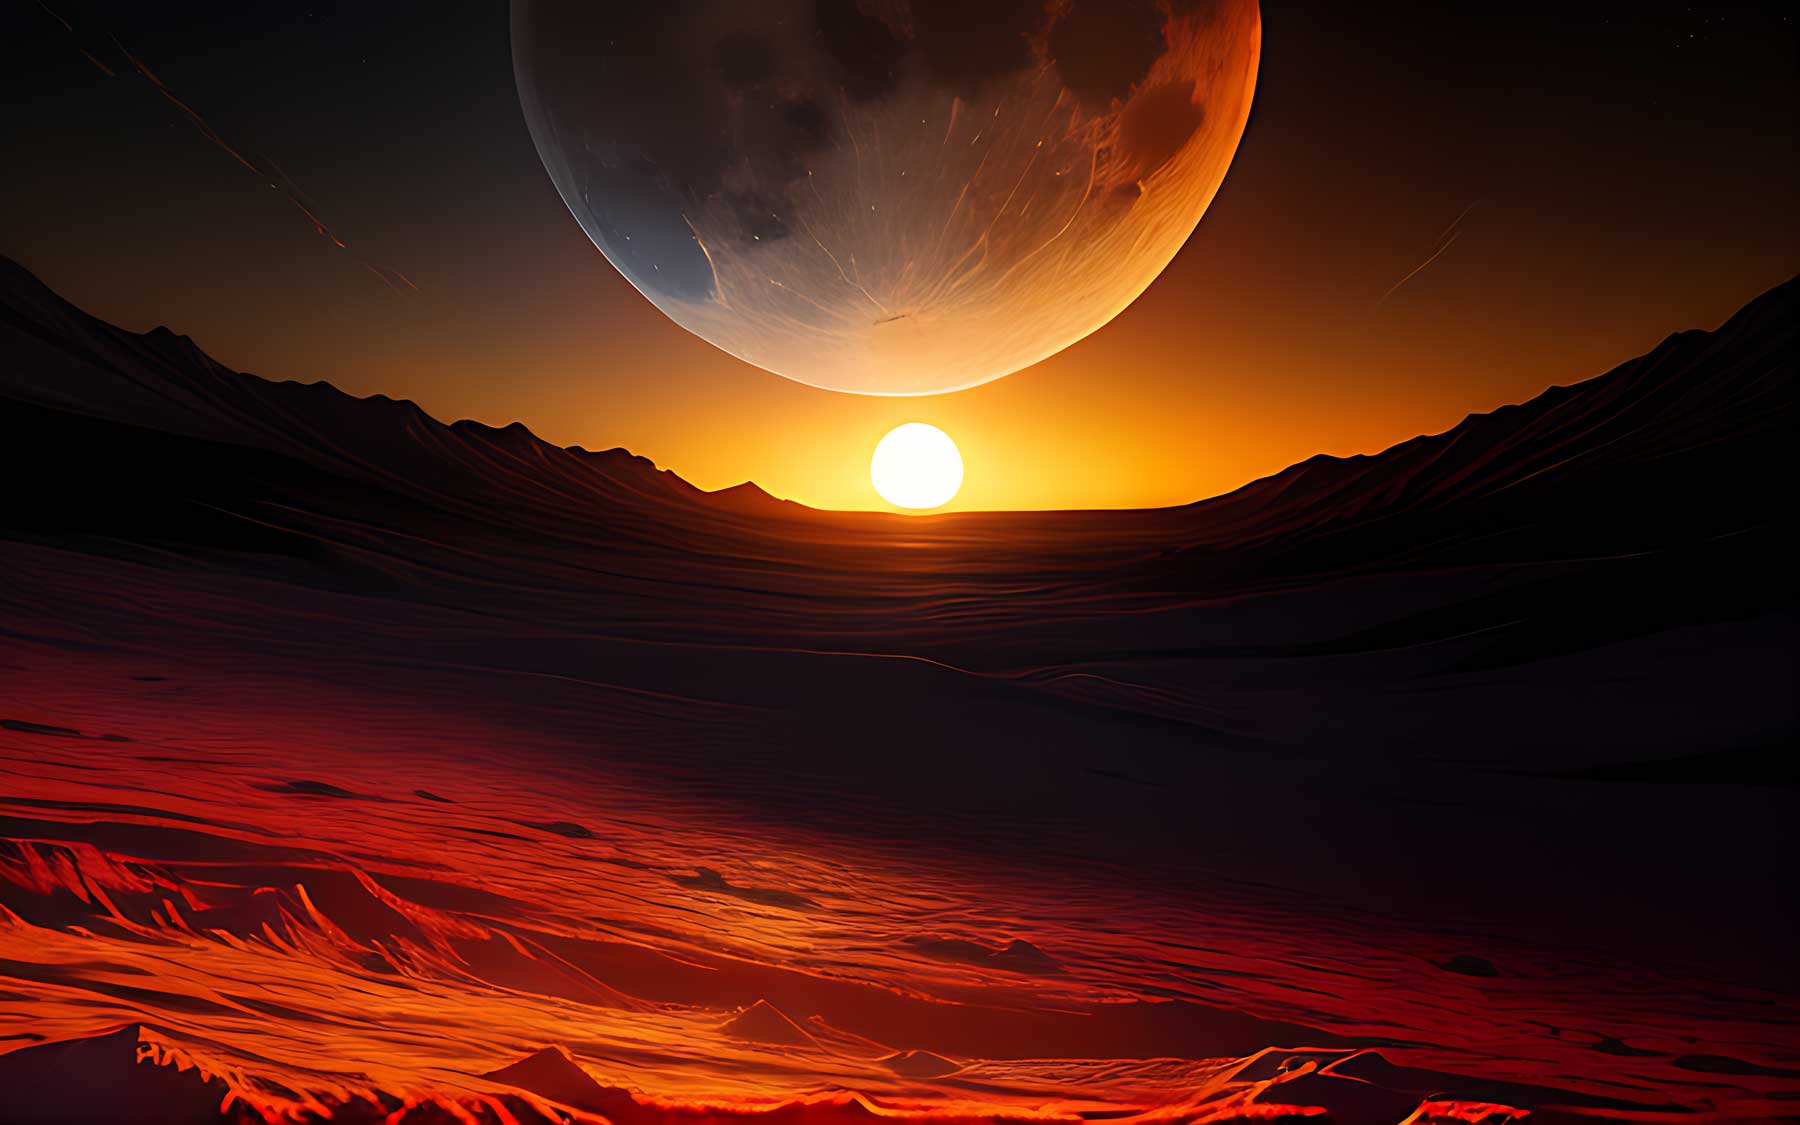
image created with Divi AI
Prompt: rocket launching, rolling firestorm, set in mid-afternoon on a sunny day, mountain backdrop, award-winning photography, clean sharp focus, sparse clouds, sunbeams, distant stars, cinematic photography –ar 16:9
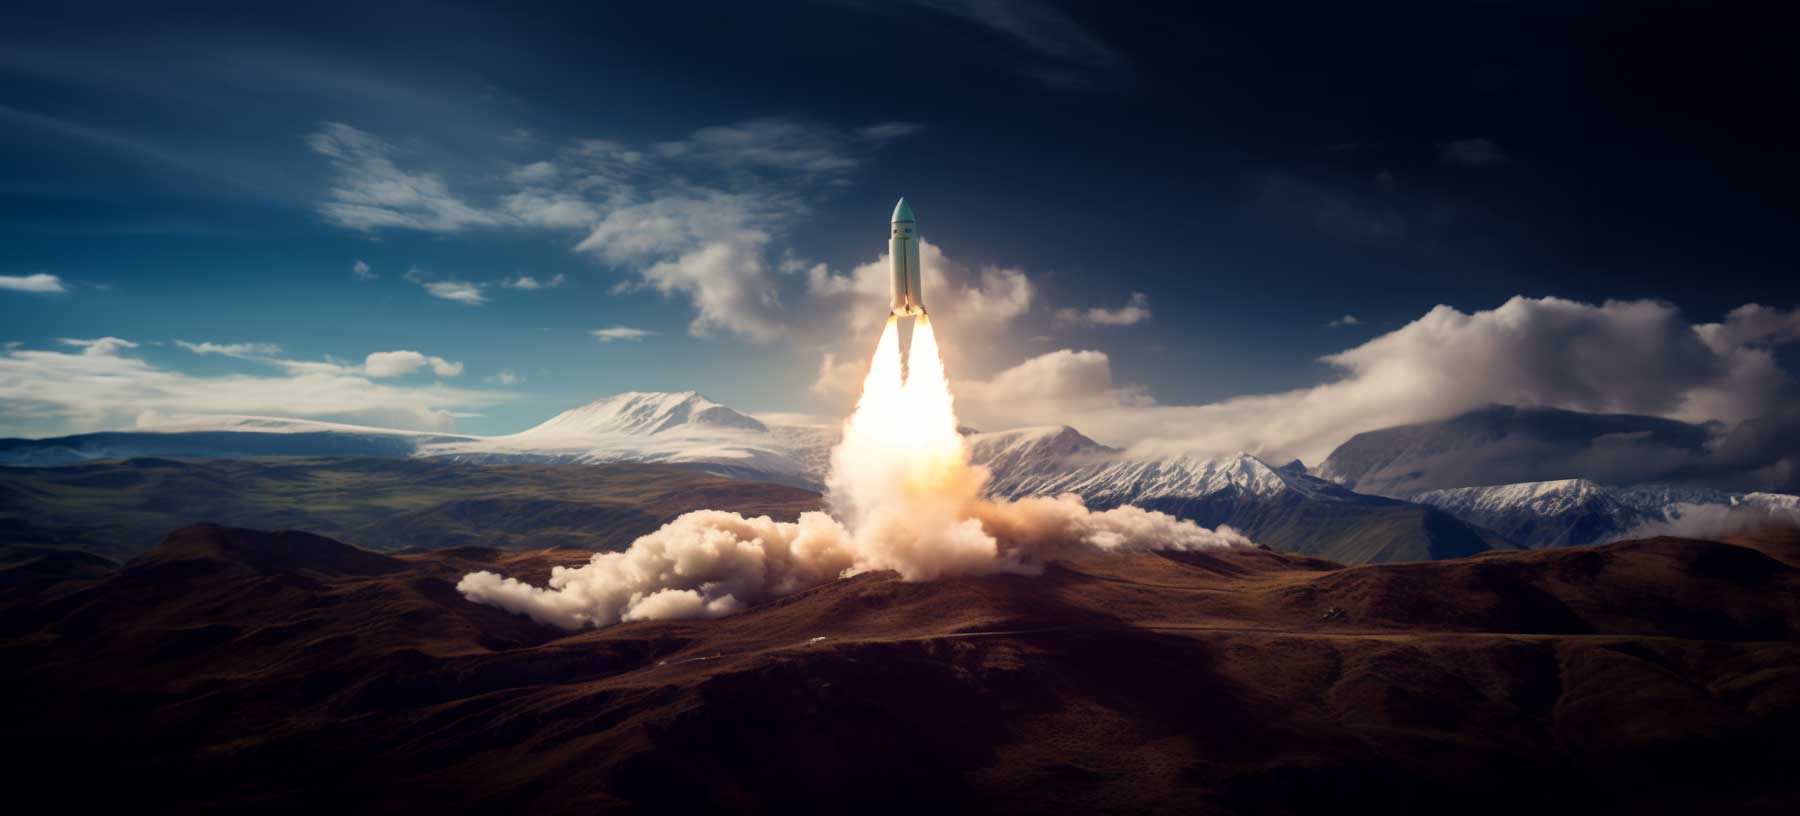
image created with Midjourney
Prompt: Temple, forest, stairs, columns, cinematic, detailed, atmospheric, epic, concept art, Matte painting, background, mist, photo-realistic, volumetric light, cinematic, 8k, movie concept art
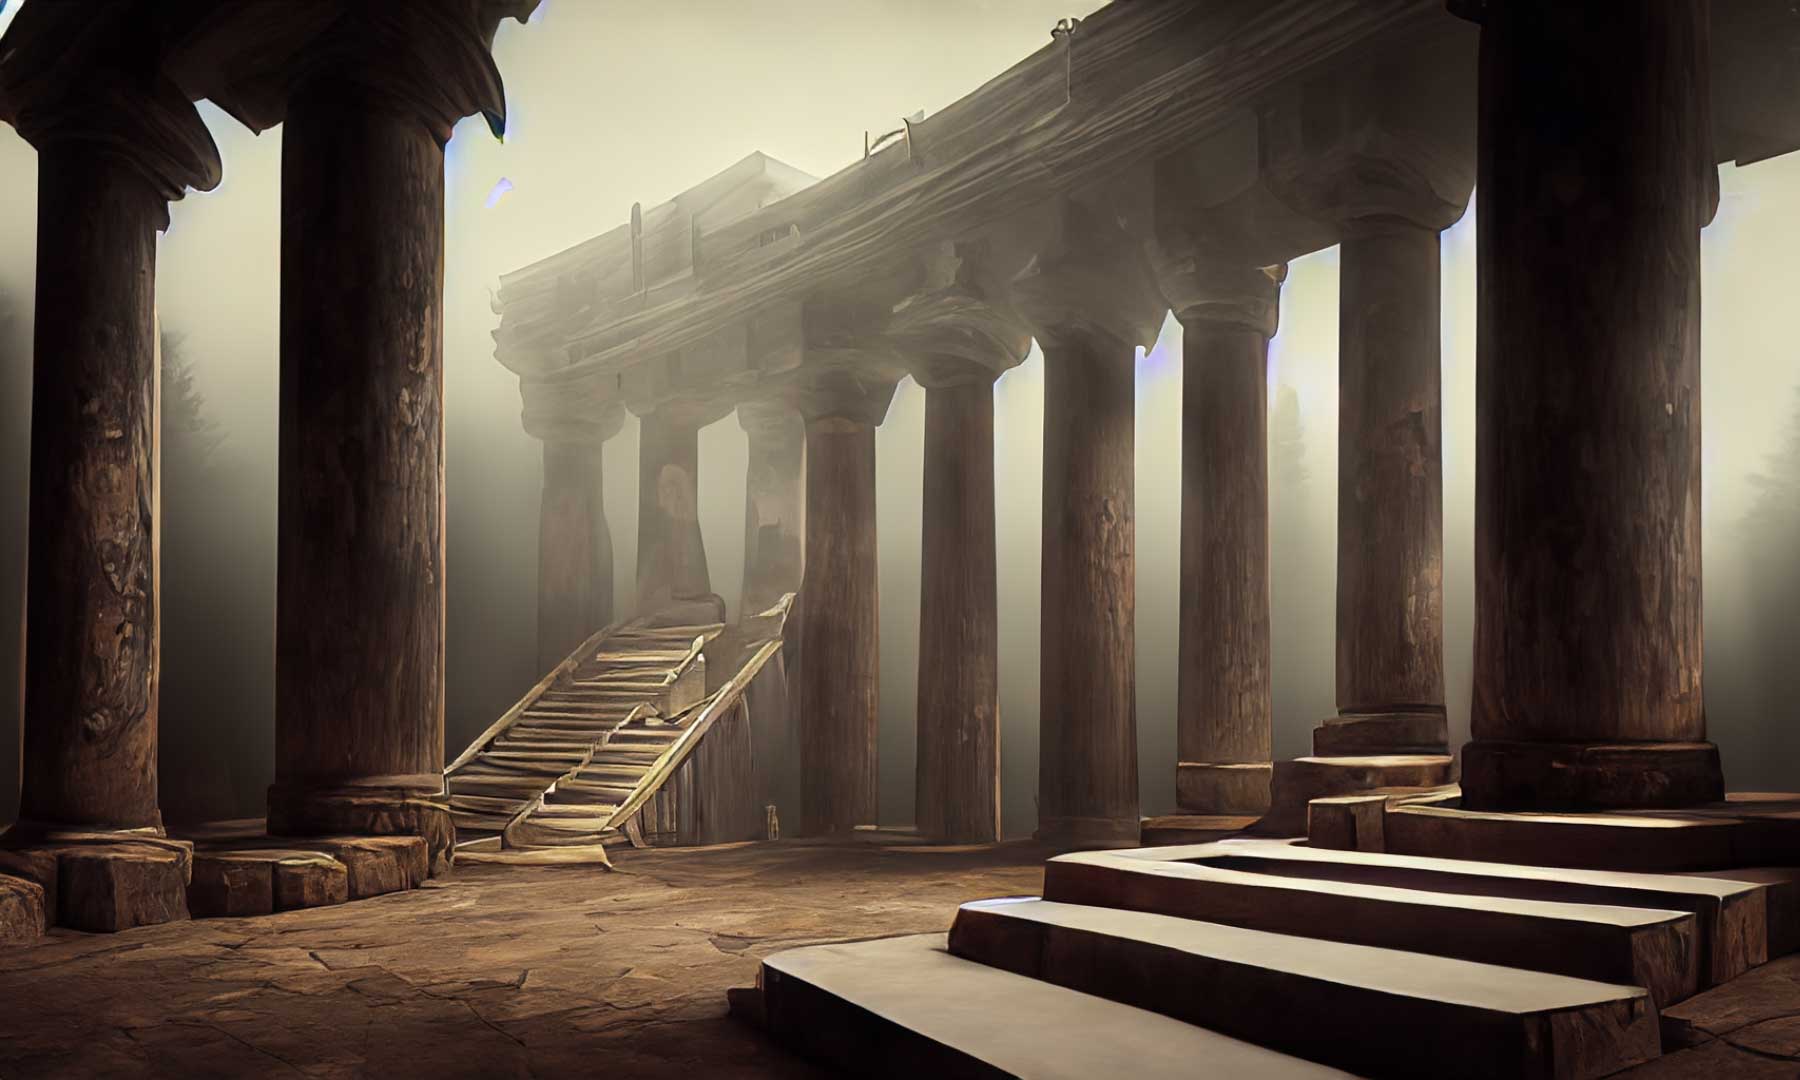
image created with Photoshop AI
Final Thoughts on Generating Images for WordPress
There are a few options for generating AI images for WordPress. Although we may seem biased, Divi AI is the best choice. With Divi AI, you’ll get unlimited image and text generations, can improve existing images, and even create images automatically that match your site’s niche – all for a very affordable price point.
What’s your favorite AI image generator? Let us know by dropping a comment below.
Featured Image via Divi AI
The post How to Generate Images For WordPress With AI (2023 Tutorial) appeared first on Elegant Themes Blog.
