Online booking is a fantastic feature to add to your website, mainly if you sell services. Booking forms provide an effortless process for your customers. They can see your availability, select their services and even pay for them beforehand. Having a WordPress booking form on your website helps your business maintain a seamless process for your customers while ensuring that your revenues are supported, as your customer will be able to return and book within your business effortlessly.
What is a WordPress Booking Form?
A WordPress booking form is a form that allows users to book or schedule appointments with you or your business directly from your WordPress website. Simple booking forms typically collect a user’s name, service, and the date and time they want their service. There are multiple applications for booking forms. They can be used to schedule deliveries or to book a service like a nail or hair appointment. They can also be used to reserve physical items like reserving a hotel room or the rental of items. Booking forms can come with various features such as adding addons to their service, text notifications, and self-service capabilities allowing customers to adjust their appointment. Some event calendar plugins will have booking forms as a built-in feature.
Benefits of Using a Booking Form in WordPress
As a busy service provider, having a booking form can make your business’ internal process run smoother. Here are some benefits of using an online booking form in your business:
- Increased Sales – With booking forms, you can collect customer deposits and payments ahead of time. This allows you to secure revenue for your business. Additionally, you can charge late or cancellation fees through a booking form to ensure your time is respected. Booking forms are also a place where you can upsell your other products and services when your customers go to book their next appointment.
- No More Playing Phone Tag – With an online booking form, you can enter your availability, and your customers can choose a time that works for them from your calendar. Your customers can now automatically and in real-time know when they can book their sessions with you without having to call or send a thread of emails.
- Track and Organize Client Information – Booking forms are a great way to build a client relationship database. Through a booking form, you can track how much your customers spend, the services they get, and more data you can use to market to your customers and nurture your relationships with them.
- Limit No-Shows and Cancellations – Notifications via text and email are a common feature that many booking forms now have. Schedule and send reminders to your customers, ensuring that they arrive at their appointment on time.
In short, adding a booking form to your WordPress site can generate more bookings more efficiently with the power of automation. Now let’s explore how easy it is to add one to your site.
How to Add a Booking Form to Your WordPress Site (Step-by-Step)
For this tutorial, we’ll walk through how to do this using the trusted, popular booking form plugin Amelia. Amelia offers a robust feature set that makes free and premium versions an excellent choice to add a WordPress booking form to your website. Let’s walk through adding this plugin to your website and adding a booking form to your site.
Install Amelia
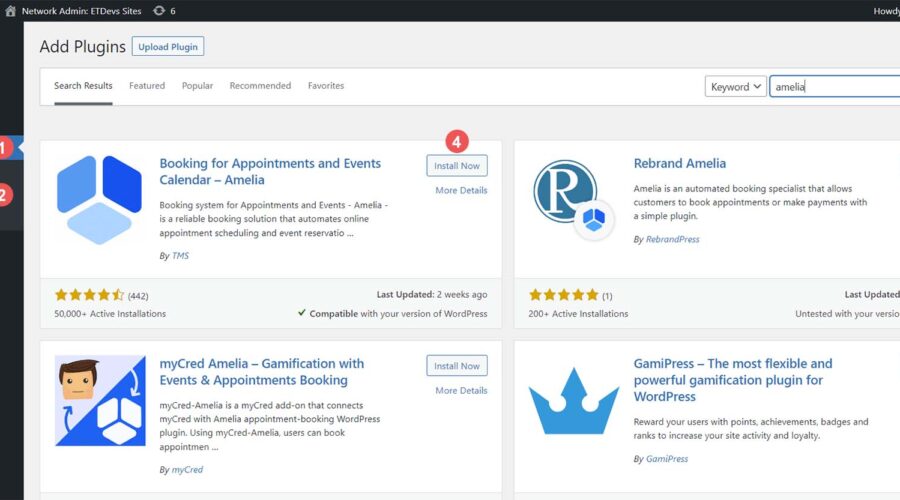
From your WordPress website, hover over the Plugins menu item. Next, click Add New and use the search form and enter Amelia. The first option will be the Amelia booking form plugin. Click Install Now to add the plugin to your WordPress website.

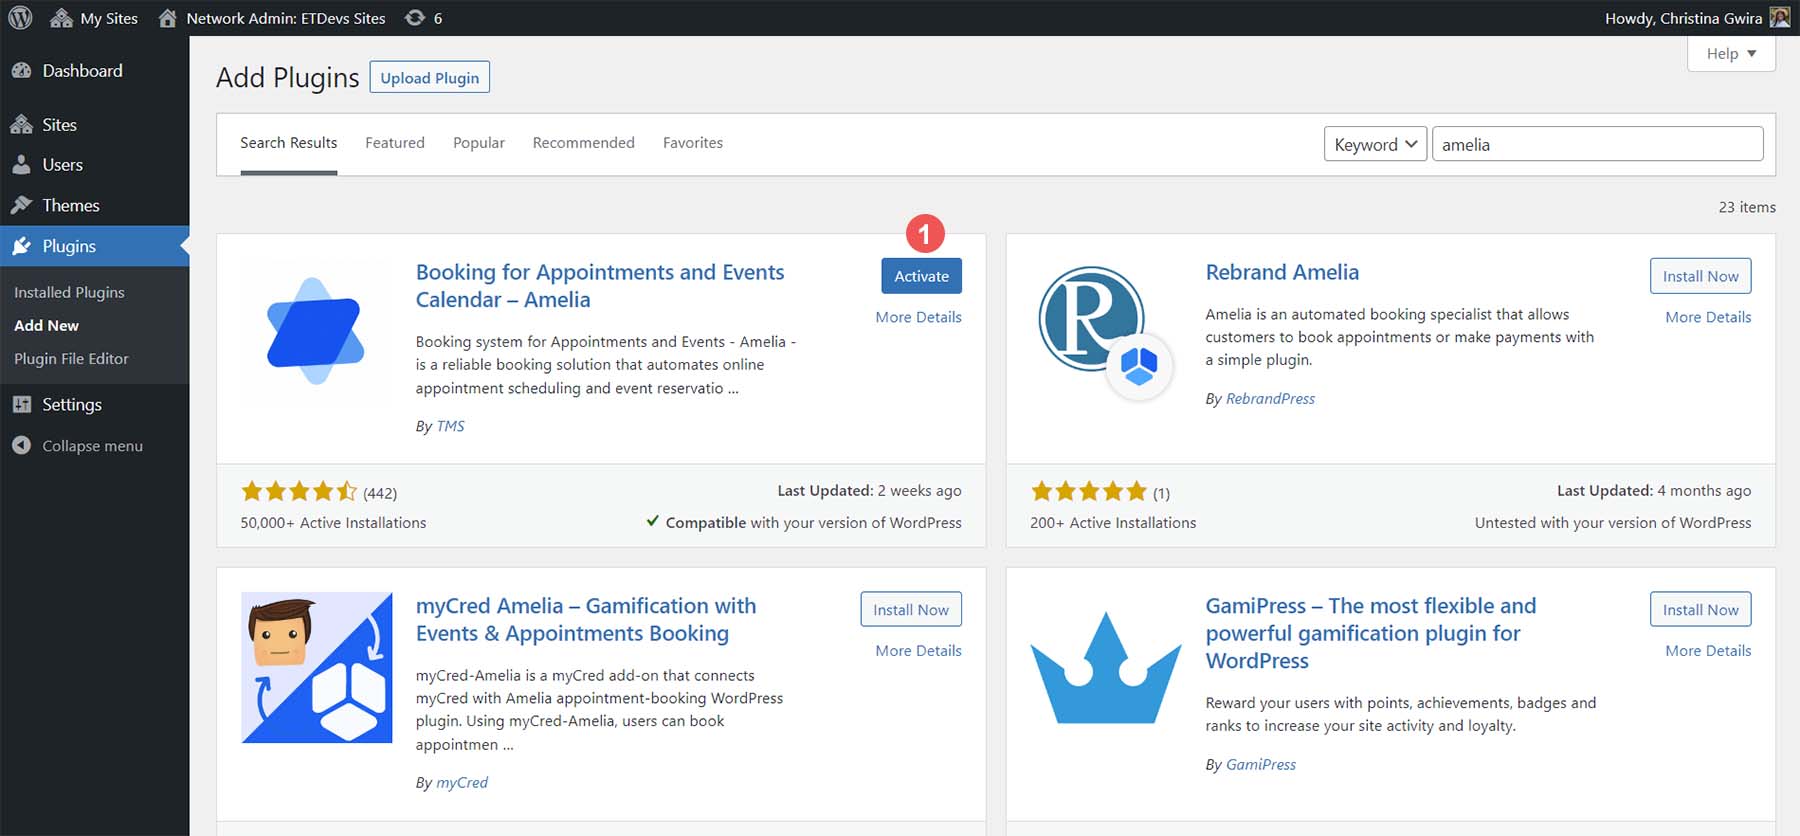
Once your plugin is installed, click the blue Activate button.
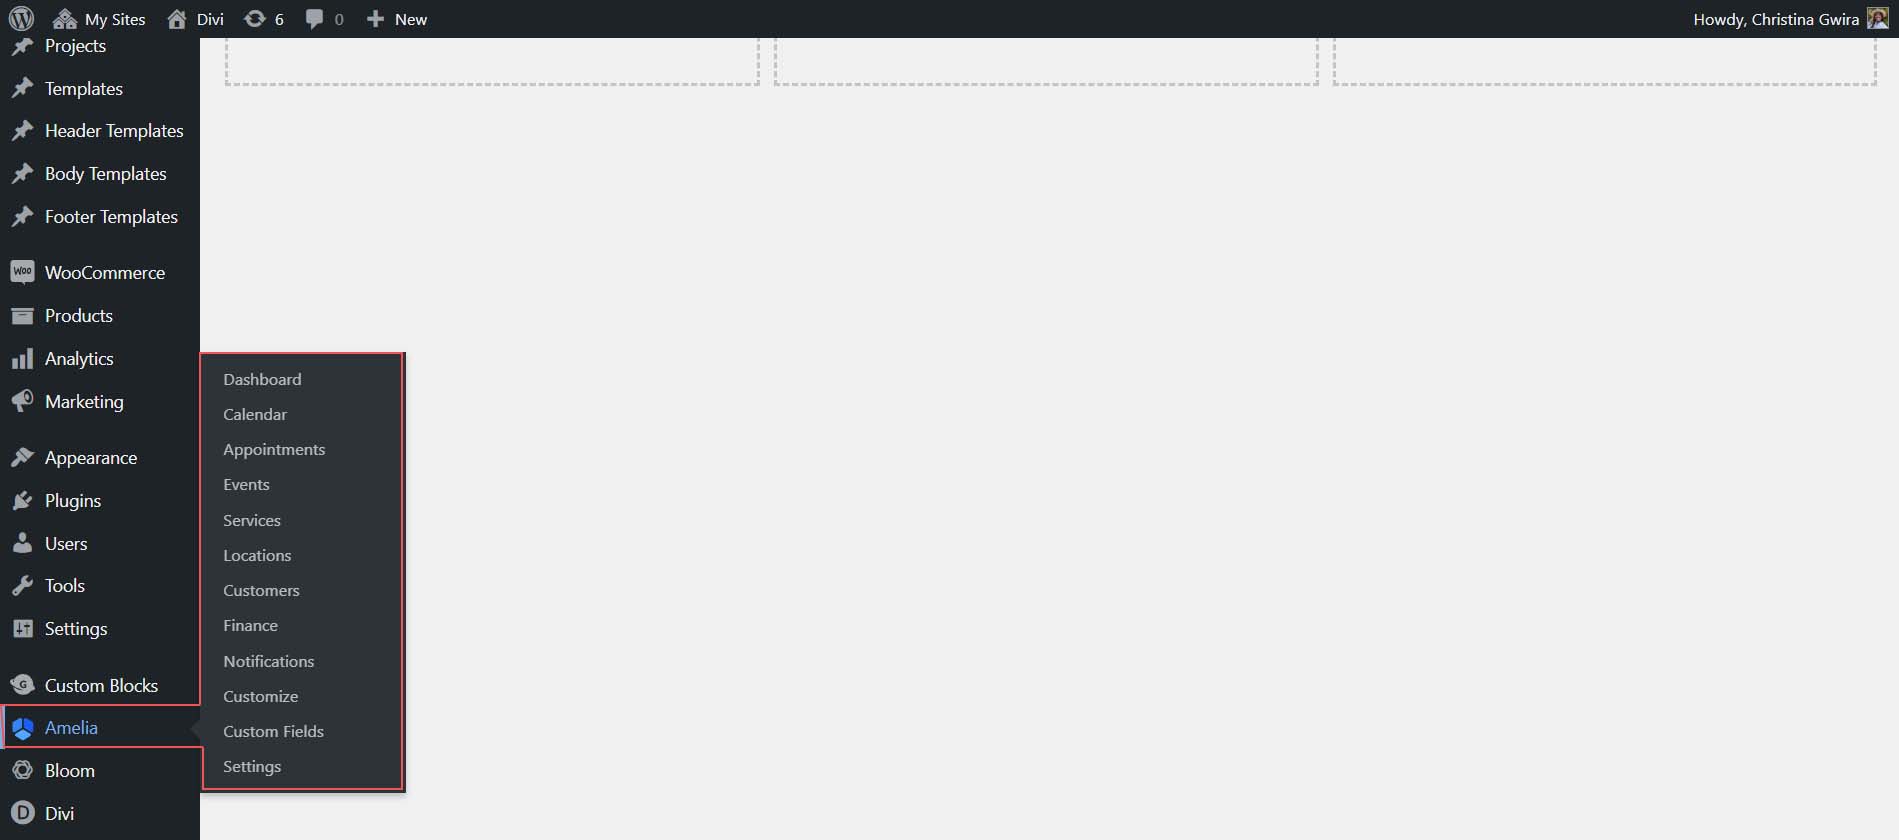
After Amelia is activated and installed, a new menu item will appear in your WordPress dashboard.
Configuring Amelia
Amelia is a full-featured yet easy-to-use booking form plugin. It provides many features to help you create the perfect booking form for your business.
While all these features may look complicated, to create your first booking form with Amelia, you’ll only need to create the following:
- A service
- An employee service
Once these two items are created, you can do more complex things with your booking form, like adding packages, setting up payments, and more. To begin, let’s create our first service.
Creating A Service
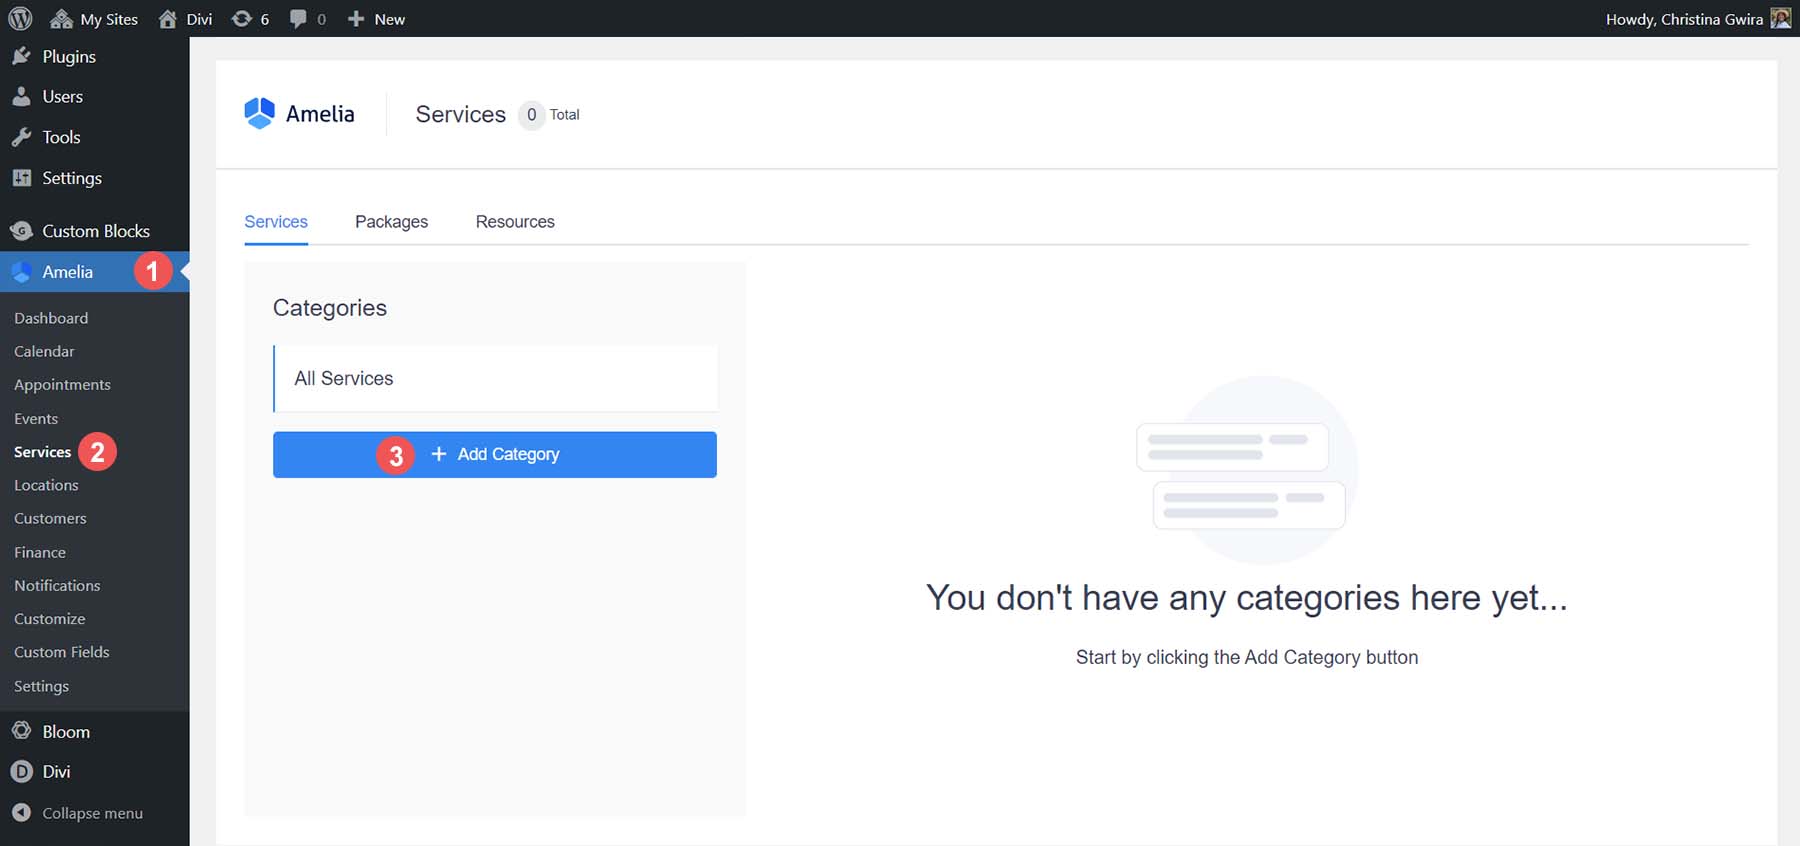
Amelia requires one service and one provider to generate a booking form at its most basic level. To begin, click on the Amelia menu option. Next, click the Services link. Services are organized in categories, and in the premium version of Amelia, you can add multiple services to create packages. Click on the blue Add Category button to create our first category.
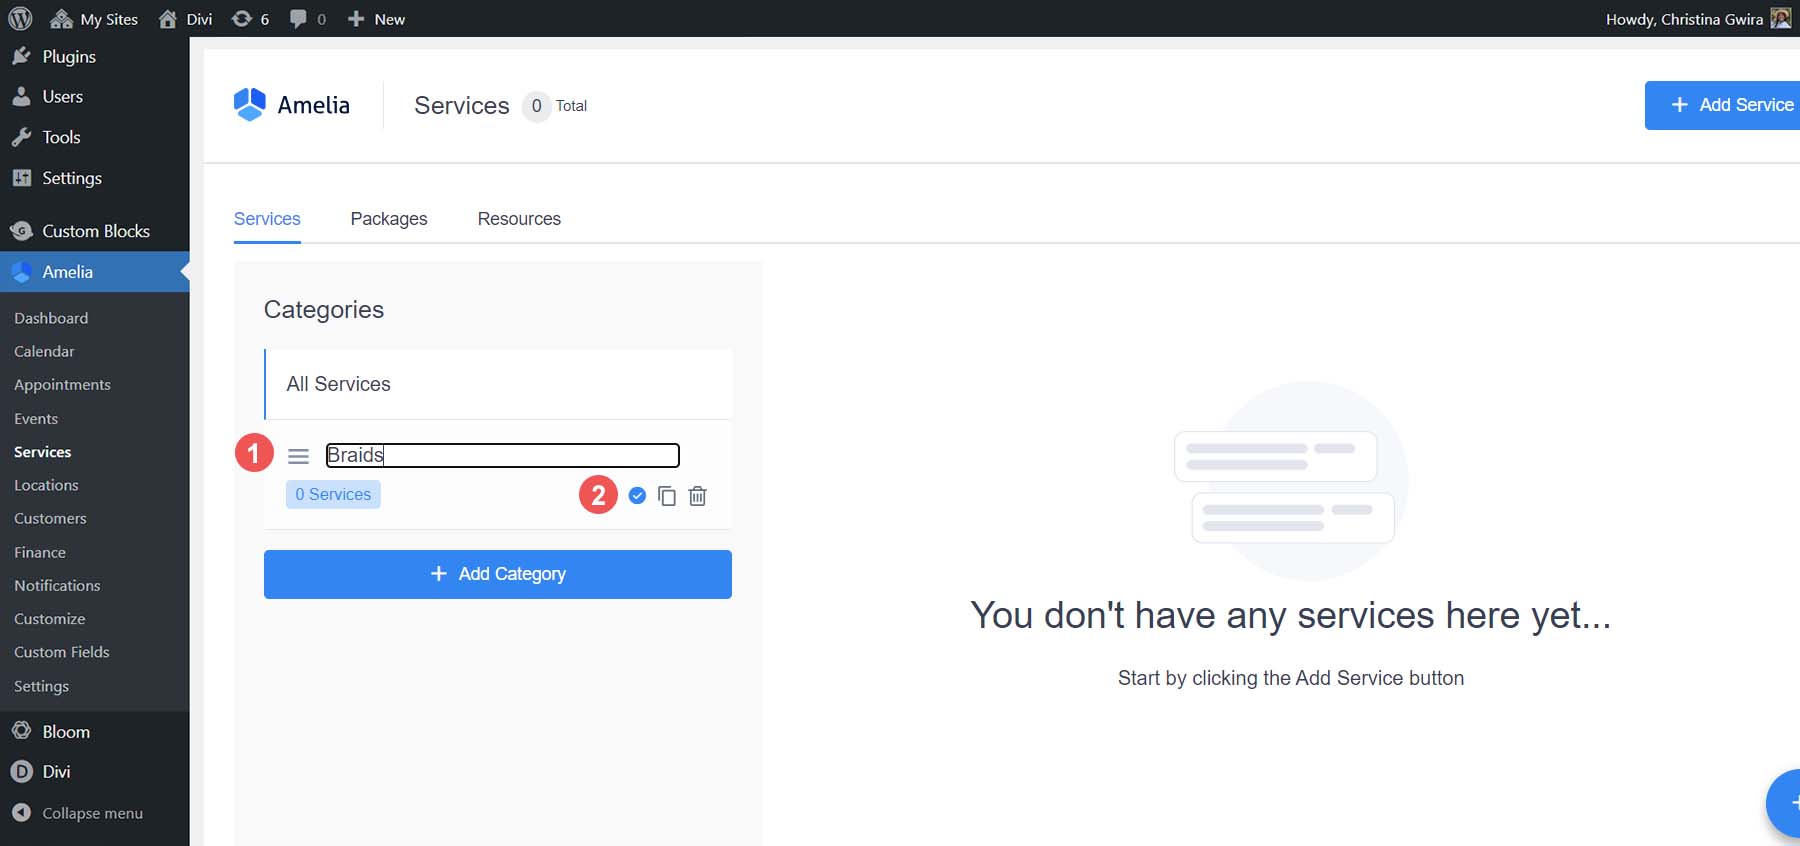
In the category name field, assign your category a name. Then, click the small blue checkmark to save your category. You can create more categories here now if you want to add more.
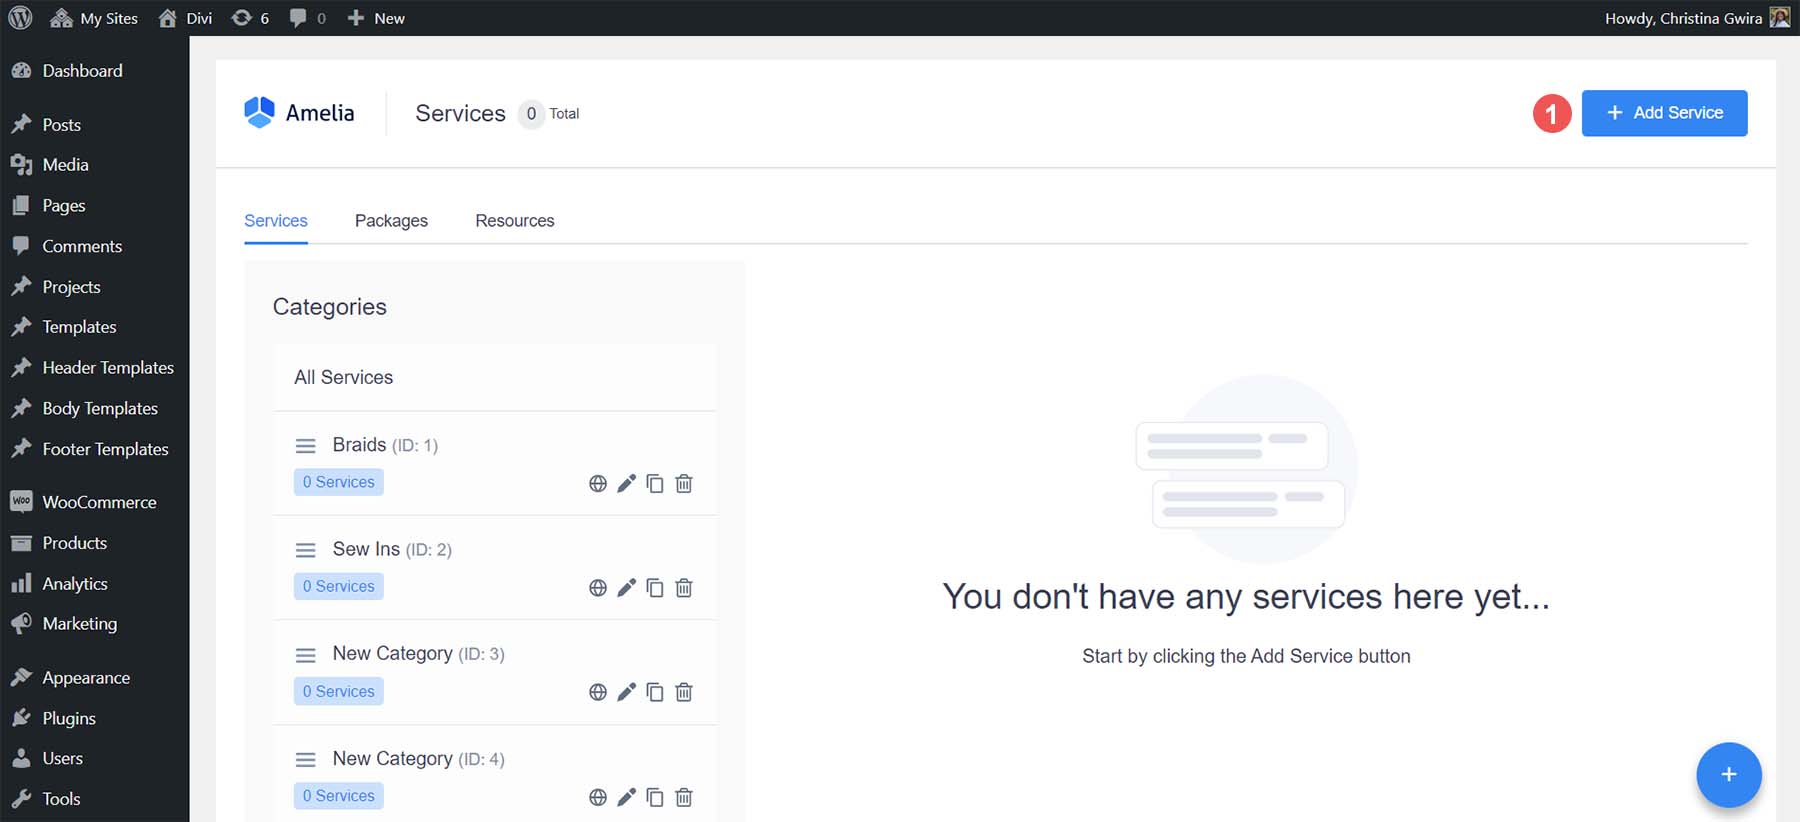
With our first category created, we can now create our first service. To do this, click the blue Add Service button in the top right corner.
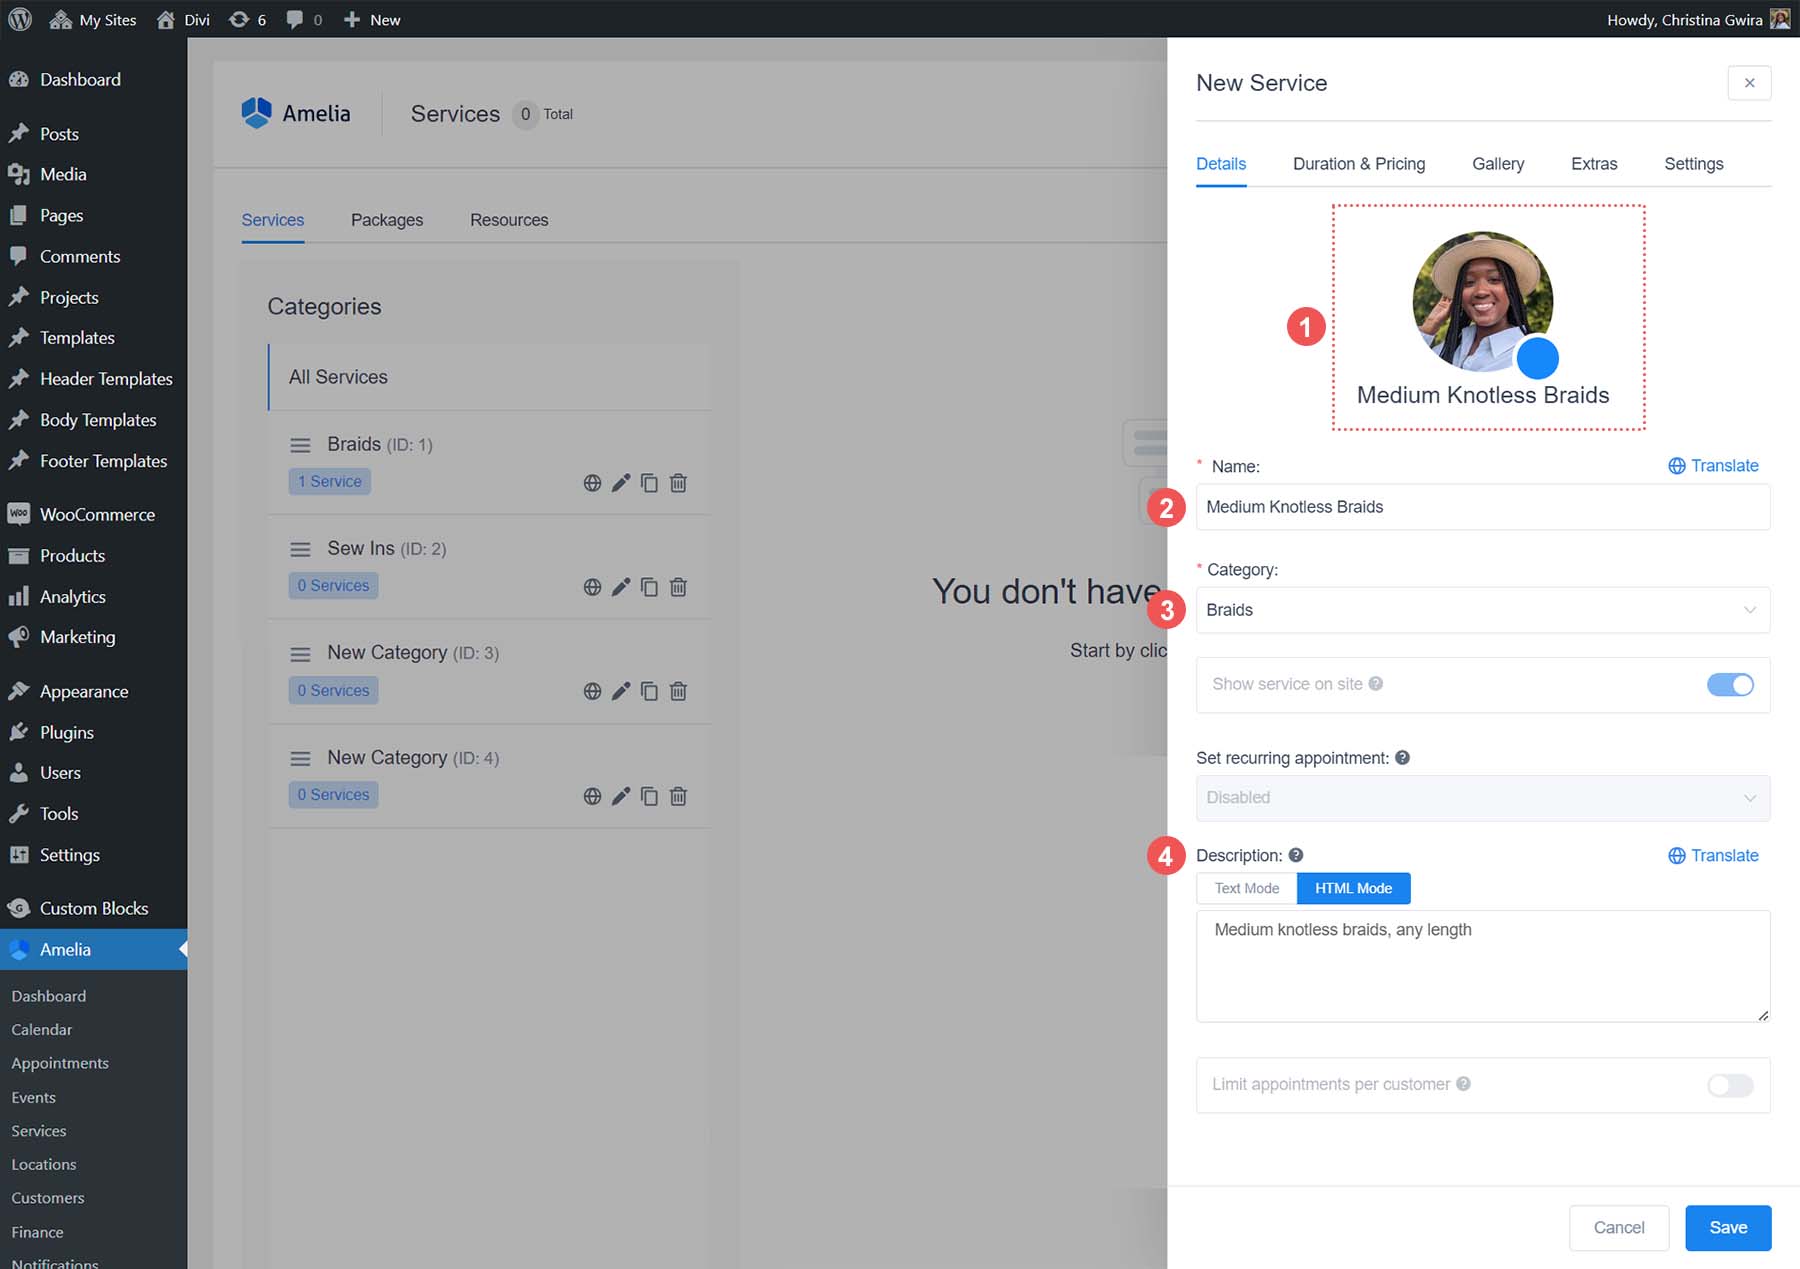
The Add Service flyout will open. The first tab, Details, is where you’ll upload a photo of your service and its name, category, and description.
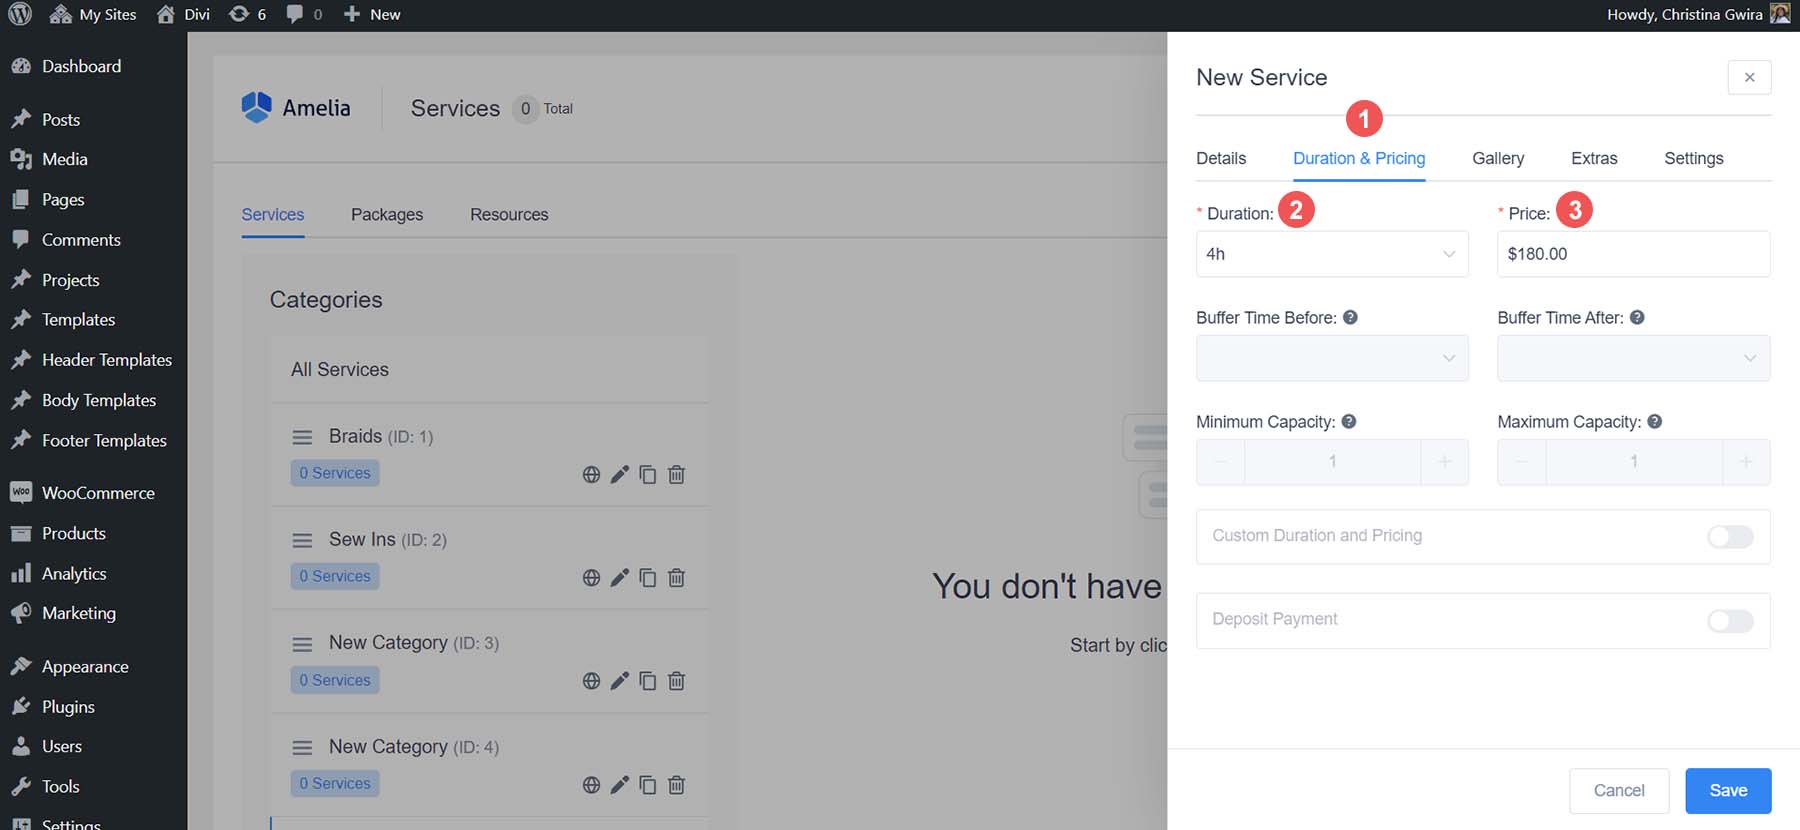
Next, click on the Duration & Pricing tab. Here, you’ll enter the length of time and price for your service.
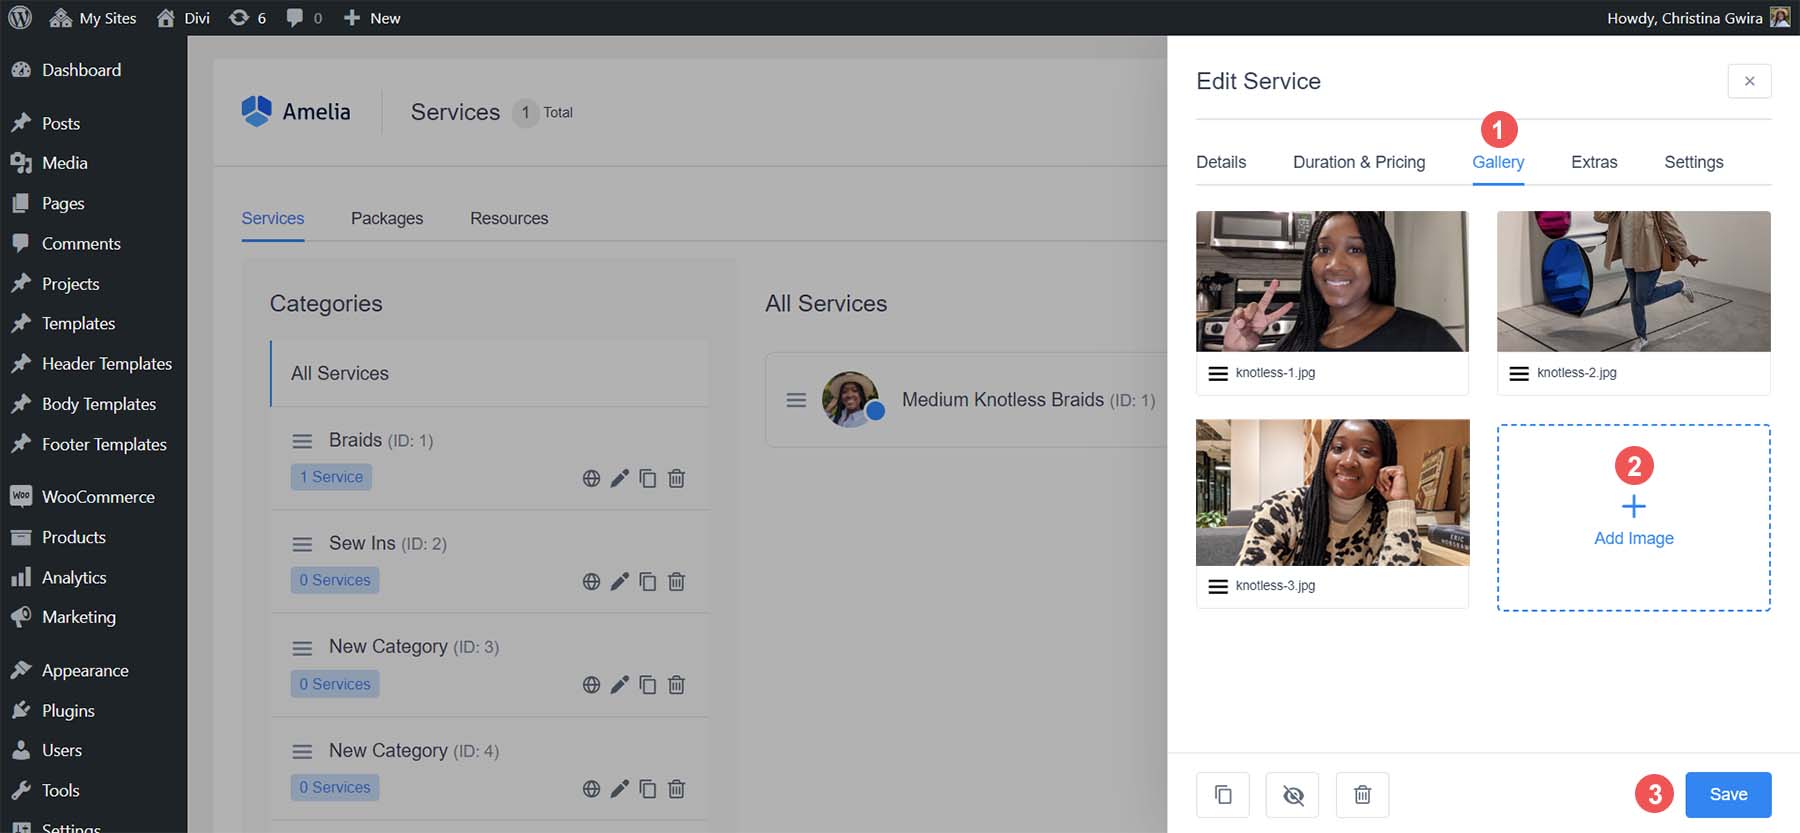
If you want to add photos to your service, click the Gallery tab. Then, click on the Add Image link. This will open up the default WordPress Media Library for you to upload and add photos to your service. Once you’ve added your images, click the blue Save button at the bottom of the flyout.
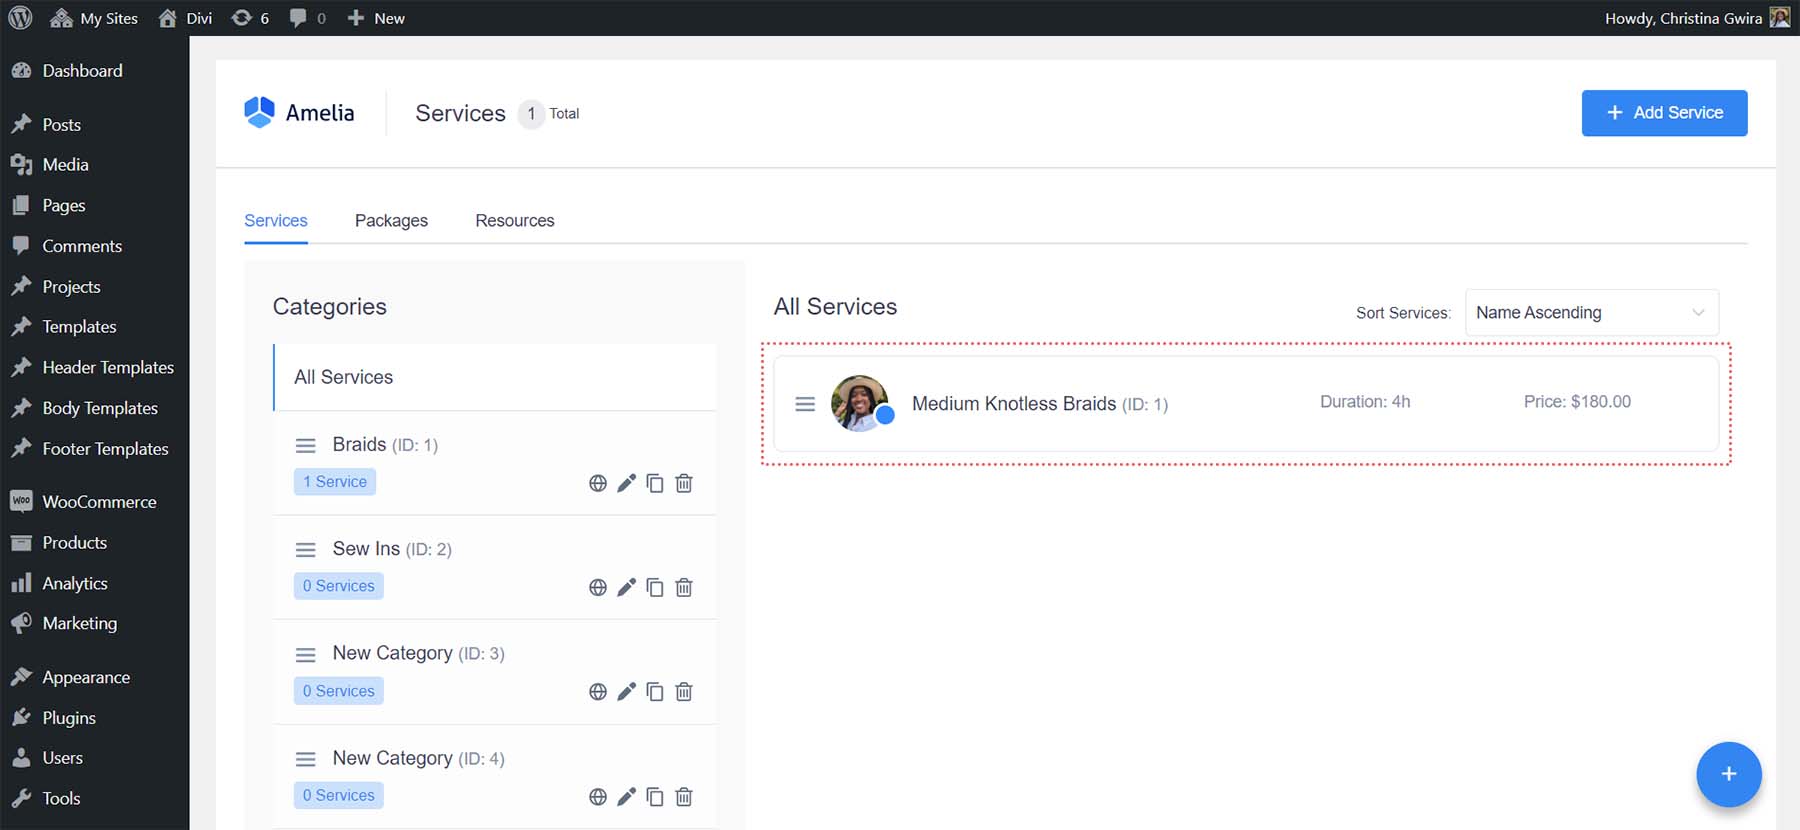
It will appear in your Services dashboard once you’ve added your necessary service details.
After creating your service, you’ll need to create and assign a provider to the service to make your booking form.
Creating An Employee
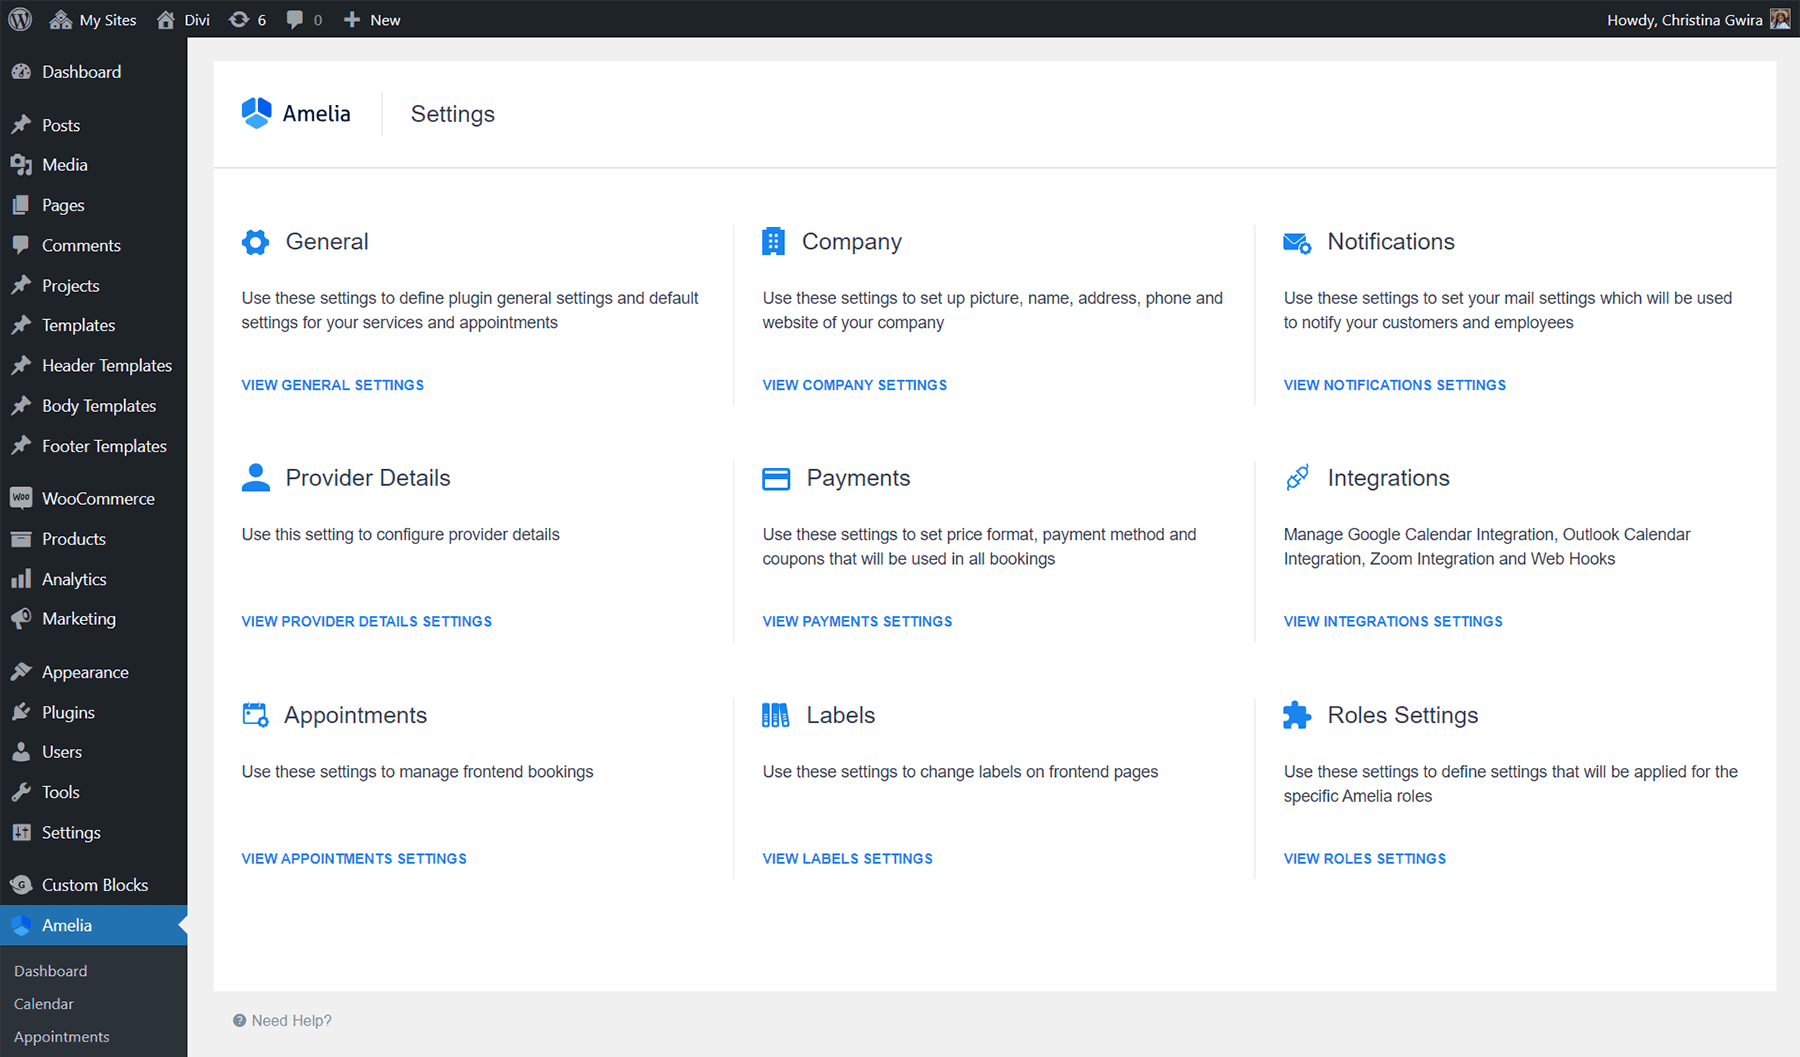
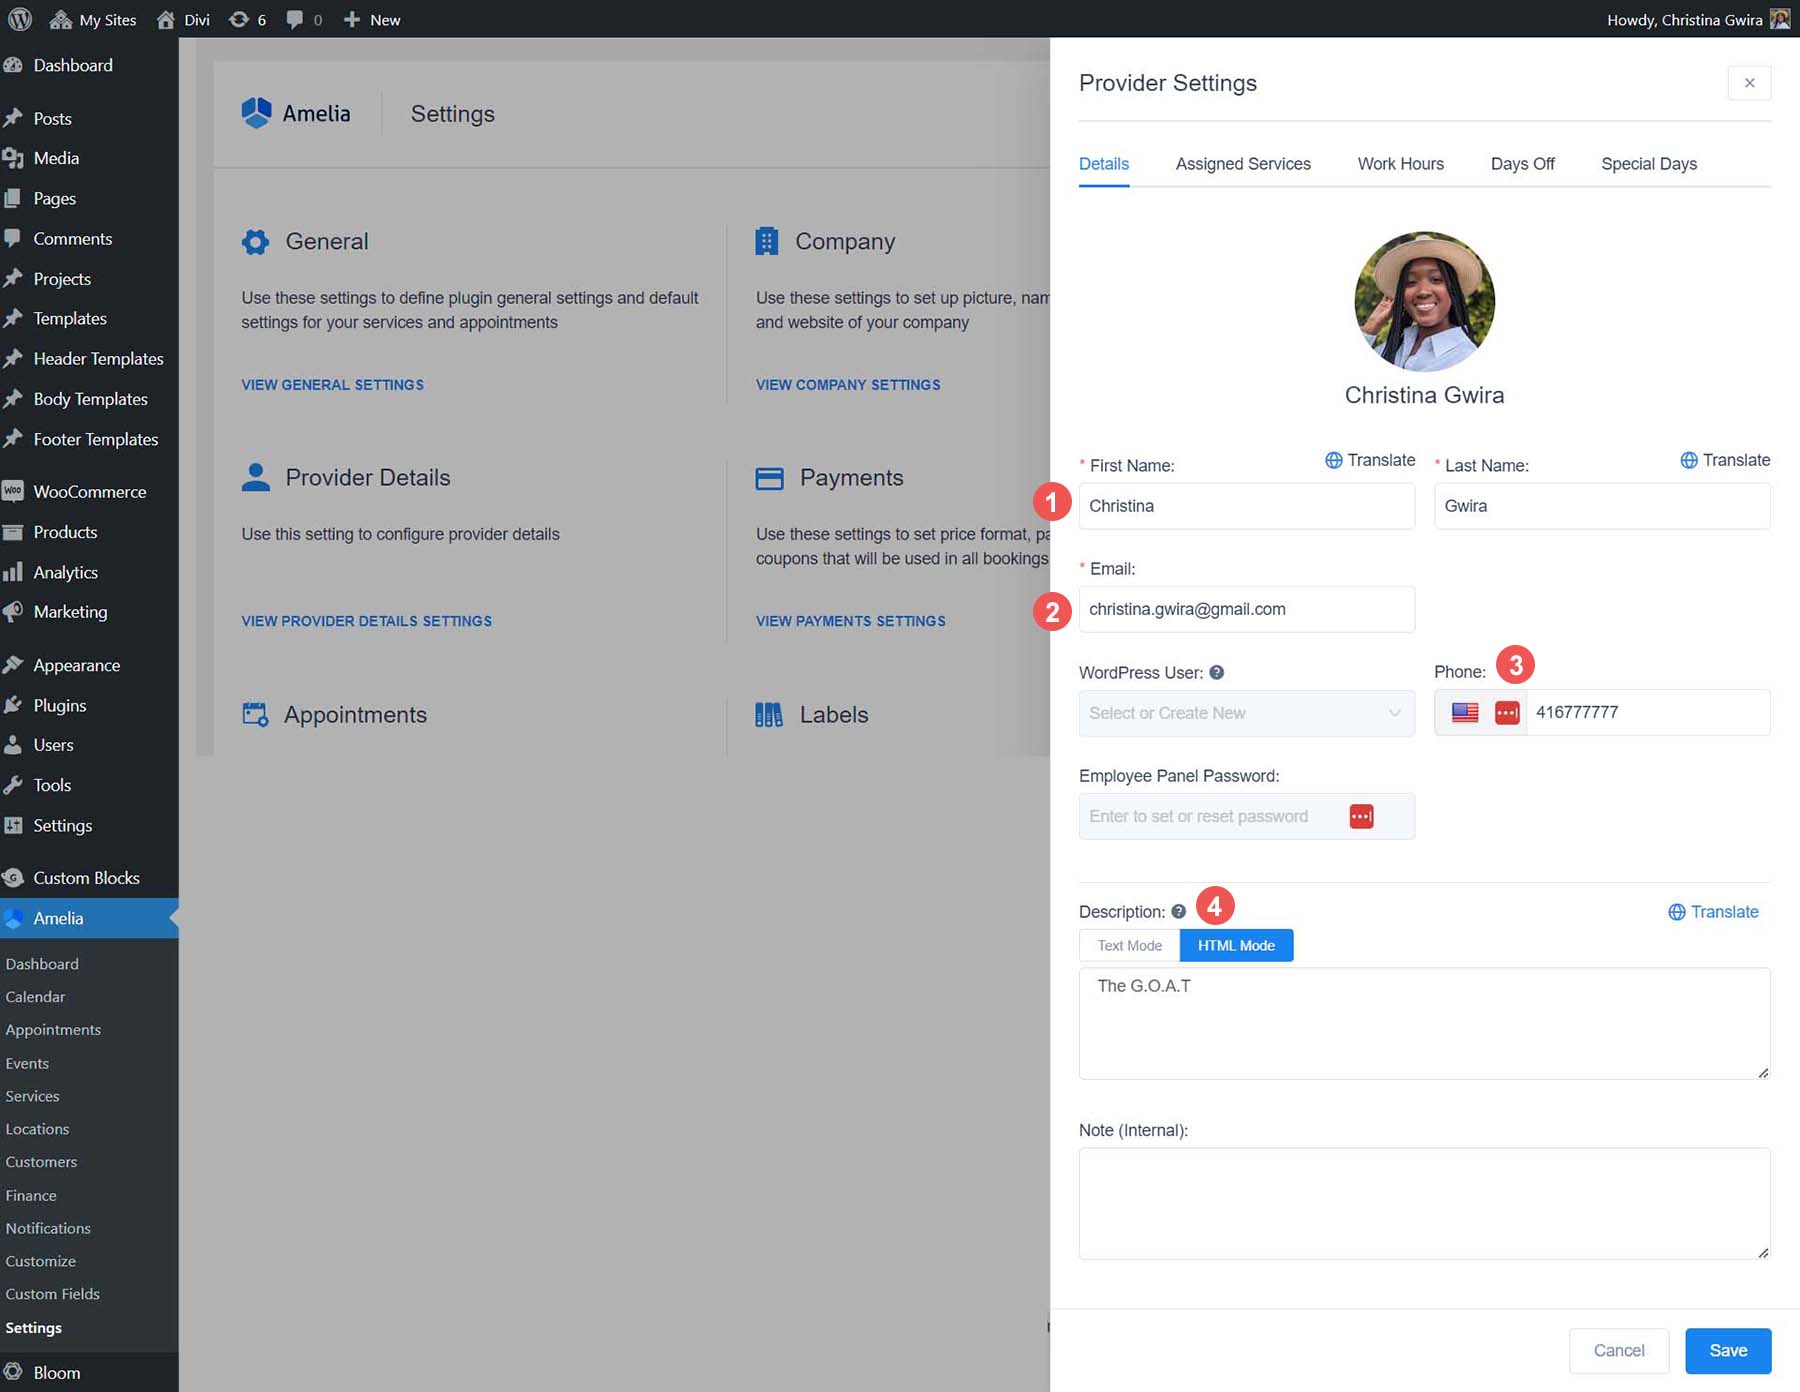
To create an employee in Amelia, from the Amelia menu, select Settings. Then, under the Provider Details title, select the link View Provider Details Settings.

This will open up the Provider Details flyout menu. Enter your details, such as name, phone number, and email address. You can add a short bio in the description box if you’d like.
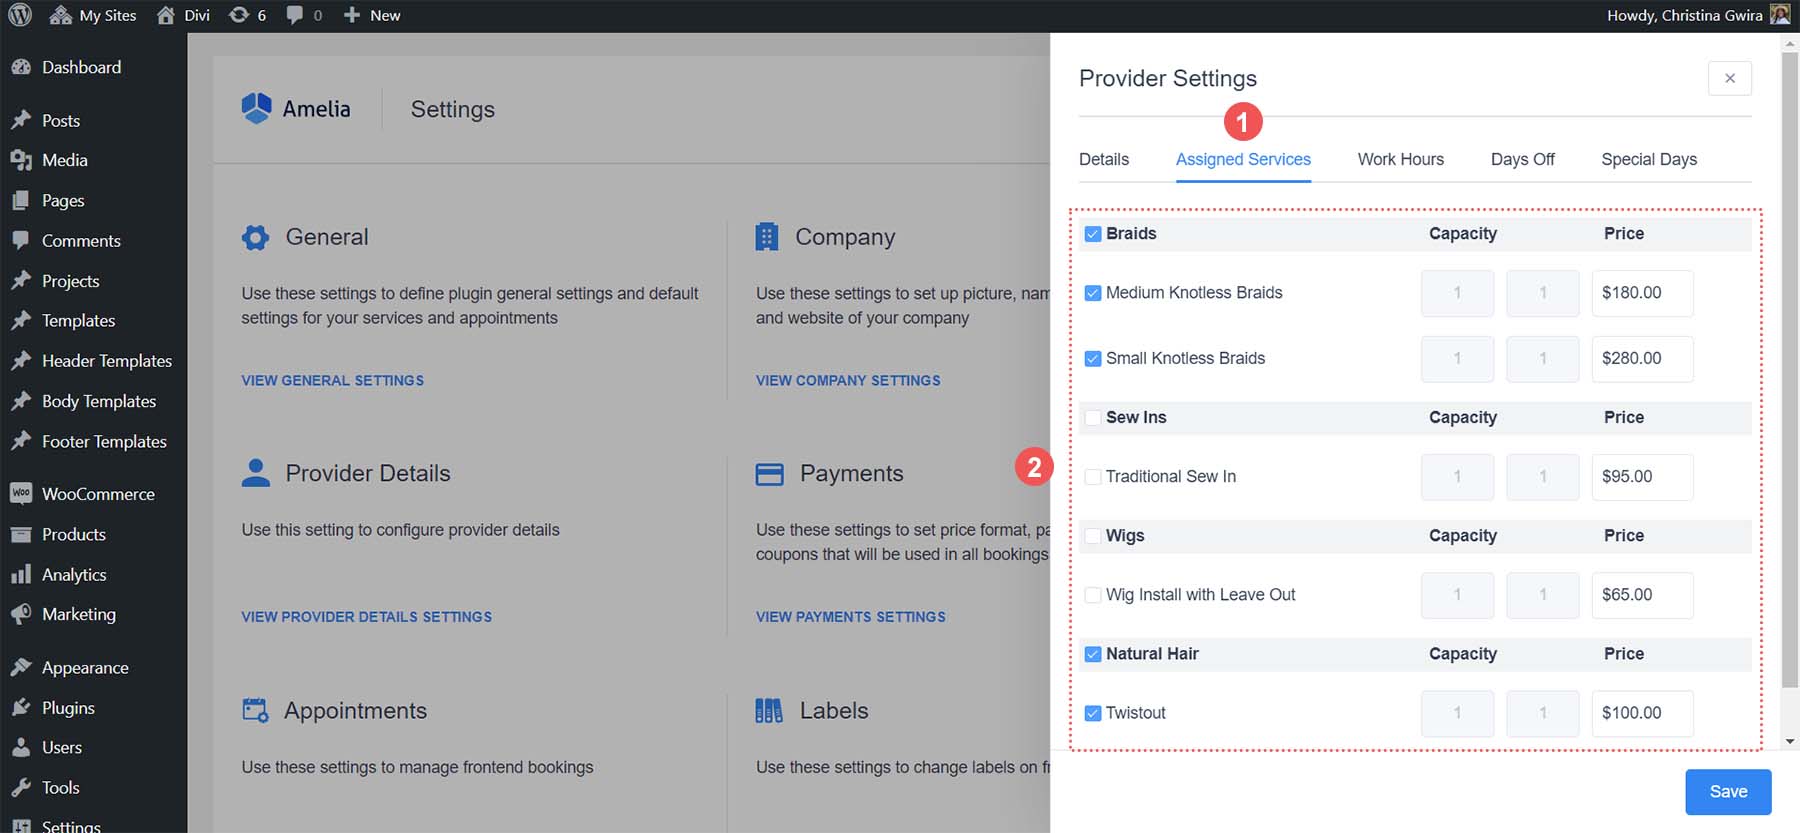
Next, click on the Assigned Services tab. You’ll see a list of your services within their corresponding categories. Select the services that you’d like to assign to this provider.
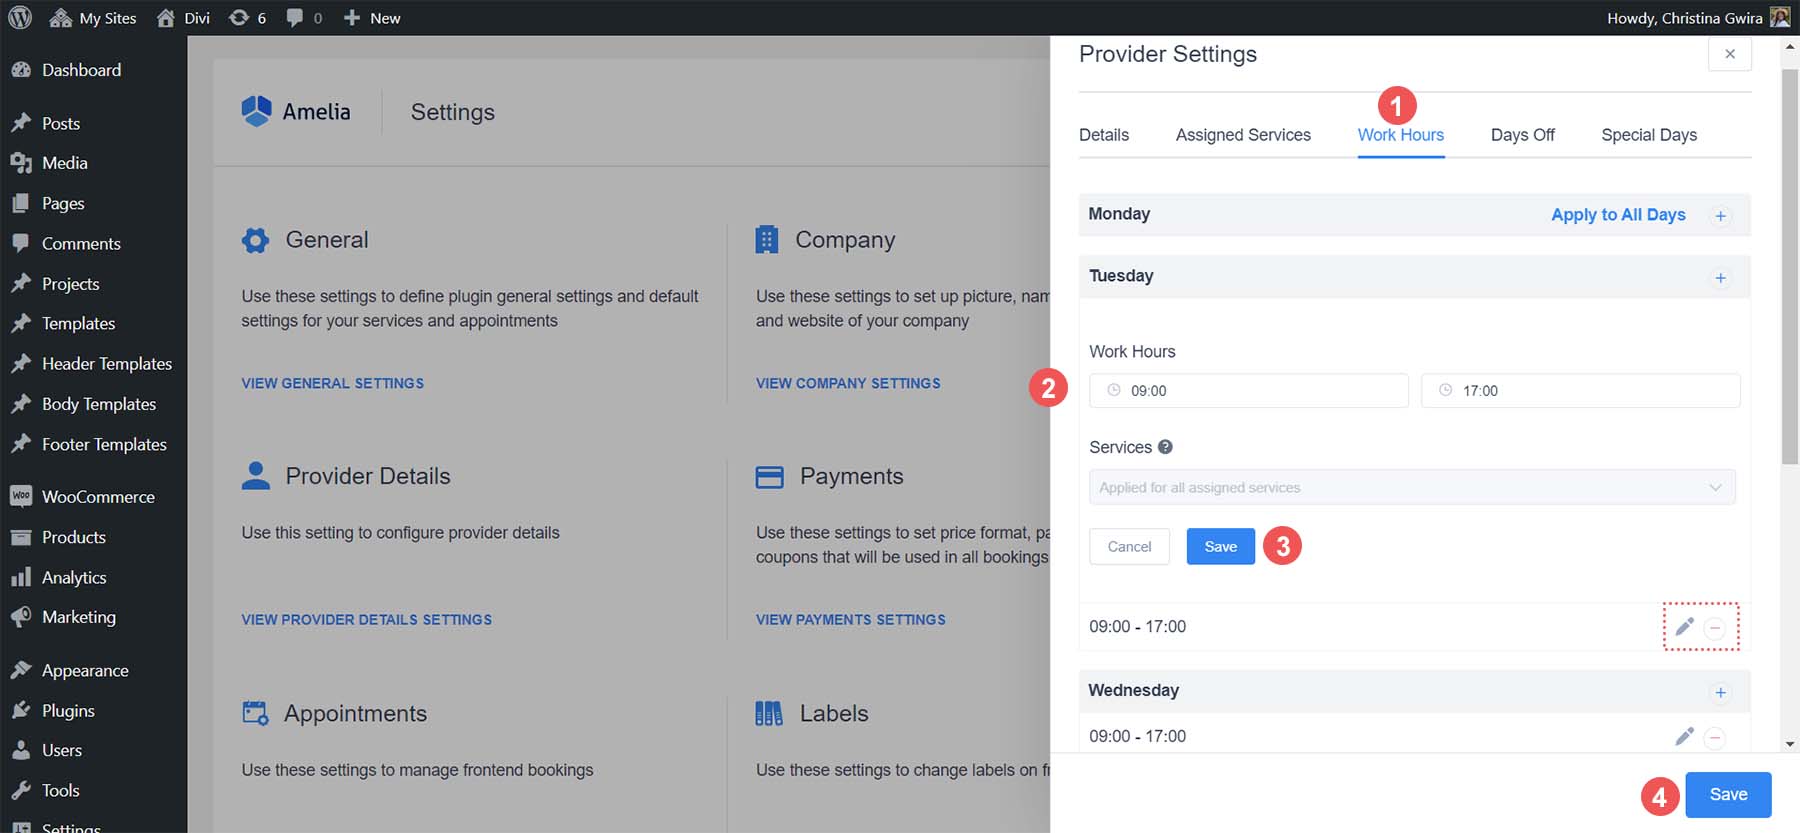
After assigning your services to your provider, click the Work Hours tab. This is where you’ll set the availability for each service and this provider. Using the pencil icon, assign time slots for each day of the week. You can also use the Apply to All Days link to assign the same schedule to each day. Once you have set up your hours of operation, click the blue Save button.
With our first service assigned to our first provider, we can now add a booking form for our customers to book services. But first, let’s customize the form and brand it to our company’s style guide.
Styling Your Booking Form
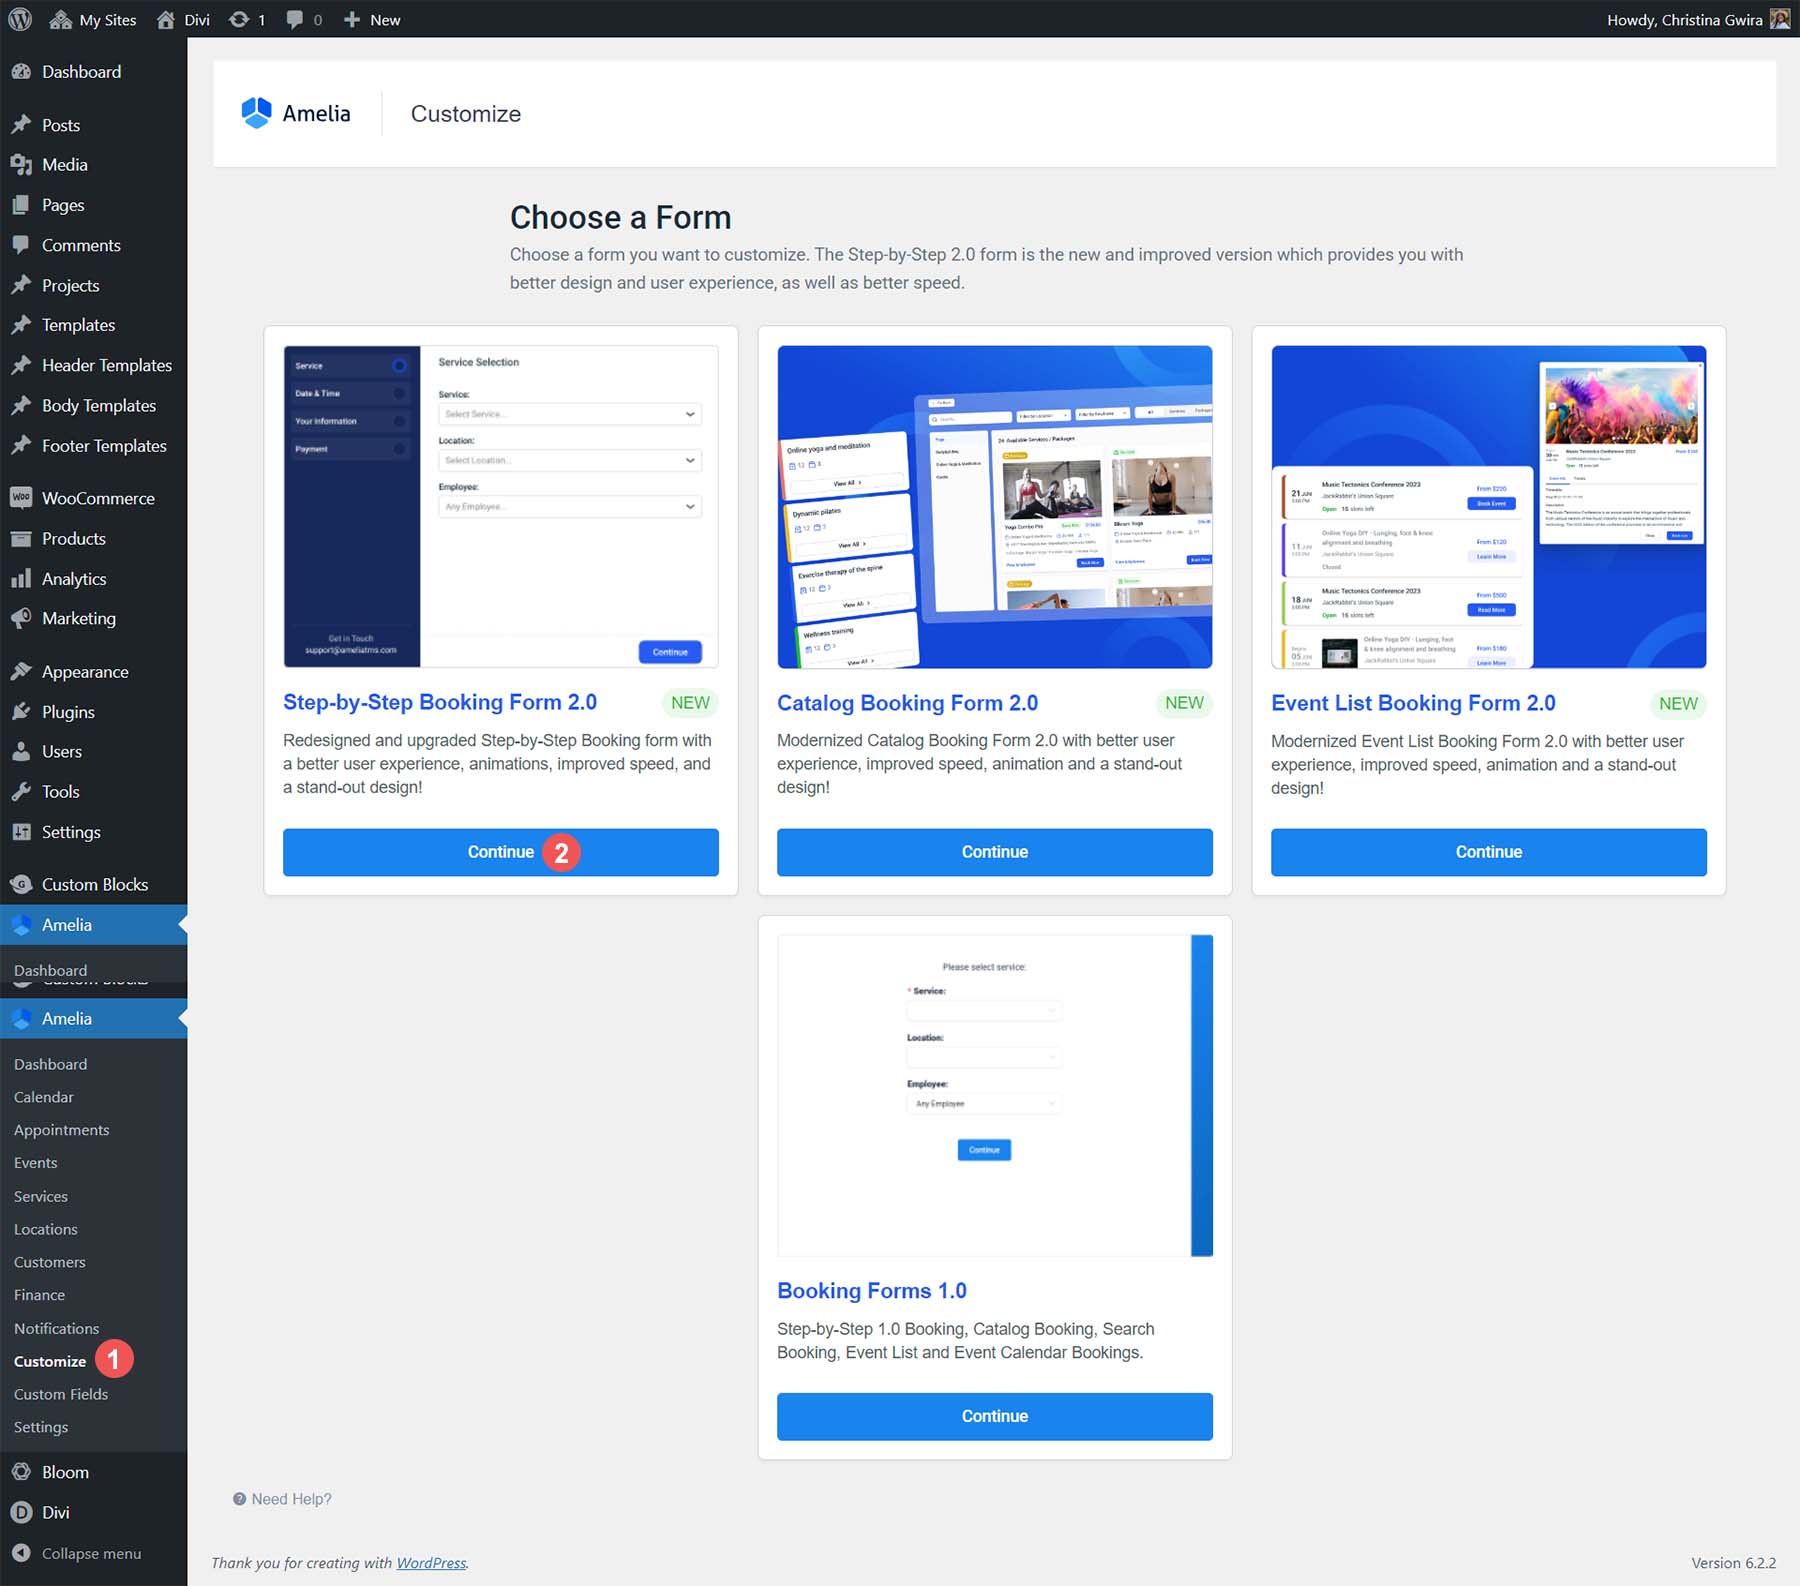
Amelia has an easy-to-use customization process from which you can change the style and colors of your booking form. To access it, from the Amelia menu, select Customize. Notice that a few options match the different booking form layouts natively with Amelia. We’ll be using the Step-by-Step Booking form layout. So, click the blue Continue button underneath the Step-by-Step Booking Form 2.0 card.
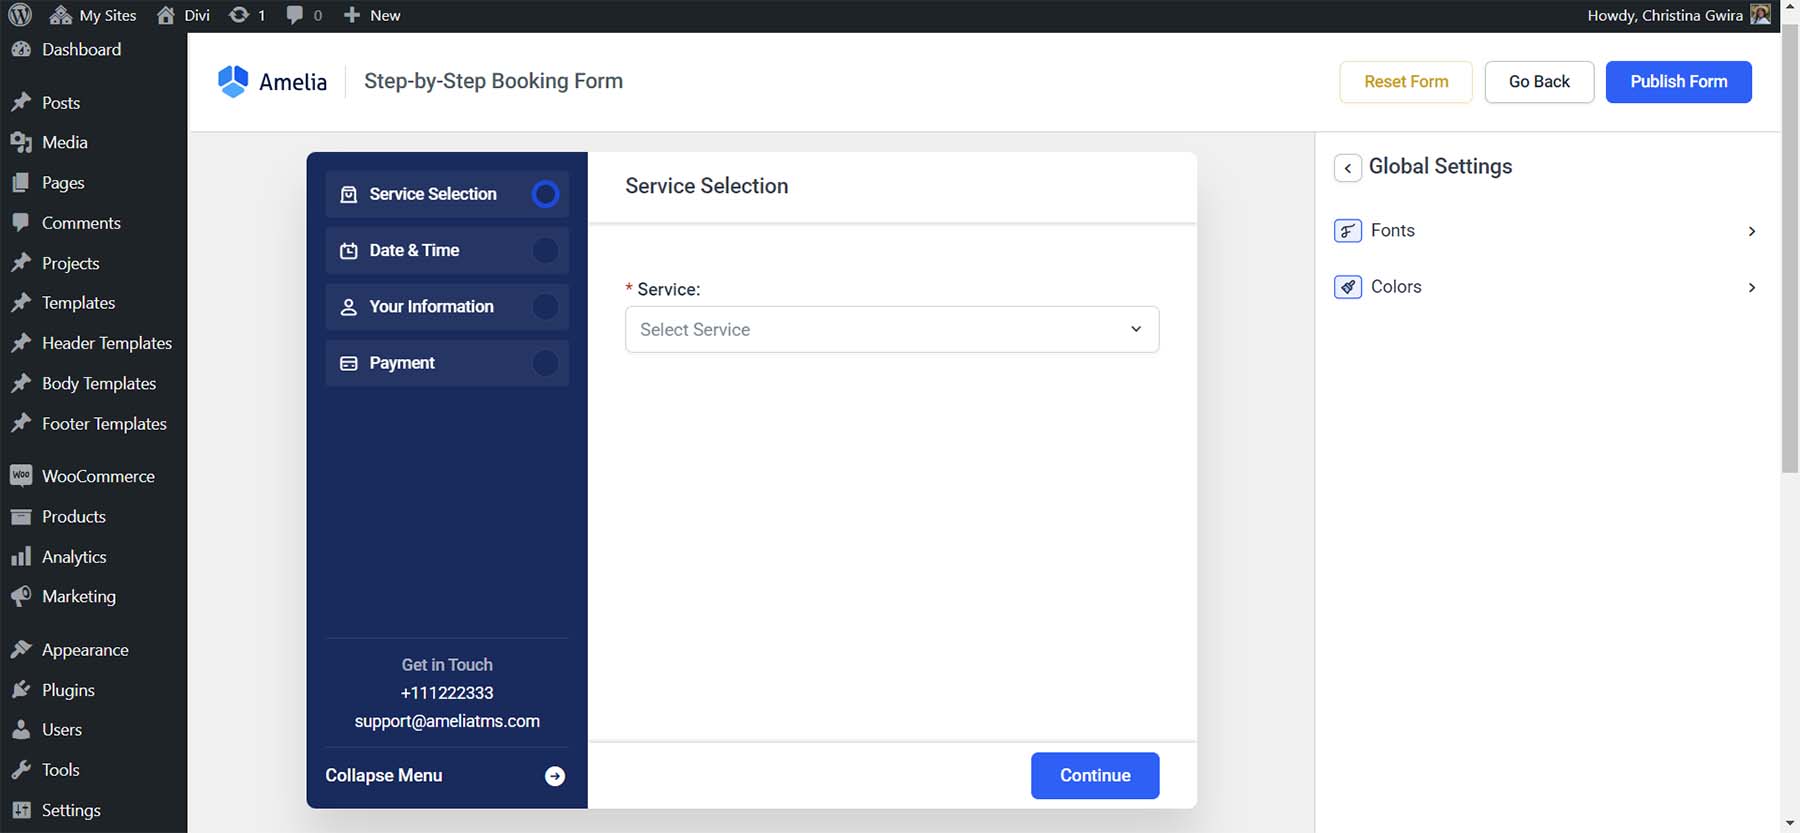
This is what the customization screen looks like:
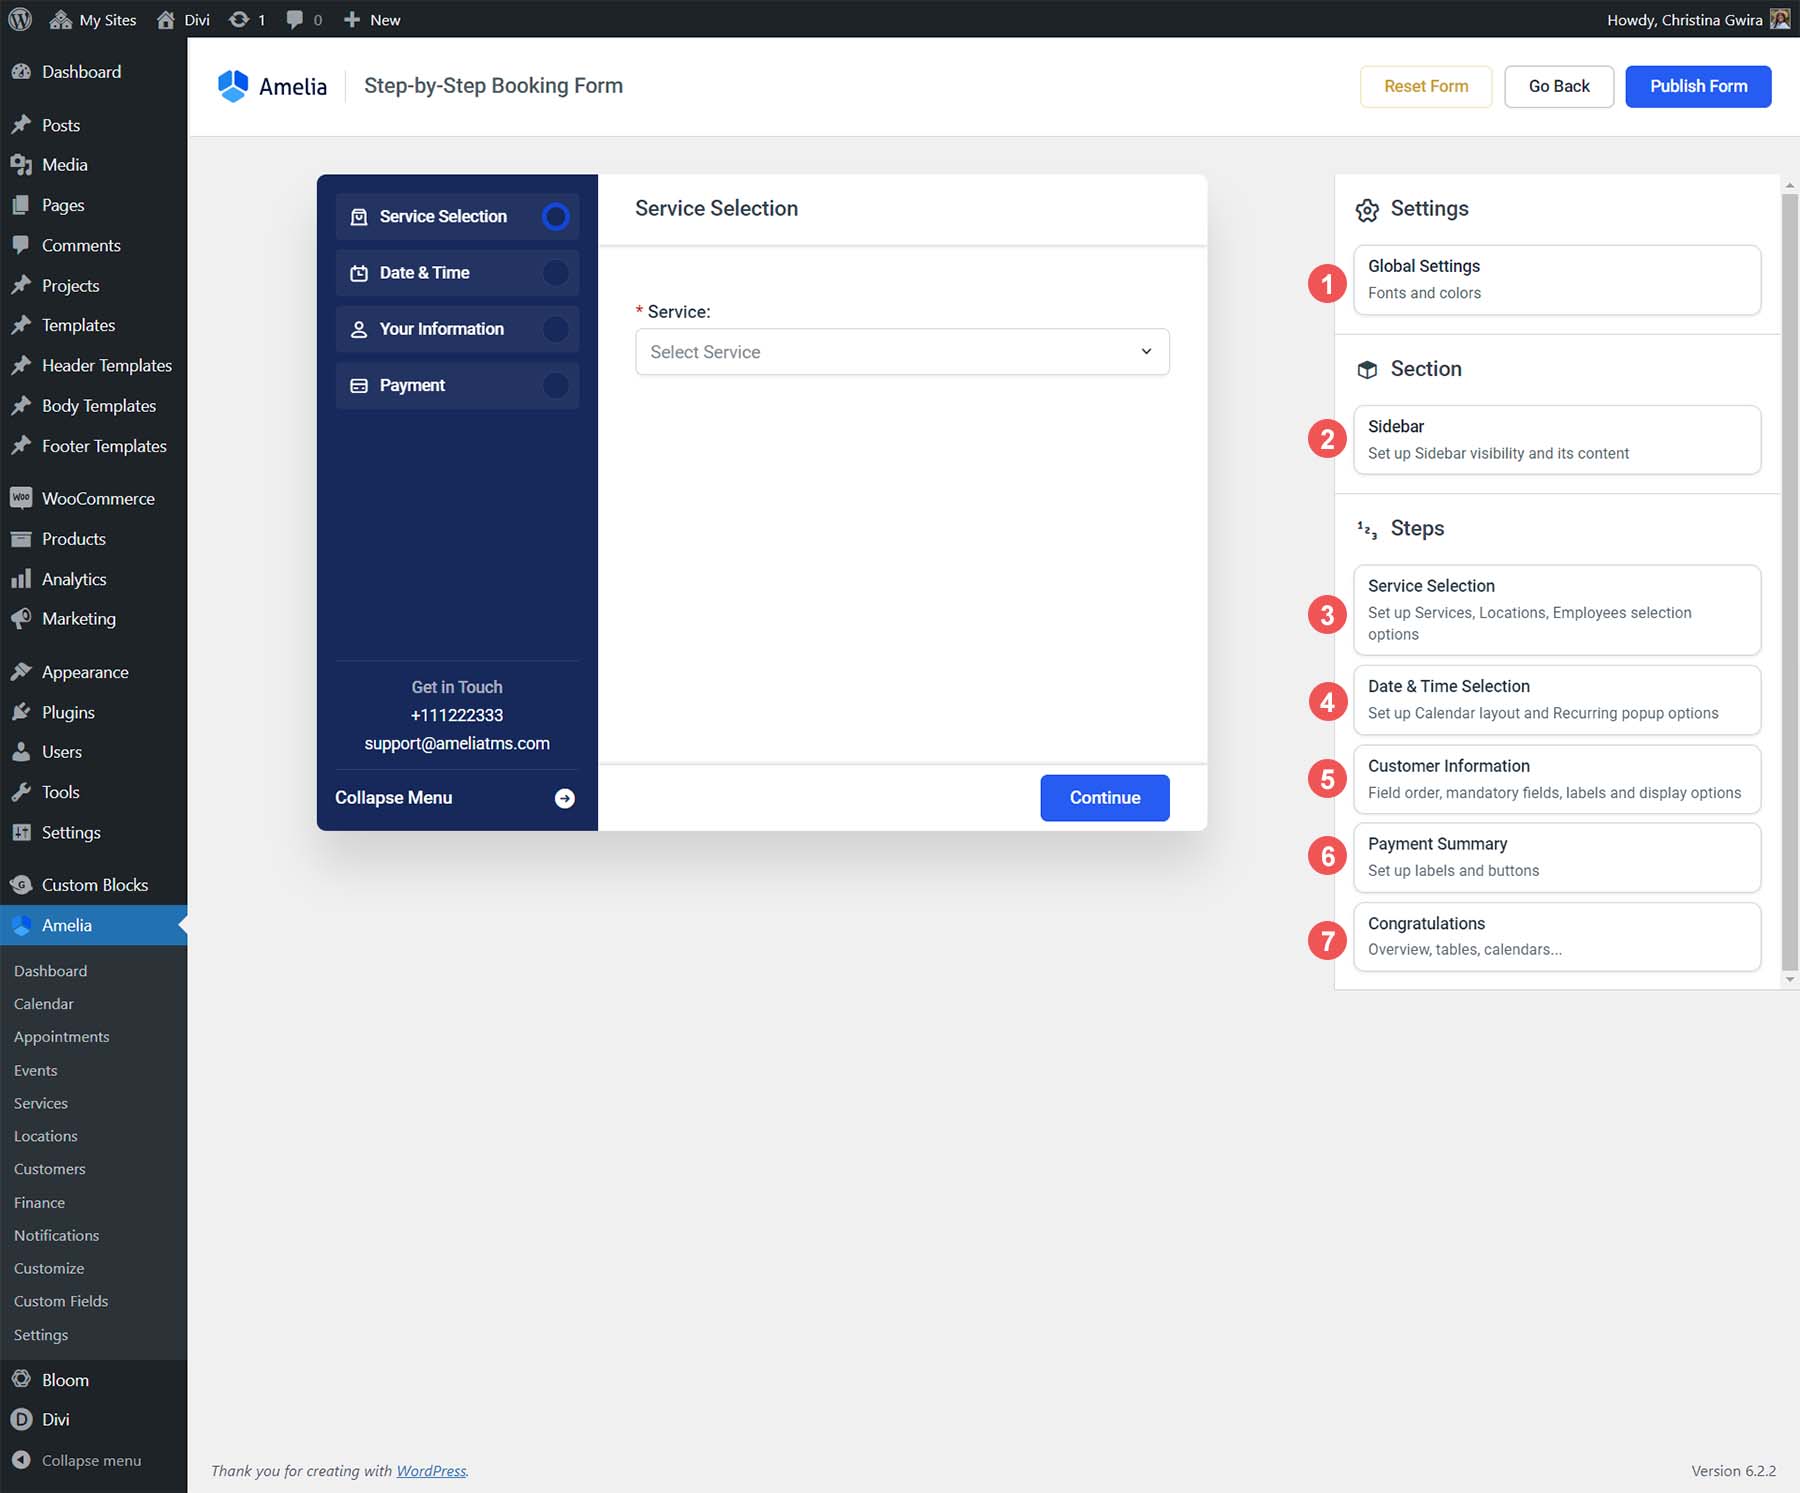
- Global Settings: Adjust your fonts and colors
- Sidebar: Design your sidebar
- Service Selection: Determine how your services will be displayed
- Date & Time Selection: Setup your calendar view and how customers can choose their date and time
- Customer Information: Order of fields, labels, and more for your customer’s information
- Payment Summary: How your payment fields will be displayed
- Congratulations: Customize your booking confirmation page
Let’s look at some of the settings available under each tab.
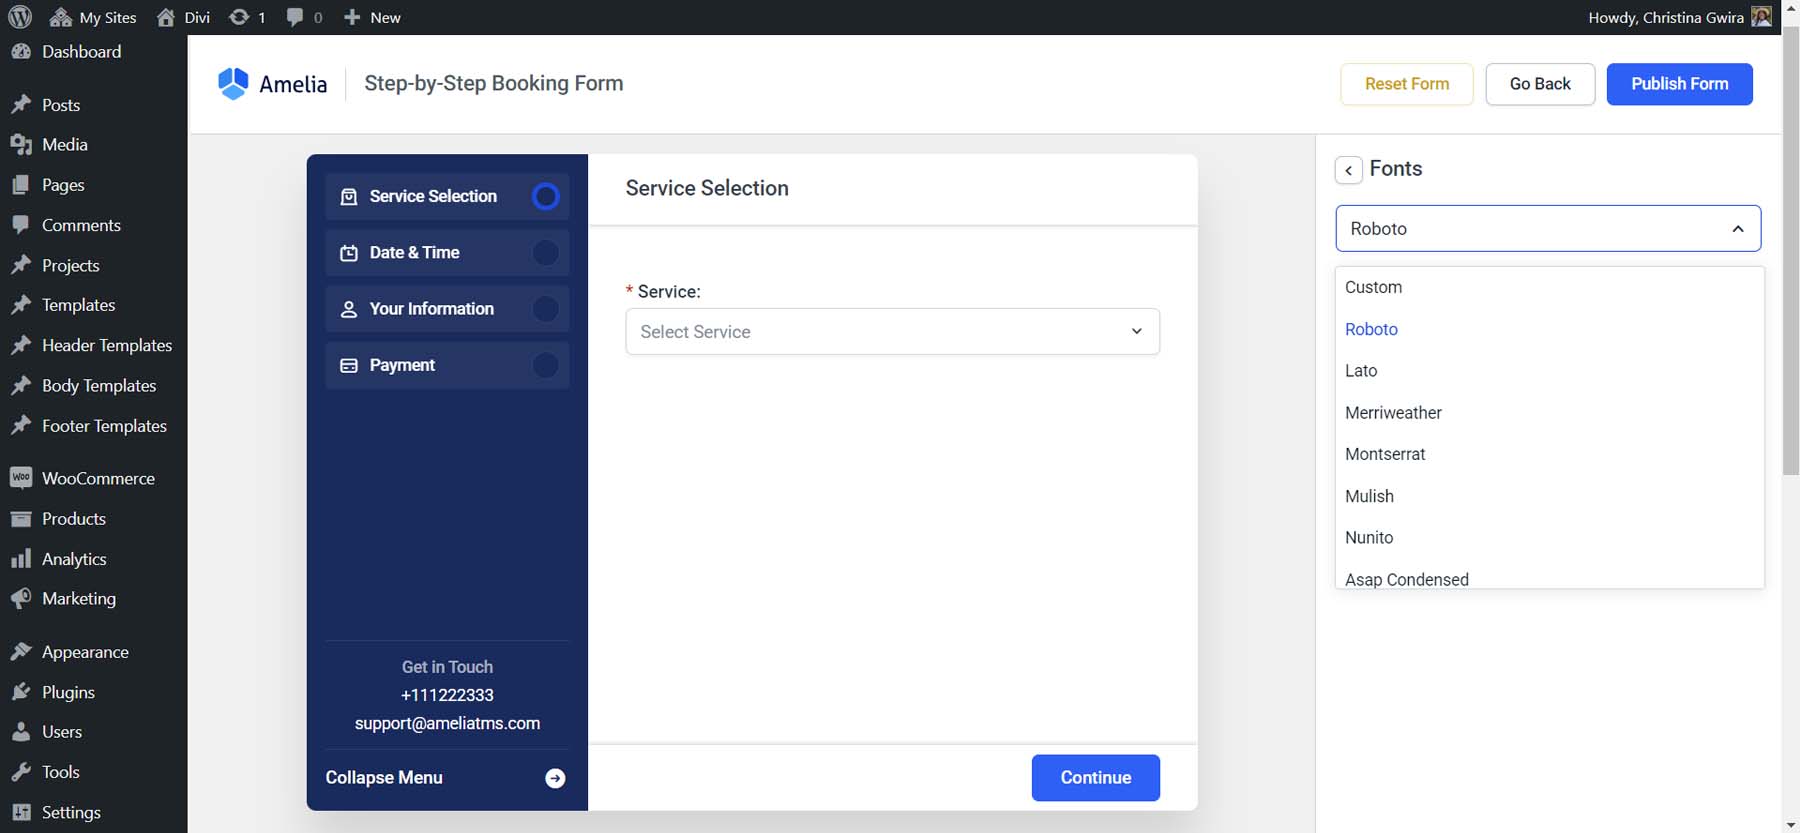
Global Settings
The Global Settings tab allows you to assign your fonts and colors.
You can even upload a custom font.
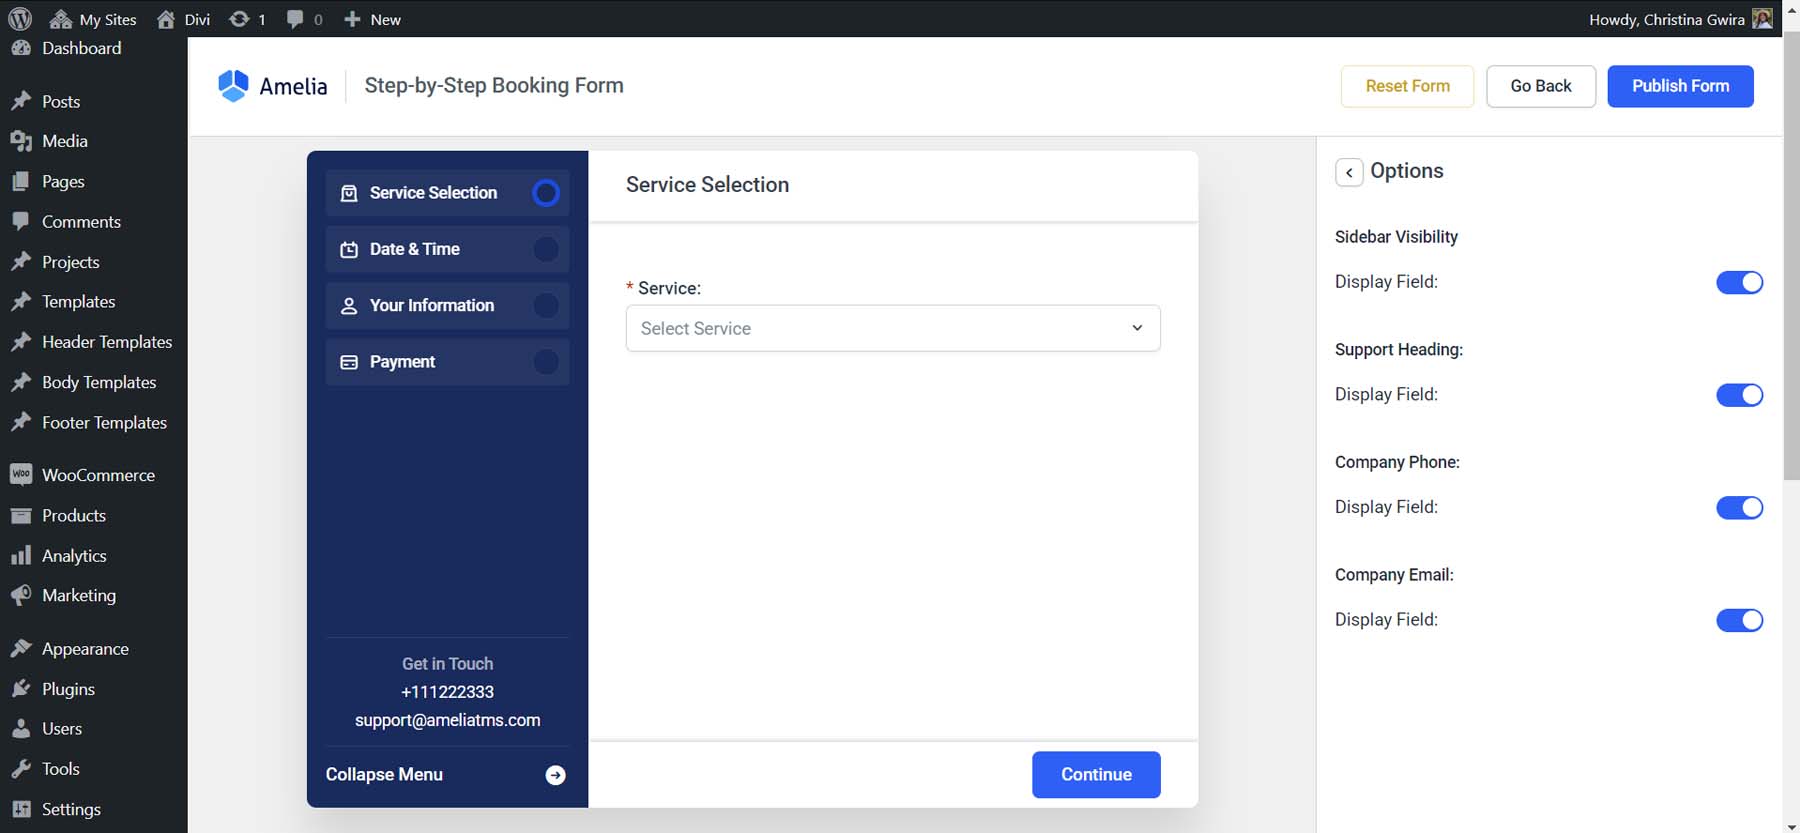
Sidebar
The Sidebar tab allows you to customize the options and labels within the sidebar of the wizard.

You can also select the fields you want to show within your company information.
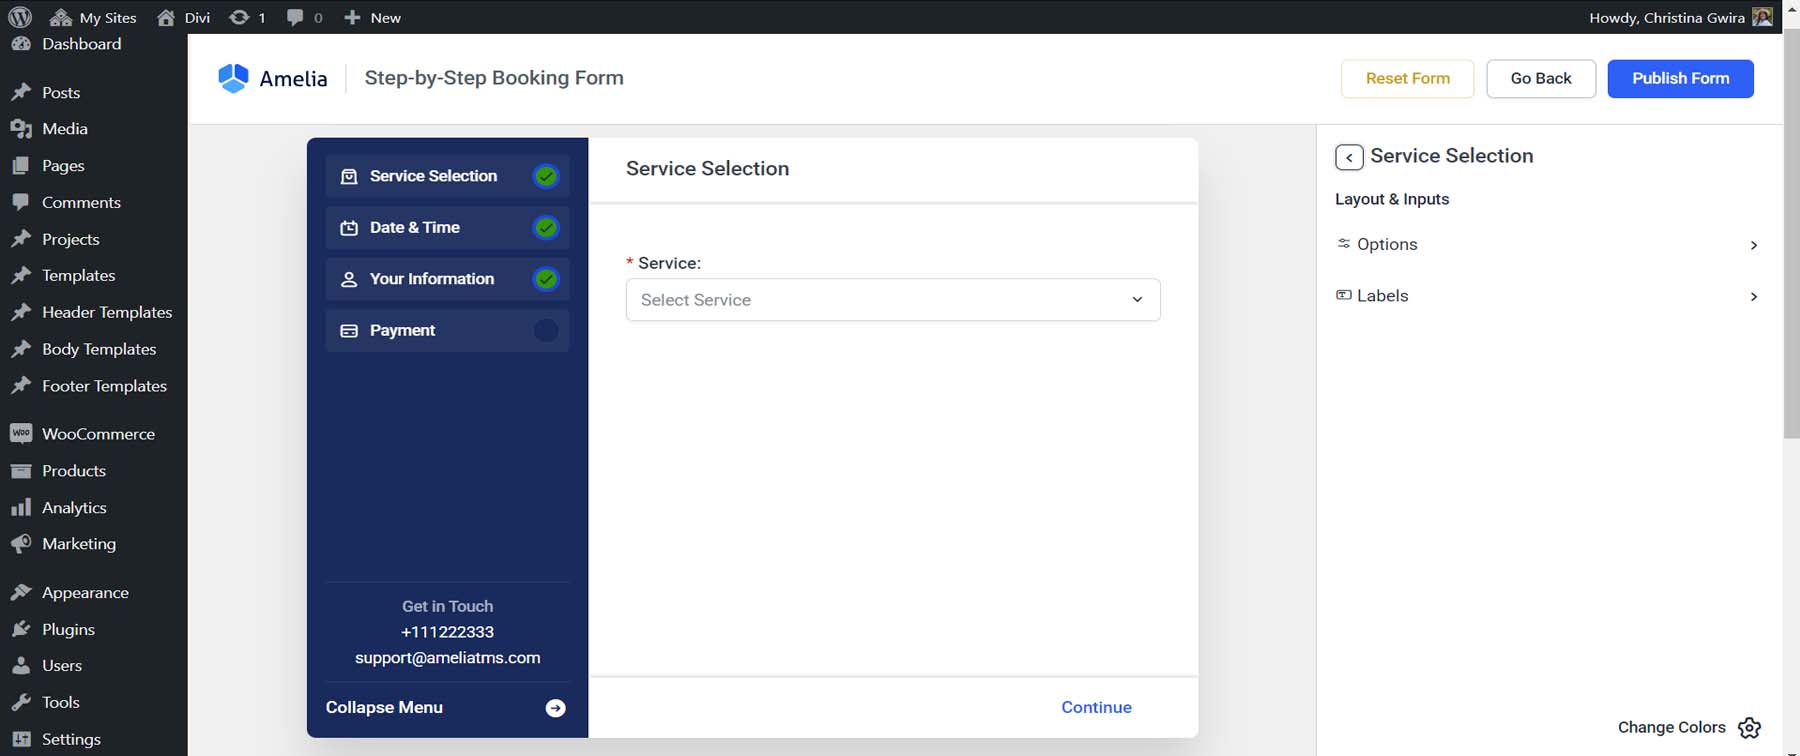
Service Selection
For Service Selection, you can edit the fields’ labels and the Continue button’s style.
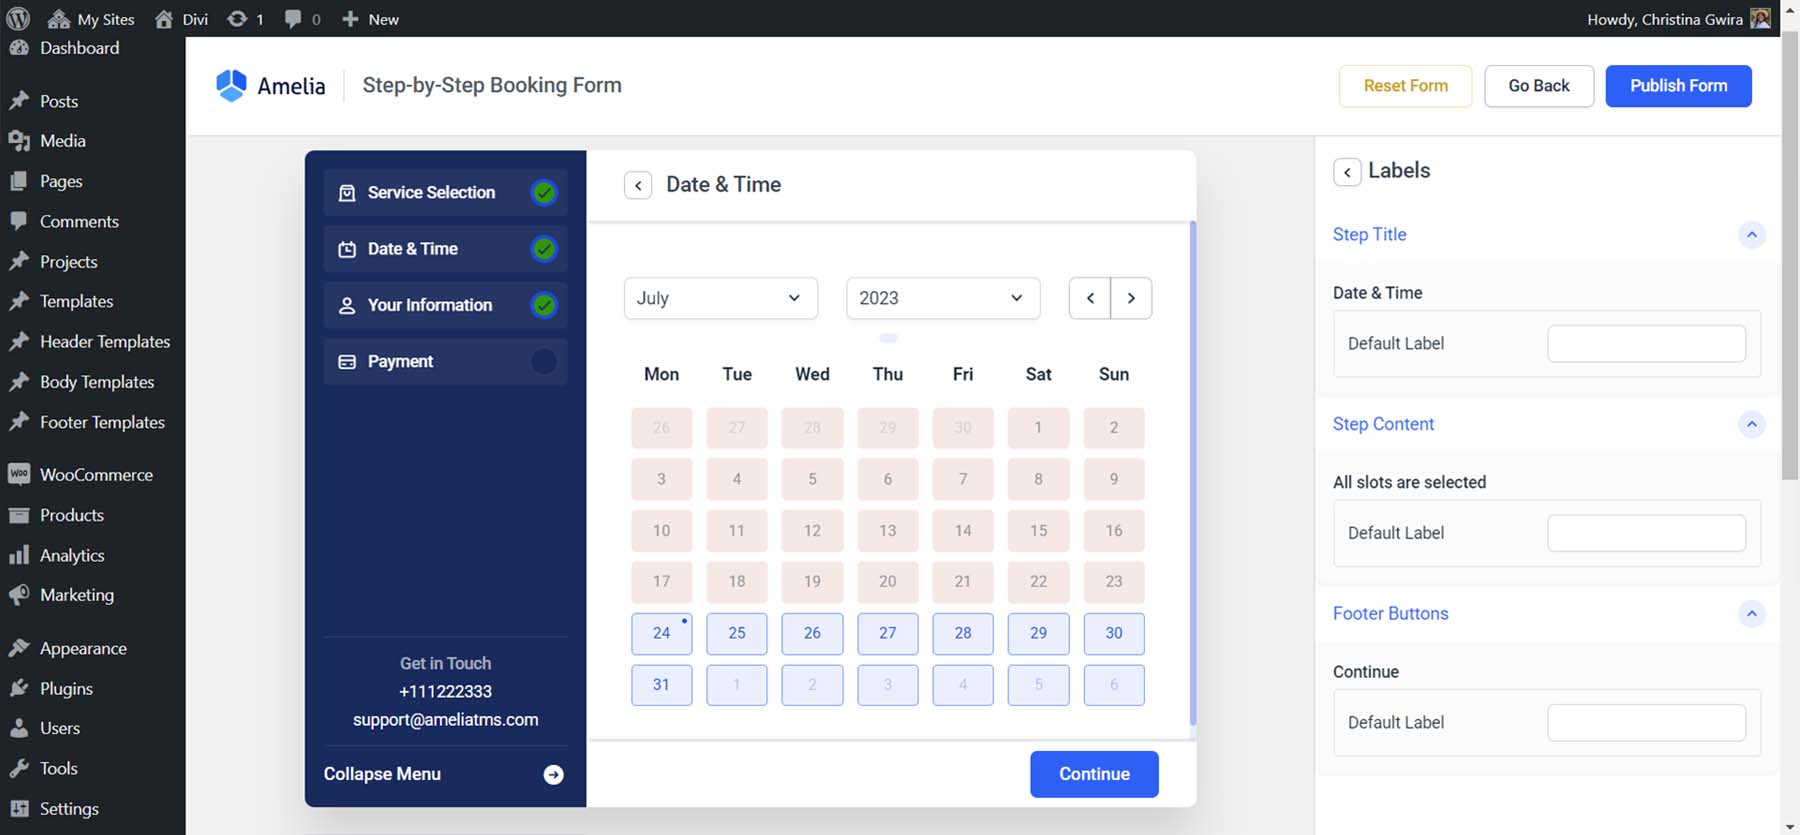
Date & Time Selection
Assign different label names or change the visibility of specific fields with the Date & Time selection tab.
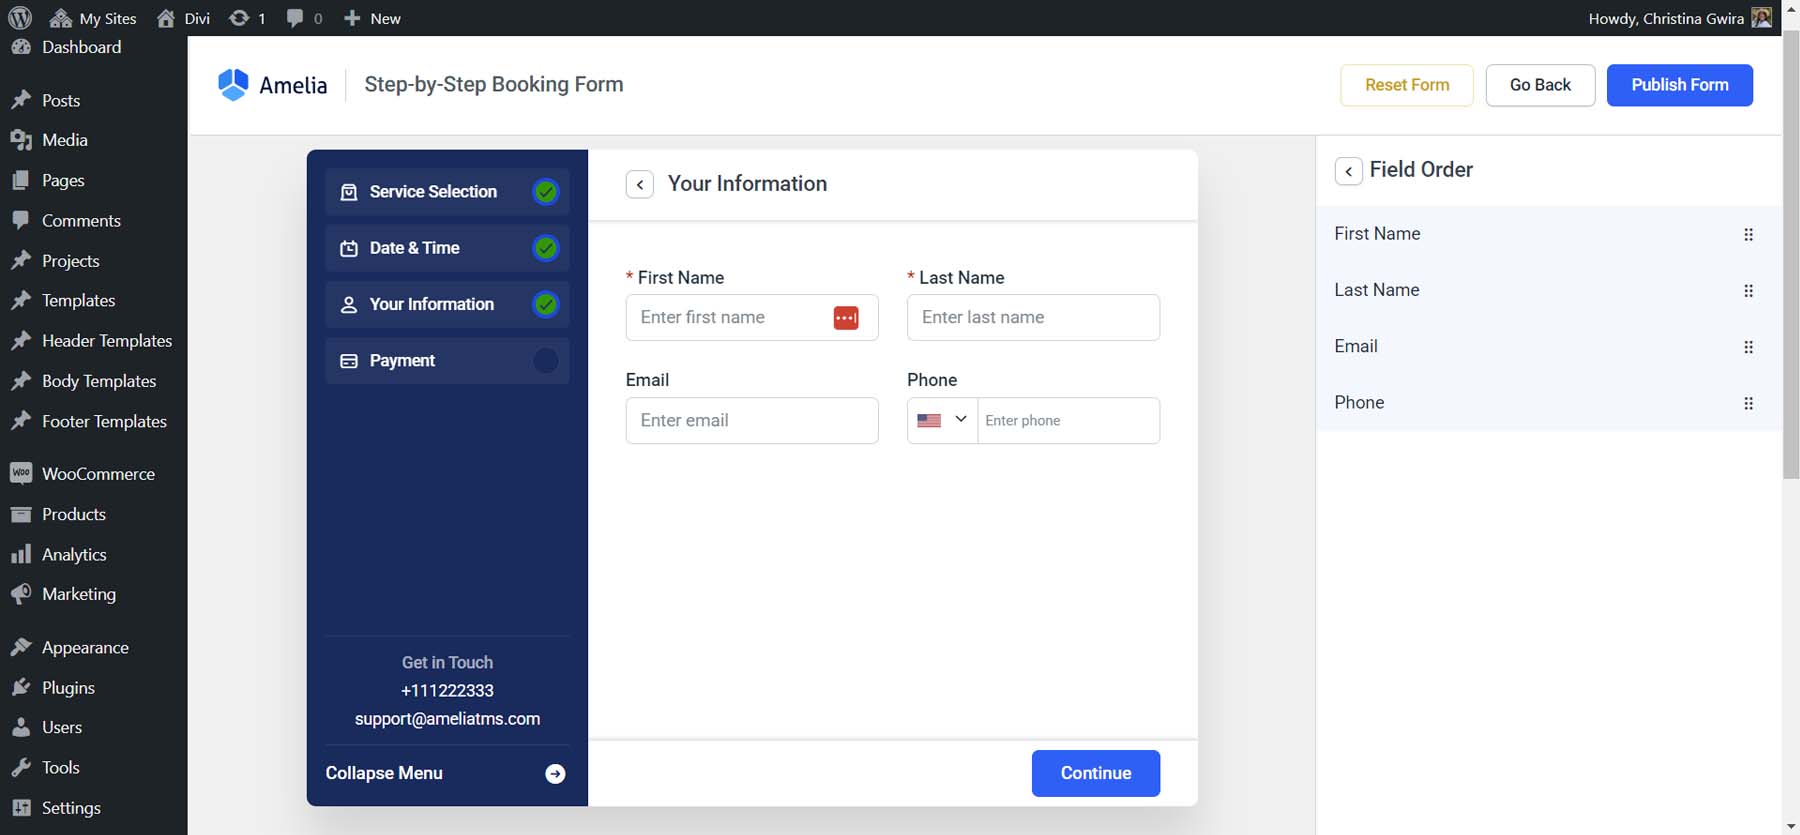
Customer Information
Determine your customer information form’s order or toggle the available active fields.
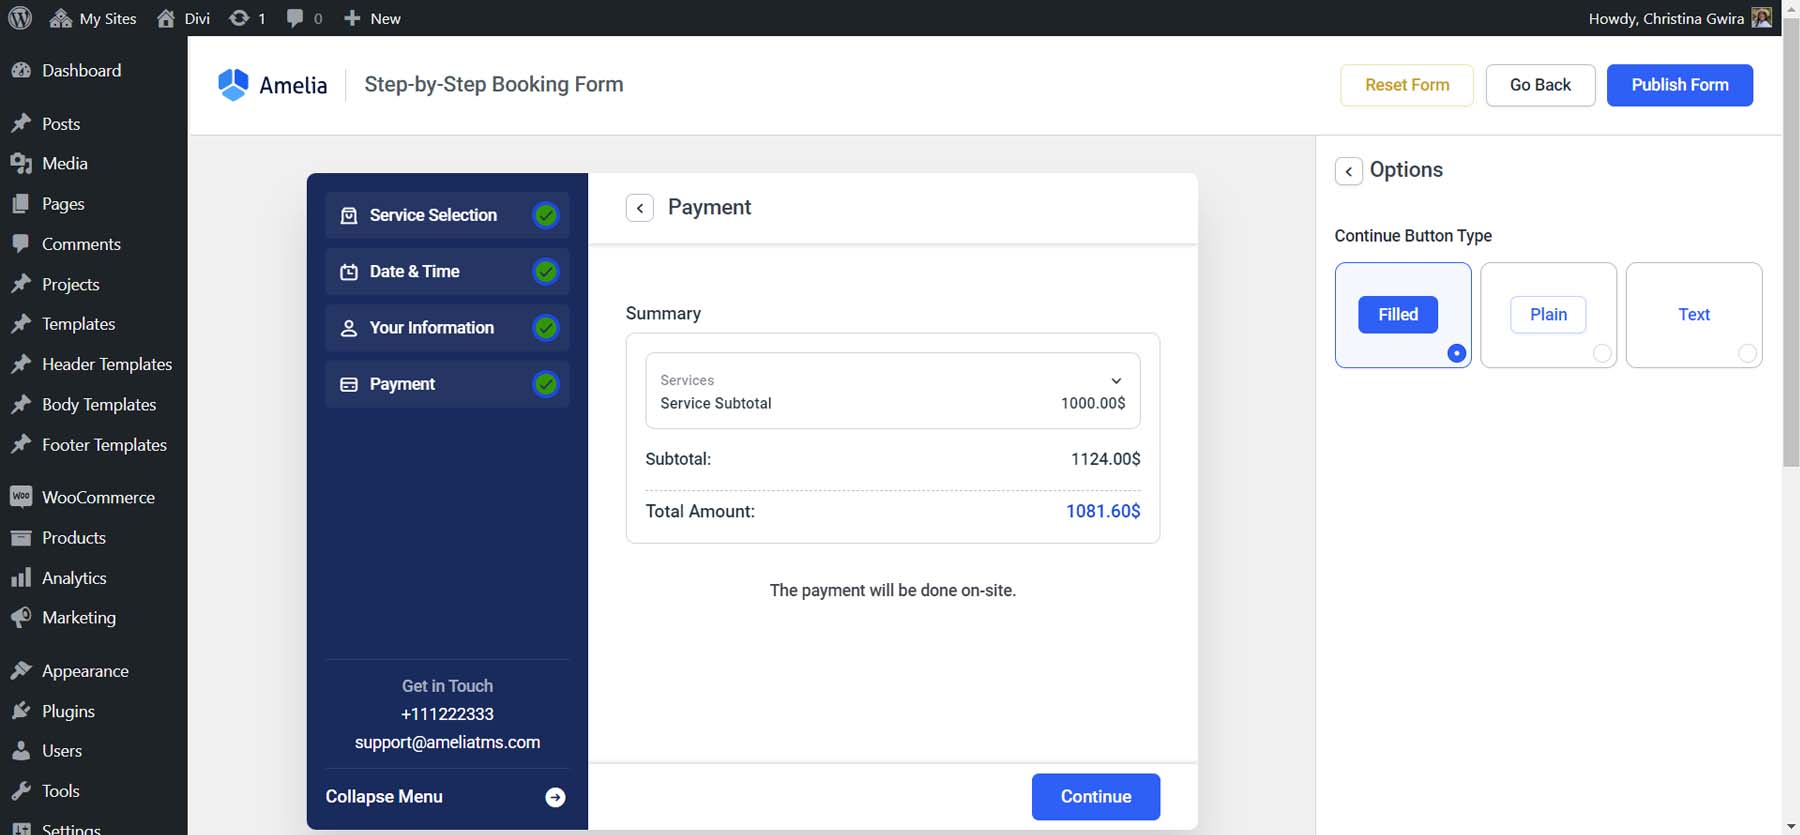
Payment Summary
Change the title and labels for your payment form, or style the buttons differently.
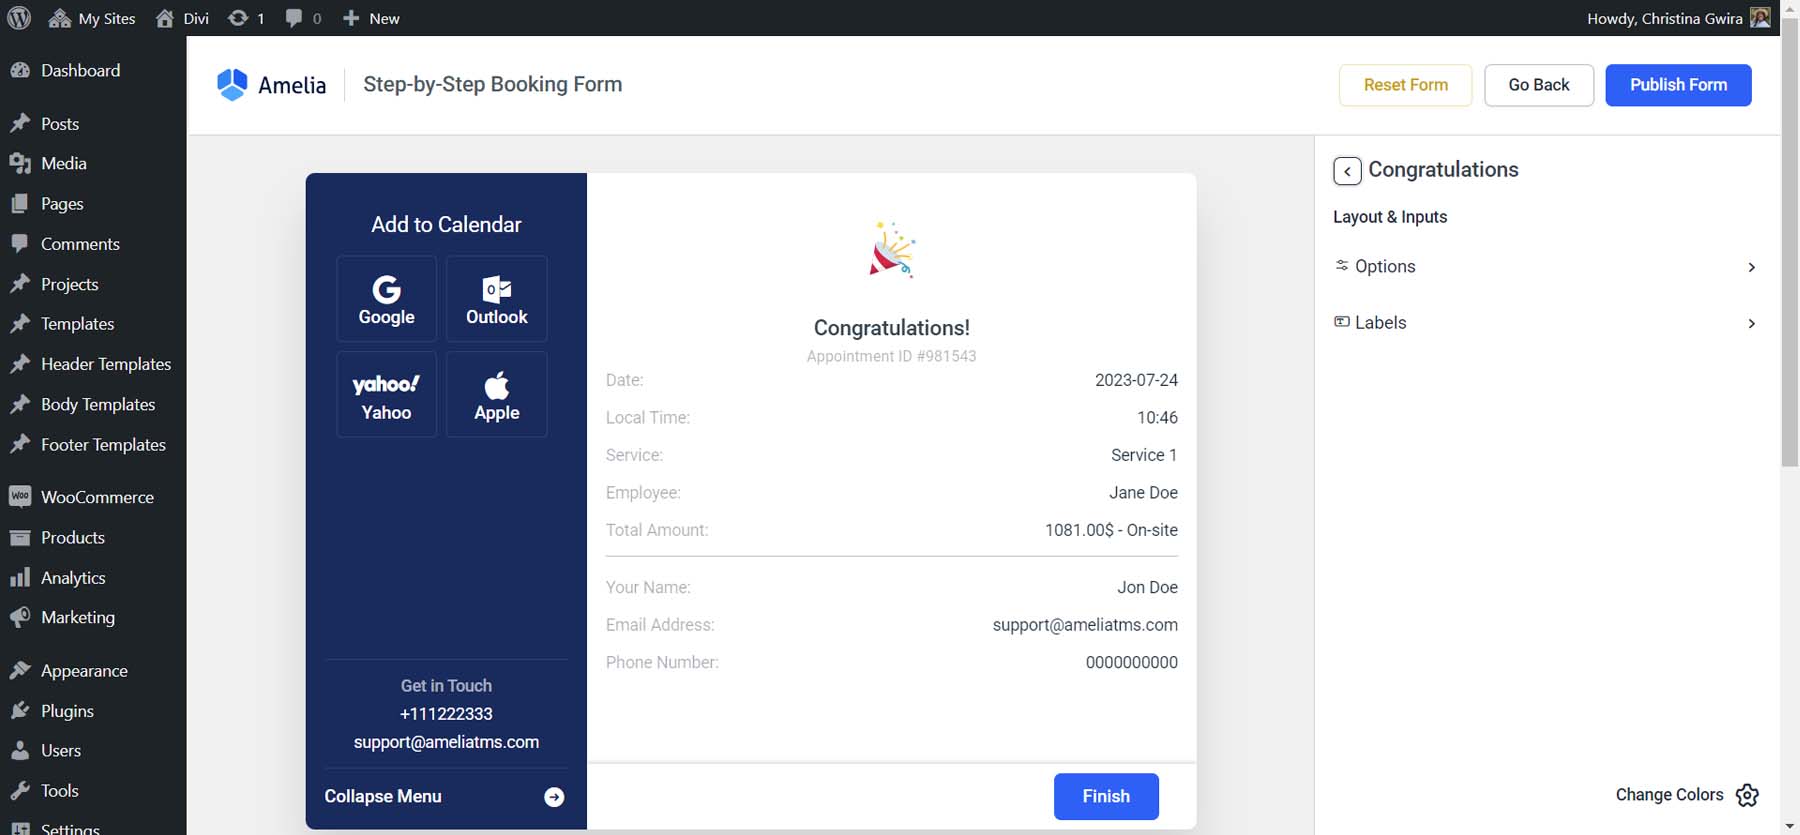
Congratulations
Lastly, the Congratulations page acts as an appointment confirmation page for your customers
Adding Your WordPress Booking Form to Your Website
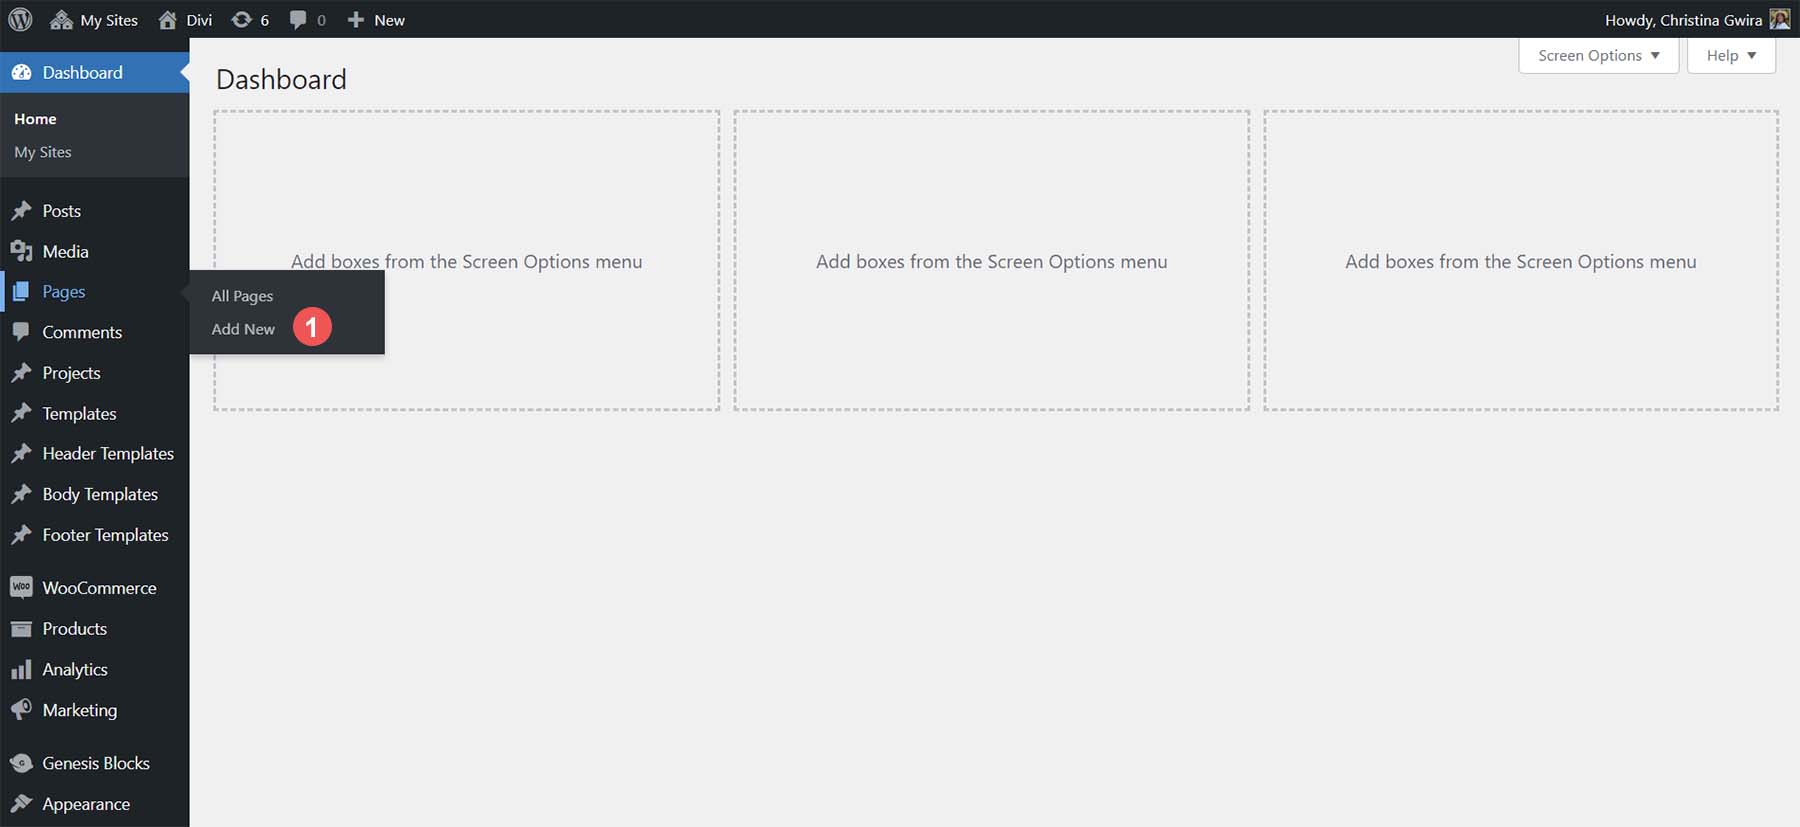
To add your booking form to your website, you’ll need to select a page for it to appear on. Hover over the Pages menu item, then click Add New to create a new page for your booking form.
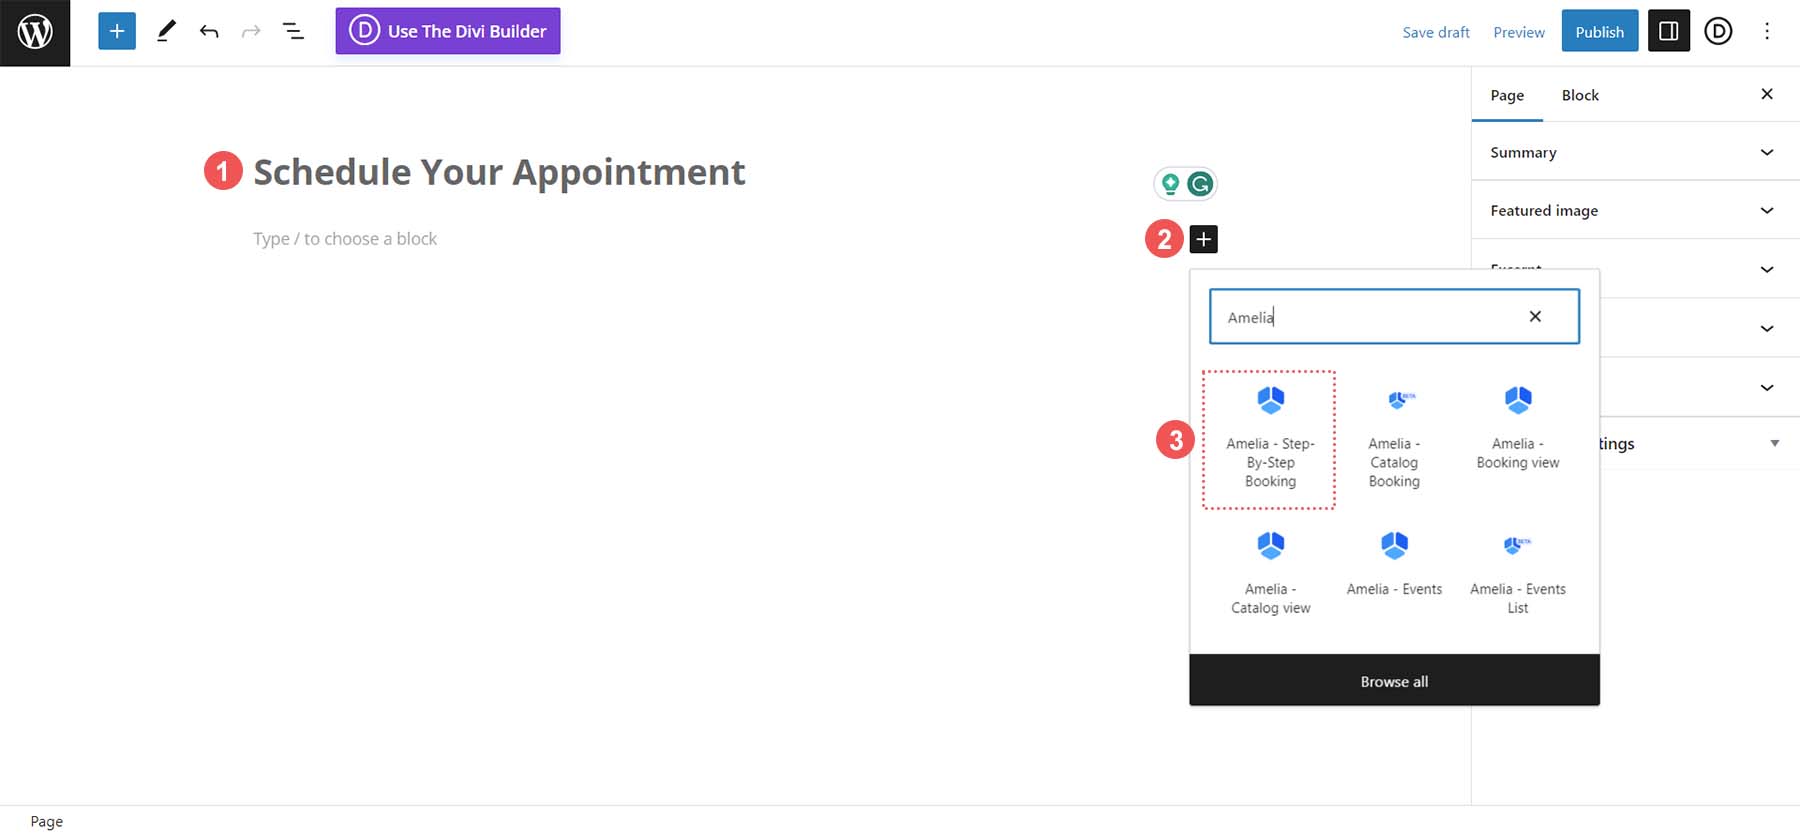
Give your new page a Title, then click the black plus icon. In the search box, enter Amelia to preview the blocks that come with Amelia. Select the Amelia – Step-by-Step Booking block.
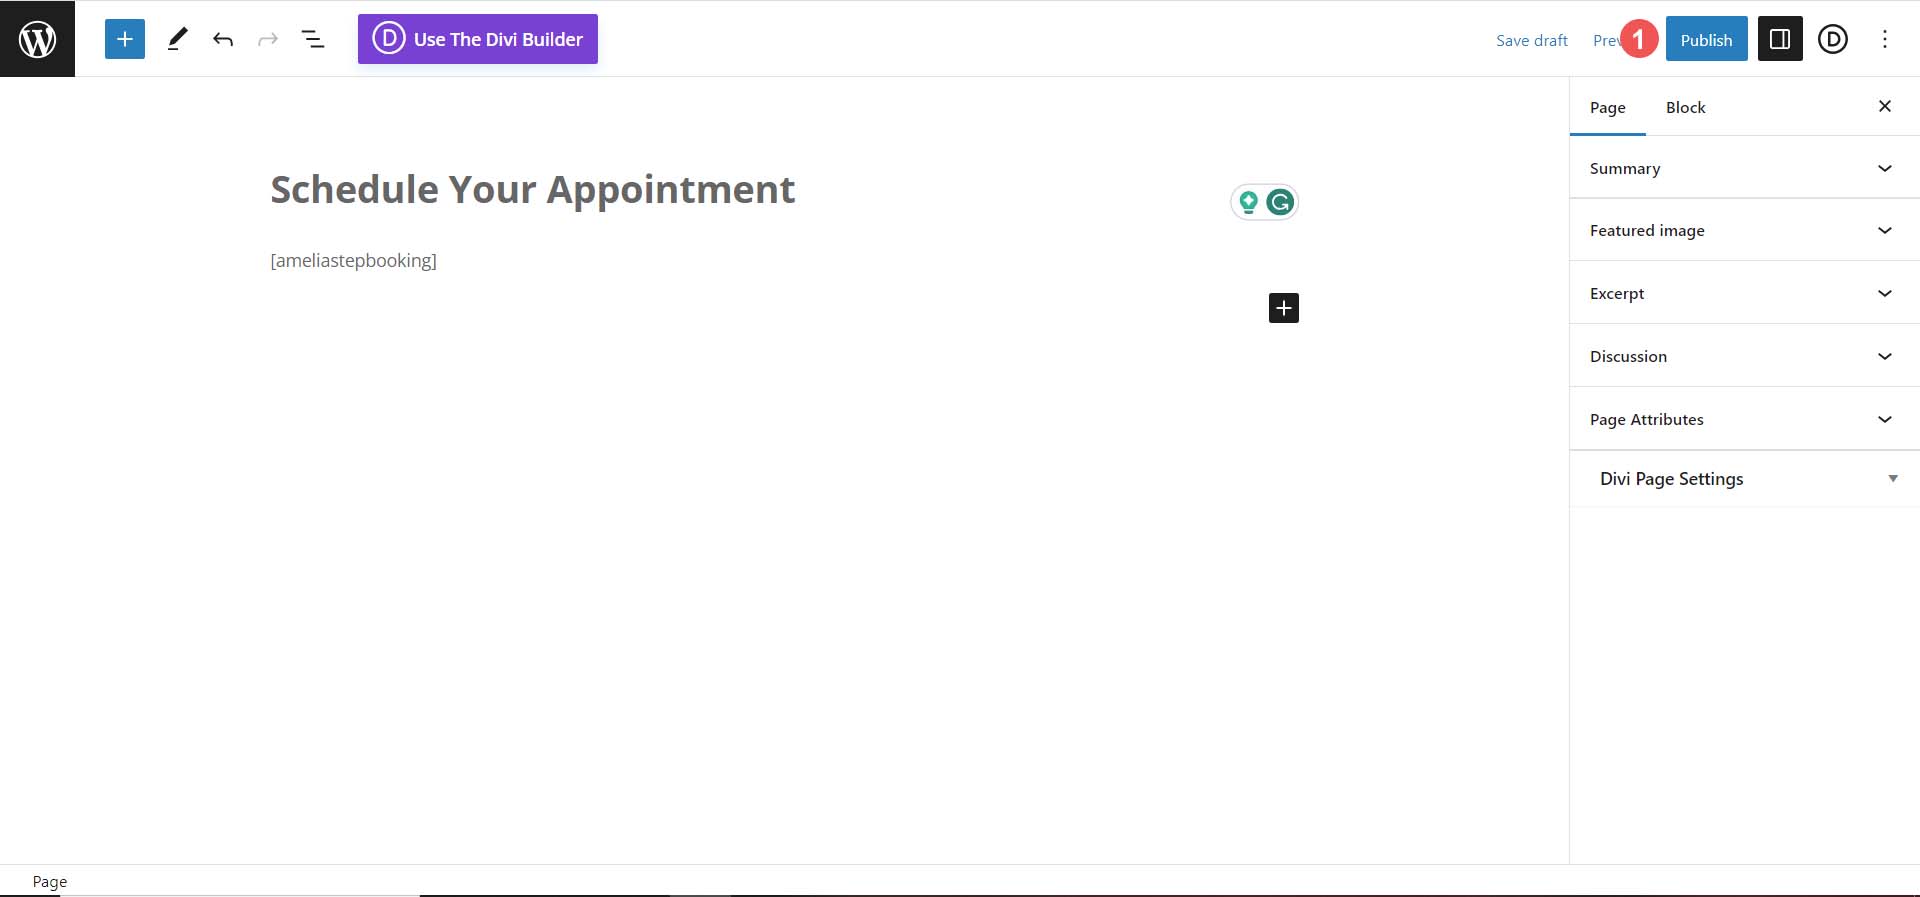
With the block added to your new booking page, click the blue Publish button at the top of your screen.
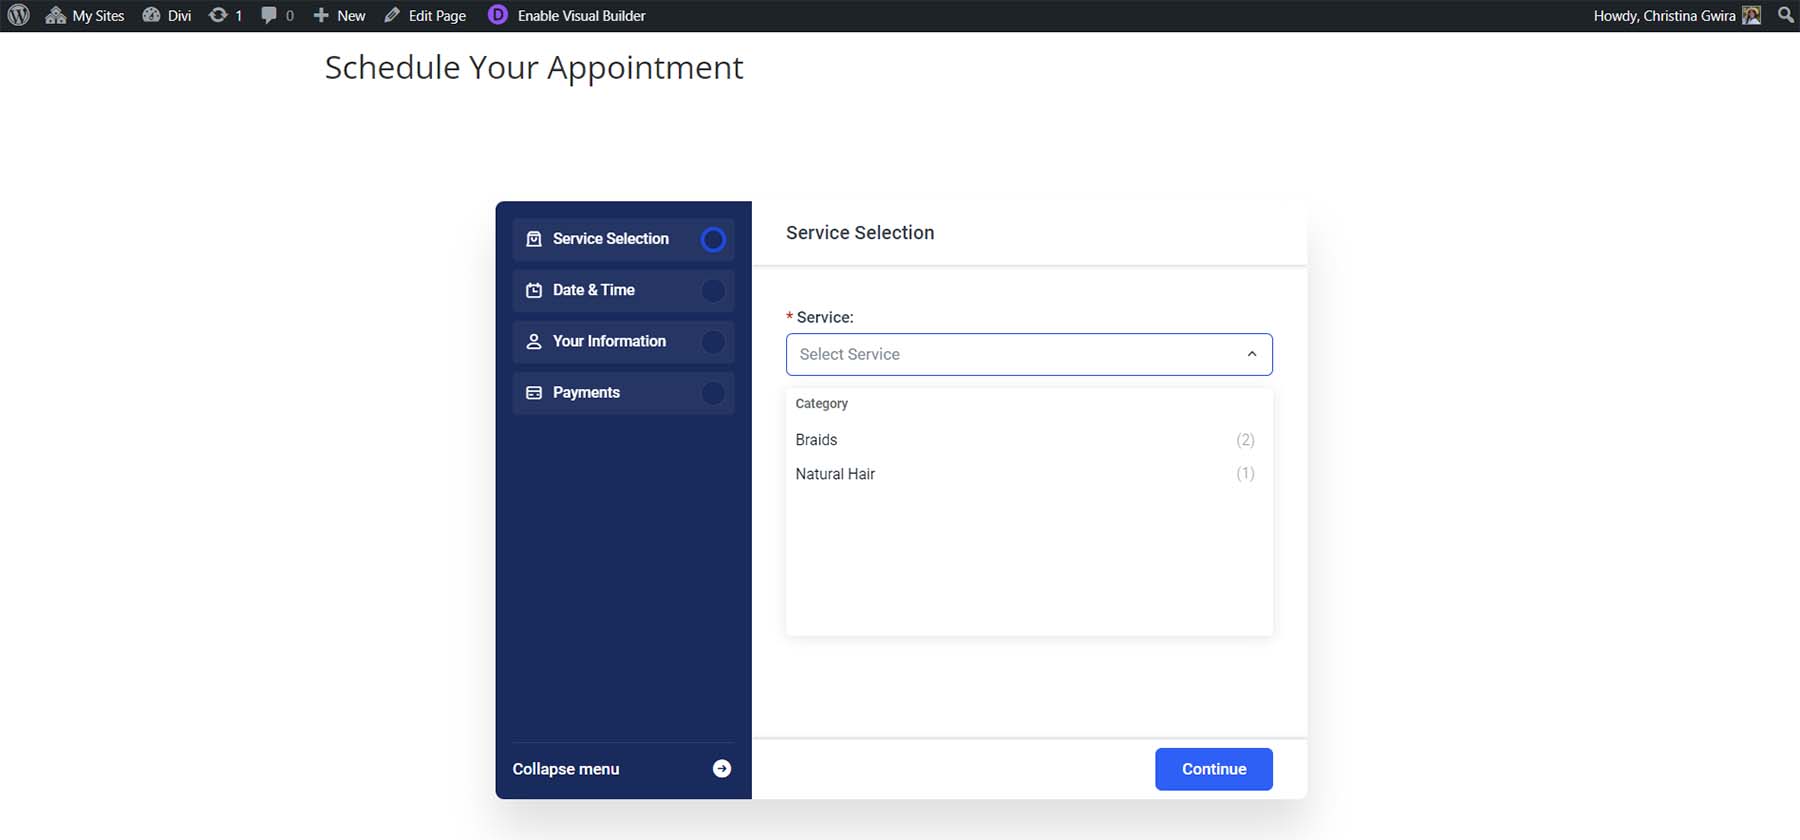
Testing Your New Booking Form
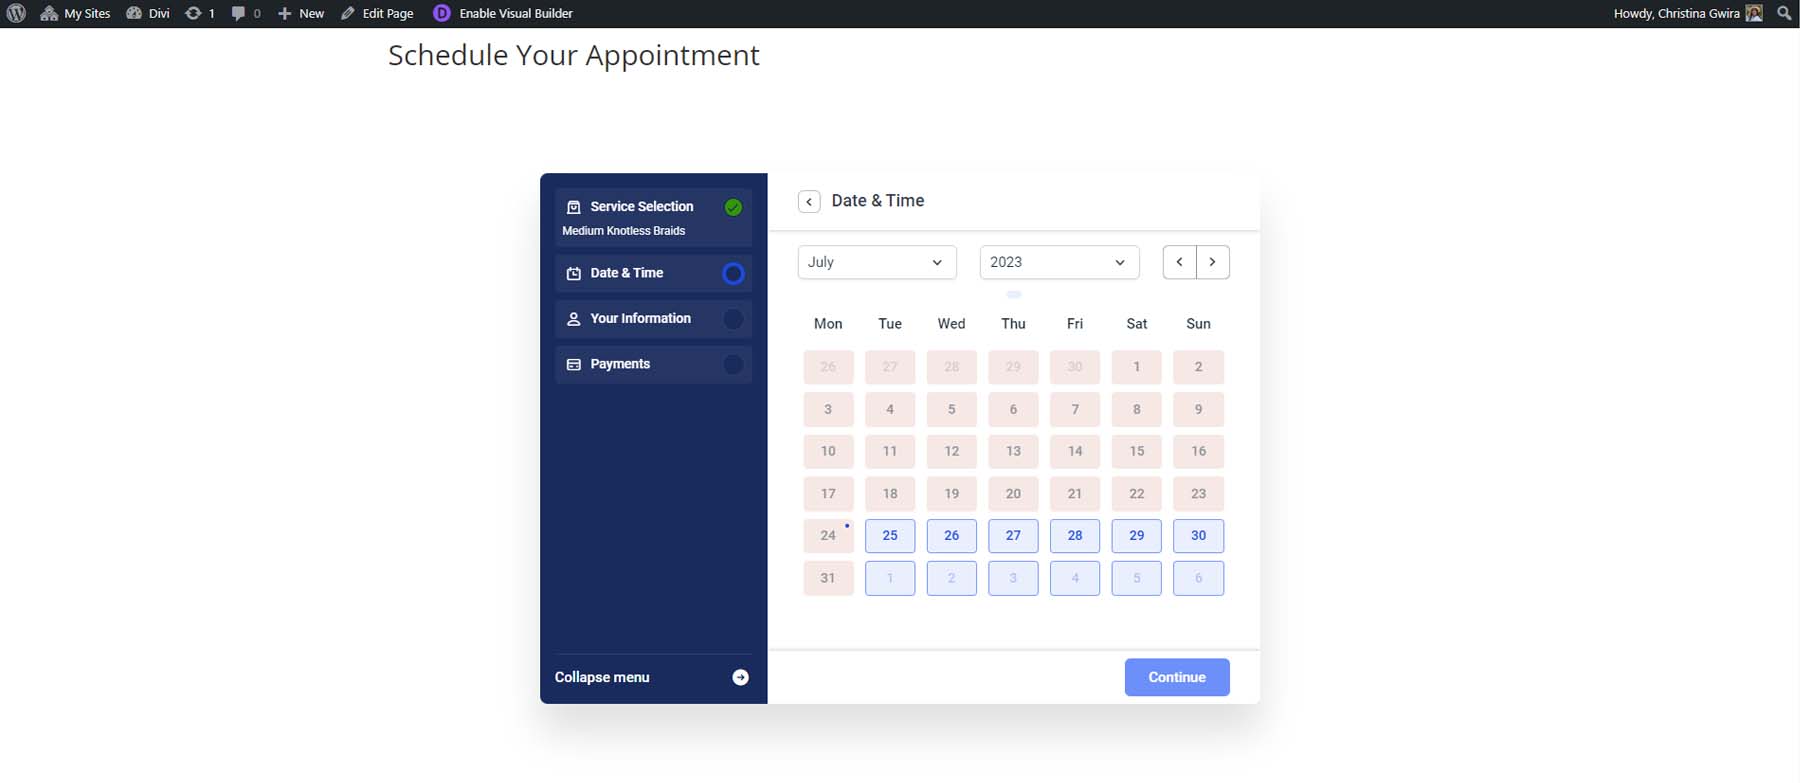
Once you’ve added the Amelia block to your page, this is what the step-by-step wizard looks like on the front end for your customers. First, they have the option to select their services.
Then, they can select the date they want to book their appointment.
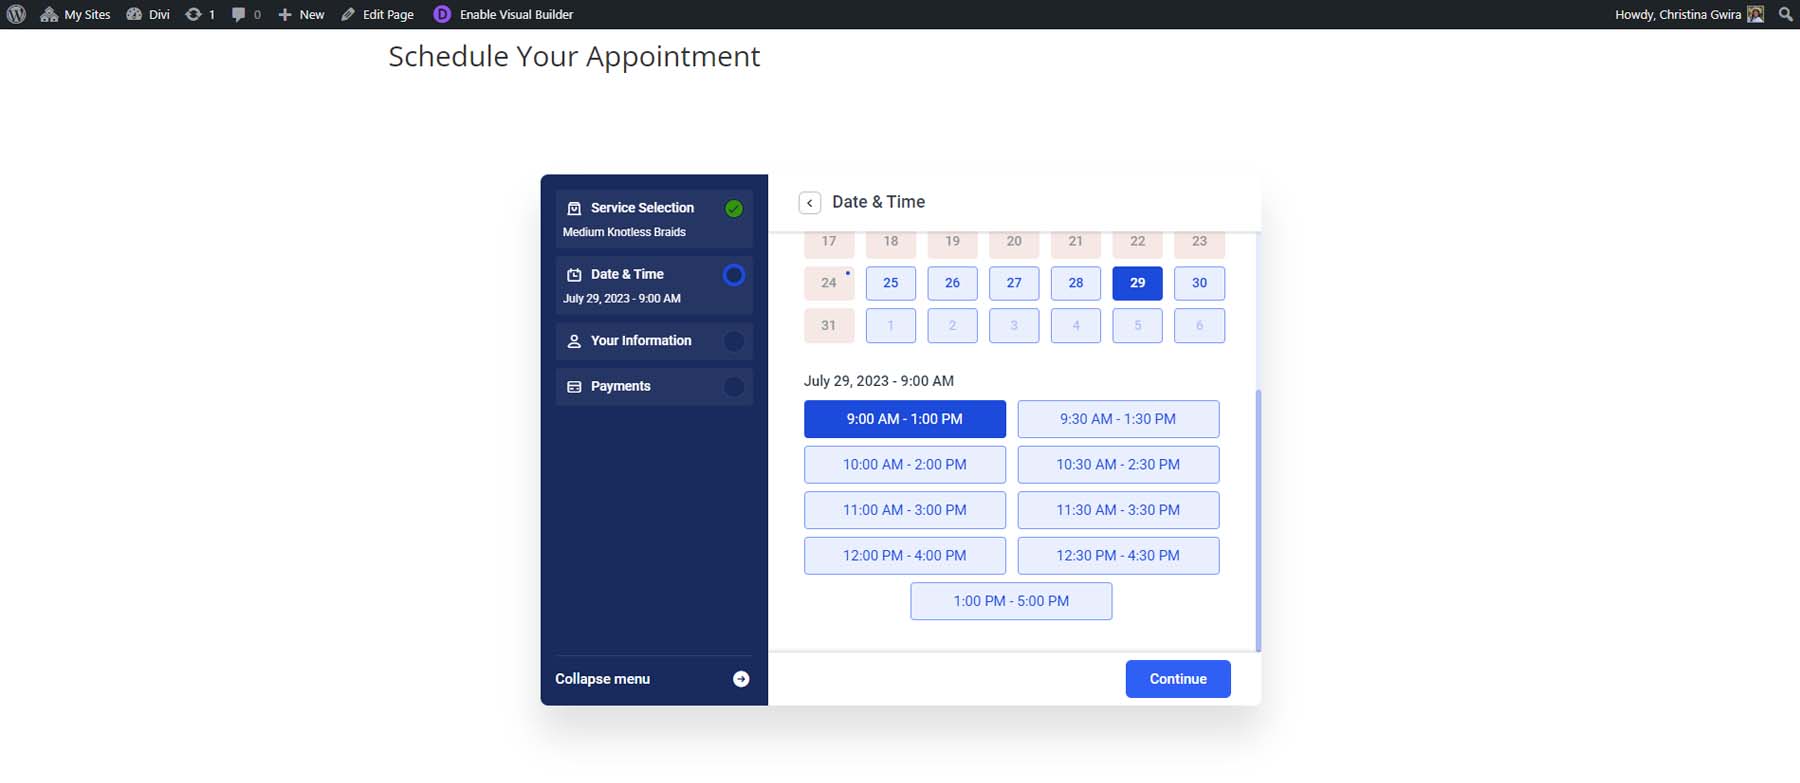
Next, the available timeslots are shown. Notice that these dates and times coincide with the availability of the provider.
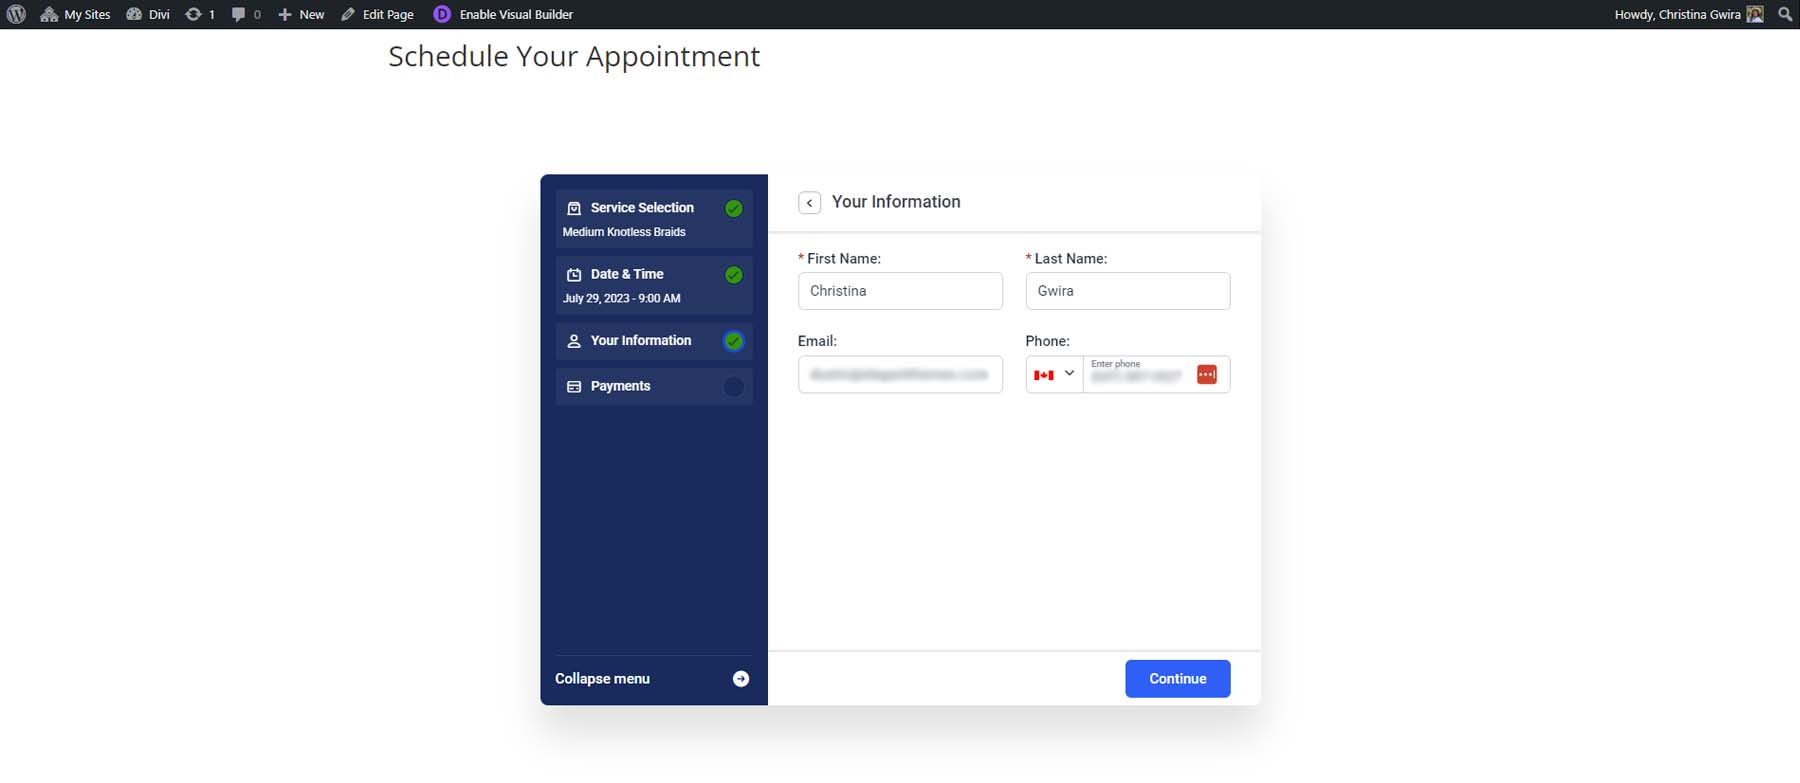
After selecting a date and time, your customer can enter their personal information.
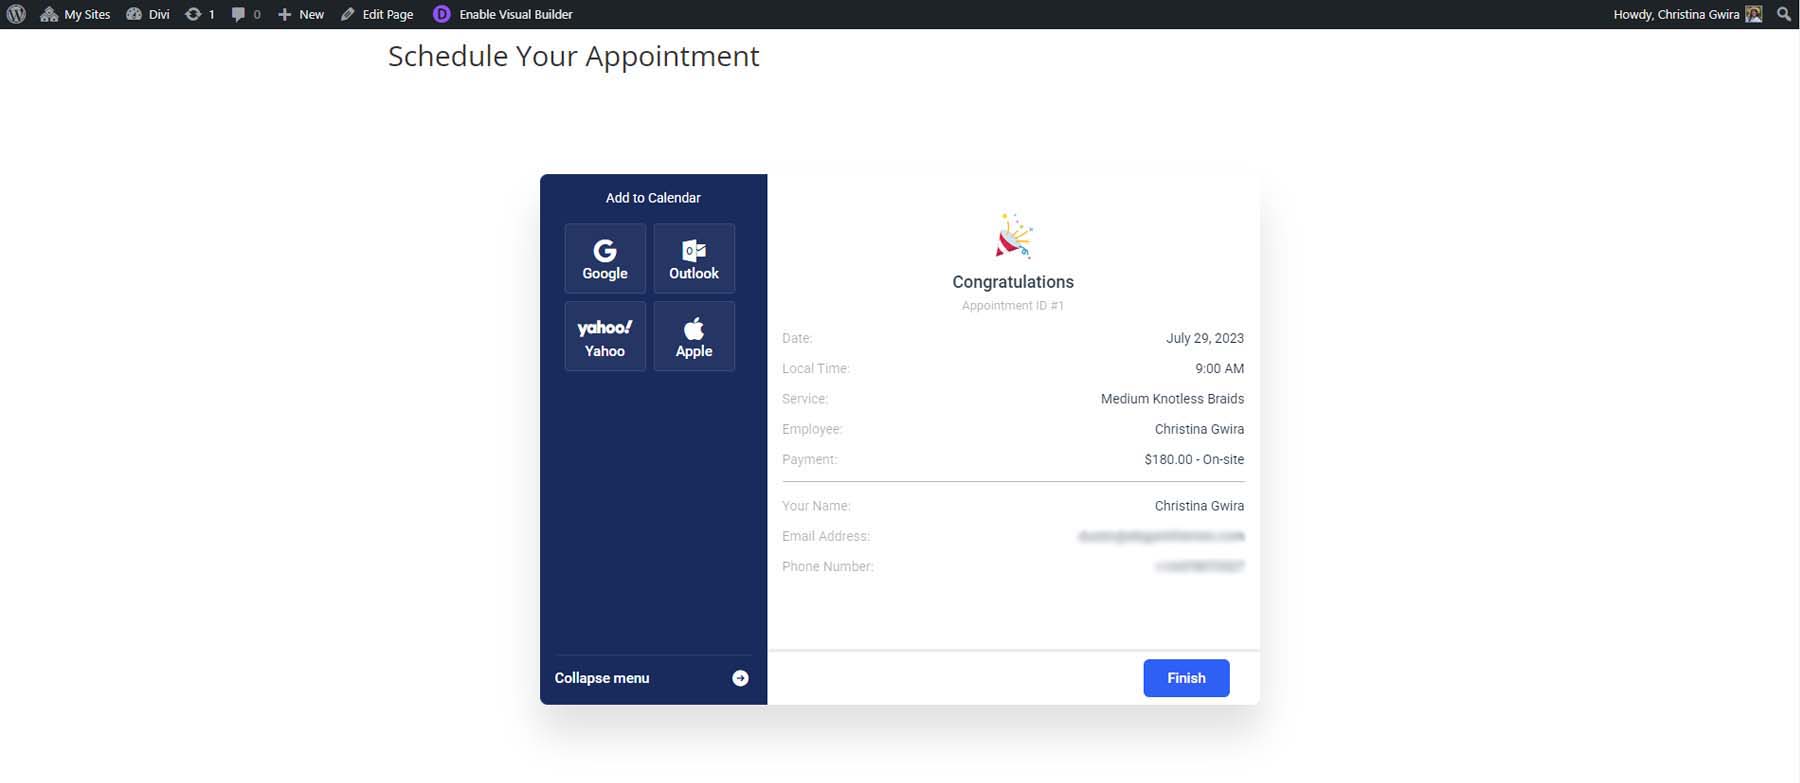
Finally, once everything is confirmed, they can see a confirmation of their appointment listing their service, the provider, and their information for notifications. They can also add their appointment to their calendar of choice.
Adding Your Form to Your Website with Divi
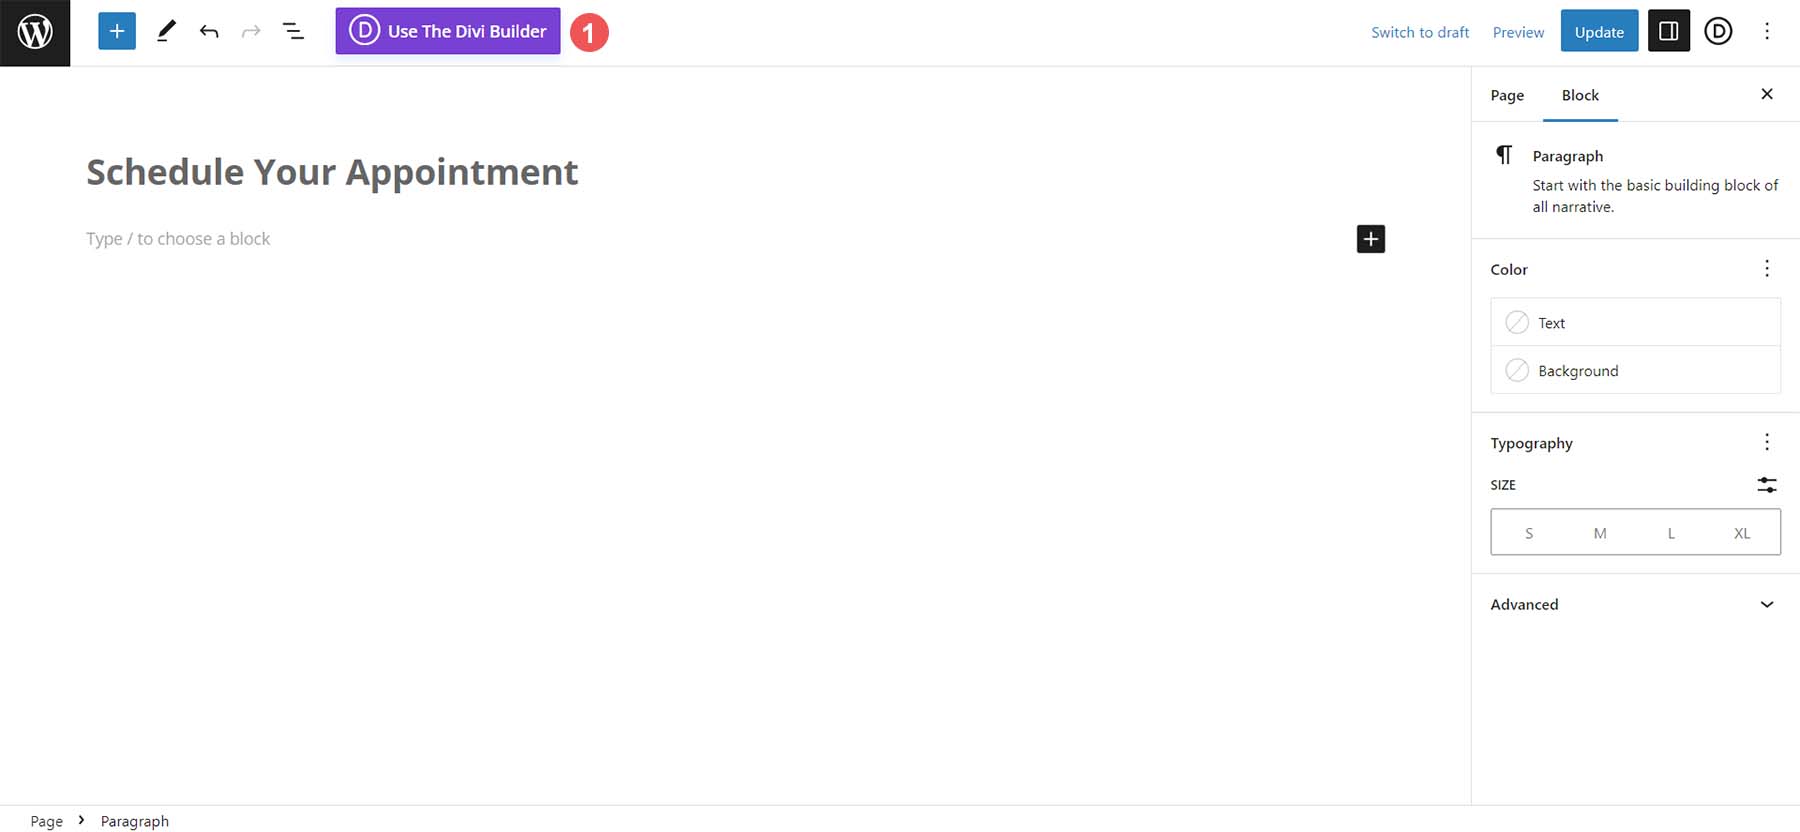
If you’re using the page builder Divi, you can benefit by using the native Amelia modules to style and add your booking form to your page. Start activating the Divi Builder by clicking the purple Use the Divi Builder button at the top of the Block Editor.
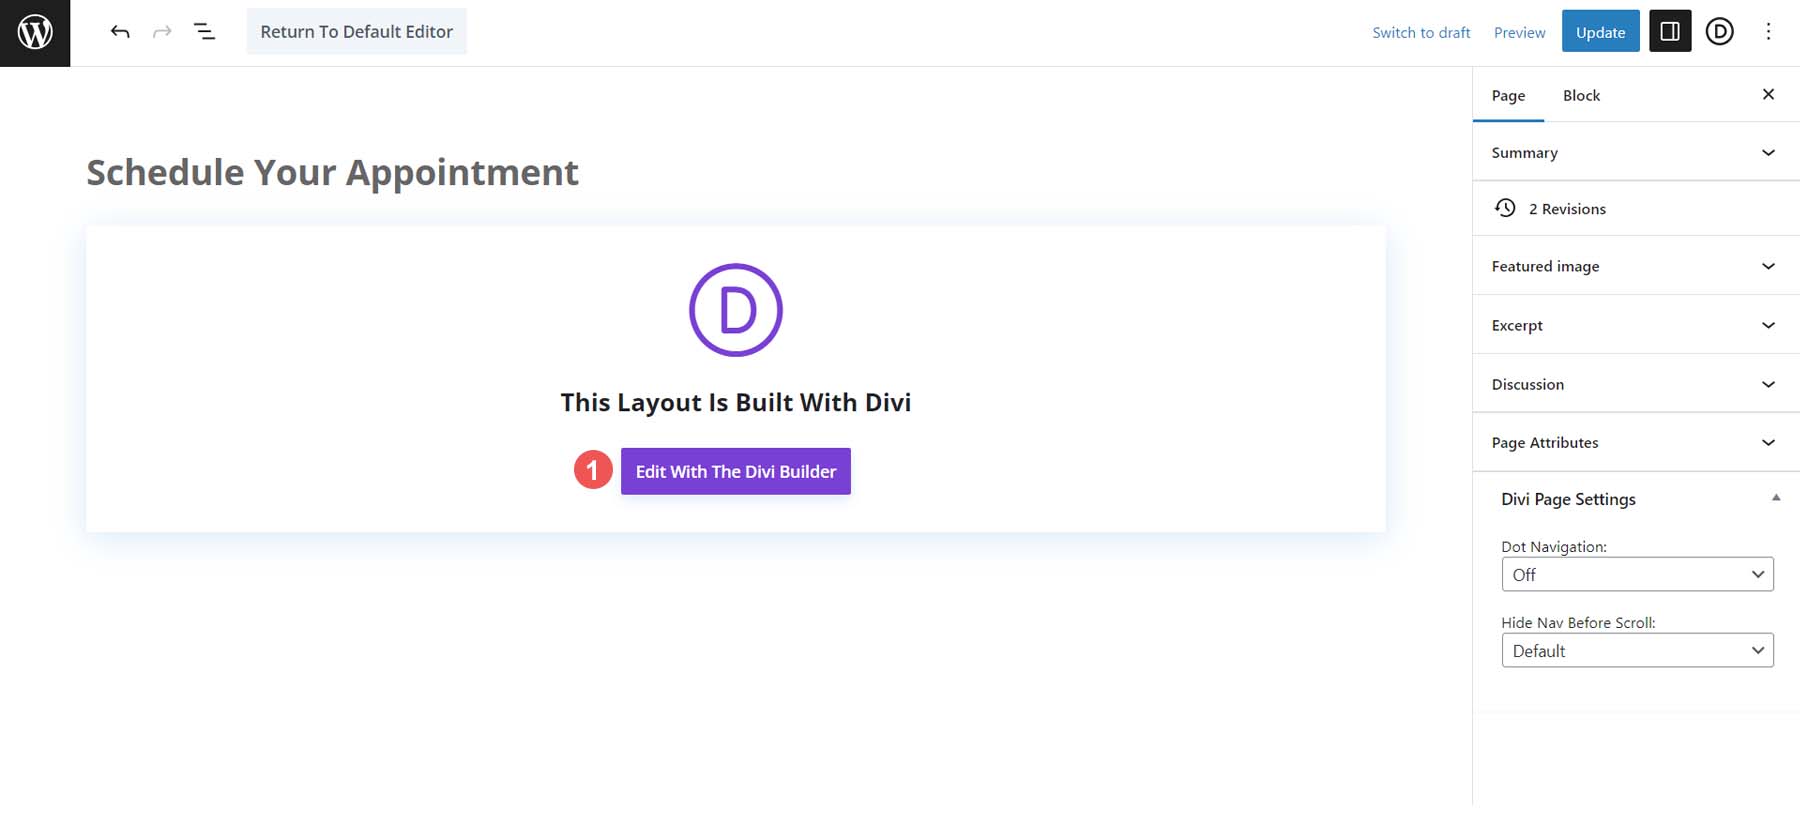
Next, click the Edit With the Divi Builder purple button.
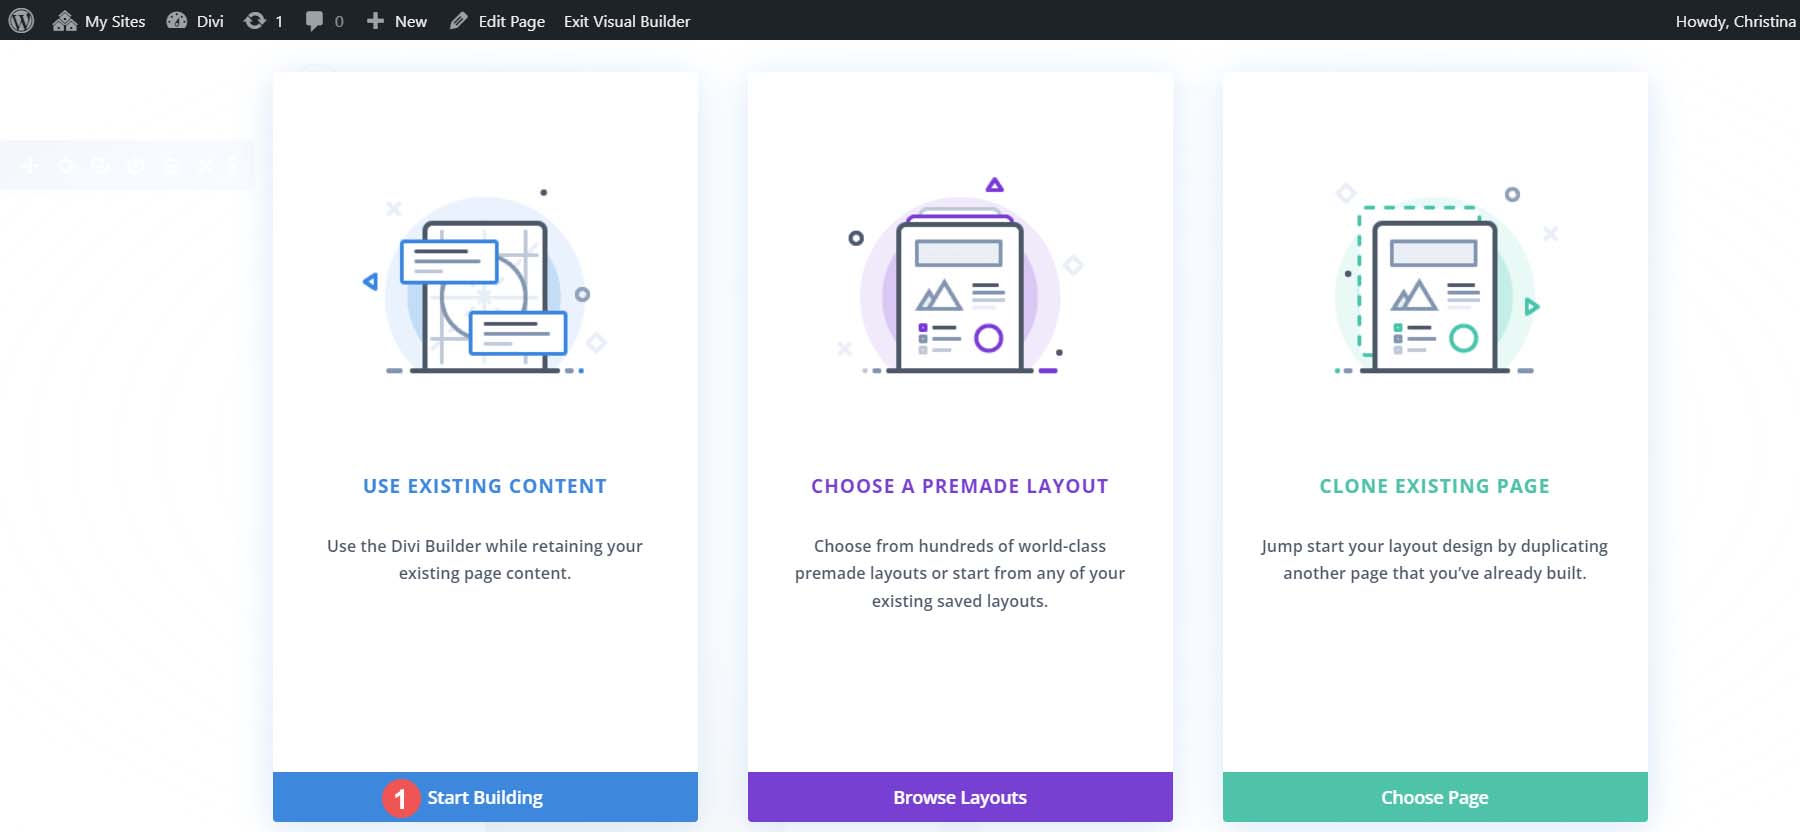
Once the builder is activated, select the blue Start Builder button under the Use Existing Content card.
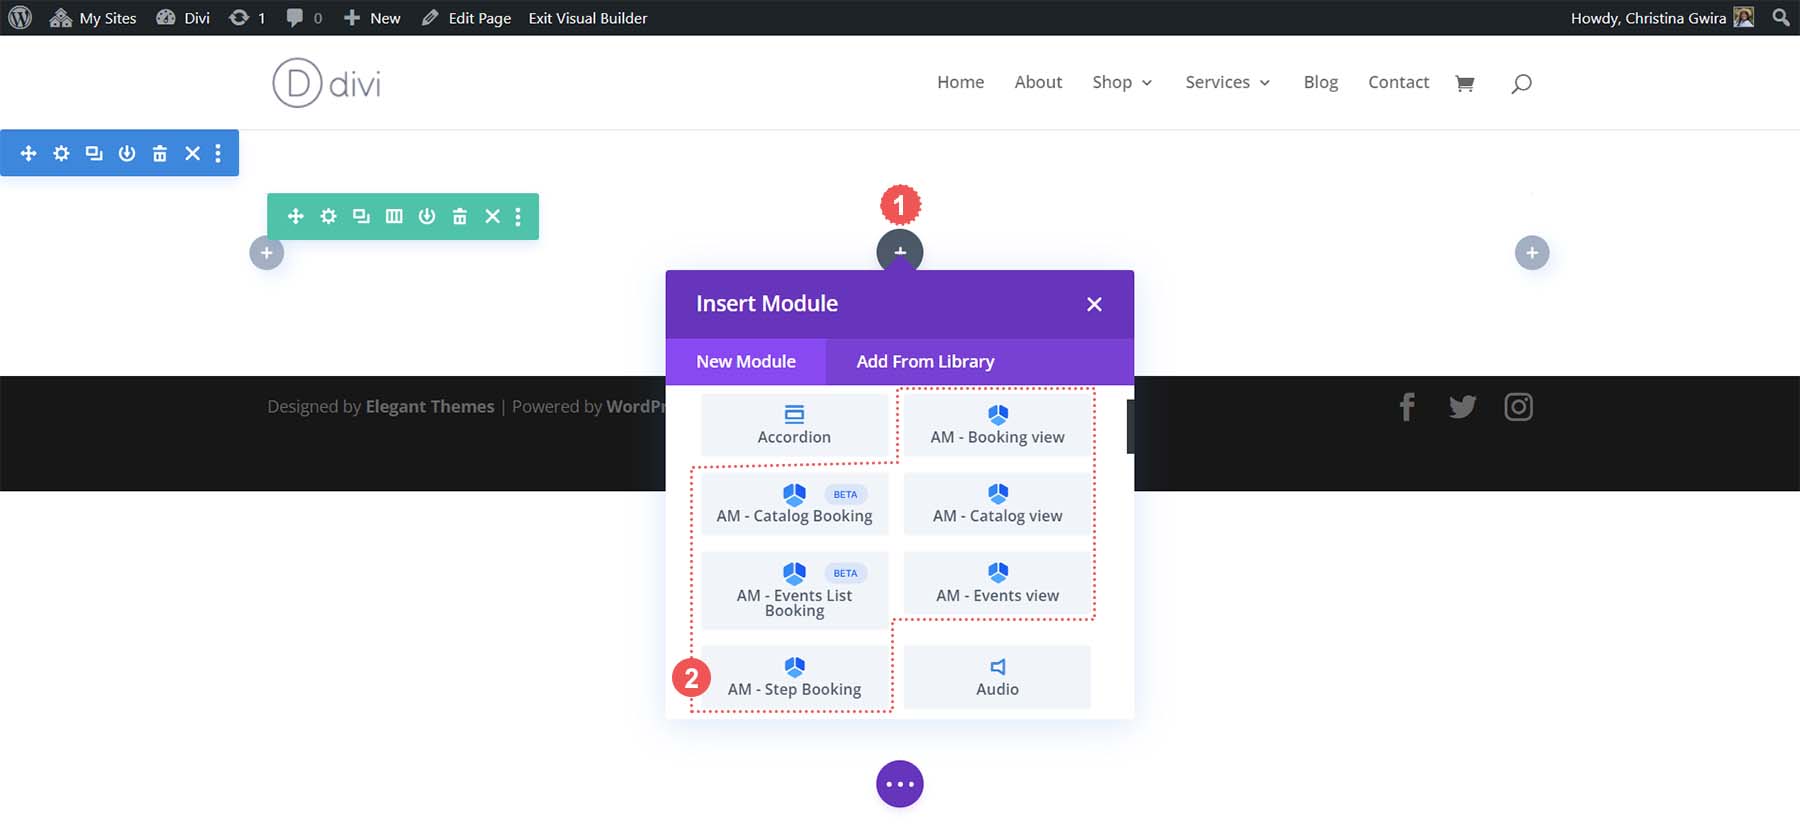
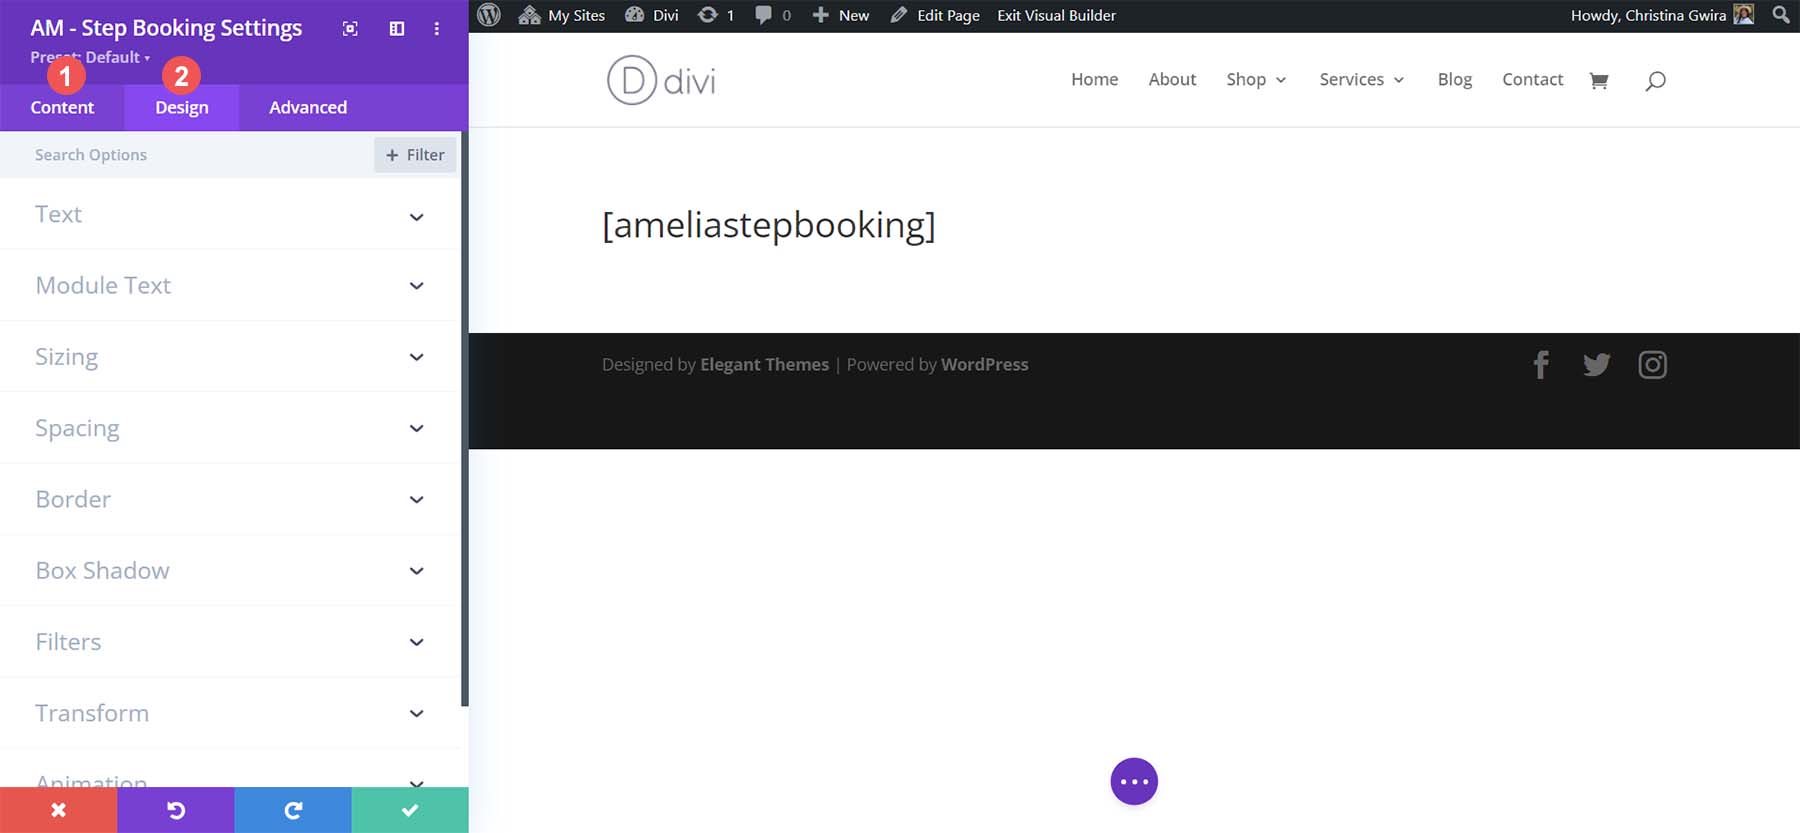
With the builder activated, you can now click the gray plus icon to open the module library. Notice that there are several Amelia modules available for you to choose from. Choose the AM – Step Booking module to add it to your row.
Just like other Divi modules, you have access to the Design tab and the Content and Advanced tab to use the powerful features of Divi on your new WordPress booking form.
Though Amelia is a solid choice to add a booking form to your WordPress website, other options on the market may be better geared to your business use case.
Other Booking Form Options for WordPress
While Amelia is a great booking form plugin for WordPress, there are many more on the scene that might pique your interest. Additionally, there are some booking form platforms that you may want to consider outside of the WordPress space, depending on your business requirements:
- Simply Schedule Appointments: A simple and powerful booking form plugin boasting an interactive setup wizard, customizable notification emails, and integration with Google Calendar and Mailchimp.
- Appointment Hour Booking: With double booking prevention, an automatic price calculator, and a straightforward user interface, this plugin is excellent for providers whose business revolves around classes, workshops, and events.
- Hotel Booking Plugin by Motopress: Geared towards serving the hospitality industry, this plugin has all the bells and whistles you’ll need to make your customers excited and stress-free to book their Airbnb, cabin, or retreat through your website.
- WPForms: For those looking to build complex booking forms, WPForms is one of the best contact form plugins with plenty of features. Complete with more than 30 field types and a library of templates, building the perfect booking form is possible with this plugin.
- The Events Calendar: This popular events calendar WordPress plugin can be used to create, manage and display events. Its Event Tickets addon allows you to sell tickets, manage attendees, and more. It also integrates with other booking form plugins.
- Calendly: A relative newcomer to online booking, this tool is popular among business coaches and professionals for its feature-rich free offering and integrations. It integrates well with WordPress and has a beautiful and intuitive user interface.
- Acuity Scheduling: With tight integration with Squarespace, Acuity is an online booking form platform with minimal aesthetics and compelling features.
In Conclusion
As a service provider, a booking form lets customers put themselves on your calendar without hassle. They can select their services, make a deposit and get reminders, which can be tedious to do through email. Whether you need video integration or the ability to include add-ons to your service list, a booking form plugin is available. Amelia is a great booking plugin with many features that can help you get started even in its free offering. A booking form should be a part of your business process as it can help you increase revenue, build brand loyalty and deepen customer relationships. WordPress has a great variety of booking form plugins that you can use to bring this powerful tool to your website today.
Featured Image via Irina Strelnikova / shutterstock.com
The post How to Easily Add a Booking Form in WordPress (2023) appeared first on Elegant Themes Blog.