Do you want to convert your WordPress categories into custom taxonomies?
Categories are one of the two default taxonomies that help you sort your content. WordPress also allows you to create and use custom taxonomies.
In this article, we will show you how to easily convert WordPress categories to custom taxonomies.
Why and When Do You Need to Convert Categories into Custom Taxonomies?
A taxonomy allows you to organize groups of posts and custom post types on your WordPress website. By default, WordPress comes with two pre-made taxonomies: categories and tags.
However, you can also create custom taxonomies with WordPress, which can be used with existing or custom post types.
As your WordPress blog grows, you might need to convert your categories into a custom taxonomy because it can be overwhelming to file and keep track of each post in a category with different subcategories.
Using custom taxonomies for tagging allows for more accurate and detailed classifications and better content organization.
For example, if you have a recipe website, then creating categories for cuisine type, dietary restrictions, and meal type can be a bit confusing.
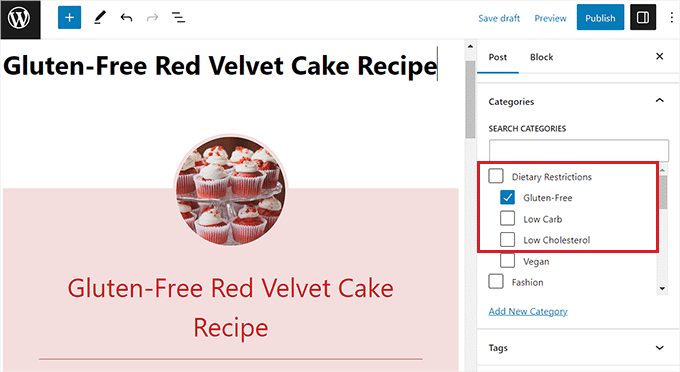
However, by creating a custom taxonomy for each of these topics, you can make content organization easier.
Custom taxonomies can also help improve your SEO rankings by giving you the flexibility to use more specific and targeted taxonomy terms.
Having said that, let’s take a look at how you can easily convert categories into custom taxonomies.
How to Convert WordPress Categories to Custom Taxonomies
First, you will need to install and activate the Taxonomy Switcher plugin. For more detailed instructions, you may want to see our step-by-step guide on how to install a WordPress plugin.
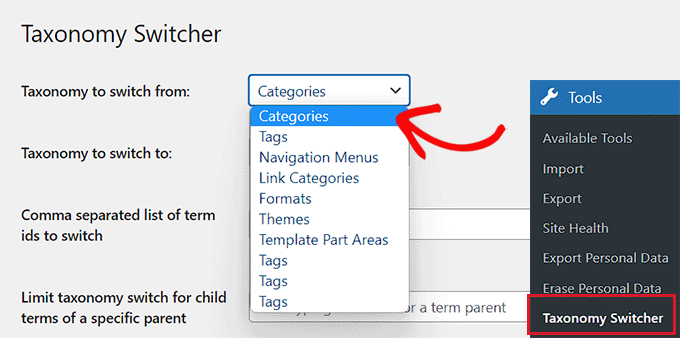
Upon activation, head over to the Tools » Taxonomy Switcher page from the WordPress admin sidebar to convert categories to custom taxonomies.
Once you are there, you need to select the ‘Categories’ option from the ‘Taxonomy to switch from’ dropdown menu.
This means that we will be converting a category into a custom taxonomy.
Next, select the custom taxonomy that you want the categories to turn into from the ‘Taxonomy to switch to’ dropdown menu.
For example, if you have a category for dietary restrictions and you want to switch to a taxonomy of the same name, then you can select the ‘Dietary Restrictions’ option from the dropdown menu.
If you don’t know how to create a custom taxonomy, then you may want to see our tutorial on how to create a custom taxonomy in WordPress.
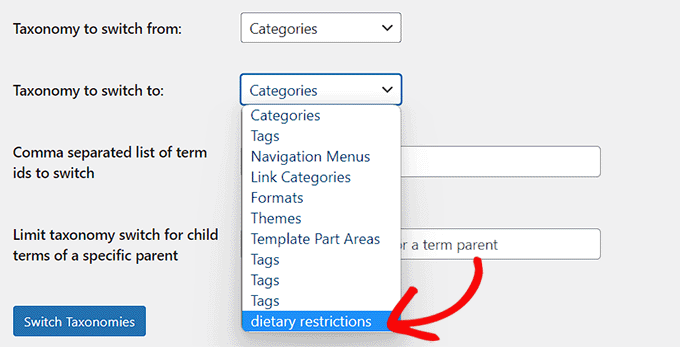
If you want to convert all the categories on your WordPress site into this specific custom taxonomy, then simply click the ‘Switch Taxonomies’ button.
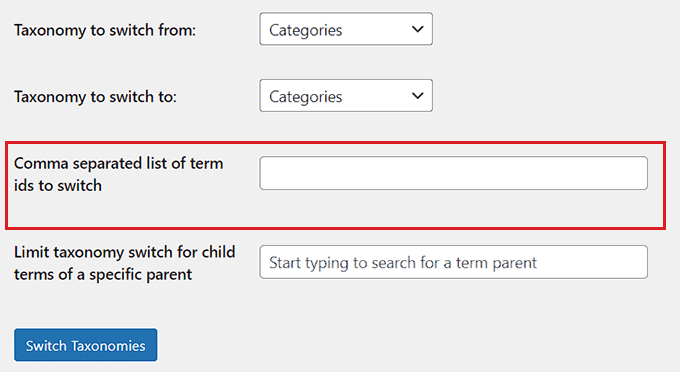
However, if you just want to convert singular or multiple categories into this taxonomy, then you will need to add the IDs of those categories into the ‘Comma separated list of term ids to switch’ field.
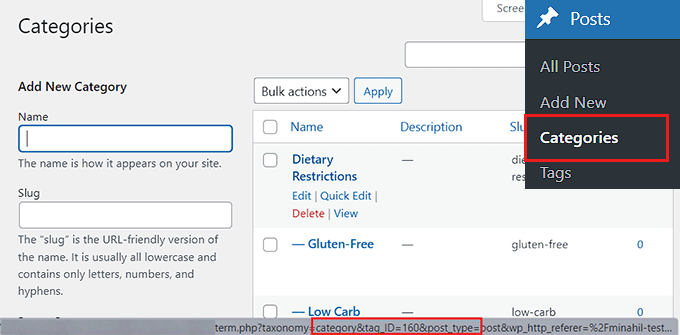
To find a category id, you will need to visit the Posts » Categories page from the WordPress dashboard and hover your mouse over the category of your choice.
The category edit URL will now appear in a popup box at the bottom left corner of your screen.
From here, you can easily find your category ID, as it is the number that comes after ‘category&tag_ID=’ and before ‘&post_type’ in the URL.
For more instructions, see our tutorial on how to find category IDs in WordPress.
Once you have found the IDs for categories, head back to the ‘Taxonomy Switcher’ page.
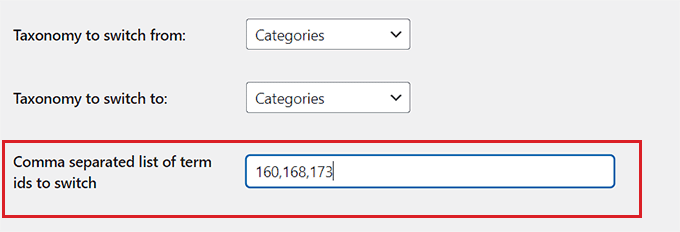
Next, simply add the IDs for all the categories that you want to convert into a specific taxonomy. Keep in mind that if you add more than one category ID, then you will have to separate them using commas.
Some of the categories in WordPress also have subcategories (child categories).
However, if you want to skip the child categories, then you can type the parent category next to the ‘Limit taxonomy switch for child terms of a specific parent’ option. This way, only the parent category will be switched to a taxonomy.
Finally, click the ‘Switch Taxonomy’ button to convert your WordPress category to a custom taxonomy.

You will now see the taxonomy that you have created along with the default taxonomies in the Posts menu tab in the WordPress sidebar.
Upon clicking on the custom taxonomy, you will be taken to a new page, where you can easily add terms for the taxonomy by typing in a name and slug.
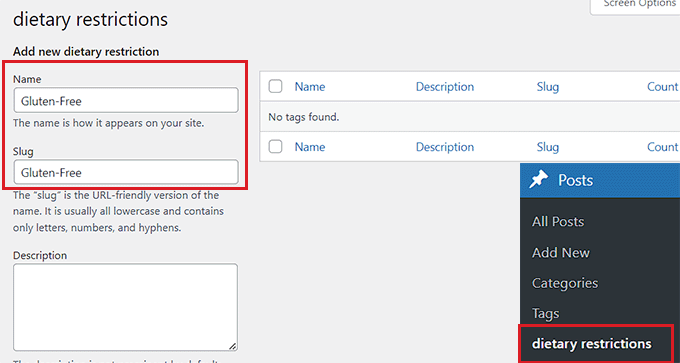
Once you have done that, just click the ‘Add New’ button at the bottom to create a new taxonomy term.
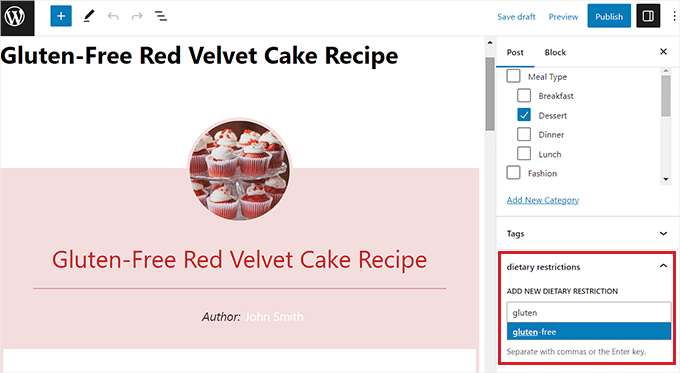
Now visit your WordPress block editor by opening up a new or existing post/page.
Here, you will notice that the category you switched to taxonomy is now displayed in the block panel on the right corner of the screen. From here, you can now easily add new terms or use existing ones for your WordPress blog post.
How to Set Up Redirects From Category to Custom Taxonomy
After you turn one of your categories into a custom taxonomy, the category archive page will now show a 404 error. This is nothing to be worried about if your website is not live yet.
However, if your website is live, then search engines may have already crawled your category pages and indexed them. This means that those pages can appear in search results, and users coming from search engines will see a 404 error page.
To fix this, you need to redirect users to the new taxonomy page for each category.
To do this, you will need to install and activate the All in One SEO for WordPress plugin. For more details, see our beginner’s guide on how to install a WordPress plugin.

AIOSEO is the best WordPress SEO plugin on the market. It comes with a powerful redirection manager addon that makes it very easy to find broken links and fix them using 301 redirections.
Note: AIOSEO also has a free version. However, you will need the pro version for this tutorial to unlock the 301 redirection feature.
Upon activation, you will need to configure AIOSEO for your website. For more detailed instructions, please refer to our guide on how to set up All in One SEO correctly.
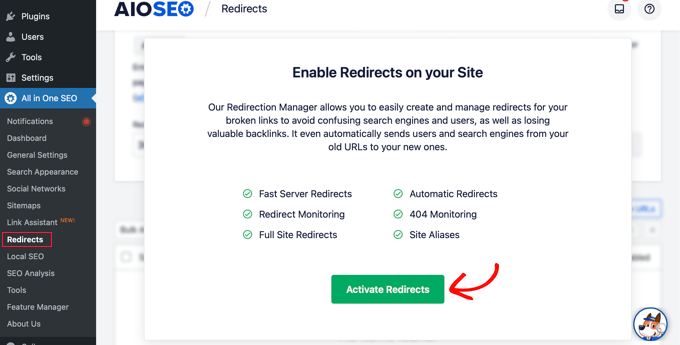
Once you have done that, head over to the All in One SEO » Redirects page from the WordPress admin sidebar.
Here, you will see a prompt asking you to activate the redirection manager. Go ahead and click the ‘Activate Redirects’ button.
The Redirects page will now be displayed on your screen.
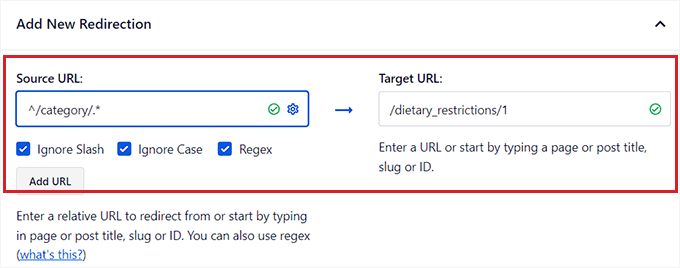
From here, simply add /category/.* into the ‘Source URL’ field.
Once you do that, click the gear icon in the field to open some additional settings for the source URL. From here, check the ‘Regex’ option.
After that, enter your custom taxonomy slug, e.g. /dietary_restrictions/1 into the ‘Target URL’ field.
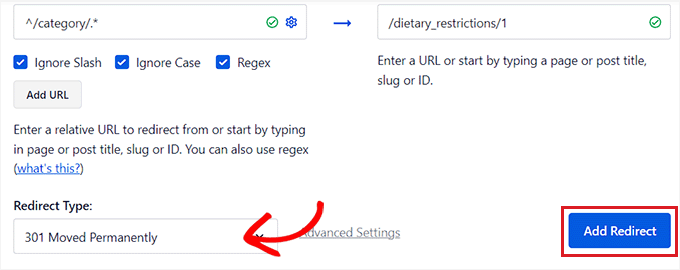
Next, make sure that ‘301 Moved Permanently’ is chosen as the redirect option from the dropdown menu.
Finally, click the ‘Add Redirect’ button in the right corner.
Upon creation, the redirect you created will be displayed at the bottom of the page.
From here, you can always toggle the switch to ‘Inactive’ if you want to disable it.
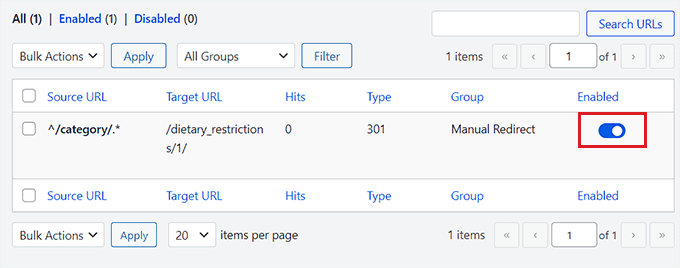
This redirect will now send all your category archive traffic to your custom taxonomy.
However, we recommend using this method only if you don’t want to use categories at all.
If you want to redirect individual categories to a custom taxonomy page, then you may want to see our beginner’s guide on setting up redirects in WordPress.
We hope this article helped you learn how to convert WordPress categories to custom taxonomies. You may also want to see our guide on how to style individual categories differently in WordPress and our expert picks for the best conditional logic plugins for WordPress.
If you liked this article, then please subscribe to our YouTube Channel for WordPress video tutorials. You can also find us on Twitter and Facebook.
The post How to Convert WordPress Categories to Custom Taxonomies first appeared on WPBeginner.
