There are times when you might need to migrate your WordPress site. For instance, you might want to move your local site to a live server, or switch to a new web host. In these cases and more, it’s helpful to have a tool like the All-in-One WP Migration plugin.
This plugin is very easy to use, so even complete beginners can migrate their WordPress websites. Better yet, it will help you auto-replace URLs during the import process and update the permalinks for your new site.
In this post, we’ll take a closer look at the benefits of using the All-in-One WP Migration plugin. Then we’ll guide you through three steps to migrate your WordPress site. Let’s dive in! 
The benefits of using the All-in-One WP Migration plugin
Your hosting provider plays a big role in how well your site performs. If you’re not happy with your current setup, it can be beneficial to switch to a new web host. Unless you want to start over from scratch, you’ll need to move your website from your old host’s server to the new one.
Some hosts will manage this process for you, either for free or at an extra cost. If you need to do it yourself, however, a migration plugin is the easiest way to get the job done. The right tool simplifies the migration process, enabling you to move your website with minimal downtime.
The best migration plugins transfer all files and database content. Plus, depending on what tool you use, you may get access to additional features. For instance, some plugins make sure that URLs are updated correctly, while others assist with testing and troubleshooting after the migration process.
There are many options, but one of the most popular migration plugins is All-in-One WP Migration.
All-in-One WP Migration has been established for years, and has been used by over sixty million websites. Better yet, this plugin is simple to install and configure, making it an excellent option for most WordPress users (even complete beginners).
Additionally, All-in-One WP Migration supports all kinds of files, such as custom uploads, plugins, and theme folders. There are no limitations on host or operating system, making it widely applicable to most websites. What’s more, this tool carries out intelligent auto-replacement of your website URLs during the import process.
How to migrate your site with the All-in-One WP Migration plugin
Now that we’ve introduced you to the All-in-One WP Migration plugin, let’s take a look at three simple steps to migrate your WordPress website using this tool.
- Step 1: Install the All-in-One WP Migration plugin
- Step 2: Export your WordPress website
- Step 3: Import your WordPress website to its new home
Step 1: Install the All-in-One WP Migration plugin
To get started with your site migration, you’ll need to install and activate the All-in-One WP Migration plugin in your WordPress dashboard. Navigate to Plugins → Add New, search for the plugin, and click on Install Now:
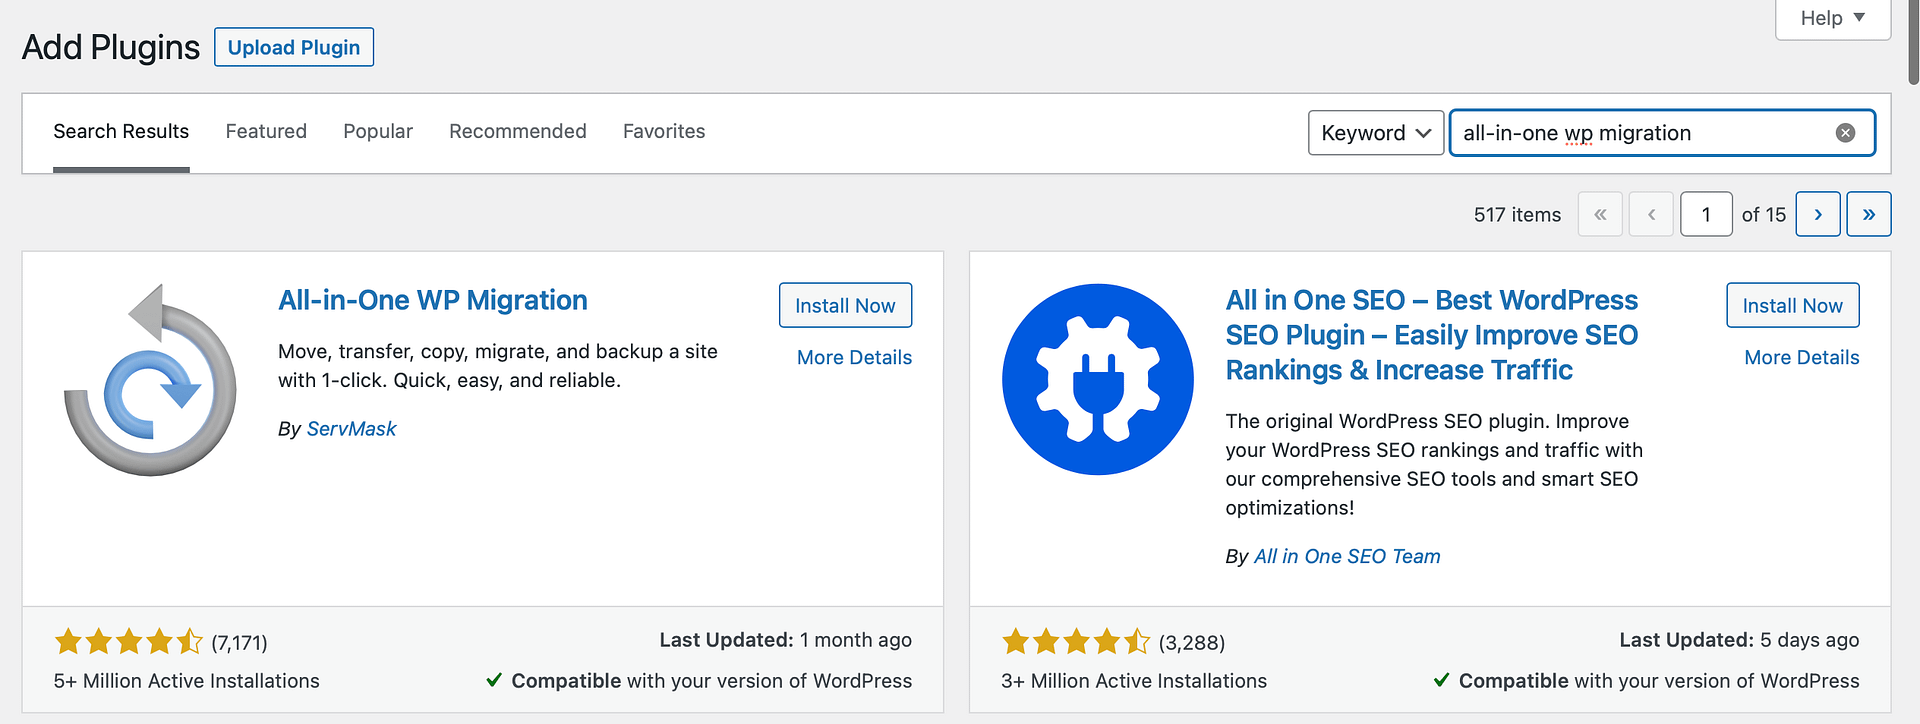
After a few seconds, you can select Activate.
If the installation has been successful, you should see an All-in-One WP Migration link appear in the sidebar of your dashboard.
Step 2: Export your WordPress website
Now that you’ve installed the All-in-One WP Migration plugin, you’re ready to export your WordPress website. All you need to do is go to All-in-One WP Migration in your WordPress dashboard. Then, click on Export:
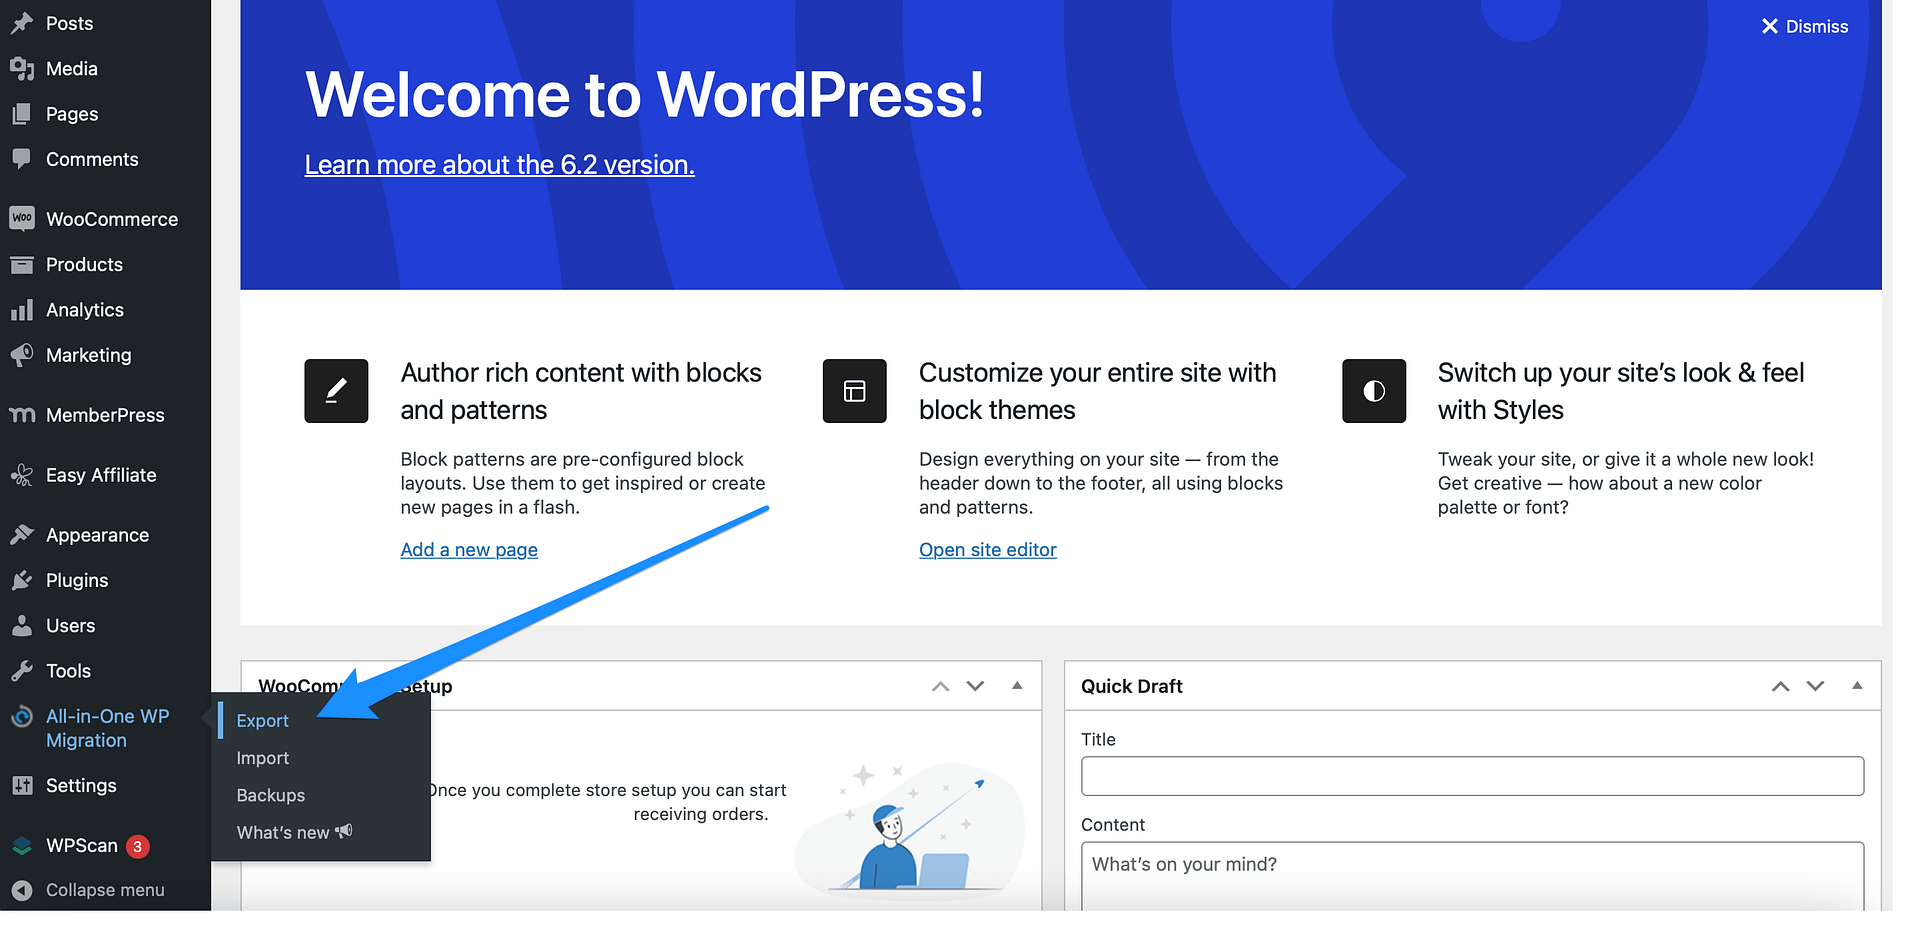
Next, you’ll be directed to a fresh screen where you can determine the settings for your migration. The first feature you’ll see is the find and replace option:

You don’t have to use this feature. However, it can be helpful if you want to replace certain information during the migration process.
If you want to exclude any items from the export, click on Advanced options. Here, you can exclude plugin files, theme files, media files, spam comments, and more:
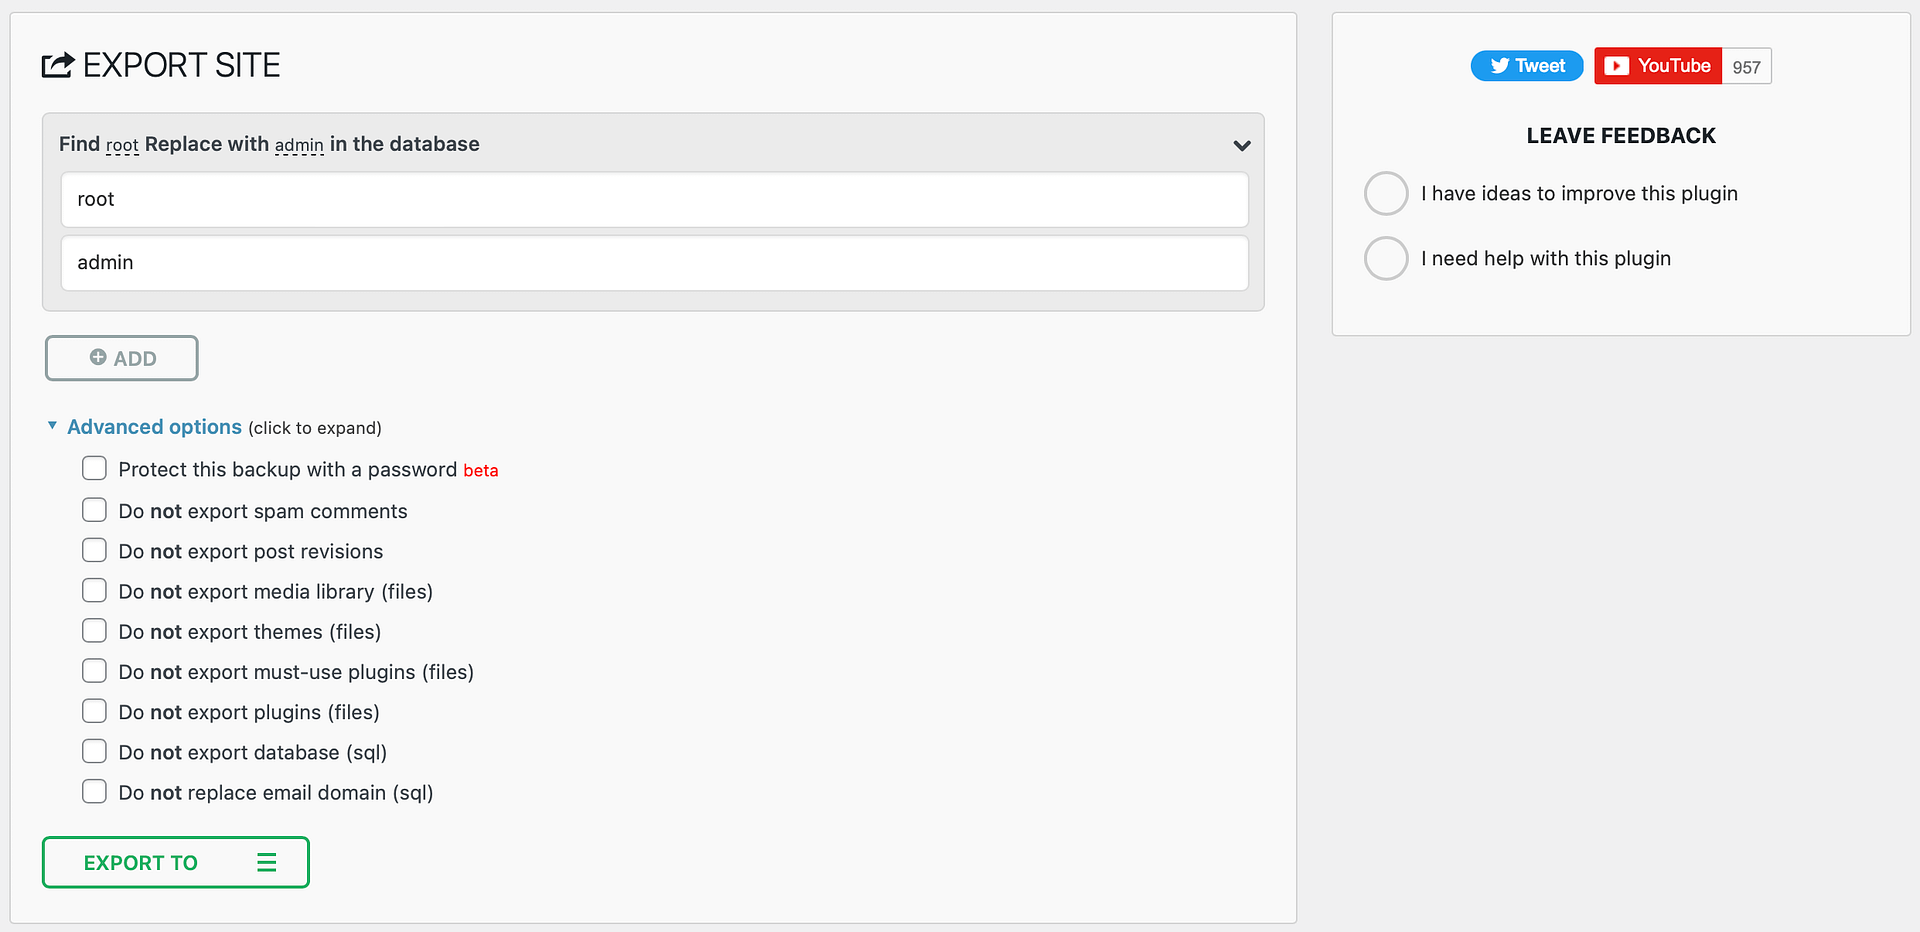
Simply check the items that you don’t want to carry over to your new website.
After that, select Export to and you’ll see a new set of options. For example, you can export your website to Dropbox, Google Drive, or Google Cloud. Or, you can simply download your website as a file:
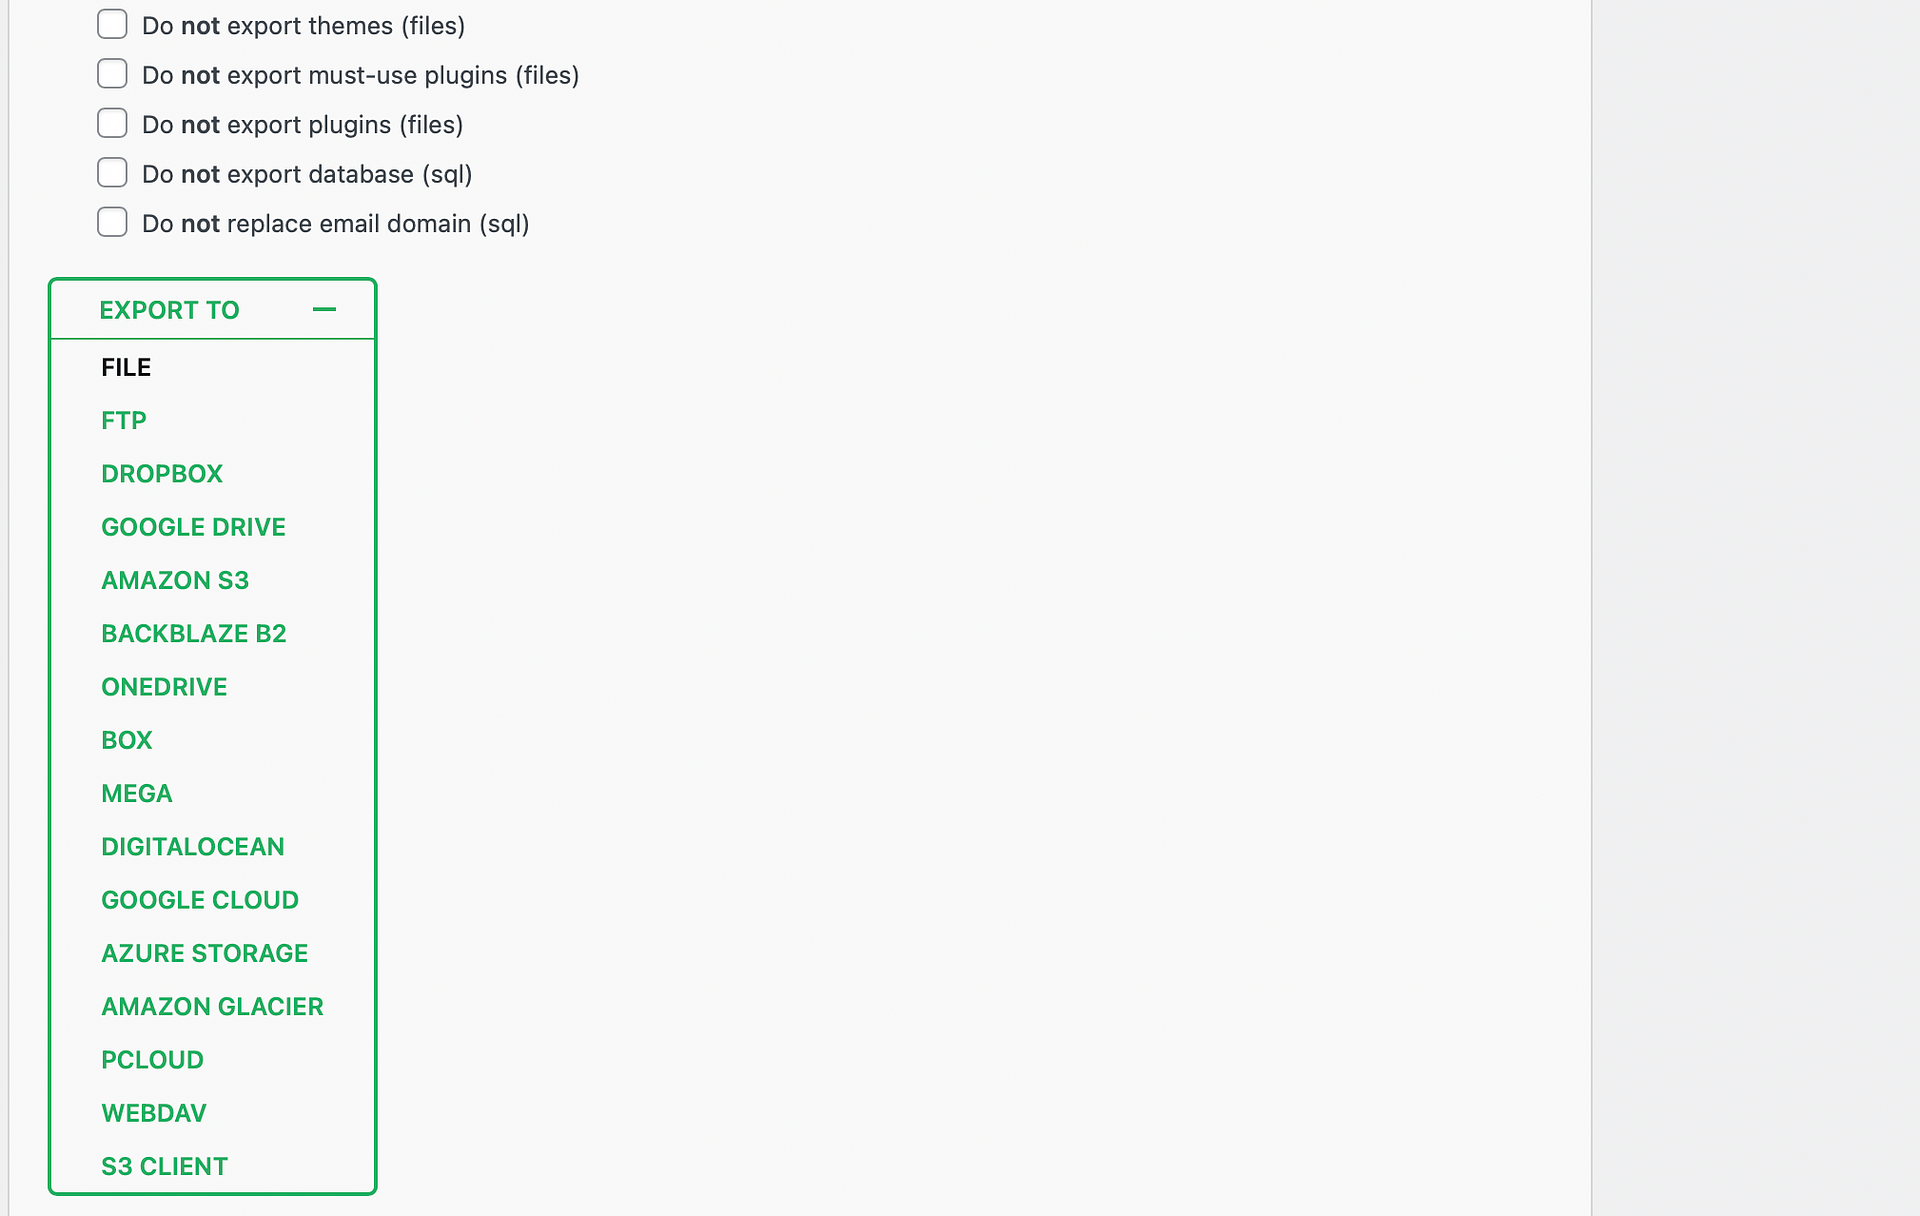
The export process will begin. Typically, this only takes a few seconds. However, if you have a particularly large website with lots of data (such as an ecommerce store), this process may be slightly longer.
You’ll then be able to download your website by clicking on the Download link in the popup box:
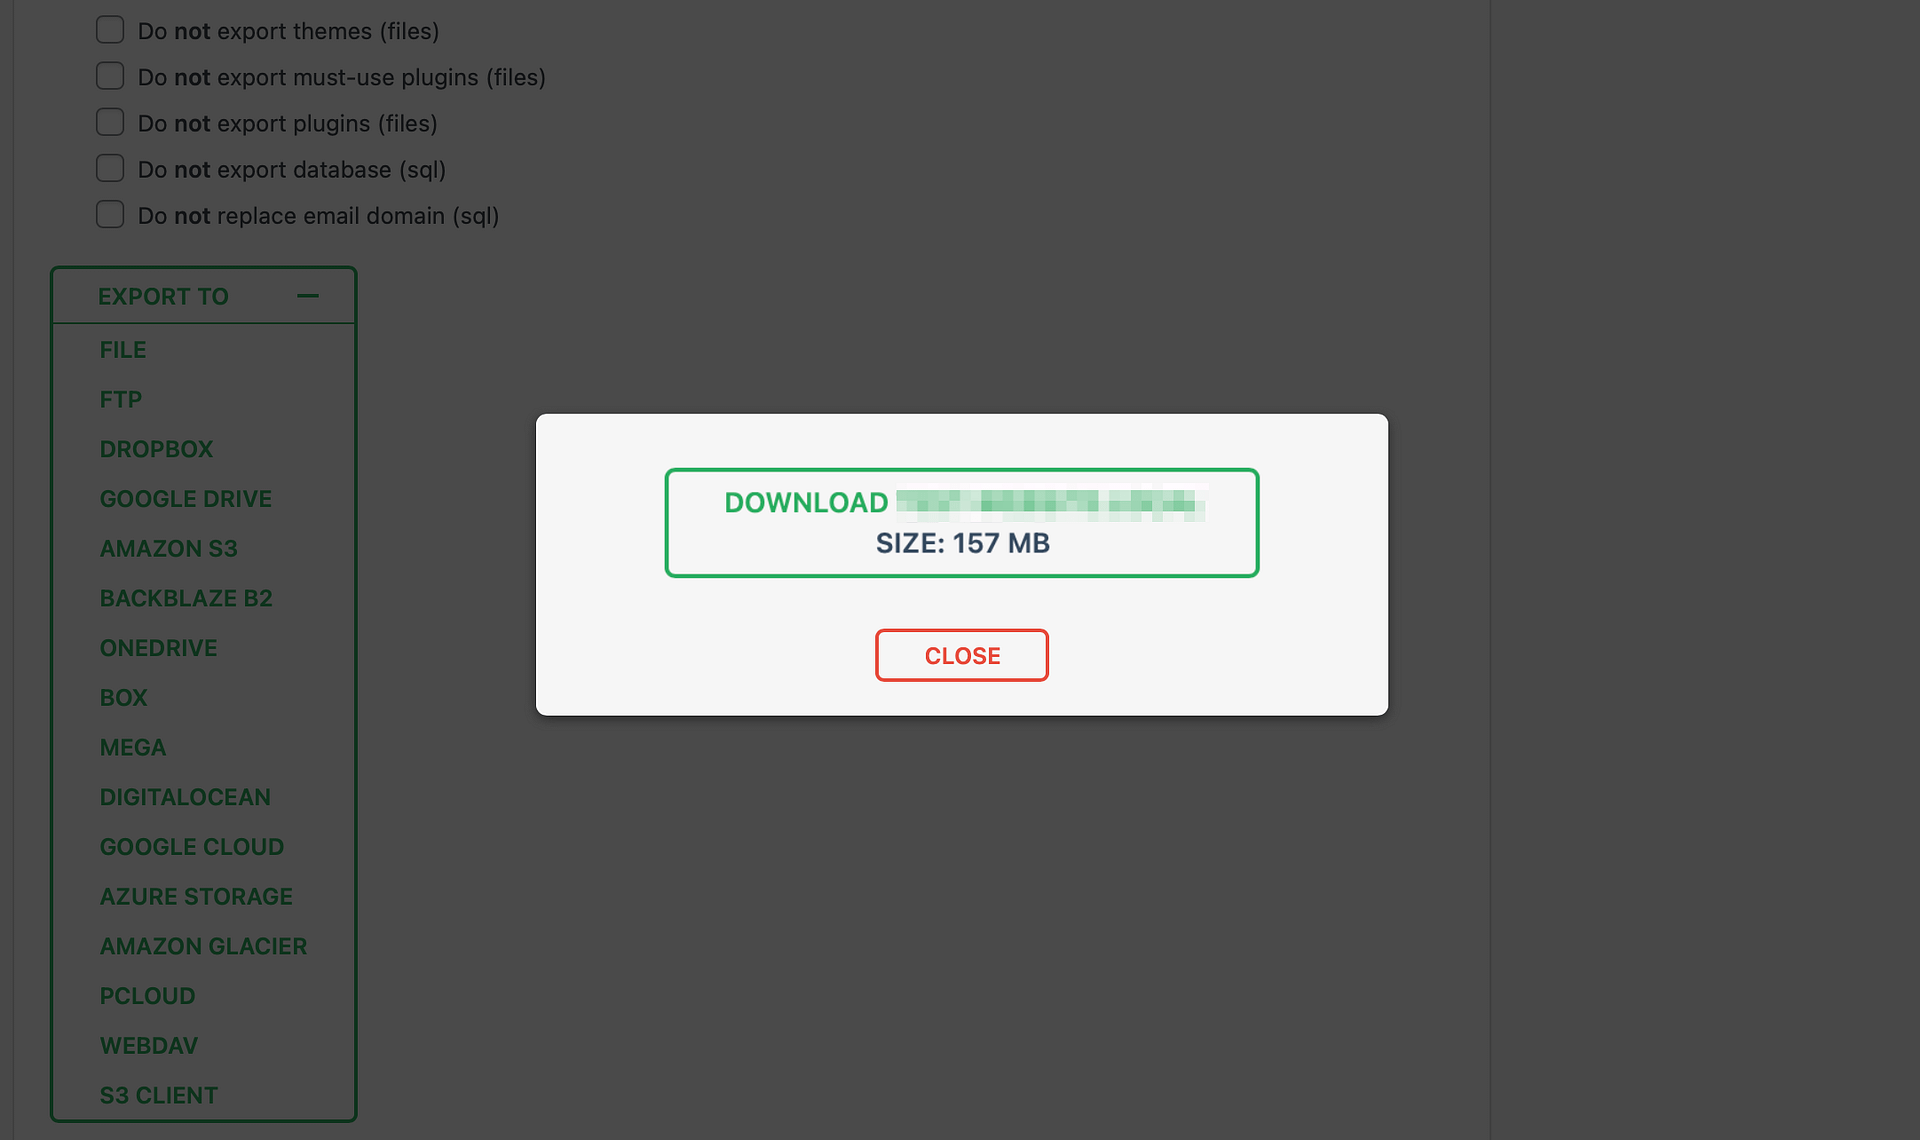
This will save your website to your computer. If you choose to rename the file, it’s important not to change the extension .wpress, since this is required for the plugin to import your file correctly.
Step 3: Import your WordPress website to its new home
At this point, you’ve exported your WordPress website with the All-in-One WP Migration plugin. Now you’re ready to import the data to a new website.
Therefore, you’ll need to head over to your new WordPress website (this might be with a new host or just on a different server). Install and activate the All-in-One WP Migration plugin, just as you did in the first step.
Then, to begin your All-in-One WP Migration import, navigate to All-in-One WP Migration in your WordPress dashboard and select Import:
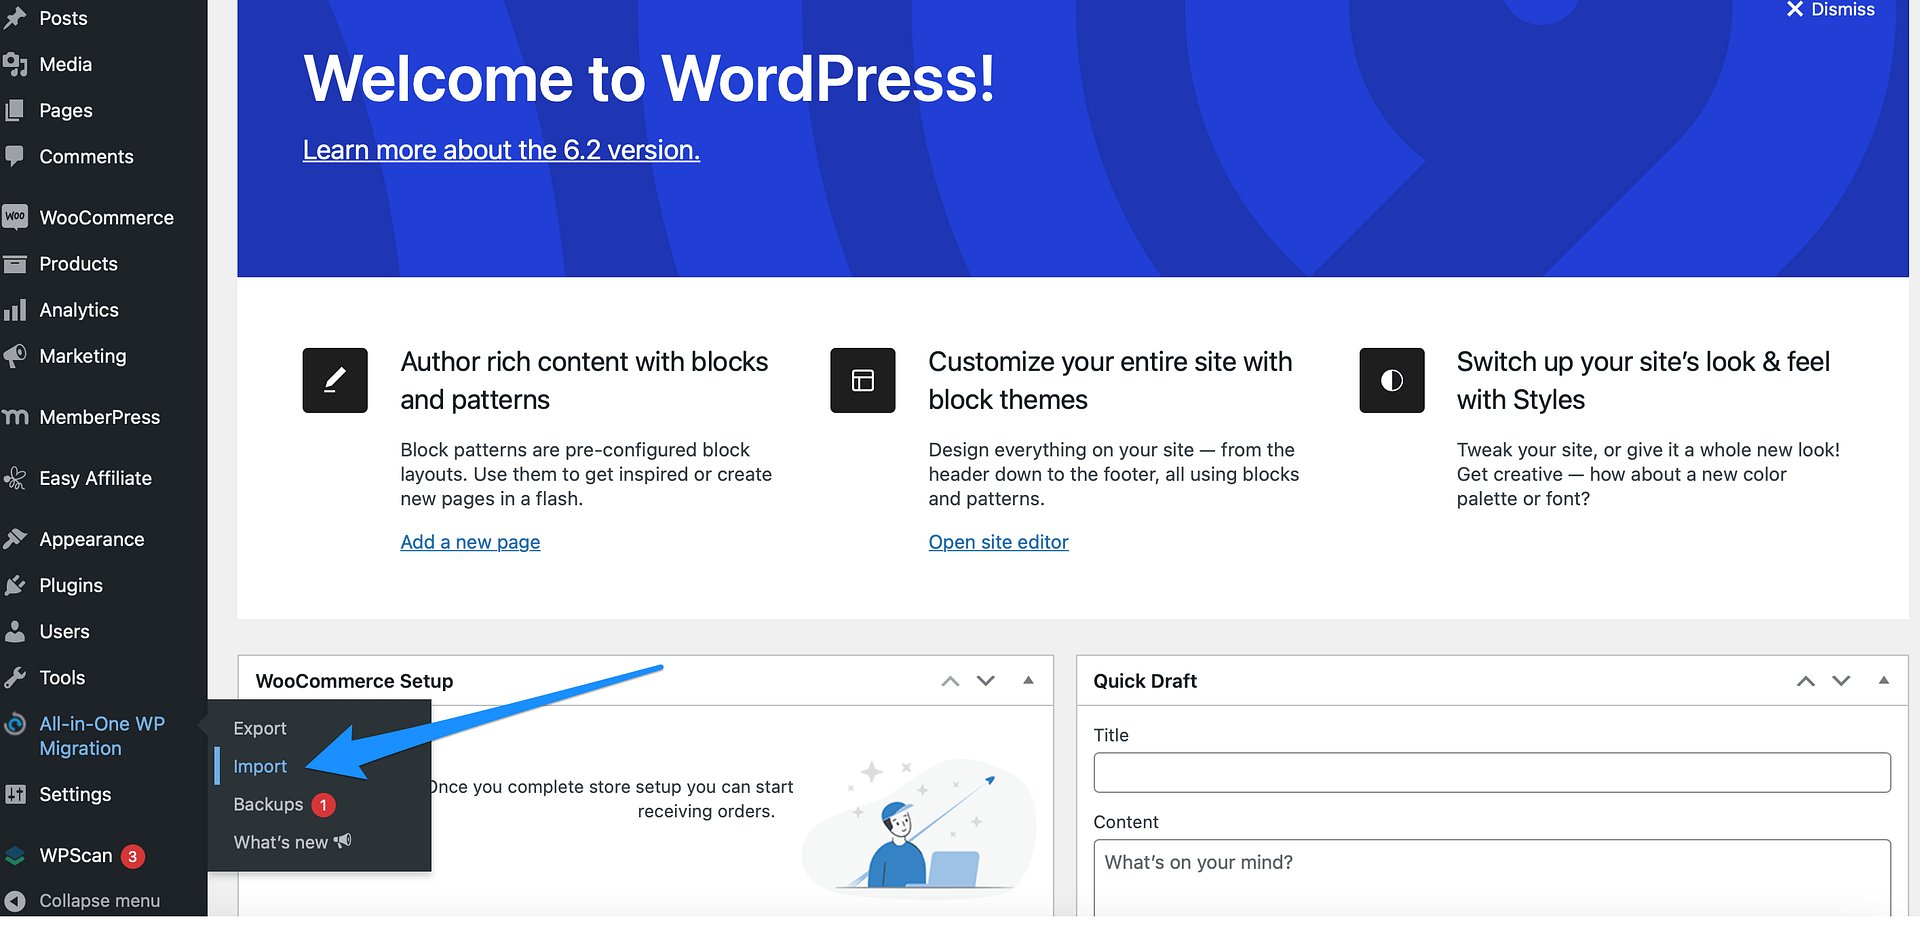
Find and upload your WordPress export file – the one you created in the previous step of this tutorial.

At this point, the import process will begin. The time this takes will depend on your new host and the size of the migration file.
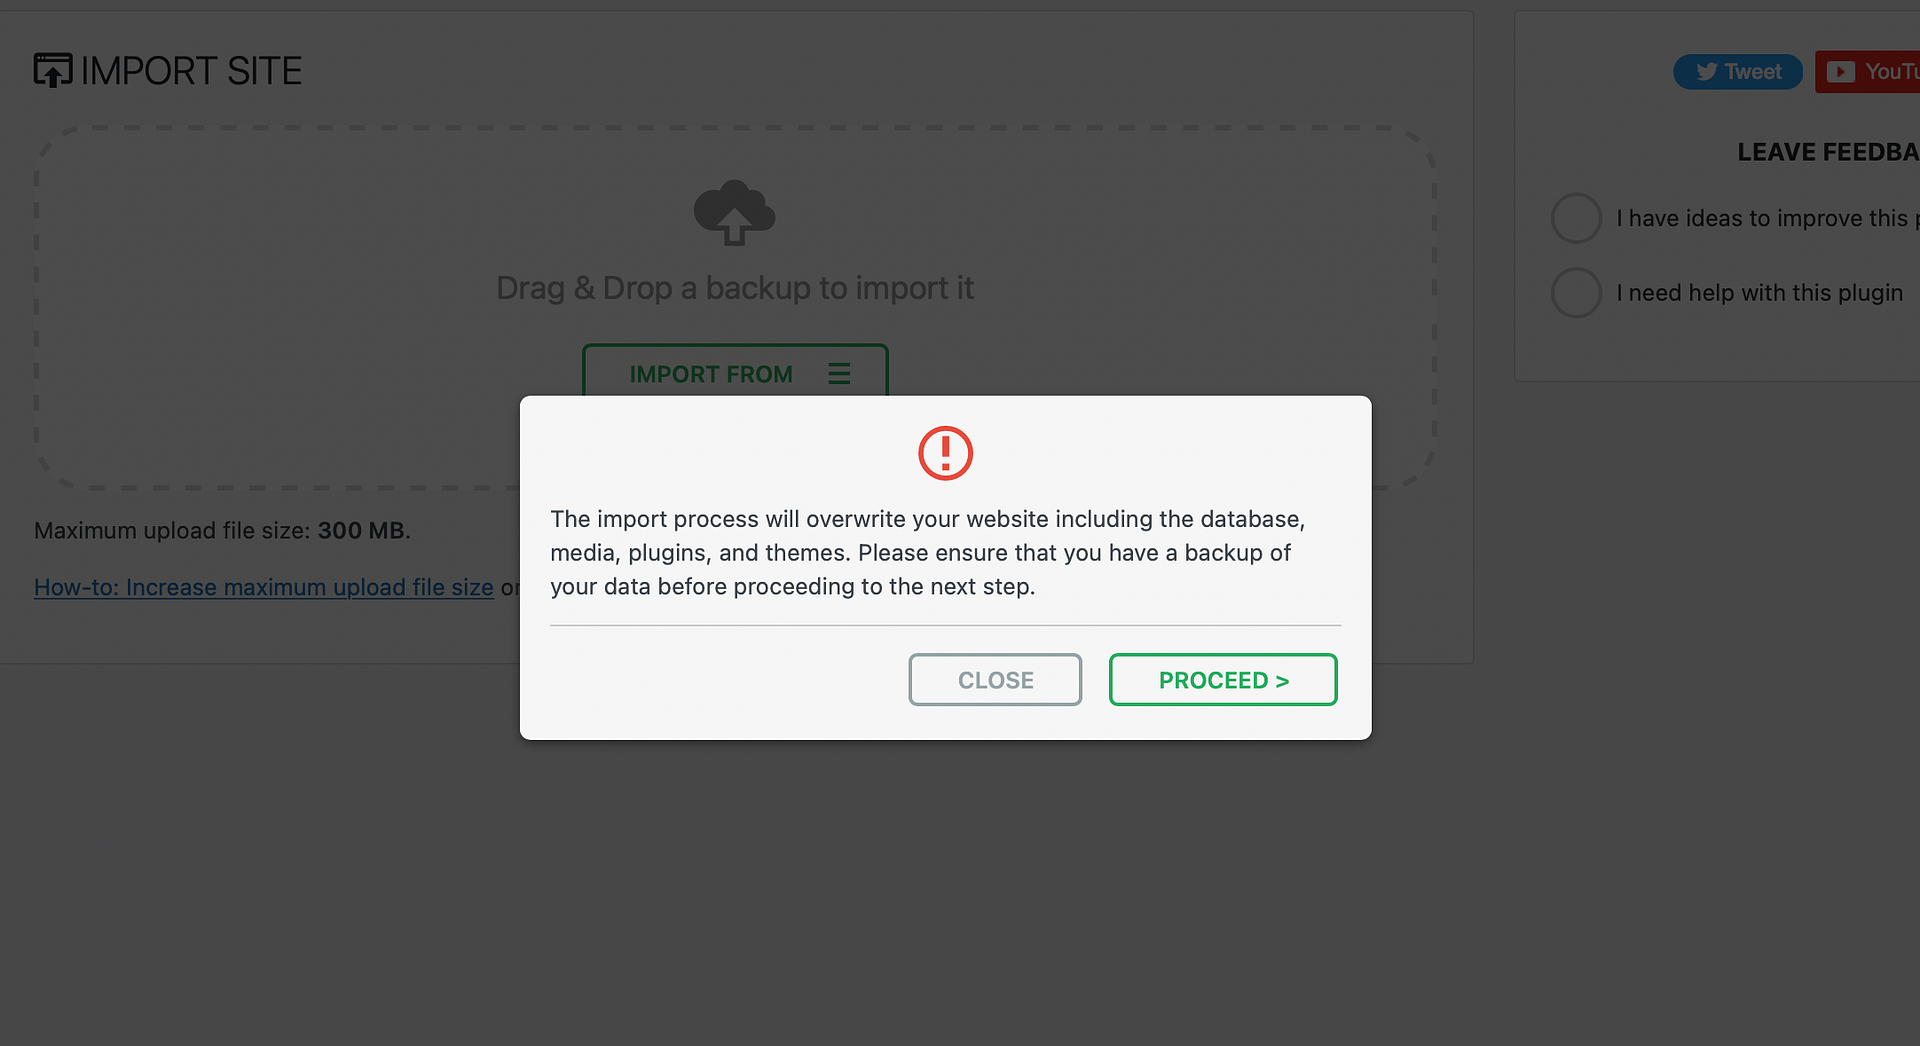
The plugin will warn you that this process will overwrite your database, media, plugins, and themes. Therefore, it’s a good idea to make sure that you have a backup of your site in case anything goes wrong. Click on Proceed to continue:
Once the import process is complete, you’ll receive a notification:
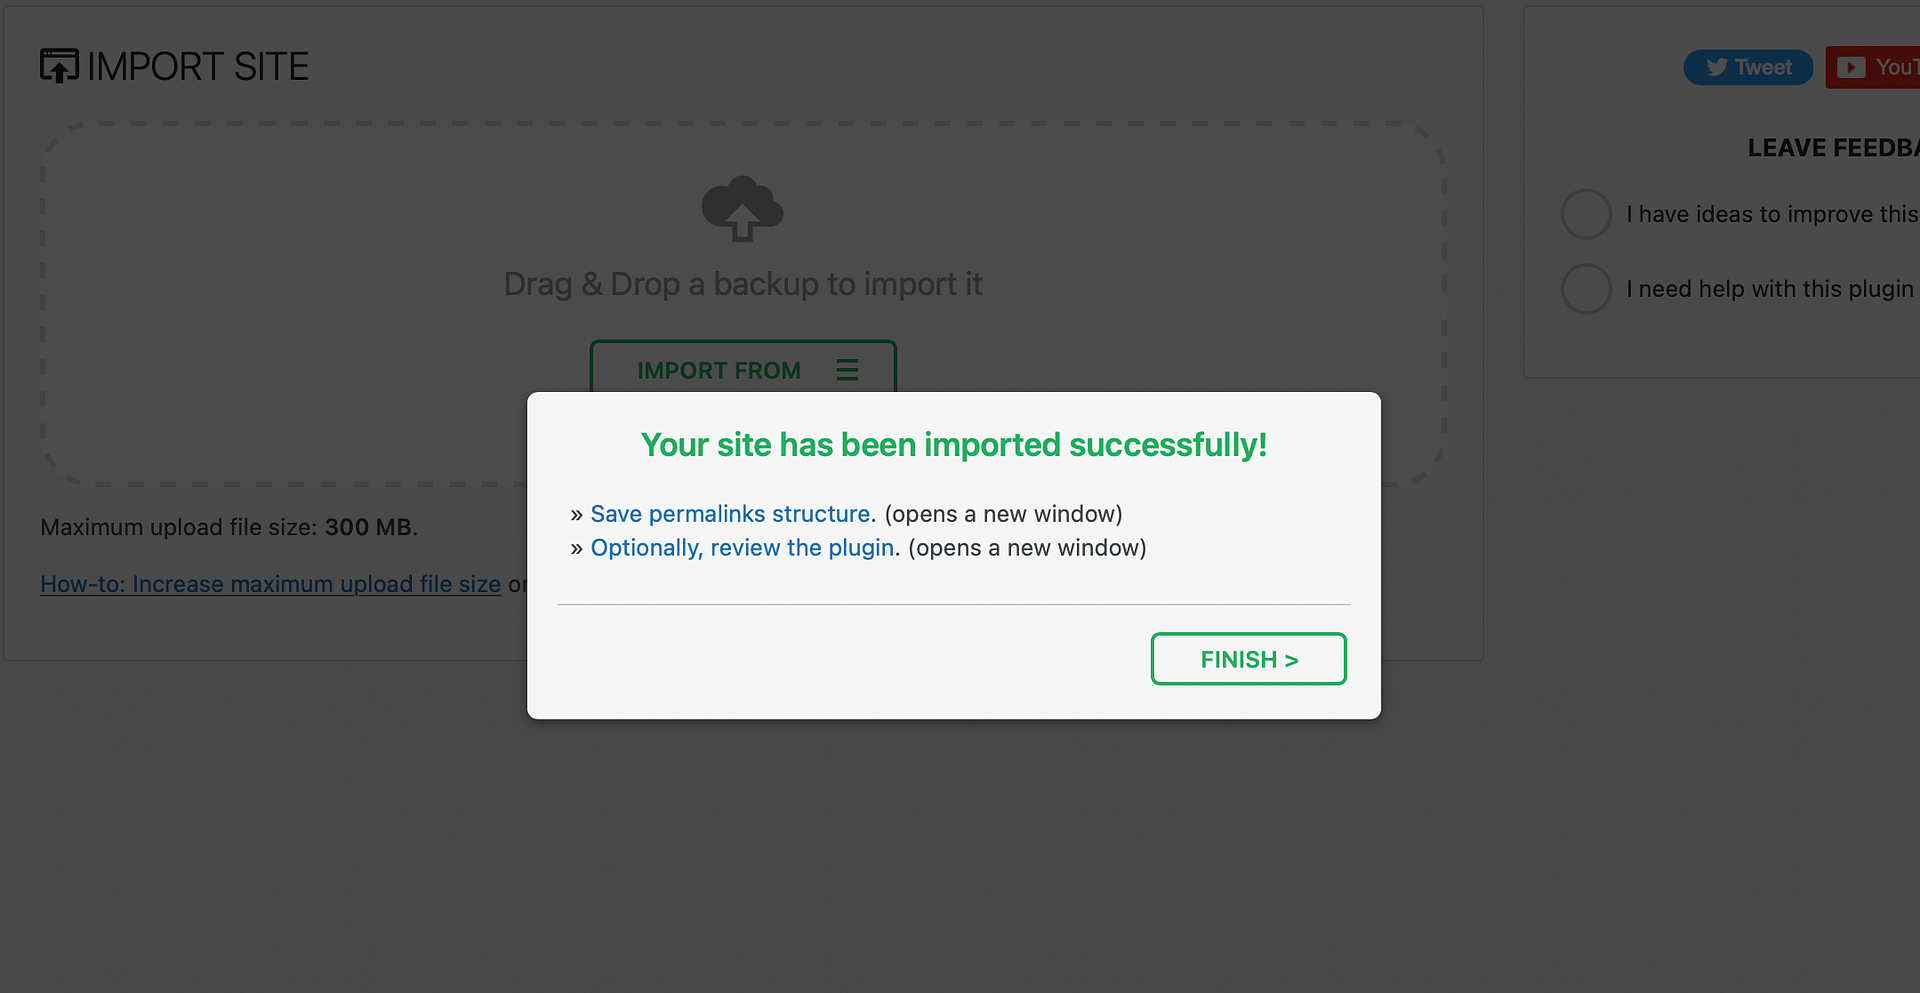
The import is nearly finished at this point. All you have to do now is just reset WordPress’ permalinks settings. This is kind of a left-over from the way WordPress configures websites. There’s no backstory here to understand about this step – it just needs to be done.
Click on Save permalinks structure. This page will open in a new tab. You might also find that you’ve been logged out of your website. If so, you’ll need to log back into your new website, using the credentials from your old WordPress site.
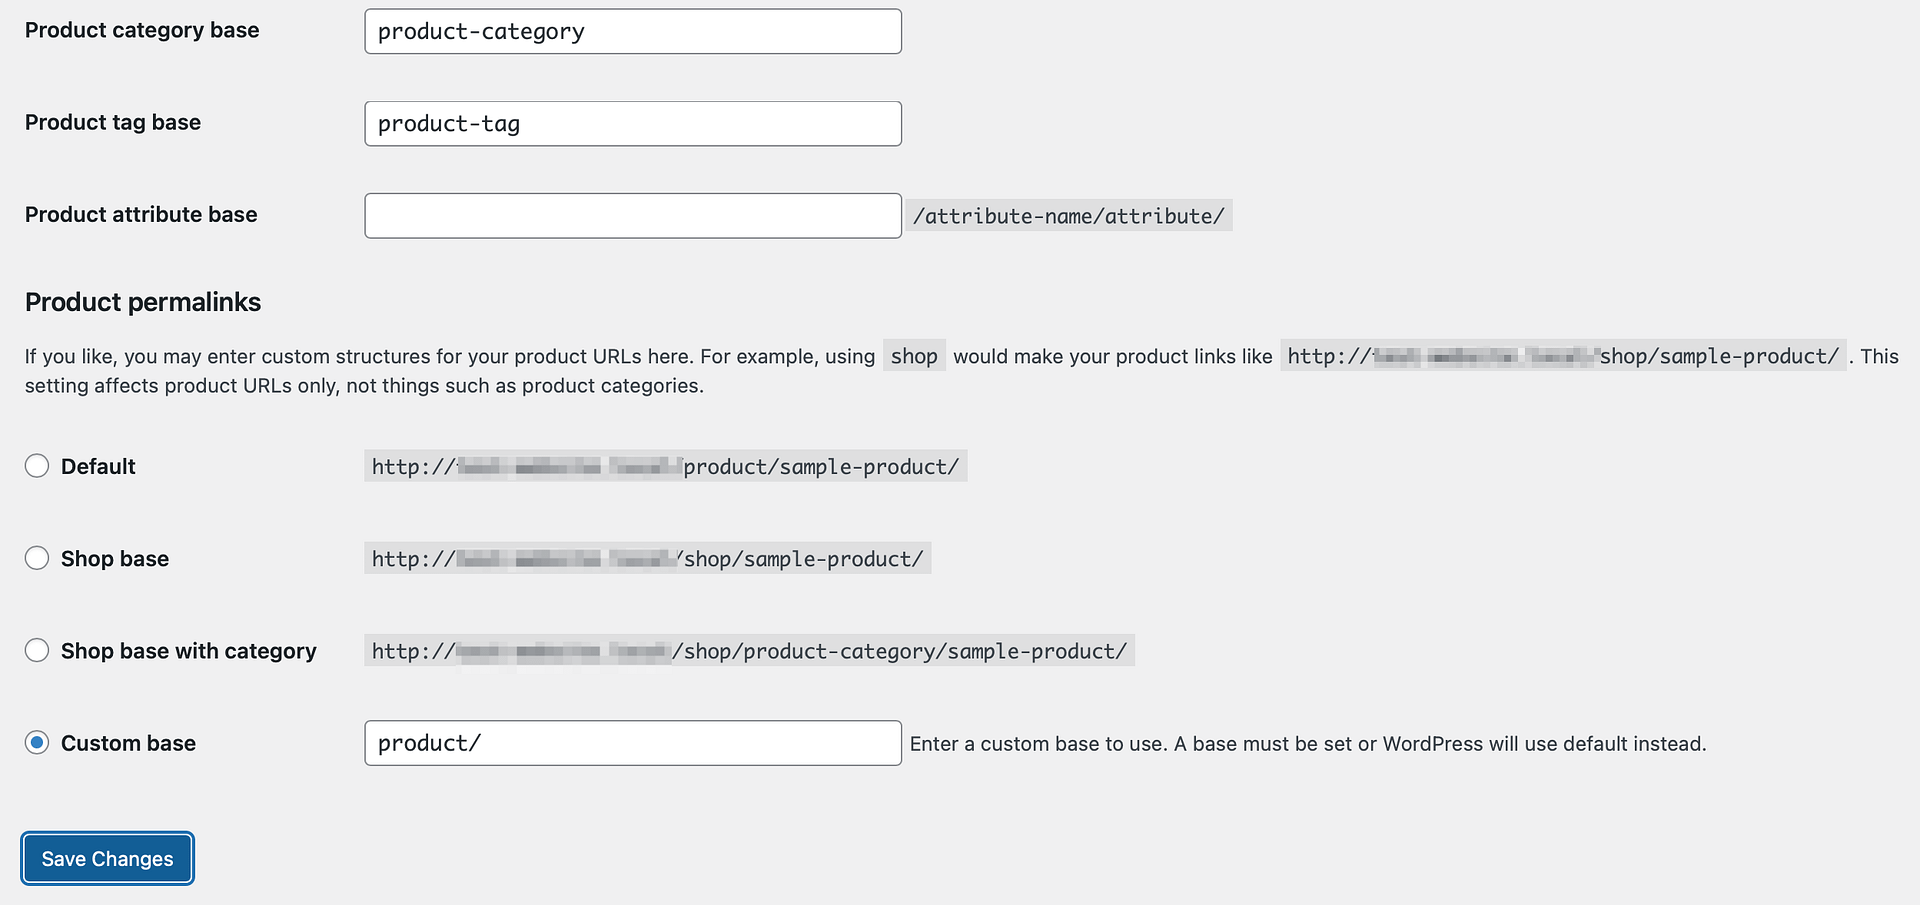
Now, you should be able to see your permalink settings. Scroll to the bottom of the page, and click on Save Changes twice to complete the import. At this point, you’ve successfully migrated your WordPress site using the All-in-One WP Migration plugin!
Conclusion 
Migrating a website can be a complex, time-consuming process if you opt for the manual route. That’s why it’s a good idea to use a plugin like All-in-One WP Migration. This way, you can simplify the migration process and perform the entire task in just a few minutes.
To recap, here are three steps to migrate your site using the All-in-One WP Migration plugin:
- Install the All-in-One WP Migration plugin.

- Export your WordPress website.

- Import your WordPress website to the new location.

Do you have any questions about how to migrate your site using the All-in-One WP Migration plugin? Let us know in the comments section below!
